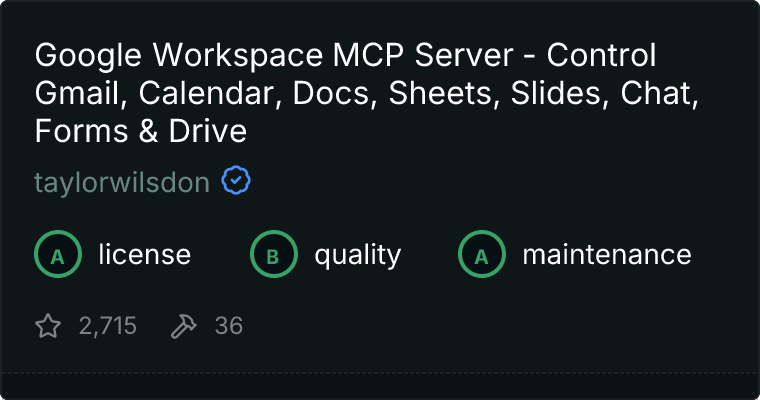
taylorwilsdon/google_workspace_mcp
GitHub: taylorwilsdon/google_workspace_mcp
基于 Python 和 FastMCP 框架的 Google Workspace MCP 服务器,让 AI 助手通过自然语言操控全套 Google 办公服务。
Stars: 2681 | Forks: 810
# Google Workspace MCP Server
[](https://opensource.org/licenses/MIT)
[](https://www.python.org/downloads/)
[](https://pypi.org/project/workspace-mcp/)
[](https://pepy.tech/projects/workspace-mcp)
[](https://workspacemcp.com)
*通过所有 MCP 客户端、AI 助手和开发者工具,实现对 Google Calendar、Drive、Gmail、Docs、Sheets、Slides、Forms、Tasks、Contacts 和 Chat 的完整自然语言控制。现包含功能齐全的 CLI,可与 Claude Code 和 Codex 等工具配合使用!*
**功能最完整的 Google Workspace MCP 服务器**,支持远程 OAuth2.1 多用户和一键 Claude 安装。
###### 支持所有免费 Google 账户(Gmail、Docs、Drive 等)及 Google Workspace 套餐(Starter、Standard、Plus、Enterprise、Non Profit),并提供 Chat 和 Spaces 等扩展应用选项。
对私有、托管云实例感兴趣?[可以安排。](https://workspacemcp.com/workspace-mcp-cloud)
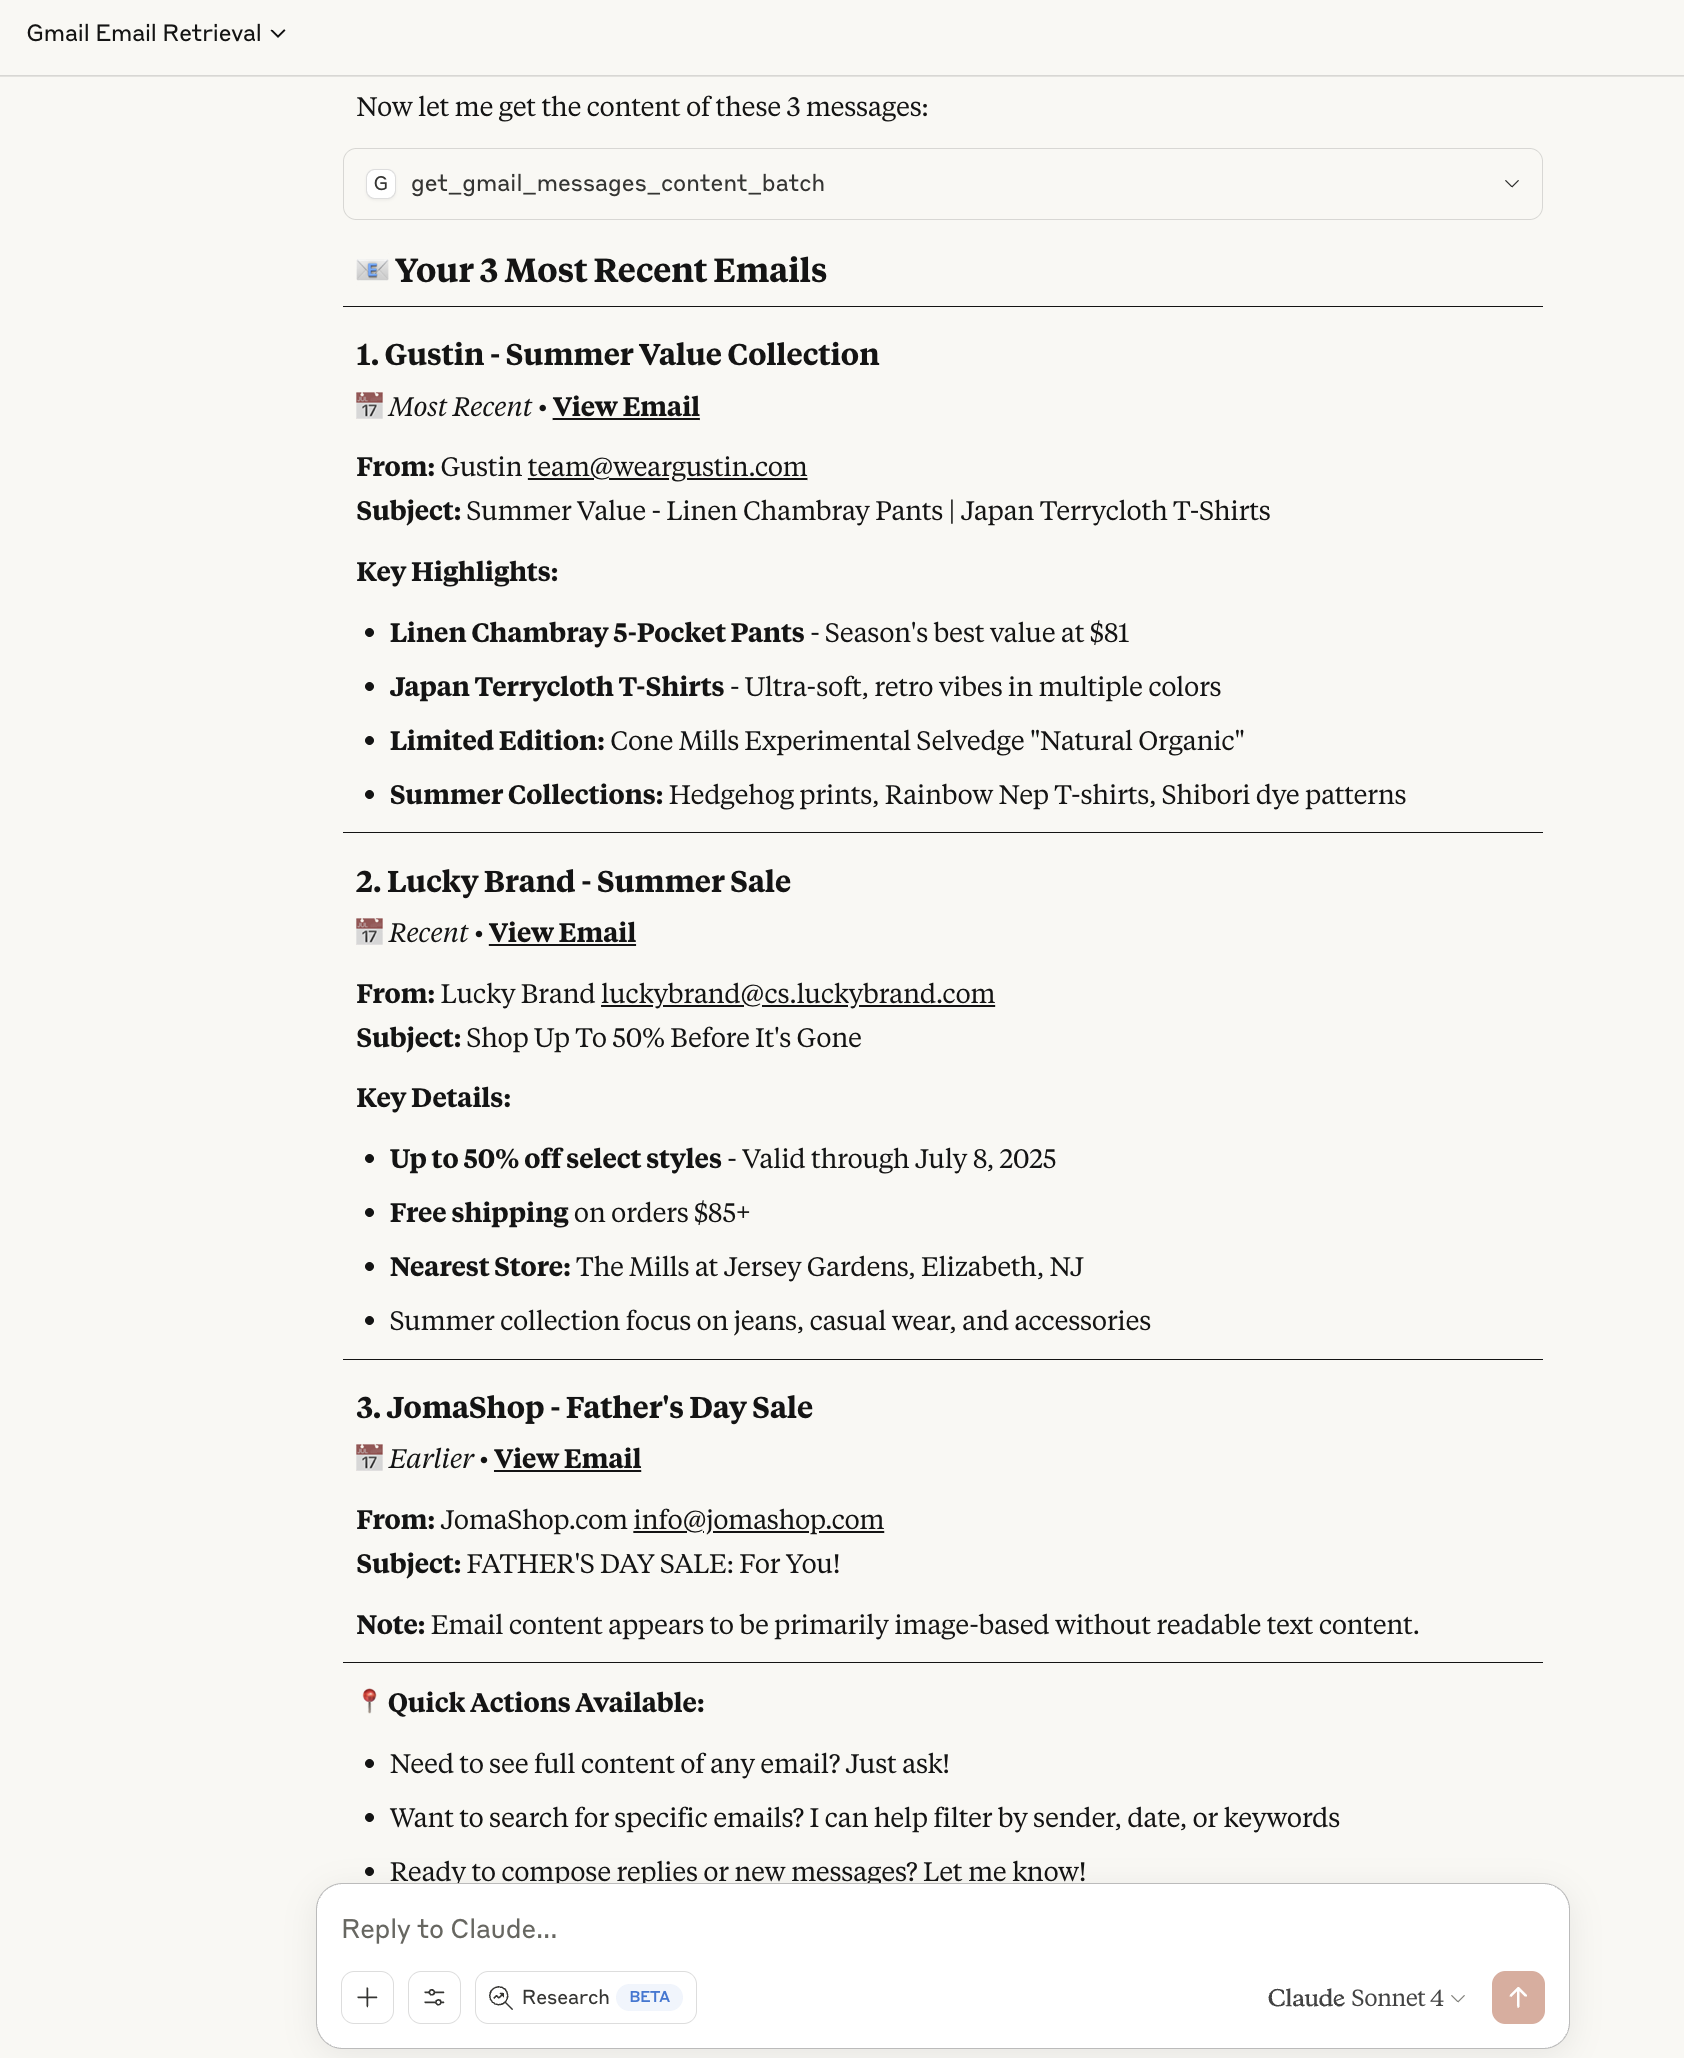
**查看实际运行效果:**
##
概述
一个生产就绪的 MCP 服务器,将所有主要 Google Workspace 服务与 AI 助手集成。它支持单用户操作和通过 OAuth 2.1 进行多用户认证,是构建自定义应用程序的强大后端。基于 FastMCP 构建,以实现最佳性能,具备先进的认证处理、服务缓存和简化的开发模式。
**简化的设置**:现在使用 Google Desktop OAuth 客户端 - 无需重定向 URI 或端口配置!
##
功能特性
|
**@ Gmail** • **≡ Drive** • **⧖ Calendar** **≡ Docs**
- 完整的 Gmail 管理,端到端覆盖
- 具备高级功能的完整日历管理
- 支持 Office 格式的文件操作
- 文档创建、编辑和评论
- 深入、详尽的细粒度编辑支持
**≡ Forms** • **@ Chat** • **≡ Sheets** • **≡ Slides**
- 表单创建、发布设置和响应管理
- Space 管理和消息功能
- 具备灵活单元格管理的电子表格操作
- 演示文稿创建、更新和内容操作
**◆ Apps Script**
- 使用自定义代码自动化跨应用工作流
- 执行现有业务逻辑和自定义函数
- 管理脚本项目、部署和版本
- 通过编程方式调试和修改 Apps Script 代码
- 通过自动化桥接 Google Workspace 服务
|
**⊠ 认证与安全**
- 高级 OAuth 2.0 和 OAuth 2.1 支持
- 自动令牌刷新和会话管理
- 传输感知回调处理
- 多用户 Bearer 令牌认证
- 创新的 CORS 代理架构
**✓ Tasks** • **👤 Contacts** • **◆ Custom Search**
- 具有层级关系的任务和任务列表管理
- 通过 People API 进行联系人管理和群组
- Programmable Search Engine (PSE) 集成
|
## 快速入门
快速参考卡 - 一目了然的基本命令和配置
|
**凭据**
```
export GOOGLE_OAUTH_CLIENT_ID="..."
export GOOGLE_OAUTH_CLIENT_SECRET="..."
```
[完整设置 →](#credential-configuration)
|
**启动命令**
```
uvx workspace-mcp --tool-tier core
uv run main.py --tools gmail drive
```
[更多选项 →](#start-the-server)
|
**工具层级**
- `core` - 核心工具
- `extended` - 核心 + 扩展
- `complete` - 全部工具
[详情 →](#tool-tiers)
|
#### 必需配置
环境变量 ← 点击在 Claude Desktop 中配置
|
**必需**
| Variable | Purpose |
|----------|---------|
| `GOOGLE_OAUTH_CLIENT_ID` | 来自 Google Cloud 的 OAuth 客户端 ID |
| `GOOGLE_OAUTH_CLIENT_SECRET` | OAuth 客户端密钥 |
| `OAUTHLIB_INSECURE_TRANSPORT=1` | 仅限开发环境(允许 `http://` 重定向) |
|
**可选**
| Variable | Purpose |
|----------|---------|
| `USER_GOOGLE_EMAIL` | 单用户认证的默认邮箱 |
| `GOOGLE_PSE_API_KEY` | 自定义搜索的 API 密钥 |
| `GOOGLE_PSE_ENGINE_ID` | 自定义搜索的搜索引擎 ID |
| `MCP_ENABLE_OAUTH21` | 设置为 `true` 以启用 OAuth 2.1 支持 |
| `EXTERNAL_OAUTH21_PROVIDER` | 设置为 `true` 以使用外部 OAuth 流程和 Bearer 令牌(需要 OAuth 2.1) |
| `WORKSPACE_MCP_STATELESS_MODE` | 设置为 `true` 以进行无状态操作(需要 OAuth 2.1) |
|
Claude Desktop 将这些安全地存储在 OS keychain 中;只需在扩展面板中设置一次。
### 一键安装 Claude Desktop(仅限 Claude Desktop,Stdio,单用户)
1. **下载:** 从“Releases”页面下载最新的 `google_workspace_mcp.dxt`
2. **安装:** 双击文件 - Claude Desktop 将打开并提示您**安装**
3. **配置:** 在 Claude Desktop → **Settings → Extensions → Google Workspace MCP** 中,粘贴您的 Google OAuth 凭据
4. **使用:** 开始新的 Claude 聊天并调用任何 Google Workspace 工具
**为什么选择 DXT?**
### 前置条件
- **Python 3.10+**
- **[uvx](https://github.com/astral-sh/uv)**(用于即时安装)或 [uv](https://github.com/astral-sh/uv)(用于开发)
- 带有 OAuth 2.0 凭据的 **Google Cloud Project**
### 配置
Google Cloud 设置 ← OAuth 2.0 凭据和 API 启用
|
**1. 创建项目**
```
console.cloud.google.com
→ Create new project
→ Note project name
```
[打开控制台 →](https://console.cloud.google.com/)
|
**2. OAuth 凭据**
```
APIs & Services → Credentials
→ Create Credentials
→ OAuth Client ID
→ Desktop Application
```
下载并保存凭据
|
**3. 启用 API**
```
APIs & Services → Library
Search & enable:
Calendar, Drive, Gmail,
Docs, Sheets, Slides,
Forms, Tasks, People,
Chat, Search
```
请参阅下方的快速链接
|
OAuth 凭据设置指南 ← 分步说明
**完整设置过程:**
1. **创建 OAuth 2.0 凭据** - 访问 [Google Cloud Console](https://console.cloud.google.com/)
- 创建新项目(或使用现有项目)
- 导航至 **APIs & Services → Credentials**
- 点击 **Create Credentials → OAuth Client ID**
- 选择 **Desktop Application** 作为应用类型(无需重定向 URI!)
- 下载凭据并记下 Client ID 和 Client Secret
2. **启用所需 API** - 在 **APIs & Services → Library** 中
- 搜索并启用每个所需的 API
- 或使用下方的快速链接一键启用
3. **配置环境** - 设置您的凭据:
export GOOGLE_OAUTH_CLIENT_ID="your-client-id"
export GOOGLE_OAUTH_CLIENT_SECRET="your-secret"
[完整文档 →](https://developers.google.com/workspace/guides/auth-overview)
|
快速 API 启用链接 ← 一键启用每个 Google API
您可以通过点击以下链接来启用每个 API(确保您已登录 Google Cloud Console 并选择了正确的项目):
* [启用 Google Calendar API](https://console.cloud.google.com/flows/enableapi?apiid=calendar-json.googleapis.com)
* [启用 Google Drive API](https://console.cloud.google.com/flows/enableapi?apiid=drive.googleapis.com)
* [启用 Gmail API](https://console.cloud.google.com/flows/enableapi?apiid=gmail.googleapis.com)
* [启用 Google Docs API](https://console.cloud.google.com/flows/enableapi?apiid=docs.googleapis.com)
* [启用 Google Sheets API](https://console.cloud.google.com/flows/enableapi?apiid=sheets.googleapis.com)
* [启用 Google Slides API](https://console.cloud.google.com/flows/enableapi?apiid=slides.googleapis.com)
* [启用 Google Forms API](https://console.cloud.google.com/flows/enableapi?apiid=forms.googleapis.com)
* [启用 Google Tasks API](https://console.cloud.google.com/flows/enableapi?apiid=tasks.googleapis.com)
* [启用 Google Chat API](https://console.cloud.google.com/flows/enableapi?apiid=chat.googleapis.com)
* [启用 Google People API](https://console.cloud.google.com/flows/enableapi?apiid=people.googleapis.com)
* [启用 Google Custom Search API](https://console.cloud.google.com/flows/enableapi?apiid=customsearch.googleapis.com)
* [启用 Google Apps Script API](https://console.cloud.google.com/flows/enableapi?apiid=script.googleapis.com)
1.1. **凭据:** 有关详细的设置选项,请参阅 [凭据配置](#credential-configuration)
2. **环境配置:**
◆ 环境变量 ← 配置您的运行时环境
|
**◆ 开发模式**
```
export OAUTHLIB_INSECURE_TRANSPORT=1
```
允许 HTTP 重定向 URI
|
**@ 默认用户**
```
export USER_GOOGLE_EMAIL=\
your.email@gmail.com
```
单用户认证
|
**◆ 自定义搜索**
```
export GOOGLE_PSE_API_KEY=xxx
export GOOGLE_PSE_ENGINE_ID=yyy
```
可选:搜索 API 设置
|
3. **服务器配置:**
◆ 服务器设置 ← 自定义端口、URI 和代理
|
**◆ 基础配置**
```
export WORKSPACE_MCP_BASE_URI=
http://localhost
export WORKSPACE_MCP_PORT=8000
export WORKSPACE_MCP_HOST=0.0.0.0 # Use 127.0.0.1 for localhost-only
```
服务器 URL 和端口设置
|
**↻ 代理支持**
```
export MCP_ENABLE_OAUTH21=
true
```
利用多用户 OAuth2.1 客户端
|
**@ 默认邮箱**
```
export USER_GOOGLE_EMAIL=\
your.email@gmail.com
```
在单用户模式下跳过认证流程中的邮箱输入
|
≡ 配置详情 ← 了解有关每个设置的更多信息
| Variable | Description | Default |
|----------|-------------|---------|
| `WORKSPACE_MCP_BASE_URI` | 基础服务器 URI(无端口) | `http://localhost` |
| `WORKSPACE_MCP_PORT` | 服务器监听端口 | `8000` |
| `WORKSPACE_MCP_HOST` | 服务器绑定主机 | `0.0.0.0` |
| `WORKSPACE_EXTERNAL_URL` | 反向代理设置的外部 URL | None |
| `WORKSPACE_ATTACHMENT_DIR` | 下载附件的目录 | `~/.workspace-mcp/attachments/` |
| `GOOGLE_OAUTH_REDIRECT_URI` | 覆盖 OAuth 回调 URL | 自动构建 |
| `USER_GOOGLE_EMAIL` | 默认认证邮箱 | None |
### Google Custom Search 设置
◆ 自定义搜索配置 ← 启用网络搜索功能
**1. 创建搜索引擎**
```
programmablesearchengine.google.com
/controlpanel/create
→ Configure sites or entire web
→ Note your Engine ID (cx)
```
[打开控制面板 →](https://programmablesearchengine.google.com/controlpanel/create)
|
**2. 获取 API 密钥**
```
developers.google.com
/custom-search/v1/overview
→ Create/select project
→ Enable Custom Search API
→ Create credentials (API Key)
```
[获取 API 密钥 →](https://developers.google.com/custom-search/v1/overview)
|
**3. 设置变量**
```
export GOOGLE_PSE_API_KEY=\
"your-api-key"
export GOOGLE_PSE_ENGINE_ID=\
"your-engine-id"
```
在环境中配置
|
≡ 快速设置指南 ← 分步说明
**完整设置过程:**
1. **创建搜索引擎** - 访问 [控制面板](https://programmablesearchengine.google.com/controlpanel/create)
- 选择“Search the entire web”或指定站点
- 复制搜索引擎 ID(格式如:`017643444788157684527:6ivsjbpxpqw`)
2. **启用 API 并获取密钥** - 访问 [Google Developers Console](https://console.cloud.google.com/)
- 在您的项目中启用“Custom Search API”
- 创建凭据 → API Key
- 将密钥限制为 Custom Search API(推荐)
3. **配置环境** - 添加到您的 shell 或 `.env`:
export GOOGLE_PSE_API_KEY="AIzaSy..."
export GOOGLE_PSE_ENGINE_ID="01764344478..."
≡ [完整文档 →](https://developers.google.com/custom-search/v1/overview)
|
### 启动服务器
▶ 启动命令 ← 选择您的启动模式
|
**▶ 传统模式**
```
uv run main.py
```
⚠️ Stdio 模式(仅适用于功能不完整的 MCP 客户端)
|
**◆ HTTP 模式(推荐)**
```
uv run main.py \
--transport streamable-http
```
✅ 完整 MCP 规范合规和 OAuth 2.1
|
**@ 单用户**
```
uv run main.py \
--single-user
```
简化的认证
⚠️ 无法与 OAuth 2.1 模式一起使用
|
◆ 高级选项 ← 工具选择、层级和 Docker
**▶ 选择性工具加载**
```
# 仅加载特定服务
uv run main.py --tools gmail drive calendar
uv run main.py --tools sheets docs
# 与其他 flags 结合使用
uv run main.py --single-user --tools gmail
```
**🔒 只读模式**
```
# 仅请求只读 scopes 并禁用写入 tools
uv run main.py --read-only
# 与特定 tools 或 tiers 结合使用
uv run main.py --tools gmail drive --read-only
uv run main.py --tool-tier core --read-only
```
只读模式通过以下方式提供安全、受限的访问:
- 仅请求 `*.readonly` OAuth 作用域(例如 `gmail.readonly`、`drive.readonly`)
- 在启动时自动过滤掉需要写权限的工具
- 允许跨所有服务进行读取操作:列表、获取、搜索和导出
**🔐 细粒度权限**
```
# 每服务权限级别
uv run main.py --permissions gmail:organize drive:readonly
# 结合权限与 tier 过滤
uv run main.py --permissions gmail:send drive:full --tool-tier core
```
细粒度权限模式提供服务级的作用域控制:
- 格式:`service:level`(每项服务一个条目)
- Gmail 级别:`readonly`、`organize`、`drafts`、`send`、`full`(累积)
- 其他服务当前支持:`readonly`、`full`
- `--permissions` 和 `--read-only` 互斥
- `--permissions` 不能与 `--tools` 组合使用;启用的服务由 `--permissions` 条目确定(可选由 `--tool-tier` 过滤)
- 使用 `--tool-tier` 时,仅启用层级匹配的工具,并且仅导入在所选层级中具有工具的服务
**★ 工具层级**
```
uv run main.py --tool-tier core # ● Essential tools only
uv run main.py --tool-tier extended # ◐ Core + additional
uv run main.py --tool-tier complete # ○ All available tools
```
**◆ Docker 部署**
```
docker build -t workspace-mcp .
docker run -p 8000:8000 -v $(pwd):/app \
workspace-mcp --transport streamable-http
# 通过环境变量选择 tool
docker run -e TOOL_TIER=core workspace-mcp
docker run -e TOOLS="gmail drive calendar" workspace-mcp
```
**可用服务**:`gmail` • `drive` • `calendar` • `docs` • `sheets` • `forms` • `tasks` • `contacts` • `chat` • `search`
|
### CLI 模式
服务器支持 CLI 模式,用于直接调用工具而无需运行完整的 MCP 服务器。这非常适合脚本编写、自动化以及编码代理(Codex、Claude Code)的使用。
▶ CLI 命令 ← 从命令行直接执行工具
|
**▶ 列出工具**
```
workspace-mcp --cli
workspace-mcp --cli list
workspace-mcp --cli list --json
```
查看所有可用工具
|
**◆ 工具帮助**
```
workspace-mcp --cli search_gmail_messages --help
```
显示参数和文档
|
|
**▶ 使用参数运行**
```
workspace-mcp --cli search_gmail_messages \
--args '{"query": "is:unread"}'
```
使用内联 JSON 执行工具
|
**◆ 通过 Stdin 管道传入**
```
echo '{"query": "is:unread"}' | \
workspace-mcp --cli search_gmail_messages
```
通过 stdin 传递参数
|
≡ CLI 使用详情 ← 完整参考
**命令结构:**
```
workspace-mcp --cli [command] [options]
```
**命令:**
| Command | Description |
|---------|-------------|
| `list`(默认) | 列出所有可用工具 |
| `` | 执行指定的工具 |
| ` --help` | 显示工具的详细帮助 |
**选项:**
| Option | Description |
|--------|-------------|
| `--args`, `-a` | 带有工具参数的 JSON 字符串 |
| `--json`, `-j` | 以 JSON 格式输出(用于 `list` 命令) |
| `--help`, `-h` | 显示工具的帮助 |
**示例:**
```
# 列出所有 Gmail tools
workspace-mcp --cli list | grep gmail
# 搜索未读邮件
workspace-mcp --cli search_gmail_messages --args '{"query": "is:unread", "max_results": 5}'
# 获取今日日历事件
workspace-mcp --cli get_events --args '{"calendar_id": "primary", "time_min": "2024-01-15T00:00:00Z"}'
# 从 URL 创建 Drive 文件
workspace-mcp --cli create_drive_file --args '{"name": "doc.pdf", "source_url": "https://example.com/file.pdf"}'
# 结合 jq 进行处理
workspace-mcp --cli list --json | jq '.tools[] | select(.name | contains("gmail"))'
```
**注意事项:**
- CLI 模式使用 OAuth 2.0(与服务器模式使用相同的凭据)
- 认证流程的工作方式相同 - 首次认证时会打开浏览器
- 结果打印到 stdout;错误打印到 stderr
- 成功时退出代码为 0,出错时为 1
### 工具层级
服务器将工具组织为**三个递进层级**,以简化部署。选择符合您使用需求和 API 配额要求的层级。
|
#### 可用层级
**● Core** (`--tool-tier core`)
日常任务的核心工具。非常适合 API 配额最少的轻度使用。包括跨所有服务的搜索、读取、创建和基本修改操作。
**● Extended** (`--tool-tier extended`)
核心功能加上管理工具。增加标签、文件夹、批处理操作和高级搜索。适合 API 需求适中的常规使用。
**● Complete** (`--tool-tier complete`)
完整的 API 访问权限,包括评论、页眉/页脚、发布设置和管理功能。适合需要最大功能的进阶用户。
|
#### 重要说明
▶ **从 `core` 开始**,并根据需要升级
▶ **层级是累积的** - 每一层都包含前一层
▶ **与 `--tools` 混合搭配**以针对特定服务
▶ **配置**在 `core/tool_tiers.yaml` 中
▶ **认证**包含在所有层级中
|
####
使用示例
```
# 基础 tier 选择
uv run main.py --tool-tier core # Start with essential tools only
uv run main.py --tool-tier extended # Expand to include management features
uv run main.py --tool-tier complete # Enable all available functionality
# 使用 tiers 进行选择性服务加载
uv run main.py --tools gmail drive --tool-tier core # Core tools for specific services
uv run main.py --tools gmail --tool-tier extended # Extended Gmail functionality only
uv run main.py --tools docs sheets --tool-tier complete # Full access to Docs and Sheets
# 结合 tier 选择与细粒度权限级别
uv run main.py --permissions gmail:organize drive:full --tool-tier core
```
## 📋 凭据配置
🔑 OAuth 凭据设置 ← 所有安装的基础
|
**🚀 环境变量**
```
export GOOGLE_OAUTH_CLIENT_ID=\
"your-client-id"
export GOOGLE_OAUTH_CLIENT_SECRET=\
"your-secret"
```
最适合生产环境
|
**📁 基于文件**
```
# 下载并放置在项目根目录
client_secret.json
# 或指定自定义路径
export GOOGLE_CLIENT_SECRET_PATH=\
/path/to/secret.json
```
传统方法
|
**⚡ .env 文件**
```
cp .env.oauth21 .env
# 使用凭证编辑 .env
```
最适合开发环境
|
📖 凭据加载详情 ← 了解优先级和最佳实践
**加载优先级**
1. 环境变量(`export VAR=value`)
2. 项目根目录中的 `.env` 文件(警告 - 如果您通过 `uvx` 而不是从仓库目录运行 `uv run`,则生成的是一个与您的仓库克隆无关的独立进程,除非直接指定,否则它将找不到您的 .env 文件)
3. 通过 `GOOGLE_CLIENT_SECRET_PATH` 的 `client_secret.json`
4. 项目根目录中的默认 `client_secret.json`
**为什么选择环境变量?**
- ✅ **Docker/K8s 就绪** - 原生容器支持
- ✅ **云平台** - Heroku、Railway、Vercel
- ✅ **CI/CD 流水线** - GitHub Actions、Jenkins
- ✅ **git 中无密钥** - 保持凭据安全
- ✅ **轻松轮换** - 无需更改代码即可更新
|
## 🧰 可用工具
|
### 📅 **Google Calendar** [`calendar_tools.py`](gcalendar/calendar_tools.py)
| Tool | Tier | Description |
|------|------|-------------|
| `list_calendars` | **Core** | 列出可访问的日历 |
| `get_events` | **Core** | 检索带有时间范围过滤的事件 |
| `manage_event` | **Core** | 创建、更新或删除日历事件 |
|
### 📁 **Google Drive** [`drive_tools.py`](gdrive/drive_tools.py)
| Tool | Tier | Description |
|------|------|-------------|
| `search_drive_files` | **Core** | 使用查询语法搜索文件 |
| `get_drive_file_content` | **Core** | 读取文件内容(Office 格式) |
| `get_drive_file_download_url` | **Core** | 将 Drive 文件下载到本地磁盘 |
| `create_drive_file` | **Core** | 创建文件或从 URL 获取 |
| `create_drive_folder` | **Core** | 在 Drive 或共享 Drive 中创建空文件夹 |
| `import_to_google_doc` | **Core** | 将文件(MD、DOCX、HTML 等)导入为 Google Docs |
| `get_drive_shareable_link` | **Core** | 获取文件的可共享链接 |
| `list_drive_items` | Extended | 列出文件夹内容 |
| `copy_drive_file` | Extended | 复制现有文件(模板)并可选择性重命名 |
| `update_drive_file` | Extended | 更新文件元数据,在文件夹之间移动 |
| `manage_drive_access` | Extended | 授予、更新、撤销权限以及转移所有权 |
| `set_drive_file_permissions` | Extended | 设置链接共享和文件级共享设置 |
| `get_drive_file_permissions` | Complete | 获取详细的文件权限 |
| `check_drive_file_public_access` | Complete | 检查公开共享状态 |
|
### 📧 **Gmail** [`gmail_tools.py`](gmail/gmail_tools.py)
| Tool | Tier | Description |
|------|------|-------------|
| `search_gmail_messages` | **Core** | 使用 Gmail 运算符搜索 |
| `get_gmail_message_content` | **Core** | 检索消息内容 |
| `get_gmail_messages_content_batch` | **Core** | 批量检索消息内容 |
| `send_gmail_message` | **Core** | 发送电子邮件 |
| `get_gmail_thread_content` | Extended | 获取完整的会话内容 |
| `modify_gmail_message_labels` | Extended | 修改消息标签 |
| `list_gmail_labels` | Extended | 列出可用标签 |
| `list_gmail_filters` | Extended | 列出 Gmail 过滤器 |
| `manage_gmail_label` | Extended | 创建/更新/删除标签 |
| `manage_gmail_filter` | Extended | 创建或删除 Gmail 过滤器 |
| `draft_gmail_message` | Extended | 创建草稿 |
| `get_gmail_threads_content_batch` | Complete | 批量检索会话内容 |
| `batch_modify_gmail_message_labels` | Complete | 批量修改标签 |
| `start_google_auth` | Complete | 传统 OAuth 2.0 认证(启用 OAuth 2.1 时禁用) |
📎 电子邮件附件 发送带文件的电子邮件
`send_gmail_message` 和 `draft_gmail_message` 都通过两种方法支持附件:
**选项 1:文件路径**(仅限本地服务器)
```
attachments=[{"path": "/path/to/report.pdf"}]
```
从磁盘读取文件,自动检测 MIME 类型。可选的 `filename` 覆盖。
**选项 2:Base64 内容**(随处可用)
```
attachments=[{
"filename": "report.pdf",
"content": "JVBERi0xLjQK...", # base64-encoded
"mime_type": "application/pdf" # optional
}]
```
**⚠️ 集中托管的服务器**:当 MCP 服务器远程运行(云、共享实例)时,它无法访问您的本地文件系统。请使用 **选项 2** 和 base64 编码的内容。您的 MCP 客户端必须在发送前对文件进行编码。
📥 下载的附件存储 ← 下载文件的保存位置
下载 Gmail 附件(`get_gmail_attachment_content`)或 Drive 文件(`get_drive_file_download_url`)时,文件将保存到持久的本地目录,而不是工作目录中的临时文件夹。
**默认位置:** `~/.workspace-mcp/attachments/`
文件使用其原始文件名加上一个简短的 UUID 后缀保存以确保唯一性(例如 `invoice_a1b2c3d4.pdf`)。在 **stdio 模式**下,工具返回绝对文件路径以供直接文件系统访问。在 **HTTP 模式**下,它通过 `/attachments/{file_id}` 端点返回下载 URL。
要自定义存储目录:
```
export WORKSPACE_ATTACHMENT_DIR="/path/to/custom/dir"
```
保存的文件在 1 小时后过期,并会自动清理。
|
### 📝 **Google Docs** [`docs_tools.py`](gdocs/docs_tools.py)
| Tool | Tier | Description |
|------|------|-------------|
| `get_doc_content` | **Core** | 提取文档文本 |
| `create_doc` | **Core** | 创建新文档 |
| `modify_doc_text` | **Core** | 修改文档文本(格式 + 链接) |
| `search_docs` | Extended | 按名称查找文档 |
| `find_and_replace_doc` | Extended | 查找并替换文本 |
| `list_docs_in_folder` | Extended | 列出文件夹中的文档 |
| `insert_doc_elements` | Extended | 添加表格、列表、分页符 |
| `update_paragraph_style` | Extended | 应用标题样式、列表(带嵌套的项目符号/编号)和段落格式 |
| `get_doc_as_markdown` | Extended | 将文档导出为格式化的 Markdown(可选带评论) |
| `insert_doc_image` | Complete | 从 Drive/URL 插入图片 |
| `update_doc_headers_footers` | Complete | 修改页眉和页脚 |
| `batch_update_doc` | Complete | 执行多个操作 |
| `inspect_doc_structure` | Complete | 分析文档结构 |
| `export_doc_to_pdf` | Extended | 将文档导出为 PDF |
| `create_table_with_data` | Complete | 创建数据表格 |
| `debug_table_structure` | Complete | 调试表格问题 |
| `list_document_comments` | Complete | 列出所有文档评论 |
| `manage_document_comment` | Complete | 创建、回复或解决评论 |
|
|
### 📊 **Google Sheets** [`sheets_tools.py`](gsheets/sheets_tools.py)
| Tool | Tier | Description |
|------|------|-------------|
| `read_sheet_values` | **Core** | 读取单元格范围 |
| `modify_sheet_values` | **Core** | 写入/更新/清除单元格 |
| `create_spreadsheet` | **Core** | 创建新电子表格 |
| `list_spreadsheets` | Extended | 列出可访问的电子表格 |
| `get_spreadsheet_info` | Extended | 获取电子表格元数据 |
| `format_sheet_range` | Extended | 应用颜色、数字格式、文本换行、对齐、粗体/斜体、字体大小 |
| `create_sheet` | Complete | 向现有文件添加工作表 |
| `list_spreadsheet_comments` | Complete | 列出所有电子表格评论 |
| `manage_spreadsheet_comment` | Complete | 创建、回复或解决评论 |
| `manage_conditional_formatting` | Complete | 添加、更新或删除条件格式规则 |
|
### 🖼️ **Google Slides** [`slides_tools.py`](gslides/slides_tools.py)
| Tool | Tier | Description |
|------|------|-------------|
| `create_presentation` | **Core** | 创建新演示文稿 |
| `get_presentation` | **Core** | 检索演示文稿详情 |
| `batch_update_presentation` | Extended | 应用多个更新 |
| `get_page` | Extended | 获取特定幻灯片信息 |
| `get_page_thumbnail` | Extended | 生成幻灯片缩略图 |
| `list_presentation_comments` | Complete | 列出所有演示文稿评论 |
| `manage_presentation_comment` | Complete | 创建、回复或解决评论 |
|
|
### 📝 **Google Forms** [`forms_tools.py`](gforms/forms_tools.py)
| Tool | Tier | Description |
|------|------|-------------|
| `create_form` | **Core** | 创建新表单 |
| `get_form` | **Core** | 检索表单详情和 URL |
| `set_publish_settings` | Complete | 配置表单设置 |
| `get_form_response` | Complete | 获取单个回复 |
| `list_form_responses` | Extended | 列出带有分页的所有回复 |
| `batch_update_form` | Complete | 应用批量更新(问题、设置) |
|
### ✓ **Google Tasks** [`tasks_tools.py`](gtasks/tasks_tools.py)
| Tool | Tier | Description |
|------|------|-------------|
| `list_tasks` | **Core** | 列出带有过滤的任务 |
| `get_task` | **Core** | 检索任务详情 |
| `manage_task` | **Core** | 创建、更新、删除或移动任务 |
| `list_task_lists` | Complete | 列出任务列表 |
| `get_task_list` | Complete | 获取任务列表详情 |
| `manage_task_list` | Complete | 创建、更新、删除任务列表或清除已完成的任务 |
|
|
### 👤 **Google Contacts** [`contacts_tools.py`](gcontacts/contacts_tools.py)
| Tool | Tier | Description |
|------|------|-------------|
| `search_contacts` | **Core** | 按姓名、电子邮件、电话搜索联系人 |
| `get_contact` | **Core** | 检索详细的联系人信息 |
| `list_contacts` | **Core** | 列出带有分页的联系人 |
| `manage_contact` | **Core** | 创建、更新或删除联系人 |
| `list_contact_groups` | Extended | 列出联系人群组/标签 |
| `get_contact_group` | Extended | 获取群组详情和成员 |
| `manage_contacts_batch` | Complete | 批量创建、更新或删除联系人 |
| `manage_contact_group` | Complete | 创建、更新、删除群组或修改成员资格 |
|
|
### 💬 **Google Chat** [`chat_tools.py`](gchat/chat_tools.py)
| Tool | Tier | Description |
|------|------|-------------|
| `list_spaces` | Extended | 列出聊天 Space/房间 |
| `get_messages` | **Core** | 检索 Space 消息 |
| `send_message` | **Core** | 向 Space 发送消息 |
| `search_messages` | **Core** | 搜索聊天历史 |
| `create_reaction` | **Core** | 为消息添加表情符号反应 |
| `download_chat_attachment` | Extended | 从聊天消息下载附件 |
|
### 🔍 **Google Custom Search** [`search_tools.py`](gsearch/search_tools.py)
| Tool | Tier | Description |
|------|------|-------------|
| `search_custom` | **Core** | 执行网络搜索(支持通过 sites 参数限制站点) |
| `get_search_engine_info` | Complete | 检索搜索引擎元数据 |
|
|
### **Google Apps Script** [`apps_script_tools.py`](gappsscript/apps_script_tools.py)
| Tool | Tier | Description |
|------|------|-------------|
| `list_script_projects` | **Core** | 列出可访问的 Apps Script 项目 |
| `get_script_project` | **Core** | 获取包含所有文件的完整项目 |
| `get_script_content` | **Core** | 检索特定文件内容 |
| `create_script_project` | **Core** | 创建新的独立或绑定项目 |
| `update_script_content` | **Core** | 更新或创建脚本文件 |
| `run_script_function` | **Core** | 使用参数执行函数 |
| `list_deployments` | Extended | 列出所有项目部署 |
| `manage_deployment` | Extended | 创建、更新或删除脚本部署 |
| `list_script_processes` | Extended | 查看最近的执行和状态 |
|
**工具层级图例:**
-
• **Core**:基本功能的核心工具 • 最少的 API 使用 • 入门首选
-
• **Extended**:核心工具 + 附加功能 • 常规使用 • 扩展能力
-
• **Complete**:所有可用工具,包括高级功能 • 进阶用户 • 完整 API 访问
### 连接到 Claude Desktop
服务器支持两种传输模式:
#### Stdio 模式(传统 - 适用于 MCP 支持不完整的客户端)
通常,您应该为 Claude Desktop 使用一键 DXT 安装包。
如果由于某种原因无法使用,您可以通过 `claude_desktop_config.json` 手动配置
**手动 Claude 配置(替代方案)**
📝 Claude Desktop JSON 配置 ← 点击查看手动设置说明
1. 打开 Claude Desktop Settings → Developer → Edit Config
- **macOS**: `~/Library/Application Support/Claude/claude_desktop_config.json`
- **Windows**: `%APPDATA%\Claude\claude_desktop_config.json`
2. 添加服务器配置:
```
{
"mcpServers": {
"google_workspace": {
"command": "uvx",
"args": ["workspace-mcp"],
"env": {
"GOOGLE_OAUTH_CLIENT_ID": "your-client-id",
"GOOGLE_OAUTH_CLIENT_SECRET": "your-secret",
"OAUTHLIB_INSECURE_TRANSPORT": "1"
}
}
}
}
```
### 连接到 LM Studio
使用相同的 JSON 格式在 LM Studio(Settings → MCP Servers)中添加新的 MCP 服务器:
```
{
"mcpServers": {
"google_workspace": {
"command": "uvx",
"args": ["workspace-mcp"],
"env": {
"GOOGLE_OAUTH_CLIENT_ID": "your-client-id",
"GOOGLE_OAUTH_CLIENT_SECRET": "your-secret",
"OAUTHLIB_INSECURE_TRANSPORT": "1",
}
}
}
}
```
### 2. 高级 / 跨平台安装
如果您正在开发、部署到服务器或使用其他支持 MCP 的客户端,请继续阅读。
#### 即时 CLI (uvx)
⚡ 使用 uvx 快速入门 ← 无需安装!
```
# 需要 Python 3.10+ 和 uvx
# 首先,设置凭证(参见上方凭证配置)
uvx workspace-mcp --tool-tier core # or --tools gmail drive calendar
```
### 本地开发设置
🛠️ 开发者工作流 ← 安装依赖、lint 和测试
```
# 安装 linting、测试和发布工具所需的一切
uv sync --group dev
# 运行 git hooks 自动调用的同一 linter
uv run ruff check .
# 执行完整测试套件(async fixtures 需要 pytest-asyncio)
uv run pytest
```
- `uv sync --group test` 仅安装测试栈,如果您需要更精简的环境。
- `uv run main.py --transport streamable-http` 使用您检出代码启动服务器进行手动验证。
- Ruff 是 `dev` 组的一部分,因为 pre-push 钩子会自动调用 `ruff check` - 在提交前在本地运行它以避免钩子失败。
### OAuth 2.1 支持(多用户 Bearer 令牌认证)
服务器包含对 OAuth 2.1 的支持,用于 Bearer 令牌认证,实现多用户会话管理。**OAuth 2.1 自动重用您现有的 `GOOGLE_OAUTH_CLIENT_ID` 和 `GOOGLE_OAUTH_CLIENT_SECRET` 凭据** - 无需额外配置!
**何时使用 OAuth 2.1:**
- 多个用户访问同一个 MCP 服务器实例
- 需要 Bearer 令牌认证而不是传递用户电子邮件
- 在 MCP 服务器之上构建 Web 应用程序或 API
- 需要安全会话管理的生产环境
- 需要 CORS 支持的基于浏览器的客户端
**⚠️ 重要:OAuth 2.1 和单用户模式互斥**
OAuth 2.1 模式(`MCP_ENABLE_OAUTH21=true`)不能与 `--single-user` 标志一起使用:
- **单用户模式**:用于在工具调用中传递用户电子邮件的传统客户端
- **OAuth 2.1 模式**:用于具有 Bearer 令牌认证的现代多用户场景
选择一种认证方法 - 同时使用两者将导致启动错误。
**启用 OAuth 2.1:**
要启用 OAuth 2.1,请将 `MCP_ENABLE_OAUTH21` 环境变量设置为 `true`。
```
# OAuth 2.1 需要 HTTP transport 模式
export MCP_ENABLE_OAUTH21=true
uv run main.py --transport streamable-http
```
如果 `MCP_ENABLE_OAUTH` 未设置为 `true`,服务器将使用传统认证,这适用于不支持 OAuth 2.1 的客户端。
🔐 FastMCP GoogleProvider 如何处理 OAuth ← 高级 OAuth 2.1 详情
FastMCP 提供了一个原生 `GoogleProvider`,我们现在直接依赖它。它解决了在 MCP 客户端中使用 Google OAuth 的两个棘手问题:
1. **动态客户端注册 (DCR)**:Google 仍然不支持 OAuth 2.1 DCR,但 FastMCP 提供程序公开了完整的 DCR 接口,并使用您的固定凭据将注册转发给 Google。MCP 客户端照常注册,提供程序在后台将您的 Google 客户端 ID/密钥传递给它们。
2. **CORS 和浏览器兼容性**:提供程序包含一个 OAuth 代理,该代理使用正确的 CORS 标头为所有发现、授权和令牌端点提供服务。我们不再维护自定义 `/oauth2/*` 路由 - 提供程序安全地处理上游交换,并向客户端通告正确的元数据。
结果是一个更精简的服务器,仍然使任何符合 OAuth 2.1 的客户端(包括基于浏览器的客户端)能够通过 Google 进行认证,而无需定制代码。
### 无状态模式(容器友好)
服务器支持一种无状态模式,专为应避免文件系统写入的容器化环境而设计:
**启用无状态模式:**
```
# 无状态模式需要启用 OAuth 2.1
export MCP_ENABLE_OAUTH21=true
export WORKSPACE_MCP_STATELESS_MODE=true
uv run main.py --transport streamable-http
```
**关键特性:**
- **无文件系统写入**:凭据从不写入磁盘
- **无调试日志**:完全禁用基于文件的日志记录
- **仅内存会话**:所有令牌通过 OAuth 2.1 会话存储在内存中
- **容器就绪**:非常适合 Docker、Kubernetes 和无服务器部署
- **每个请求一个令牌**:每个请求必须包含有效的 Bearer 令牌
**要求:**
- 必须与 `MCP_ENABLE_OAUTH21=true` 一起使用
- 与单用户模式不兼容
- 客户端必须处理 OAuth 流程并在每个请求中发送有效令牌
此模式非常适合:
- 无法使用持久存储的云部署
- 需要严格隔离的多租户环境
- 具有只读文件系统的容器化应用程序
- 无服务器函数和临时计算环境
**MCP Inspector**:使用 Desktop OAuth 客户端无需额外配置。
**Claude Code**:使用 Desktop OAuth 客户端无需额外配置。
### OAuth 代理存储后端
服务器通过 FastMCP 2.13.0+ 支持用于 OAuth 代理状态管理的可插拔存储后端。根据您的部署需求选择后端。
**可用后端:**
| Backend | Best For | Persistence | Multi-Server |
|---------|----------|-------------|--------------|
| Memory | 开发、测试 | ❌ | ❌ |
| Disk | 单服务器生产环境 | ✅ | ❌ |
| Valkey/Redis | 分布式生产环境 | ✅ | ✅ |
**配置:**
```
# 内存存储(快速,无持久化)
export WORKSPACE_MCP_OAUTH_PROXY_STORAGE_BACKEND=memory
# 磁盘存储(重启后保留)
export WORKSPACE_MCP_OAUTH_PROXY_STORAGE_BACKEND=disk
export WORKSPACE_MCP_OAUTH_PROXY_DISK_DIRECTORY=~/.fastmcp/oauth-proxy
# Valkey/Redis 存储(分布式,多服务器)
export WORKSPACE_MCP_OAUTH_PROXY_STORAGE_BACKEND=valkey
export WORKSPACE_MCP_OAUTH_PROXY_VALKEY_HOST=redis.example.com
export WORKSPACE_MCP_OAUTH_PROXY_VALKEY_PORT=6379
```
🔐 Valkey/Redis 配置选项
| Variable | Default | Description |
|----------|---------|-------------|
| `WORKSPACE_MCP_OAUTH_PROXY_VALKEY_HOST` | localhost | Valkey/Redis 主机 |
| `WORKSPACE_MCP_OAUTH_PROXY_VALKEY_PORT` | 6379 | 端口(6380 自动启用 TLS) |
| `WORKSPACE_MCP_OAUTH_PROXY_VALKEY_DB` | 0 | 数据库编号 |
| `WORKSPACE_MCP_OAUTH_PROXY_VALKEY_USE_TLS` | auto | 启用 TLS(如果端口为 6380 则自动) |
| `WORKSPACE_MCP_OAUTH_PROXY_VALKEY_USERNAME` | - | 认证用户名 |
| `WORKSPACE_MCP_OAUTH_PROXY_VALKEY_PASSWORD` | - | 认证密码 |
| `WORKSPACE_MCP_OAUTH_PROXY_VALKEY_REQUEST_TIMEOUT_MS` | 5000 | 远程主机请求超时 |
| `WORKSPACE_MCP_OAUTH_PROXY_VALKEY_CONNECTION_TIMEOUT_MS` | 10000 | 远程主机连接超时 |
**加密:** 磁盘和 Valkey 存储使用 Fernet 加密。加密密钥派生自 `FASTMCP_SERVER_AUTH_GOOGLE_JWT_SIGNING_KEY`(如果已设置),否则派生自 `GOOGLE_OAUTH_CLIENT_SECRET`。
### 外部 OAuth 2.1 提供程序模式
服务器支持外部 OAuth 2.1 提供程序模式,用于认证由外部系统处理的场景。在此模式下,MCP 服务器本身不管理 OAuth 流程,而是期望在工具调用的 Authorization 标头中有有效的 Bearer 令牌。
**启用外部 OAuth 2.1 提供程序模式:**
```
# 外部 OAuth provider 模式需要启用 OAuth 2.1
export MCP_ENABLE_OAUTH21=true
export EXTERNAL_OAUTH21_PROVIDER=true
uv run main.py --transport streamable-http
```
**工作原理:**
- **协议级认证禁用**:MCP 握手(`initialize`)和 `tools/list` 不需要认证
- **工具级认证必需**:所有工具调用必须包含 `Authorization: Bearer
` 标头
- **外部 OAuth 流程**:您的外部系统处理 OAuth 流程并获取 Google 访问令牌
- **令牌验证**:服务器通过 Google 的 tokeninfo API 验证 Bearer 令牌
- **多用户支持**:每个请求根据其 Bearer 令牌独立认证
**关键特性:**
- **无本地 OAuth 流程**:服务器不提供 OAuth 回调端点或管理 OAuth 状态
- **仅 Bearer 令牌**:所有认证通过 Authorization 标头进行
- **设计上无状态**:与 `WORKSPACE_MCP_STATELESS_MODE=true` 无缝协作
- **外部身份提供程序**:与您现有的认证基础设施集成
- **工具发现**:客户端可以在没有认证的情况下列出可用工具
**要求:**
- 必须与 `MCP_ENABLE_OAUTH21=true` 一起使用
- 仍然需要 OAuth 凭据进行令牌验证(`GOOGLE_OAUTH_CLIENT_ID`、`GOOGLE_OAUTH_CLIENT_SECRET`)
- 外部系统必须获取有效的 Google OAuth 访问令牌(ya29.*)
- 每个工具调用请求必须包含有效的 Bearer 令牌
**使用案例:**
- 与现有认证系统集成
- 由您的应用程序管理的自定义 OAuth 流程
- 在上游处理认证的 API 网关
- 具有集中认证的多租户 SaaS 应用程序
- 具有自己的 OAuth 实现的移动或 Web 应用程序
### VS Code MCP 客户端支持
🆚 VS Code 配置 ← VS Code MCP 扩展设置
```
{
"servers": {
"google-workspace": {
"url": "http://localhost:8000/mcp/",
"type": "http"
}
}
}
```
*注意:使用 VS Code MCP 时,请确保使用 `--transport streamable-http` 启动服务器。*
### Claude Code MCP 客户端支持
🆚 Claude Code 配置 ← Claude Code MCP 支持设置
```
# 首先以 HTTP 模式启动 server
uv run main.py --transport streamable-http
# 然后添加到 Claude Code
claude mcp add --transport http workspace-mcp http://localhost:8000/mcp
```
#### 反向代理设置
如果您在反向代理(nginx、Apache、Cloudflare 等)后面运行 MCP 服务器,您有两个配置选项:
**问题**:当在反向代理后面时,服务器使用内部端口(例如 `http://localhost:8000`)构建 OAuth URL,但外部客户端需要公共 URL(例如 `https://your-domain.com`)。
**解决方案 1**:为所有 OAuth 端点设置 `WORKSPACE_EXTERNAL_URL`:
```
# 这将配置所有 OAuth endpoints 使用您的外部 URL
export WORKSPACE_EXTERNAL_URL="https://your-domain.com"
```
**解决方案 2**:仅为回调设置 `GOOGLE_OAUTH_REDIRECT_URI`:
```
# 这仅覆盖 OAuth callback URL
export GOOGLE_OAUTH_REDIRECT_URI="https://your-domain.com/oauth2callback"
```
您还有以下选项:
| `OAUTH_CUSTOM_REDIRECT_URIS` *(可选)* | 附加重定向 URI 的逗号分隔列表 |
| `OAUTH_ALLOWED_ORIGINS` *(可选)* | 附加 CORS 源的逗号分隔列表 |
**重要**:
- 当所有 OAuth 端点都应使用外部 URL 时使用 `WORKSPACE_EXTERNAL_URL`(推荐用于反向代理设置)
- 当您只需要覆盖回调 URL 时使用 `GOOGLE_OAUTH_REDIRECT_URI`
- 重定向 URI 必须与您的 Google Cloud Console 中配置的完全匹配
- 您的反向代理必须将与 OAuth 相关的请求(`/oauth2callback`、`/oauth2/*`、`/.well-known/*`)转发到 MCP 服务器
🚀 高级 uvx 命令 ← 更多启动选项
```
# 首先配置凭证(参见凭证配置部分)
# 仅以特定 tools 启动
uvx workspace-mcp --tools gmail drive calendar tasks
# 以 tool tiers 启动(推荐大多数用户使用)
uvx workspace-mcp --tool-tier core # Essential tools
uvx workspace-mcp --tool-tier extended # Core + additional features
uvx workspace-mcp --tool-tier complete # All tools
# 以 HTTP 模式启动进行调试
uvx workspace-mcp --transport streamable-http
```
*需要 Python 3.10+ 和 [uvx](https://github.com/astral-sh/uv)。该软件包可在 [PyPI](https://pypi.org/project/workspace-mcp) 上获得。*
### 开发安装
用于开发或自定义:
```
git clone https://github.com/taylorwilsdon/google_workspace_mcp.git
cd google_workspace_mcp
uv run main.py
```
**开发安装(面向贡献者)**:
🔧 开发者设置 JSON ← 面向贡献者和自定义
```
{
"mcpServers": {
"google_workspace": {
"command": "uv",
"args": [
"run",
"--directory",
"/path/to/repo/google_workspace_mcp",
"main.py"
],
"env": {
"GOOGLE_OAUTH_CLIENT_ID": "your-client-id",
"GOOGLE_OAUTH_CLIENT_SECRET": "your-secret",
"OAUTHLIB_INSECURE_TRANSPORT": "1"
}
}
}
}
```
#### HTTP 模式(用于调试或 Web 界面)
如果您需要在 Claude Desktop 中使用 HTTP 模式:
```
{
"mcpServers": {
"google_workspace": {
"command": "npx",
"args": ["mcp-remote", "http://localhost:8000/mcp"]
}
}
}
```
*注意:使用 HTTP 模式时,请确保使用 `--transport streamable-http` 启动服务器。*
### 首次认证
服务器使用 **Google Desktop OAuth** 进行简化的认证:
- **无需重定向 URI**:Desktop OAuth 客户端处理认证而无需复杂的回调 URL
- **自动流程**:服务器透明地管理整个 OAuth 过程
- **传输无关**:在 stdio 和 HTTP 模式下都能无缝工作
调用工具时:
1. 服务器返回授权 URL
2. 在浏览器中打开 URL 并授权
3. Google 提供授权码
4. 在提示时粘贴代码(或自动处理)
5. 服务器完成认证并重试您的请求
## ◆ 开发
### 项目结构
```
google_workspace_mcp/
├── auth/ # Authentication system with decorators
├── core/ # MCP server and utilities
├── g{service}/ # Service-specific tools
├── main.py # Server entry point
├── client_secret.json # OAuth credentials (not committed)
└── pyproject.toml # Dependencies
```
### 添加新工具
```
from auth.service_decorator import require_google_service
@require_google_service("drive", "drive_read") # Service + scope group
async def your_new_tool(service, param1: str, param2: int = 10):
"""Tool description"""
# service is automatically injected and cached
result = service.files().list().execute()
return result # Return native Python objects
```
### 架构亮点
- **服务缓存**:30 分钟 TTL 减少认证开销
- **作用域管理**:集中在 `SCOPE_GROUPS` 中以便于维护
- **错误处理**:原生异常而不是手动错误构建
- **多服务支持**:`@require_multiple_services()` 用于复杂工具
### 凭据存储系统
服务器包含一个抽象凭据存储 API 和一个默认后端,用于管理 Google OAuth 凭据,并支持多种存储后端:
**特性:**
- **抽象接口**:`CredentialStore` 基类定义标准操作(get、store、delete、list users)
- **本地文件存储**:`LocalDirectoryCredentialStore` 实现将凭据存储为 JSON 文件
- **可配置存储**:环境变量 `GOOGLE_MCP_CREDENTIALS_DIR` 设置存储位置
- **多用户支持**:存储和管理多个 Google 账户的凭据
- **自动目录创建**:如果存储目录不存在,则会自动创建
**配置:**
```
# 可选:设置自定义凭证目录
export GOOGLE_MCP_CREDENTIALS_DIR="/path/to/credentials"
# 默认位置(如果未设置 GOOGLE_MCP_CREDENTIALS_DIR):
# - ~/.google_workspace_mcp/credentials(如果主目录可访问)
# - ./.credentials(回退)
```
**使用示例:**
```
from auth.credential_store import get_credential_store
# 获取全局 credential store 实例
store = get_credential_store()
# 为用户存储 credentials
store.store_credential("user@example.com", credentials)
# 检索 credentials
creds = store.get_credential("user@example.com")
# 列出所有已存储 credentials 的用户
users = store.list_users()
```
凭据存储自动处理凭据序列化、过期解析,并为存储操作提供错误处理。
## ⊠ 安全
- **凭据**:永远不要将 `.env`、`client_secret.json` 或 `.credentials/` 目录提交到源代码管理!
- **OAuth 回调**:开发环境使用 `http://localhost:8000/oauth2callback`(需要 `OAUTHLIB_INSECURE_TRANSPORT=1`)
- **传输感知回调**:Stdio 模式仅为 OAuth 启动最小 HTTP 服务器,确保回调在所有模式下工作
- **生产环境**:使用 HTTPS 和 OAuth 2.1 并相应配置
- **作用域最小化**:工具仅请求必要的权限
- **本地文件访问控制**:读取本地文件的工具(例如附件、`file://` 上传)默认限制为用户的主目录。使用 `ALLOWED_FILE_DIRS` 环境变量覆盖此设置:
# 允许读取本地文件的目录列表(以冒号分隔,Windows 上以分号分隔)
export ALLOWED_FILE_DIRS="/home/user/documents:/data/shared"
无论白名单如何,对敏感路径(`.env`、`.ssh/`、`.aws/`、`/etc/shadow`、凭据文件等)的访问始终被阻止。
## ≡ 许可证
MIT 许可证 - 有关详细信息,请参阅 `LICENSE` 文件。
验证:
[](https://lobehub.com/mcp/taylorwilsdon-google_workspace_mcp)
[](https://mseep.ai/app/eebbc4a6-0f8c-41b2-ace8-038e5516dba0)
标签:AI 助手, API 集成, Claude 集成, CLI 工具, DNS解析, Gmail 自动化, Google Calendar, Google Chat, Google Docs, Google Drive, Google Forms, Google Sheets, Google Slides, Google Tasks, Google Workspace, G Suite, MCP Server, Model Context Protocol, OAuth2.1, PyPI 包, Python, 云协作, 办公自动化, 多用户支持, 开源项目, 文档管理, 无后门, 日程管理, 生产力工具, 自然语言控制, 请求拦截, 逆向工具, 邮件管理