Biomni 是一款由斯坦福推出的通用生物医学 AI Agent,通过结合大模型推理与检索增强规划,帮助科学家自主完成复杂的跨领域生物医学研究任务并生成可验证的假设。






# Biomni:通用生物医学 AI Agent
## 概述
Biomni 是一款通用生物医学 AI Agent,旨在自主执行跨越不同生物医学子领域的广泛研究任务。通过将前沿的大型语言模型 (LLM) 推理与检索增强规划 (retrieval-augmented planning) 及基于代码的执行相结合,Biomni 帮助科学家大幅提升研究生产力并生成可测试的假设。
## 快速开始
### 安装
我们的软件环境非常庞大,我们提供了一个单一的 setup.sh 脚本来进行设置。
请先按照此[文件](biomni_env/README.md)设置环境。
然后激活环境 E1:
```
conda activate biomni_e1
```
接着安装 biomni 官方 pip 包:
```
pip install biomni --upgrade
```
若要获取最新更新,请从 github 源码版本安装,或者执行:
```
pip install git+https://github.com/snap-stanford/Biomni.git@main
```
最后,使用以下方法之一配置您的 API 密钥:
点击展开
#### 选项 1:使用 .env 文件(推荐)
在您的项目目录中创建一个 `.env` 文件:
```
# 复制示例文件
cp .env.example .env
# 使用你实际的 API keys 编辑 .env 文件
```
您的 `.env` 文件应如下所示:
```
# 必需:用于 Claude models 的 Anthropic API Key
ANTHROPIC_API_KEY=your_anthropic_api_key_here
# 可选:OpenAI API Key(如果使用 OpenAI models)
OPENAI_API_KEY=your_openai_api_key_here
# 可选:Azure OpenAI API Key(如果使用 Azure OpenAI models)
OPENAI_API_KEY=your_azure_openai_api_key
OPENAI_ENDPOINT=https://your-resource-name.openai.azure.com/
# 可选:AI Studio Gemini API Key(如果使用 Gemini models)
GEMINI_API_KEY=your_gemini_api_key_here
# 可选:groq API Key(如果使用 groq 作为 model provider)
GROQ_API_KEY=your_groq_api_key_here
# 可选:设置你的 LLM 来源,例如:
#"OpenAI", "AzureOpenAI", "Anthropic", "Ollama", "Gemini", "Bedrock", "Groq", "Custom"
LLM_SOURCE=your_LLM_source_here
# 可选:AWS Bedrock 配置(如果使用 AWS Bedrock models)
AWS_BEARER_TOKEN_BEDROCK=your_bedrock_api_key_here
AWS_REGION=us-east-1
# 可选:自定义模型服务配置
# CUSTOM_MODEL_BASE_URL=http://localhost:8000/v1
# CUSTOM_MODEL_API_KEY=your_custom_api_key_here
# 可选:Biomni 数据路径(默认为 ./data)
# BIOMNI_DATA_PATH=/path/to/your/data
# 可选:超时设置(默认为 600 秒)
# BIOMNI_TIMEOUT_SECONDS=600
```
#### 选项 2:使用 shell 环境变量
或者,在 bash 配置文件 `~/.bashrc` 中配置您的 API 密钥:
```
export ANTHROPIC_API_KEY="YOUR_API_KEY"
export OPENAI_API_KEY="YOUR_API_KEY" # optional if you just use Claude
export OPENAI_ENDPOINT="https://your-resource-name.openai.azure.com/" # optional unless you are using Azure
export AWS_BEARER_TOKEN_BEDROCK="YOUR_BEDROCK_API_KEY" # optional for AWS Bedrock models
export AWS_REGION="us-east-1" # optional, defaults to us-east-1 for Bedrock
export GEMINI_API_KEY="YOUR_GEMINI_API_KEY" #optional if you want to use a gemini model
export GROQ_API_KEY="YOUR_GROQ_API_KEY" # Optional: set this to use models served by Groq
export LLM_SOURCE="Groq" # Optional: set this to use models served by Groq
```
#### ⚠️ 已知的包冲突
由于依赖冲突,某些 Python 包默认未在 Biomni 环境中安装。如果您需要这些功能,必须手动安装这些包,并可能需要取消代码库中相关代码的注释。请查看 [docs/known_conflicts.md](./docs/known_conflicts.md) 中的最新列表和详细信息。
### 基本用法
进入环境后,您就可以开始使用 Biomni 了:
```
from biomni.agent import A1
# 使用数据路径初始化 agent,首次运行时会自动下载 Data lake(约 11GB)
agent = A1(path='./data', llm='claude-sonnet-4-20250514')
# 使用自然语言执行 biomedical tasks
agent.go("Plan a CRISPR screen to identify genes that regulate T cell exhaustion, generate 32 genes that maximize the perturbation effect.")
agent.go("Perform scRNA-seq annotation at [PATH] and generate meaningful hypothesis")
agent.go("Predict ADMET properties for this compound: CC(C)CC1=CC=C(C=C1)C(C)C(=O)O")
```
#### 控制 Datalake 加载
默认情况下,Biomni 会在您创建 agent 时自动下载 datalake 文件(约 11GB)。您可以控制此行为:
```
# 跳过自动 datalake 下载(更快的初始化)
agent = A1(path='./data', llm='claude-sonnet-4-20250514', expected_data_lake_files = [])
```
这适用于:
- 更快的测试和开发
- 存储或带宽有限的环境
- 您只需要不需要 datalake 文件的特定工具的情况
如果您计划使用 Azure 作为您的模型,请始终在模型名称前加上 azure- 前缀(例如 llm='azure-gpt-4o')。
### Gradio 界面
启动 Biomni 的交互式 Web UI:
```
from biomni.agent import A1
agent = A1(path='./data', llm='claude-sonnet-4-20250514')
agent.launch_gradio_demo()
```
**安装:**
```
pip install "gradio>=5.0,<6.0"
```
**注意:** 由于 Gradio 6.0 中的 API 变更,Biomni 的 Gradio 界面目前需要 Gradio 5.x。如果您安装了 Gradio 6.x,可能需要进行降级。
**选项:**
- `share=True` - 创建可公开分享的链接
- `server_name="127.0.0.1"` - 仅限本地访问(默认:"0.0.0.0")
- `require_verification=True` - 需要访问码(默认访问码:"Biomni2025")
该界面将通过 `http://localhost:7860` 提供
### 配置管理
Biomni 包含一个集中式配置系统,为管理设置提供了灵活的方式。您可以通过环境变量、运行时修改或直接参数来配置 Biomni。
```
from biomni.config import default_config
from biomni.agent import A1
# 推荐:修改全局默认值以保持一致性
default_config.llm = "gpt-4"
default_config.timeout_seconds = 1200
# 所有 agents 和数据库查询都使用这些默认值
agent = A1() # Everything uses gpt-4, 1200s timeout
```
**注意**:传递给 `A1()` 的直接参数仅影响该 agent 的推理,而不影响数据库查询。如需在所有操作中保持配置一致,请使用 `default_config` 或环境变量。
有关详细的配置选项,请参阅 **[配置指南](docs/configuration.md)**。
### PDF 生成
生成执行轨迹的 PDF 报告:
```
from biomni.agent import A1
# 初始化 agent
agent = A1(path='./data', llm='claude-sonnet-4-20250514')
# 运行你的任务
agent.go("Your biomedical task here")
# 将对话历史保存为 PDF
agent.save_conversation_history("my_analysis_results.pdf")
```
**PDF 生成依赖项:**
点击展开
为了获得最佳的 PDF 生成效果,请安装以下其中一个包:
```
# 选项 1:WeasyPrint(推荐用于最佳布局控制)
# Conda 环境(推荐)
conda install weasyprint
# 系统安装
brew install weasyprint # macOS
apt install weasyprint # Linux
# 有关详细说明,请参阅 [WeasyPrint Installation Guide](https://doc.courtbouillon.org/weasyprint/stable/first_steps.html)。
# 选项 2:markdown2pdf(基于 Rust,快速且可靠)
# macOS:
brew install theiskaa/tap/markdown2pdf
# Windows/Linux(使用 Cargo):
cargo install markdown2pdf
# 或者从以下地址下载预编译的二进制文件:
# https://github.com/theiskaa/markdown2pdf/releases/latest
# 选项 3:Pandoc(pip 安装)
pip install pandoc
```
## MCP (Model Context Protocol) 支持
Biomni 支持用于外部工具集成的 MCP 服务器:
```
from biomni.agent import A1
agent = A1()
agent.add_mcp(config_path="./mcp_config.yaml")
agent.go("Find FDA active ingredient information for ibuprofen")
```
**内置 MCP 服务器:**
有关用法和实现细节,请参阅 [MCP 集成文档](docs/mcp_integration.md) 以及 [`tutorials/examples/add_mcp_server/`](tutorials/examples/add_mcp_server/) 和 [`tutorials/examples/expose_biomni_server/`](tutorials/examples/expose_biomni_server/) 中的示例。
## Biomni-R0
**Biomni-R0** 是我们首个用于生物学的推理模型,基于 Qwen-32B 构建,并利用从 agent 交互数据中进行的强化学习进行训练。它旨在通过迭代的自我纠正,在工具使用、多步推理和复杂的生物学问题解决方面表现出色。
- 🤗 模型:[biomni/Biomni-R0-32B-Preview](https://huggingface.co/biomni/Biomni-R0-32B-Preview)
- 📝 技术报告:[biomni.stanford.edu/blog/biomni-r0-technical-report](https://biomni.stanford.edu/blog/biomni-r0-technical-report)
要将 Biomni-R0 用于 agent 推理,同时将数据库查询保留在您常用的提供商上(推荐),请运行本地 SGLang 服务器并将模型直接传递给 `A1()`。
1. 使用 Biomni-R0 启动 SGLang:
```
python -m sglang.launch_server --model-path RyanLi0802/Biomni-R0-Preview --port 30000 --host 0.0.0.0 --mem-fraction-static 0.8 --tp 2 --trust-remote-code --json-model-override-args '{"rope_scaling":{"rope_type":"yarn","factor":1.0,"original_max_position_embeddings":32768}, "max_position_embeddings": 131072}'
```
2. 将 agent 指向您的 SGLang endpoint 进行推理:
```
from biomni.config import default_config
from biomni.agent import A1
# 数据库查询(indexes、retrieval 等)使用 default_config
default_config.llm = "claude-3-5-sonnet-20241022"
default_config.source = "Anthropic"
# Agent 推理使用通过 SGLang 服务的 Biomni-R0(OpenAI-compatible API)
agent = A1(
llm="biomni/Biomni-R0-32B-Preview",
source="Custom",
base_url="http://localhost:30000/v1",
api_key="EMPTY",
)
agent.go("Plan a CRISPR screen to identify genes regulating T cell exhaustion")
```
## Biomni-Eval1
**Biomni-Eval1** 是一个全面的评估基准,旨在评估跨越各种任务的生物学推理能力。它包含 **433 个实例**,涵盖 **10 项生物学推理任务**,从基因识别到疾病诊断。
**包含的任务:**
- GWAS 致病基因识别(3 种变体)
- 实验台问答(2 种变体)
- 患者基因检测
- 筛选基因检索
- GWAS 变异优先级排序
- 罕见病诊断
- CRISPR 递送方法选择
**资源:**
- 🤗 数据集:[biomni/Eval1](https://huggingface.co/datasets/biomni/Eval1)
- 💻 快速开始:
```
from biomni.eval import BiomniEval1
evaluator = BiomniEval1()
score = evaluator.evaluate('gwas_causal_gene_opentargets', 0, 'BRCA1')
```
## 📚 Know-How 库
Biomni 包含一个 **Know-How 库** —— 这是一个精选的集合,包含生物医学技术的最佳实践、协议和故障排除指南。当与查询相关时,A1 agent 会自动检索这些文档,以提供领域专业知识和实用知识。
**功能:**
- 基于查询相关性自动检索
- 元数据跟踪(作者、所属机构、许可、商业用途)
- 兼容商业模式(过滤非商业性内容)
## 教程和示例
**[Biomni 101](./tutorials/biomni_101.ipynb)** - 基本概念和入门步骤
更多内容即将推出!
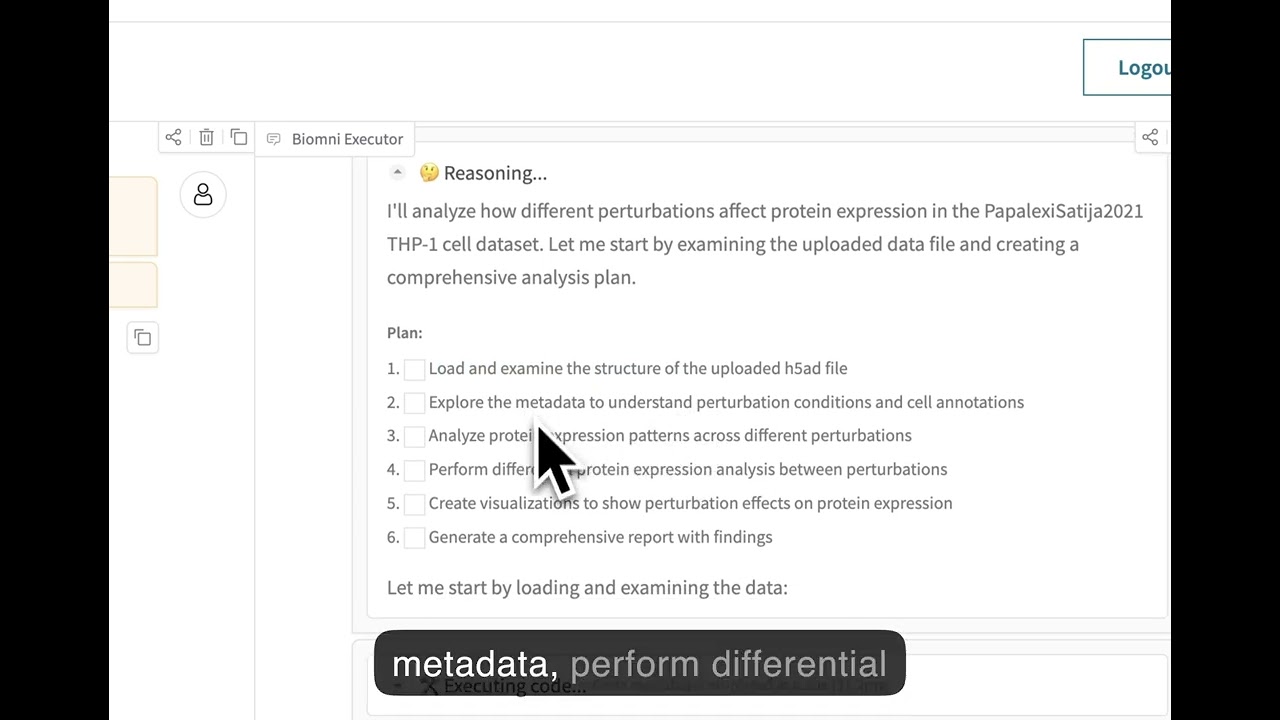
## 🌐 Web 界面
通过我们的无代码 Web 界面体验 Biomni,请访问 **[biomni.stanford.edu](https://biomni.stanford.edu)**。
[](https://youtu.be/E0BRvl23hLs)
## 重要提示
- 安全警告:目前,Biomni 会以完整的系统权限执行 LLM 生成的代码。如果您想在生产环境中使用它,请在隔离/沙盒环境中使用。该 agent 可以访问文件、网络和系统命令。请小心处理敏感数据或凭证。
- 此版本已于 2025 年 4 月 15 日冻结,因此它与当前的 Web 平台有所不同。
- Biomni 本身采用 Apache 2.0 许可协议,但某些集成的工具、数据库或软件可能带有更严格的商业许可。在任何商业用途之前,请仔细审查每个组件。
## 引用我们
```
@article{huang2025biomni,
title={Biomni: A General-Purpose Biomedical AI Agent},
author={Huang, Kexin and Zhang, Serena and Wang, Hanchen and Qu, Yuanhao and Lu, Yingzhou and Roohani, Yusuf and Li, Ryan and Qiu, Lin and Zhang, Junze and Di, Yin and others},
journal={bioRxiv},
pages={2025--05},
year={2025},
publisher={Cold Spring Harbor Laboratory}
}
```