AutoAgent: Fully-Automated & Zero-Code LLM Agent Framework
欢迎使用 AutoAgent!AutoAgent 是一个 **完全自动化** 且高度 **自演进** 的框架,使用户能够仅通过 **自然语言** 即可创建和部署 LLM agents。
## ✨AutoAgent 的关键特性
* 💬 **由自然语言驱动的 Agent 构建**
纯粹通过自然对话自动构建和编排协作式 agent 系统,无需手动编写代码或进行技术配置。
* 🚀 **零代码框架**
允许任何人,无论其编程经验如何,都可以仅使用自然语言来创建和定制自己的 agents、工具和工作流,从而实现 AI 开发的民主化。
* ⚡ **自管理工作流生成**
根据高层级任务描述动态创建、优化和调整 agent 工作流,即使用户无法完全指定实现细节。
* 🔧 **智能资源编排**
支持通过迭代式自我改进来进行受控的代码生成,以创建工具、agents 和工作流,同时支持单个 agent 创建和多 agent 工作流生成。
* 🎯 **自我博弈 Agent 定制**
支持通过迭代式自我改进来进行受控的代码生成,以创建工具、agents 和工作流,同时支持单个 agent 创建和多 agent 工作流生成。
🚀 解锁 LLM Agents 的未来。立即体验 🔥AutoAgent🔥!
Quick Overview of AutoAgent.
## 🔥 新闻资讯
## 📑 目录
*
✨ 功能特性
*
🔥 新闻资讯
*
🔍 如何使用 AutoAgent
*
1. `user mode` (深度研究 Agents)
*
2. `agent editor` (无工作流的 Agent 创建)
*
3. `workflow editor` (带工作流的 Agent 创建)
*
⚡ 快速开始
*
安装说明
*
API Keys 设置
*
从 CLI 模式开始
*
☑️ 待办事项
*
🔬 如何复现论文中的结果
*
📖 文档
*
🤝 加入社区
*
🙏 致谢
*
🌟 引用
## 🔍 如何使用 AutoAgent
### 1. `user mode` (深度研究 Agents)
AutoAgent 的特色在于其现成可用的多 agent 系统,该系统可通过起始页面的 user mode 访问。该系统作为一个综合性的 AI 研究助手,专为信息检索、复杂的分析任务和综合报告生成而设计。
- 🚀 **高性能**:使用 Claude 3.5 而非 OpenAI 的 o3 模型即可匹敌 Deep Research 的性能。
- 🔄 **模型灵活性**:兼容任何 LLM(包括 Deepseek-R1、Grok、Gemini 等)。
- 💰 **高性价比**:Deep Research $200/月订阅费的开源替代方案。
- 🎯 **用户友好**:易于部署的 CLI 界面,实现无缝交互。
- 📁 **文件支持**:支持文件上传以增强数据交互。
🎥 Deep Research (aka User Mode)
### 2. `agent editor` (无工作流的 Agent 创建)
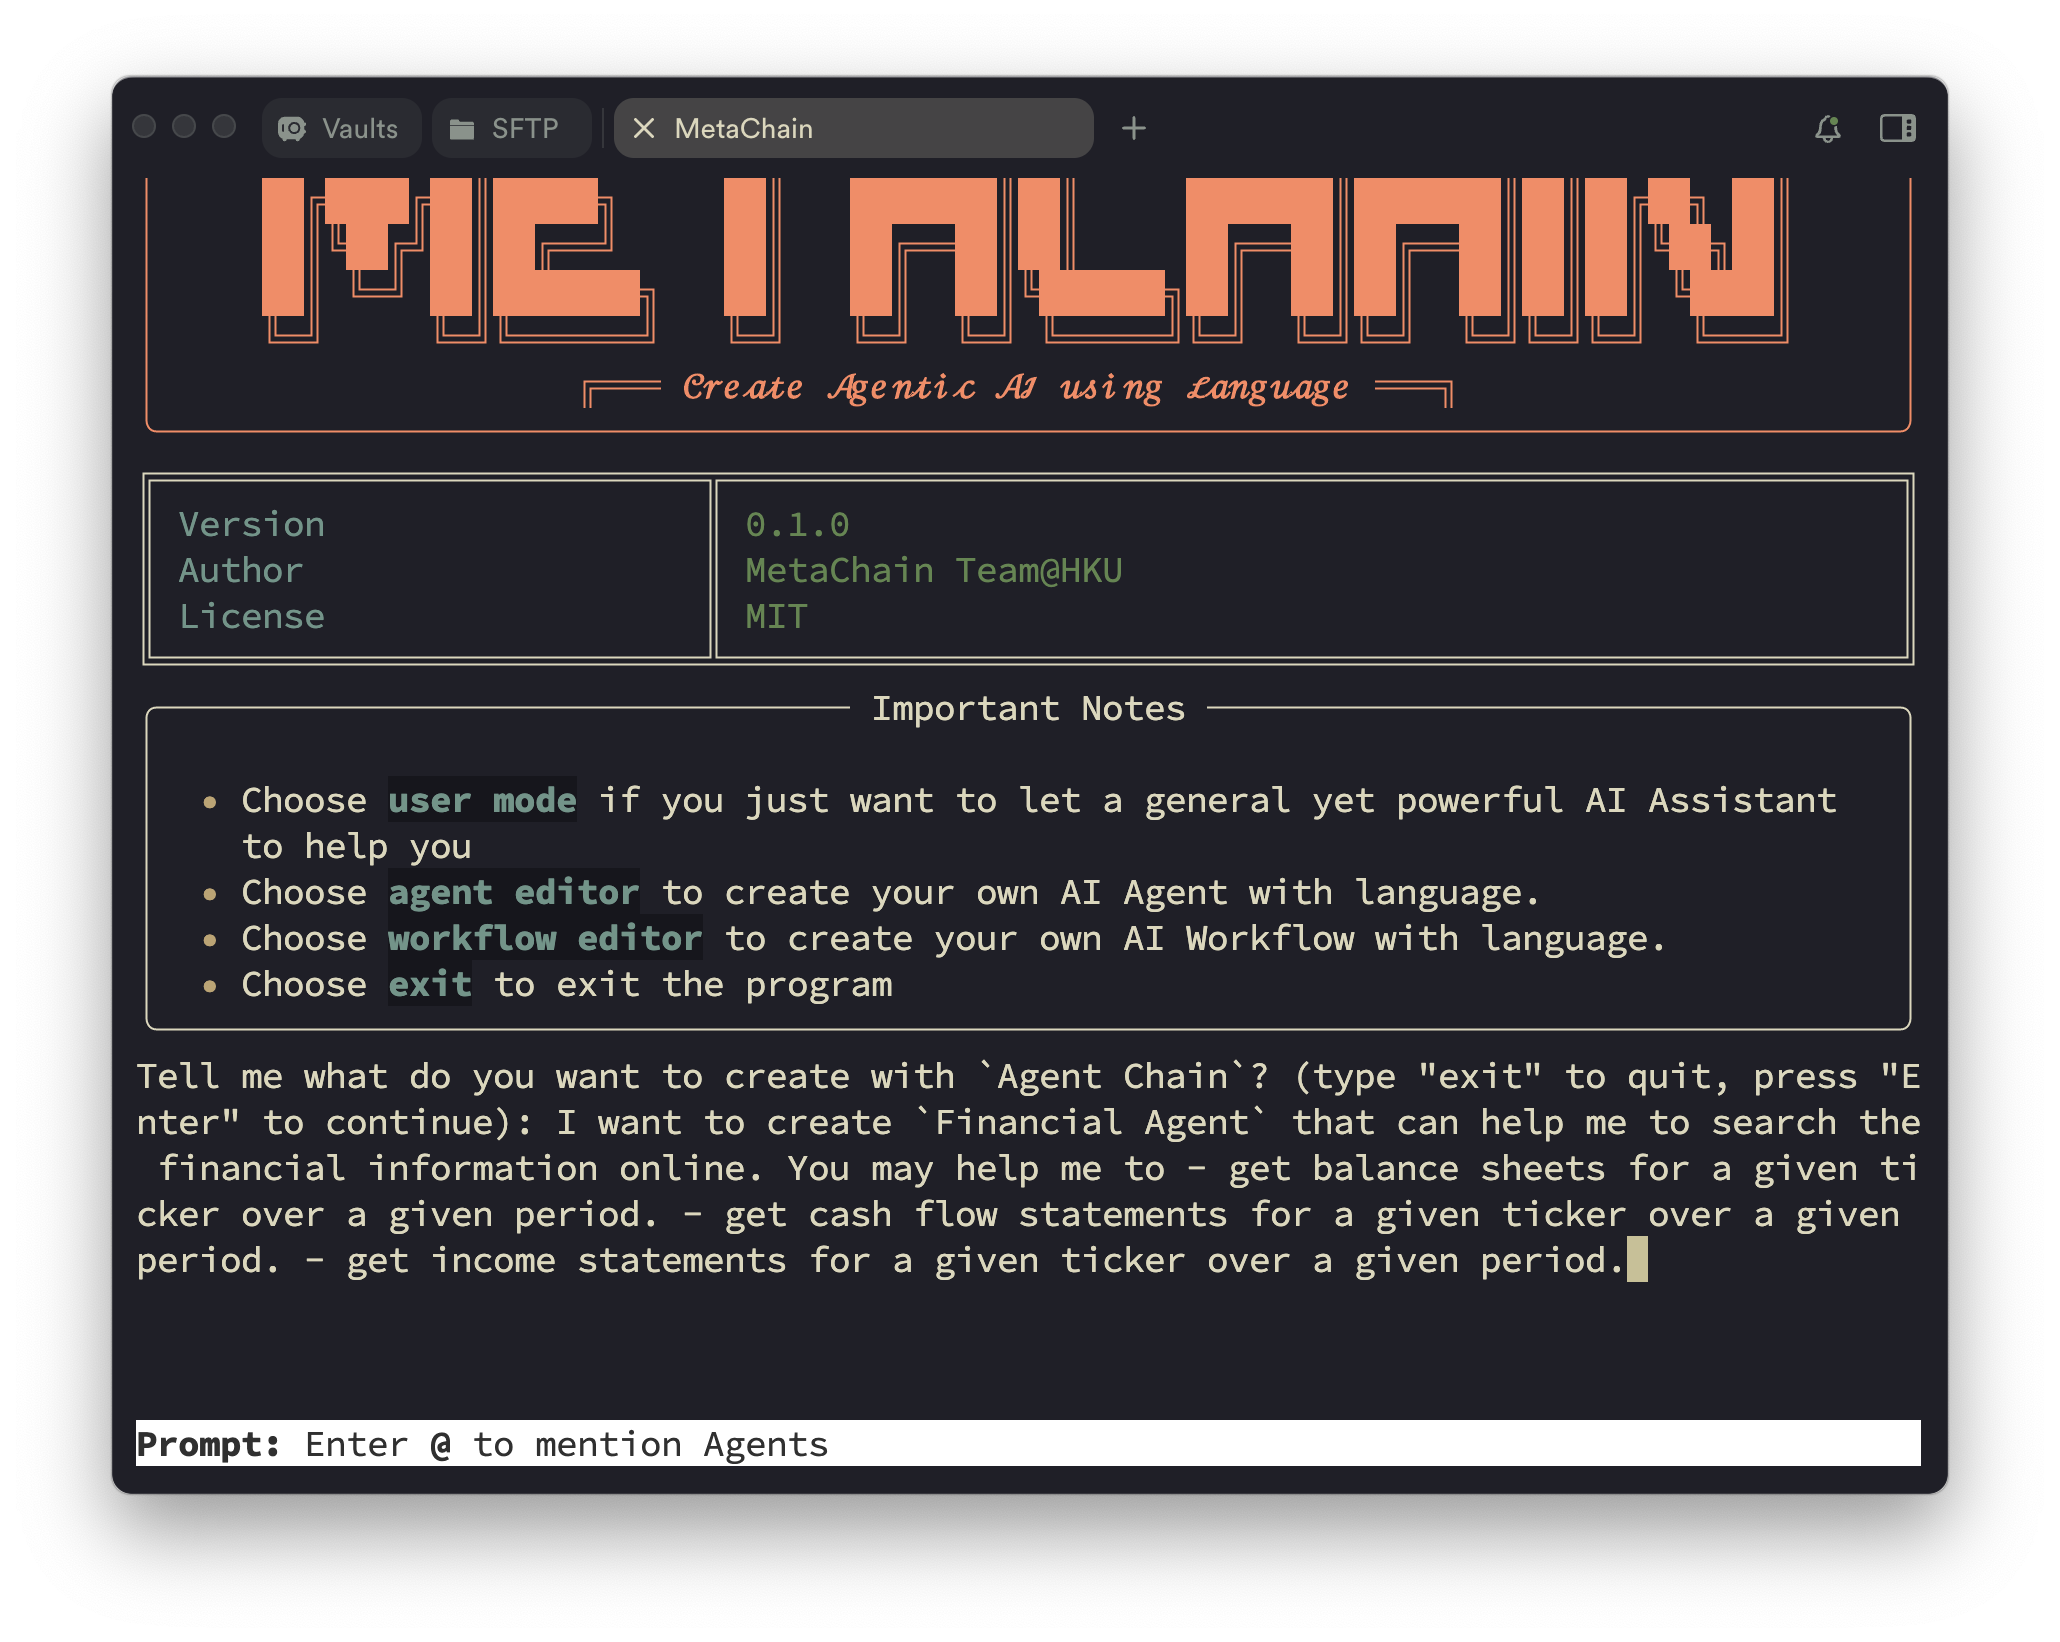
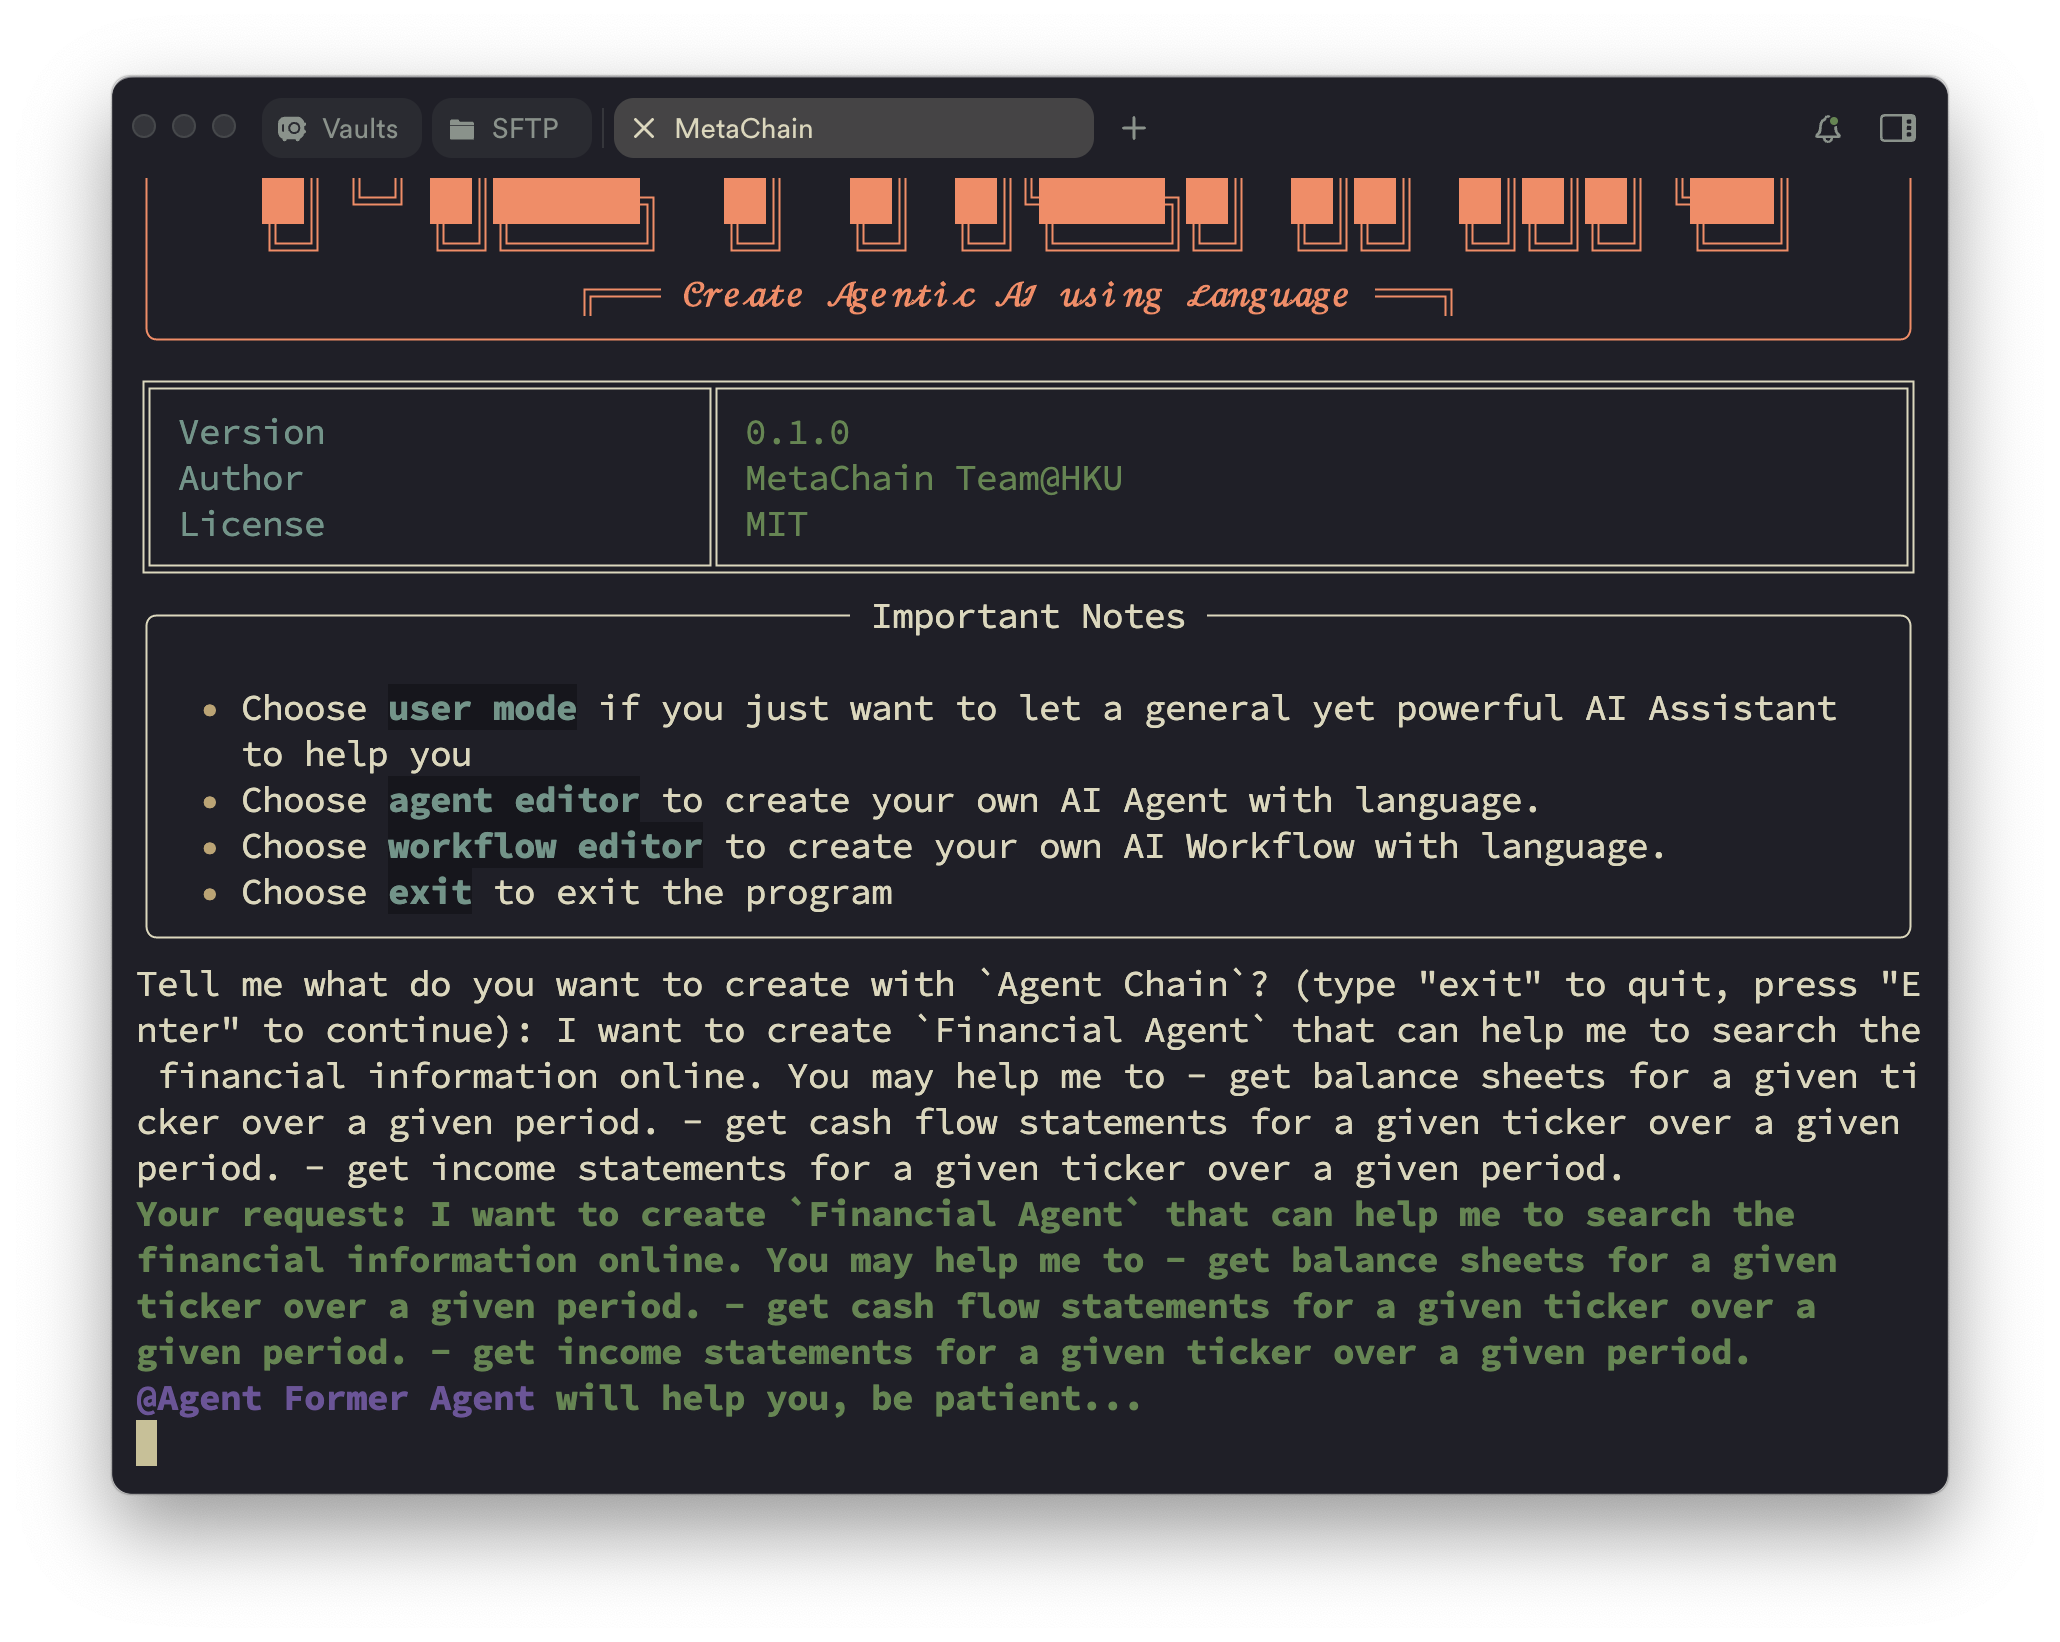
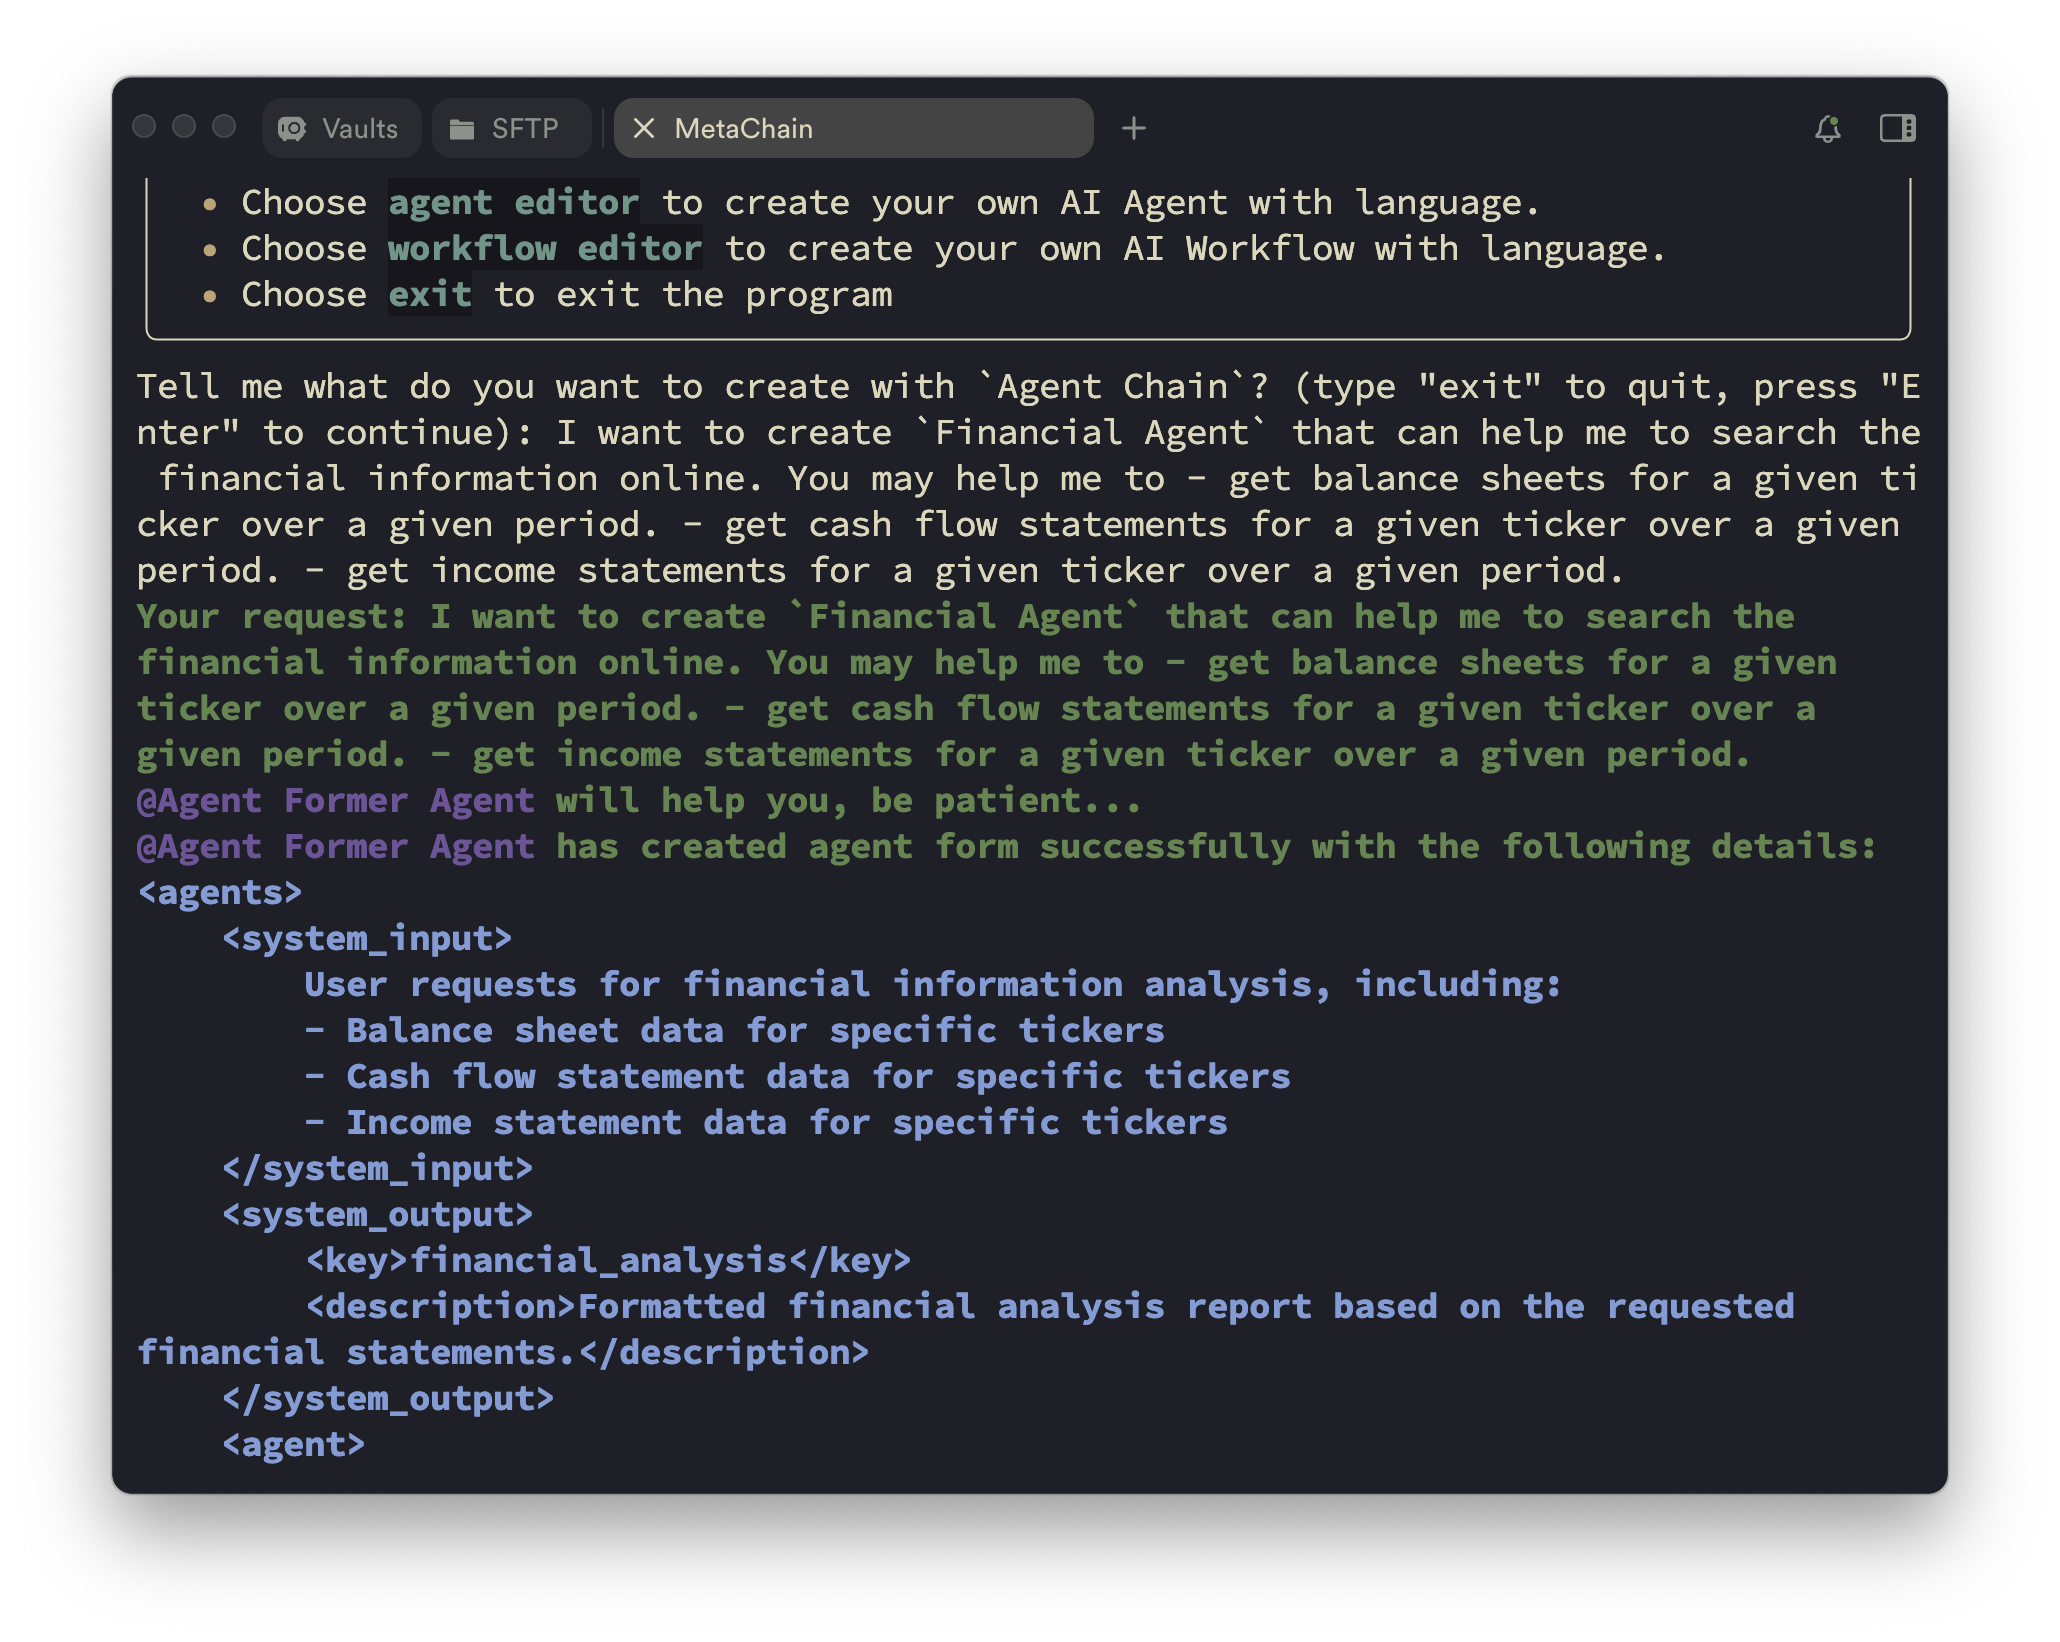
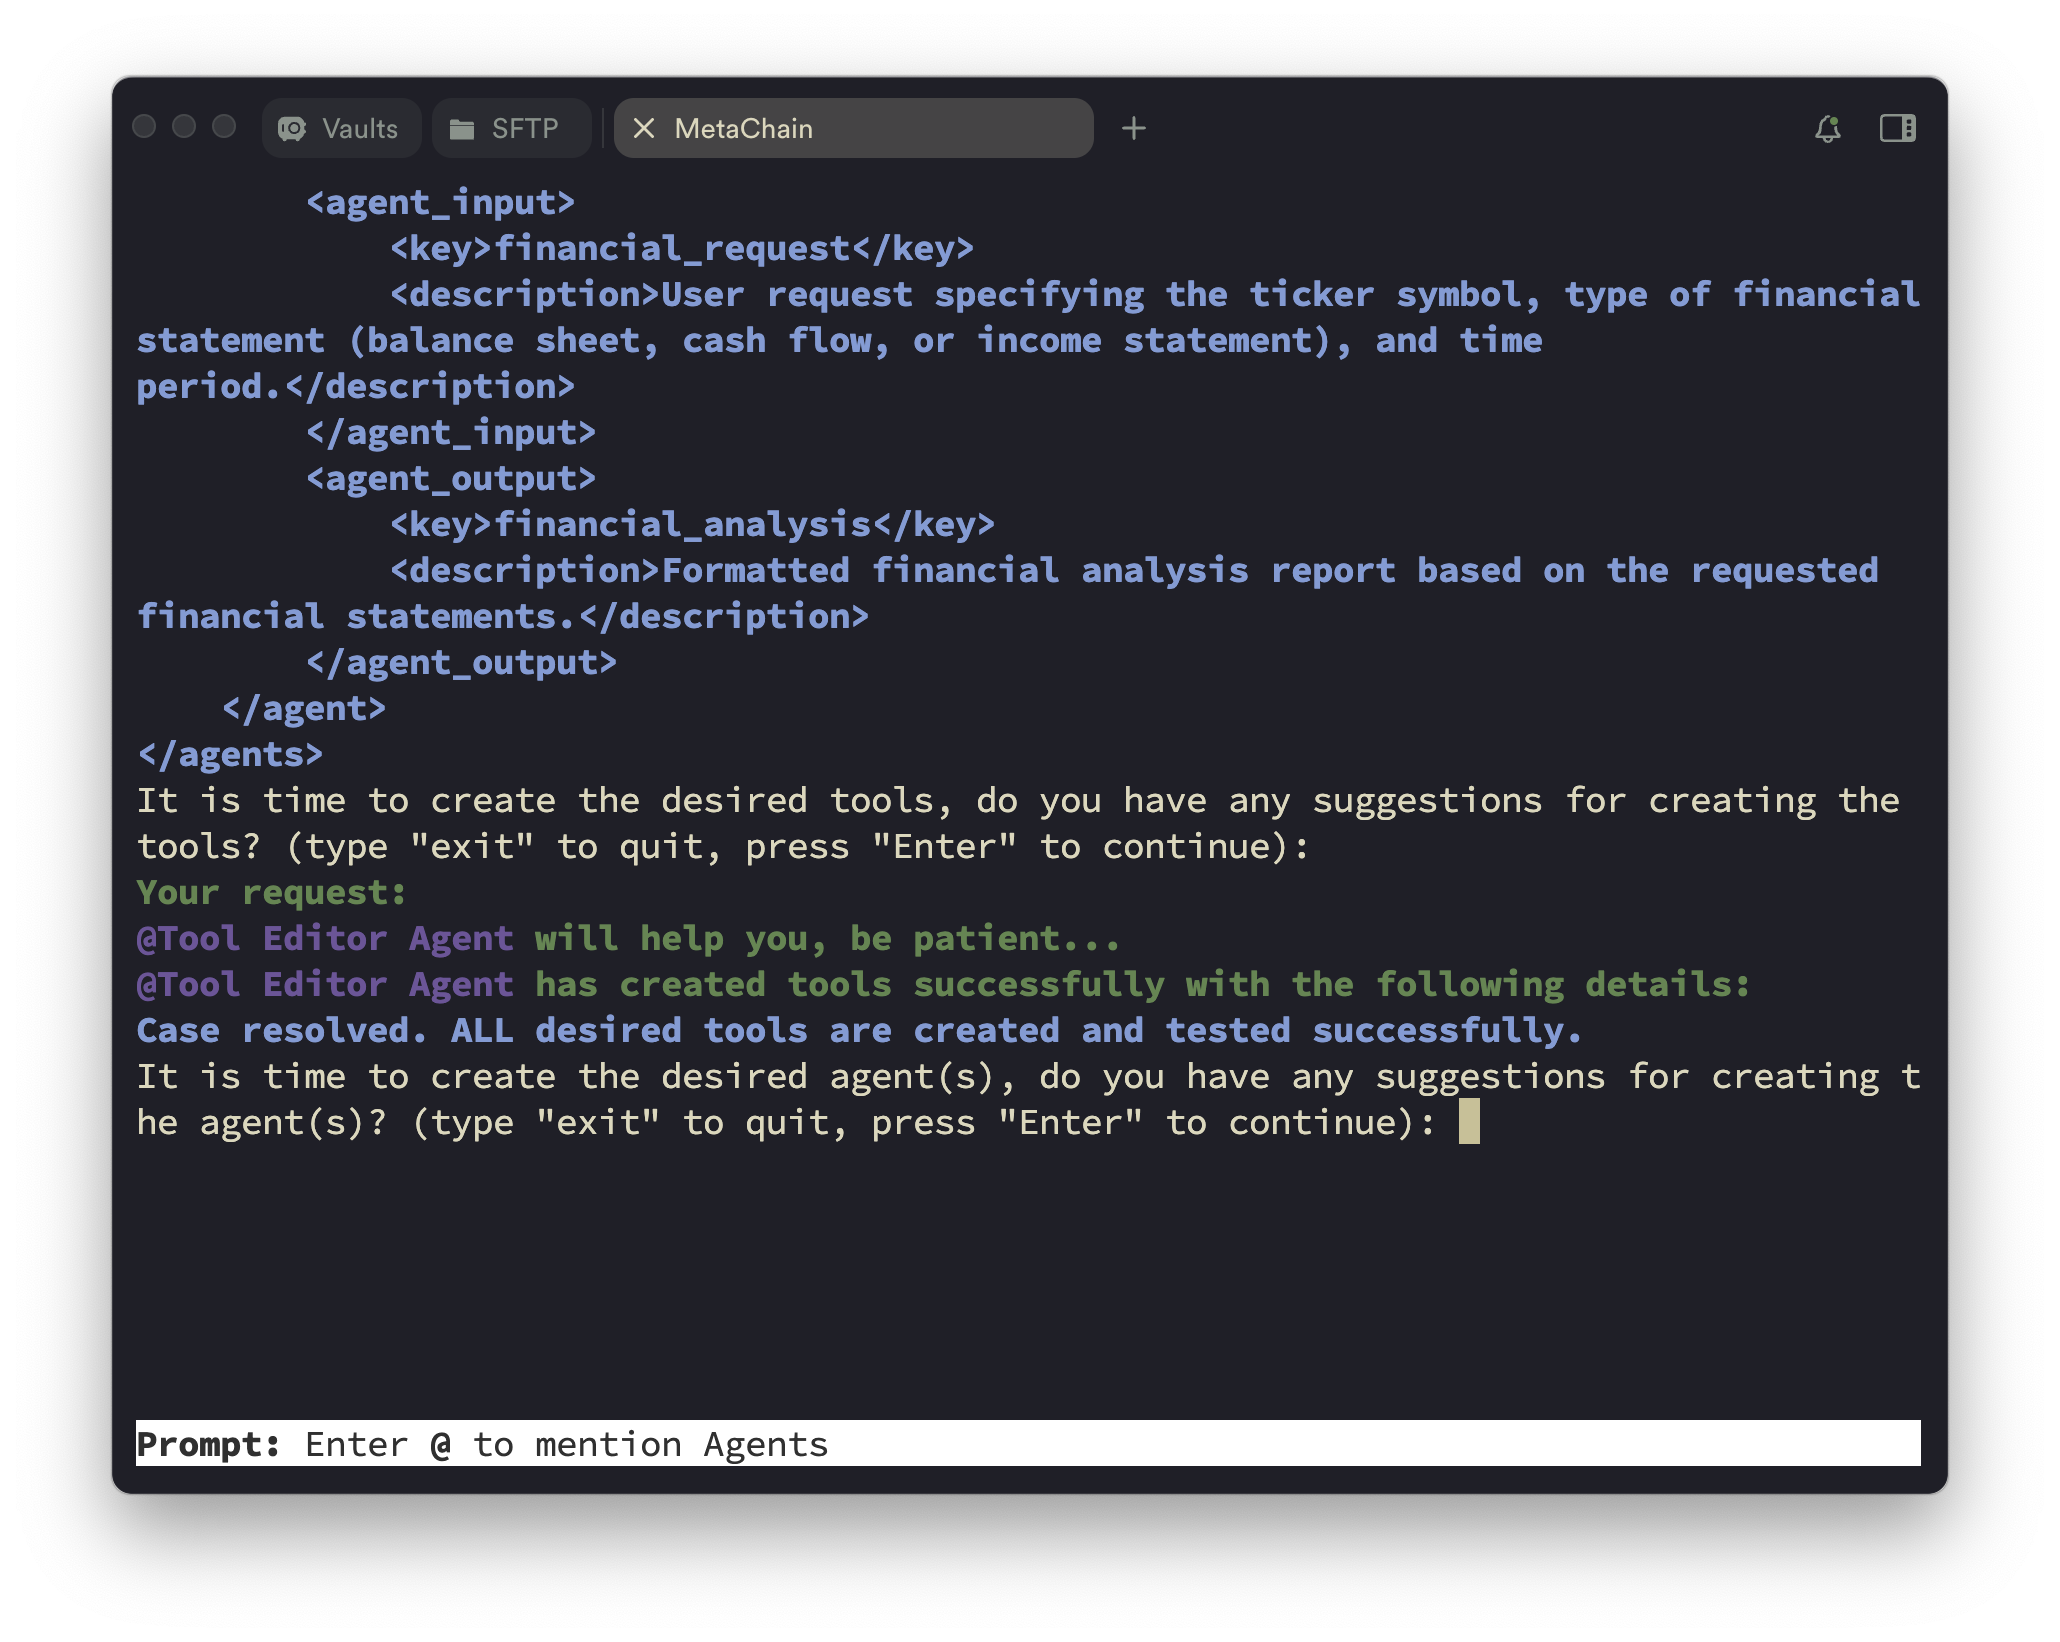
AutoAgent 最独特的功能在于其自然语言定制能力。与其他 agent 框架不同,AutoAgent 允许您仅使用自然语言即可创建工具、agents 和工作流。只需选择 `agent editor` 或 `workflow editor` 模式,即可开启通过对话构建 agents 的旅程。
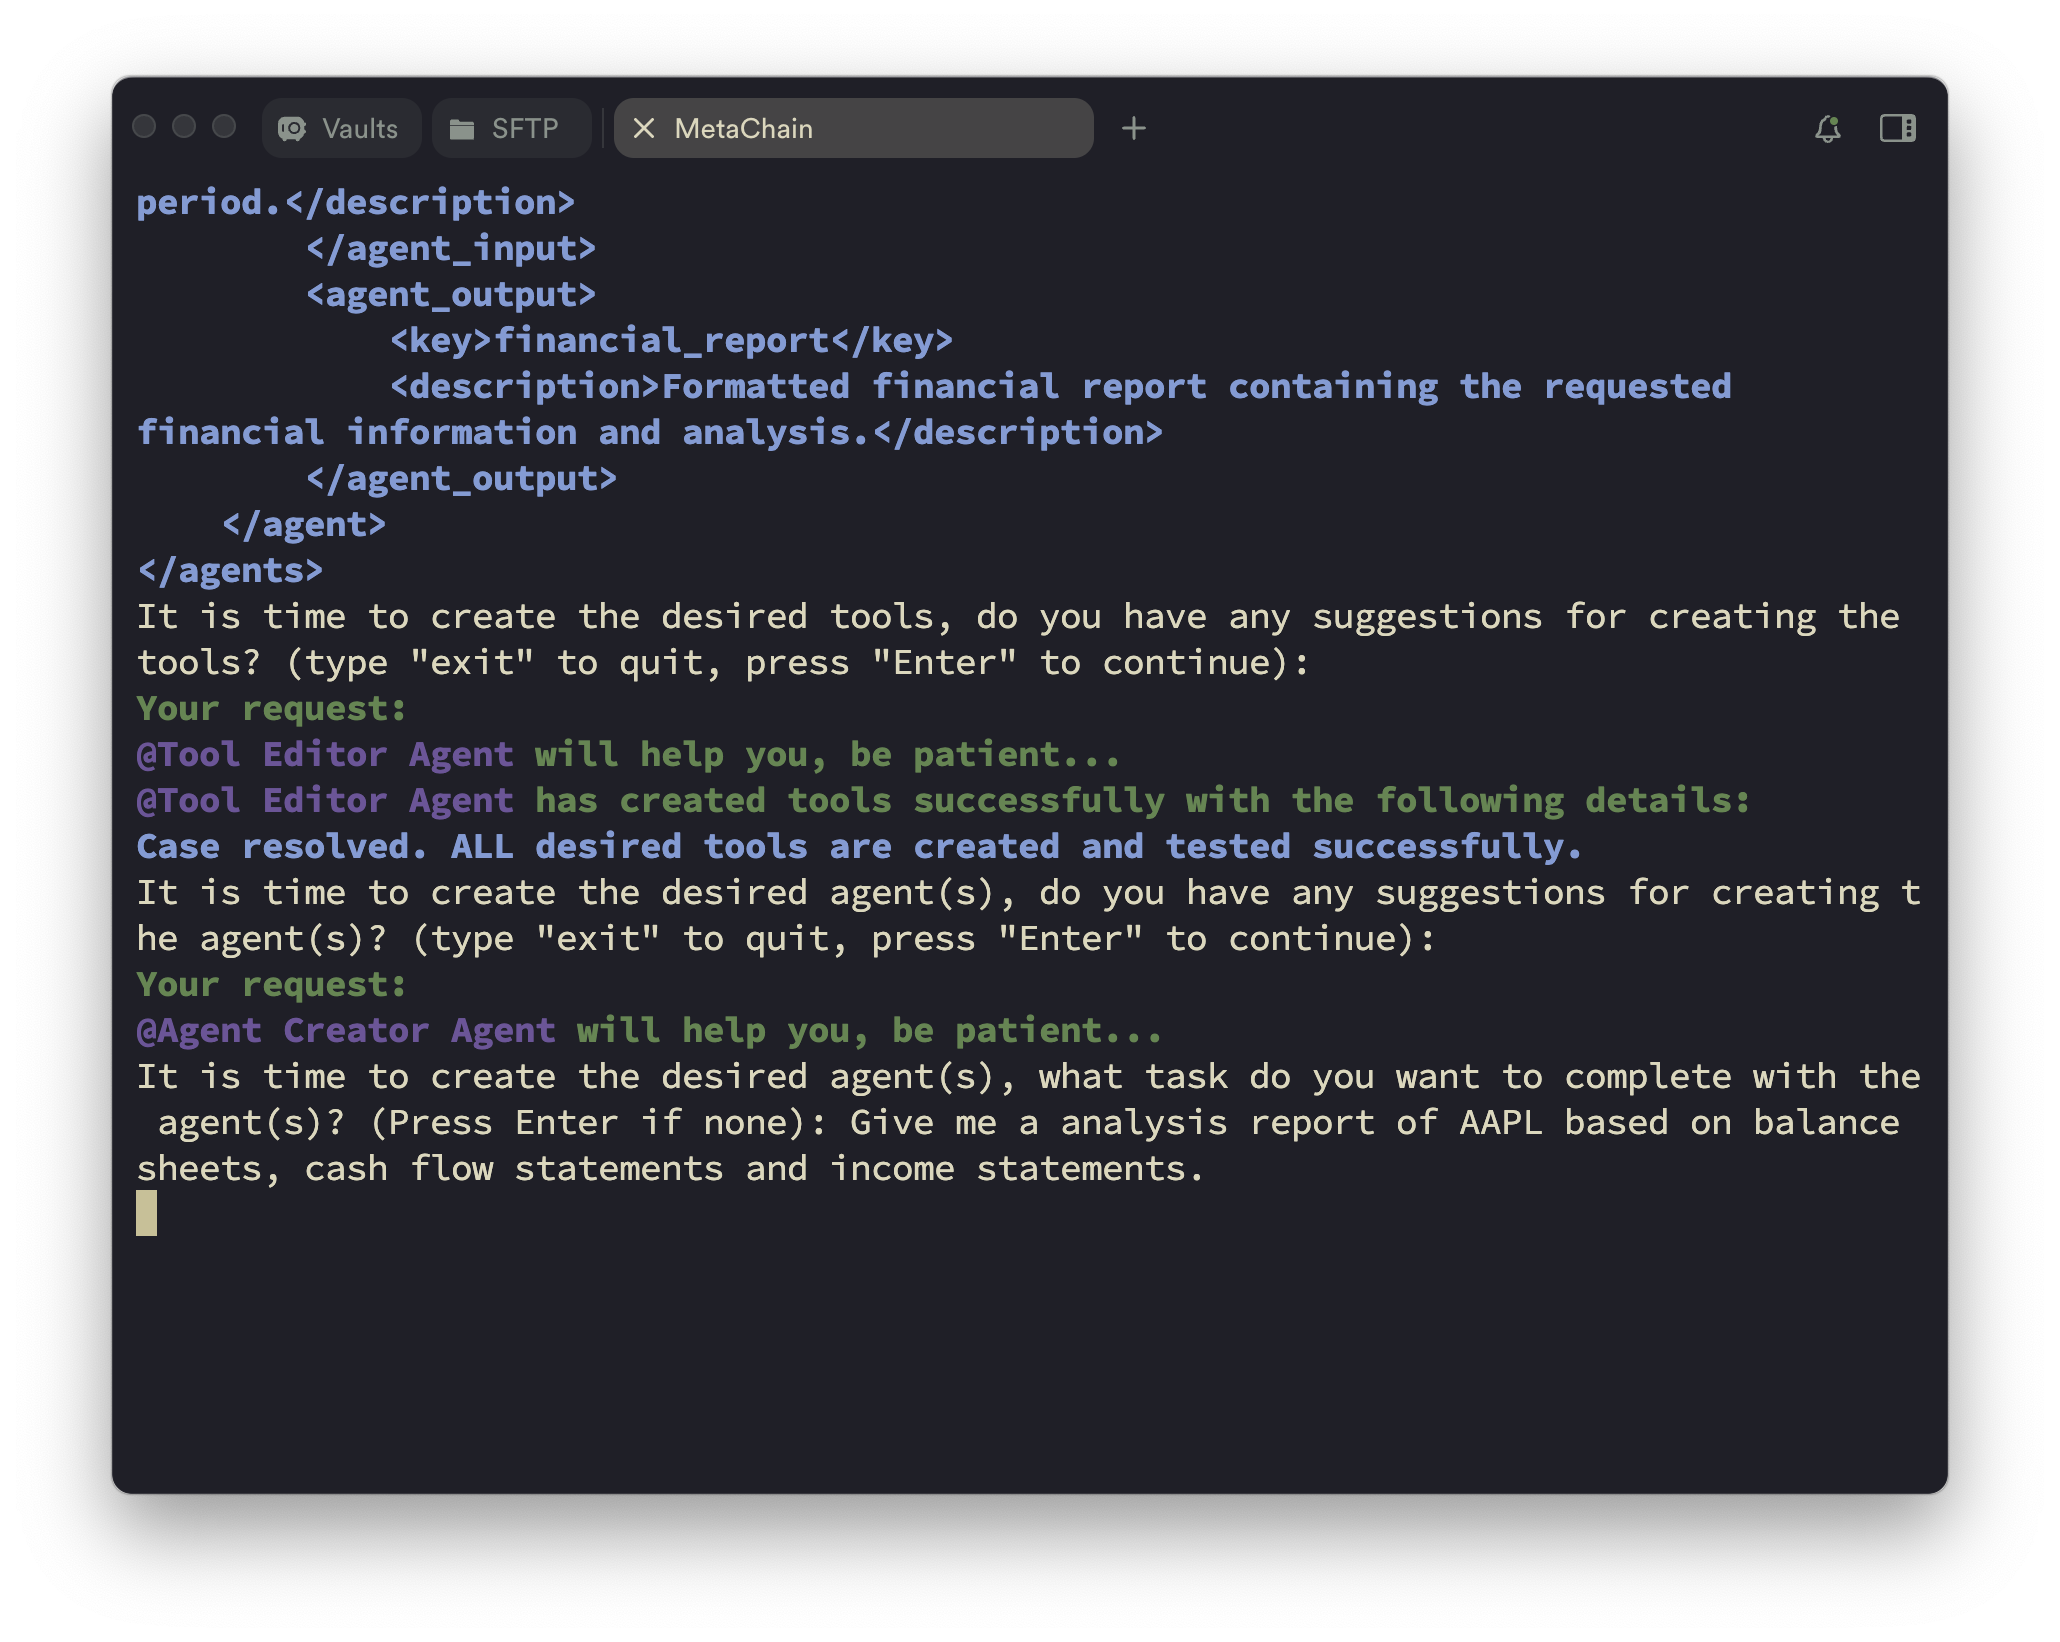
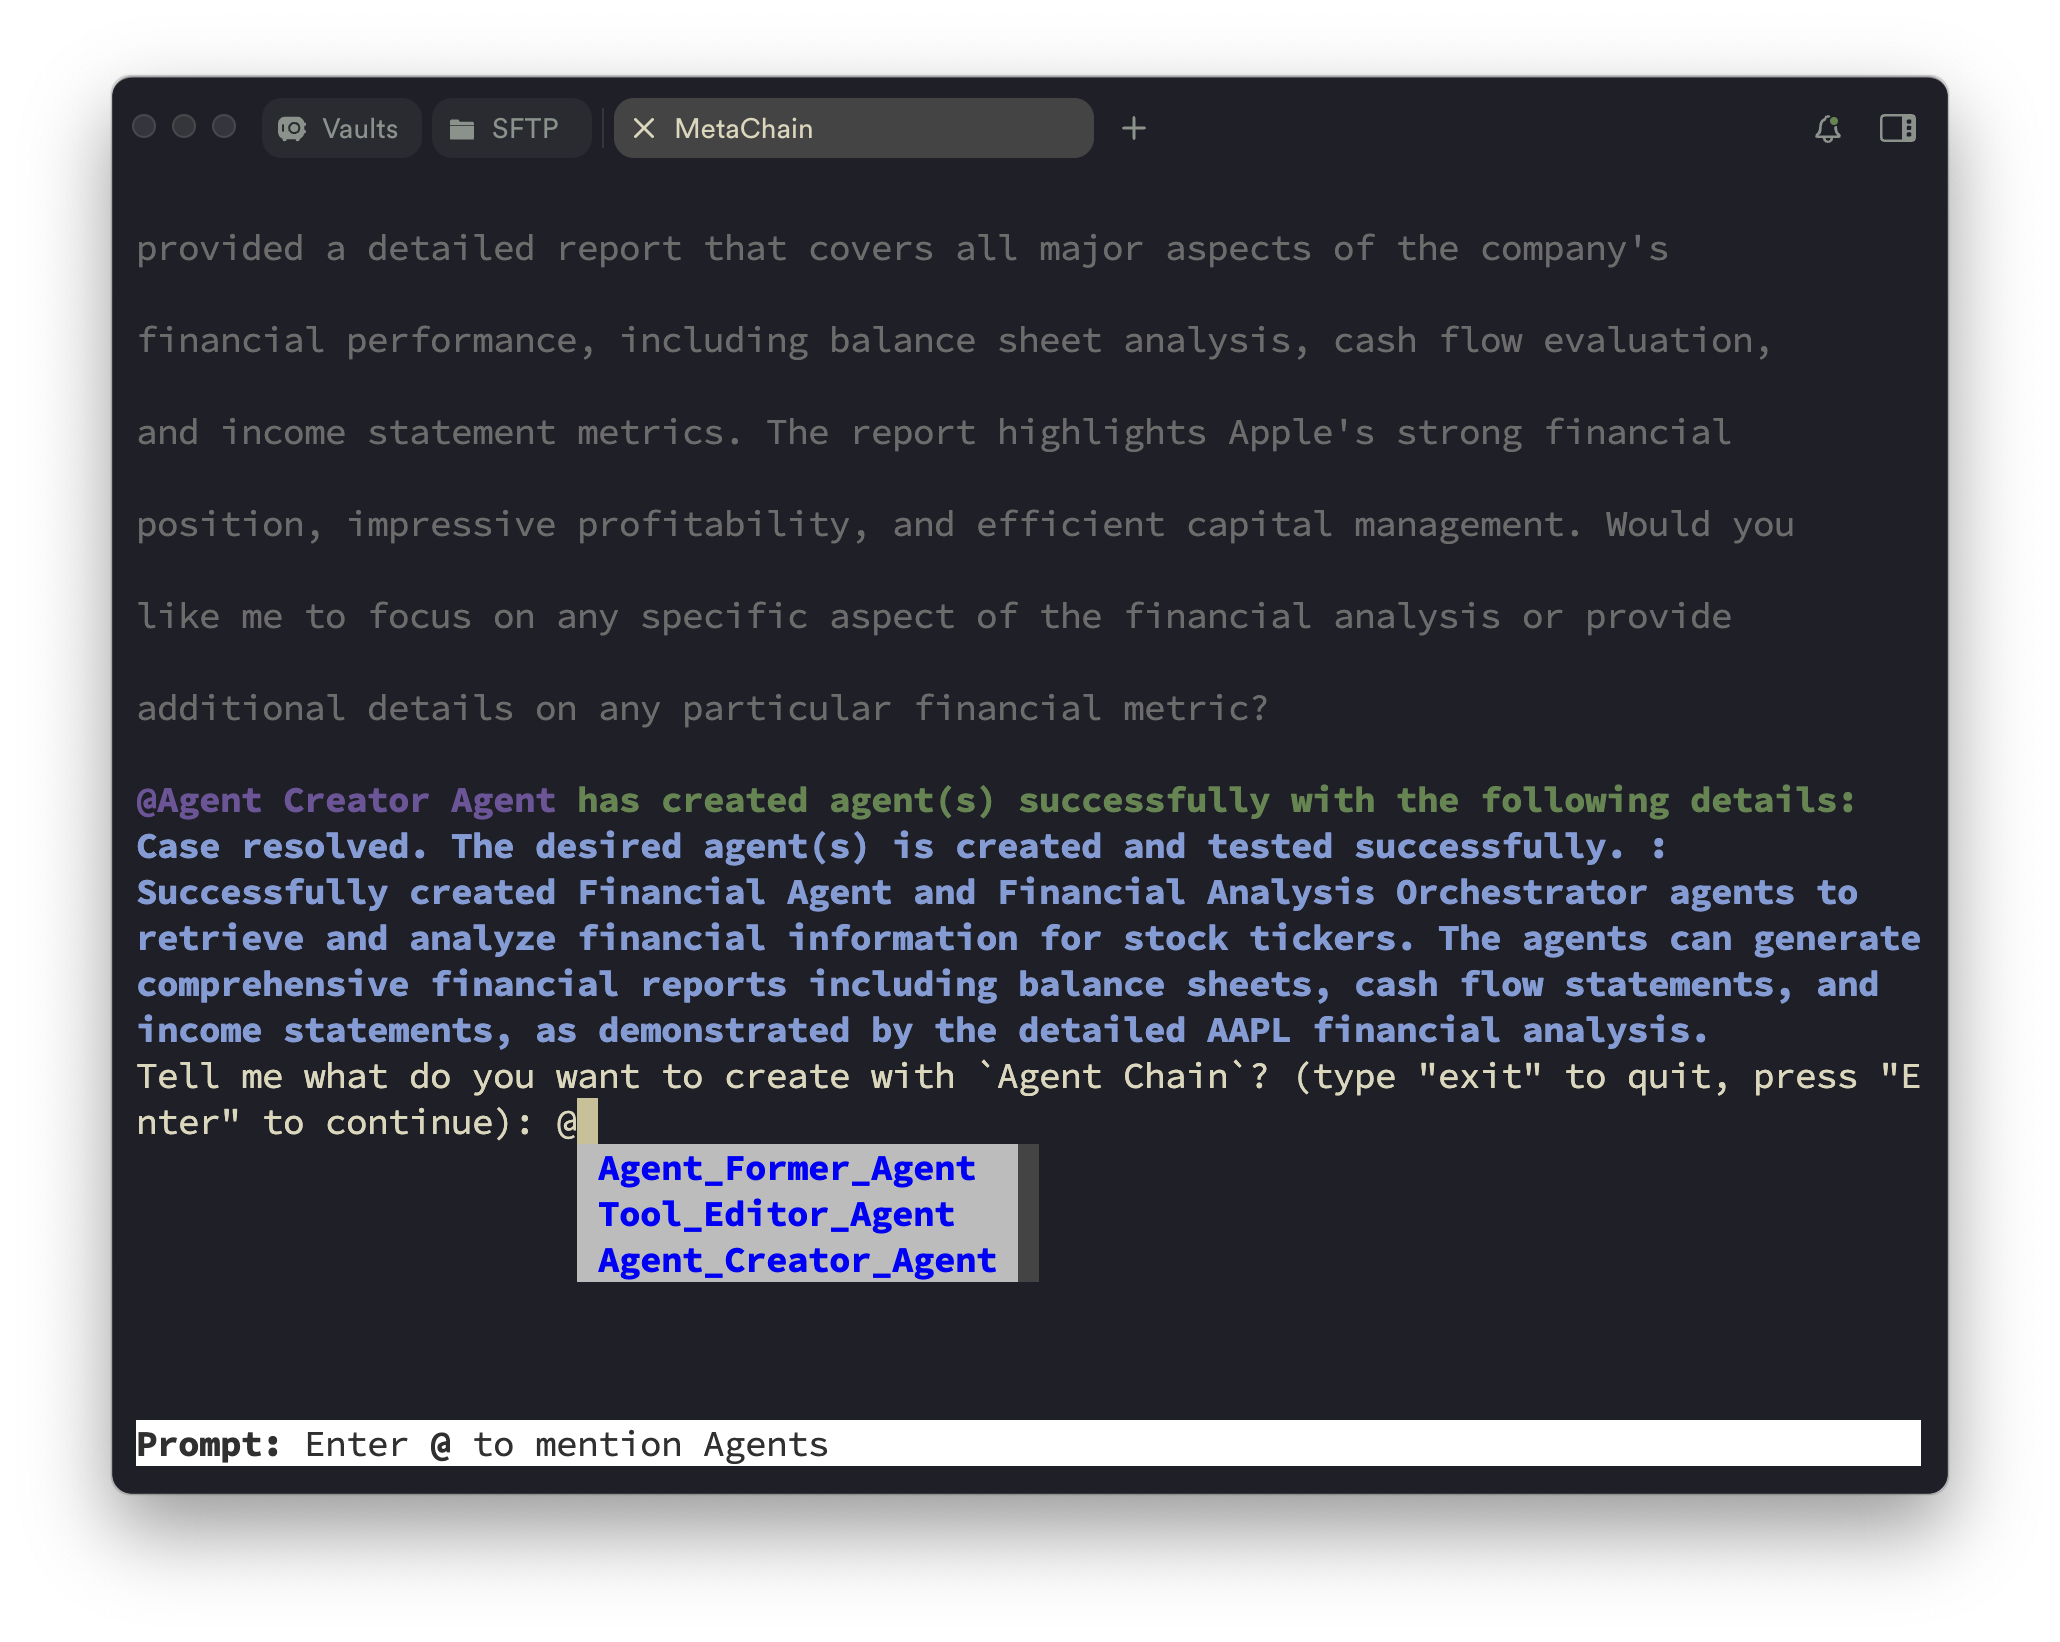
您可以如下图所示使用 `agent editor`。
Input what kind of agent you want to create.
Automated agent profiling.
Output the agent profiles.
Create the desired tools.
Input what do you want to complete with the agent. (Optional)
Create the desired agent(s) and go to the next step.
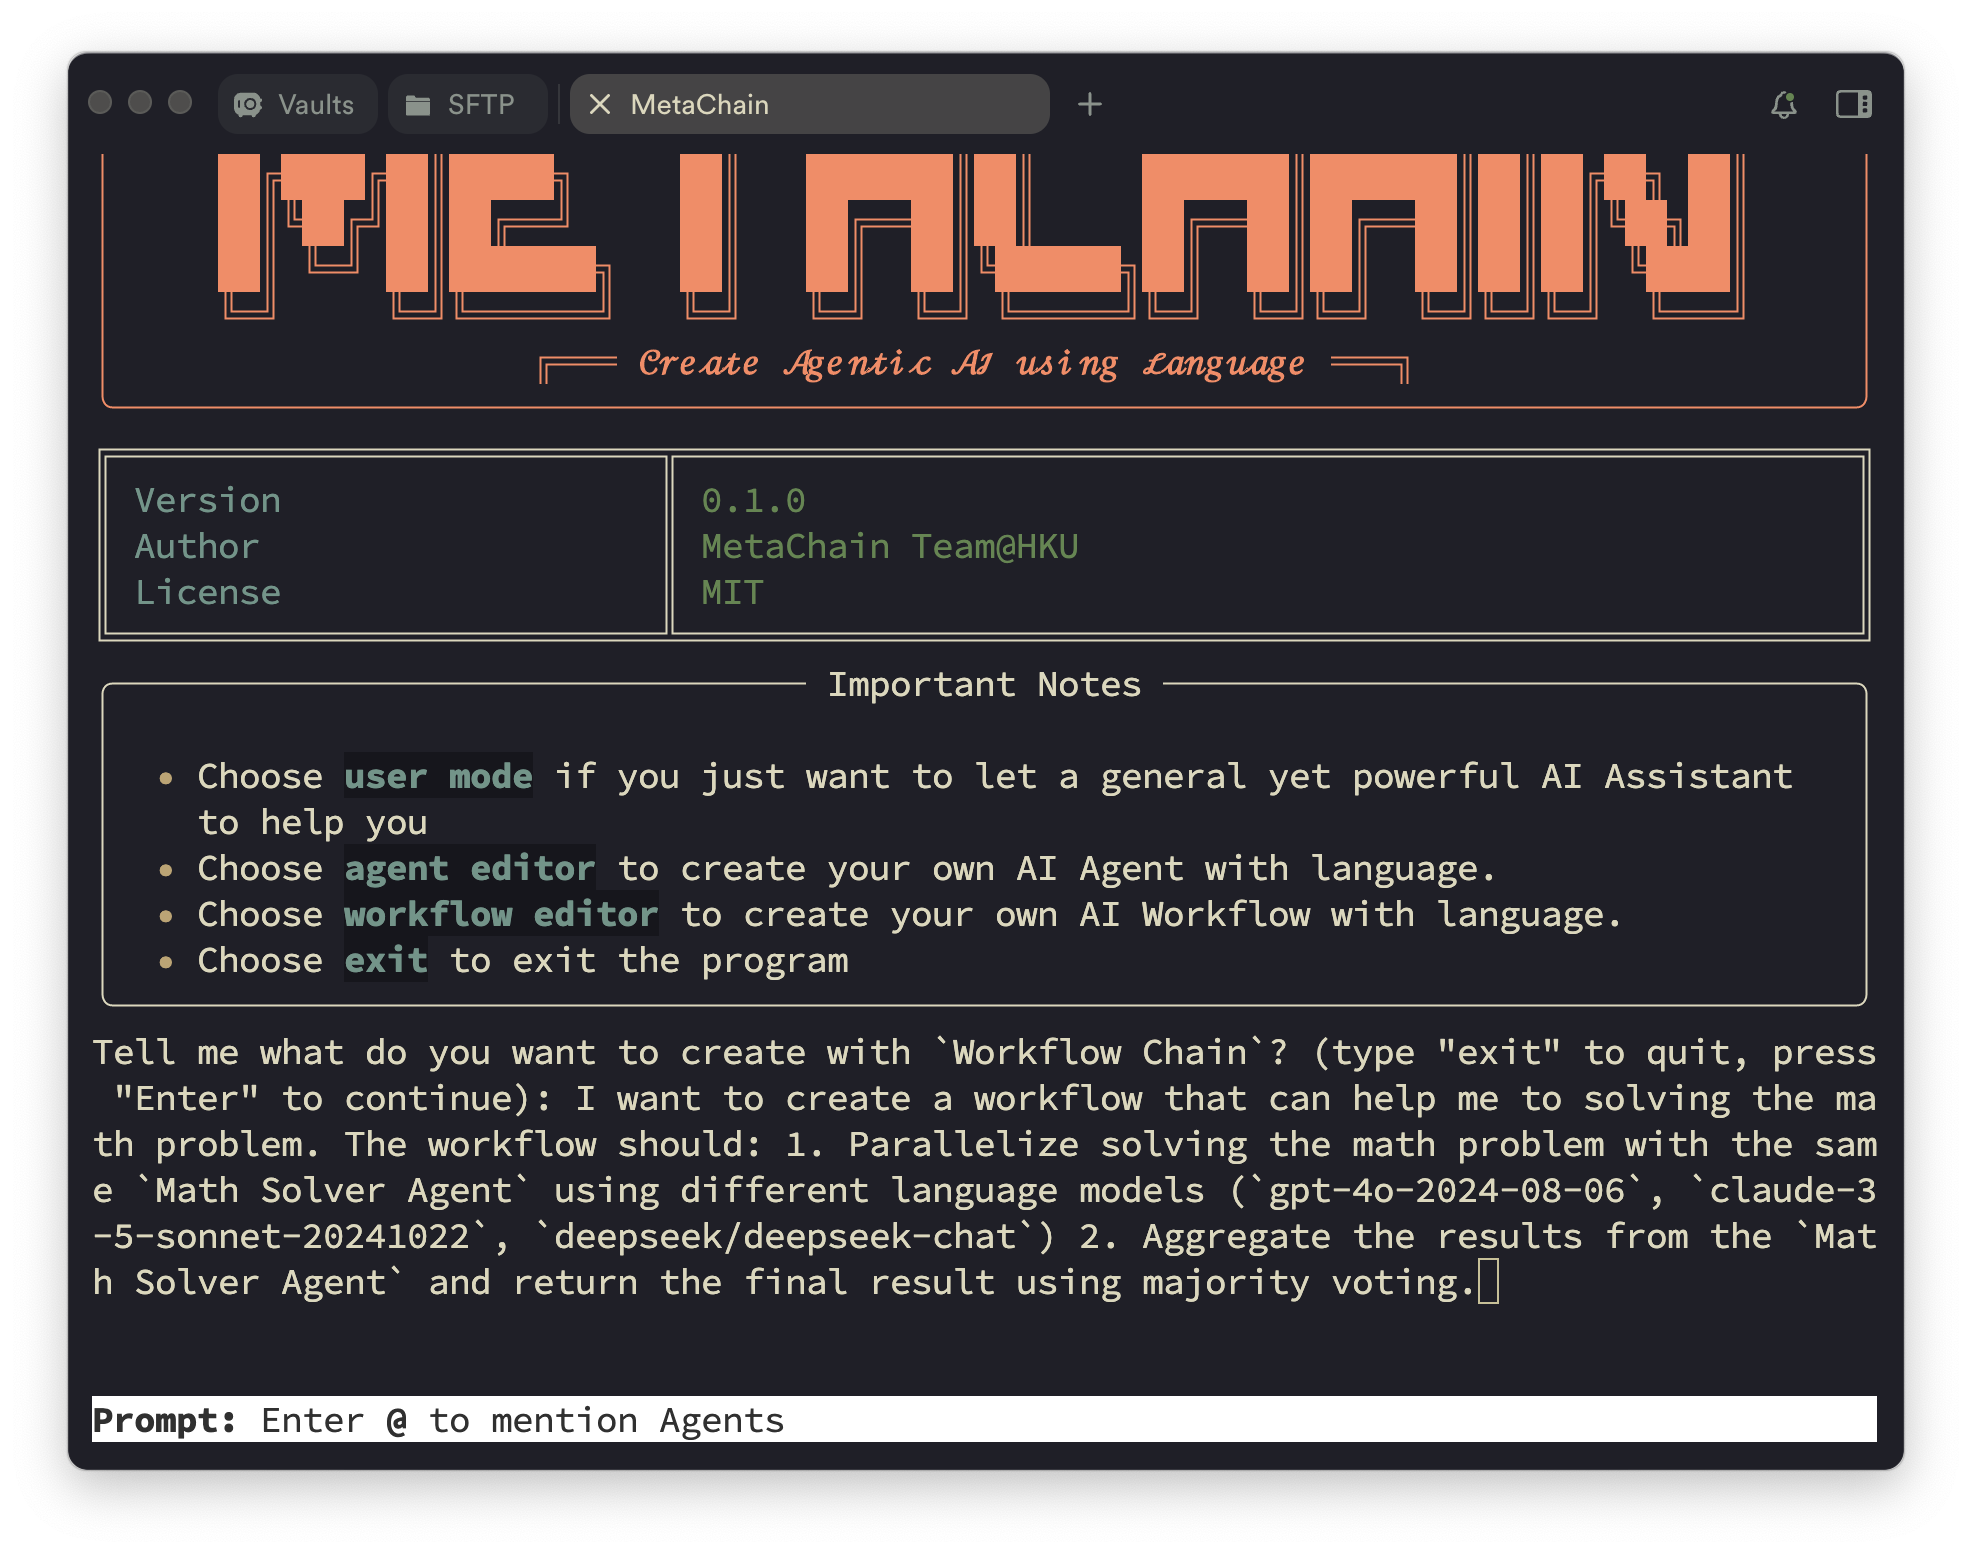
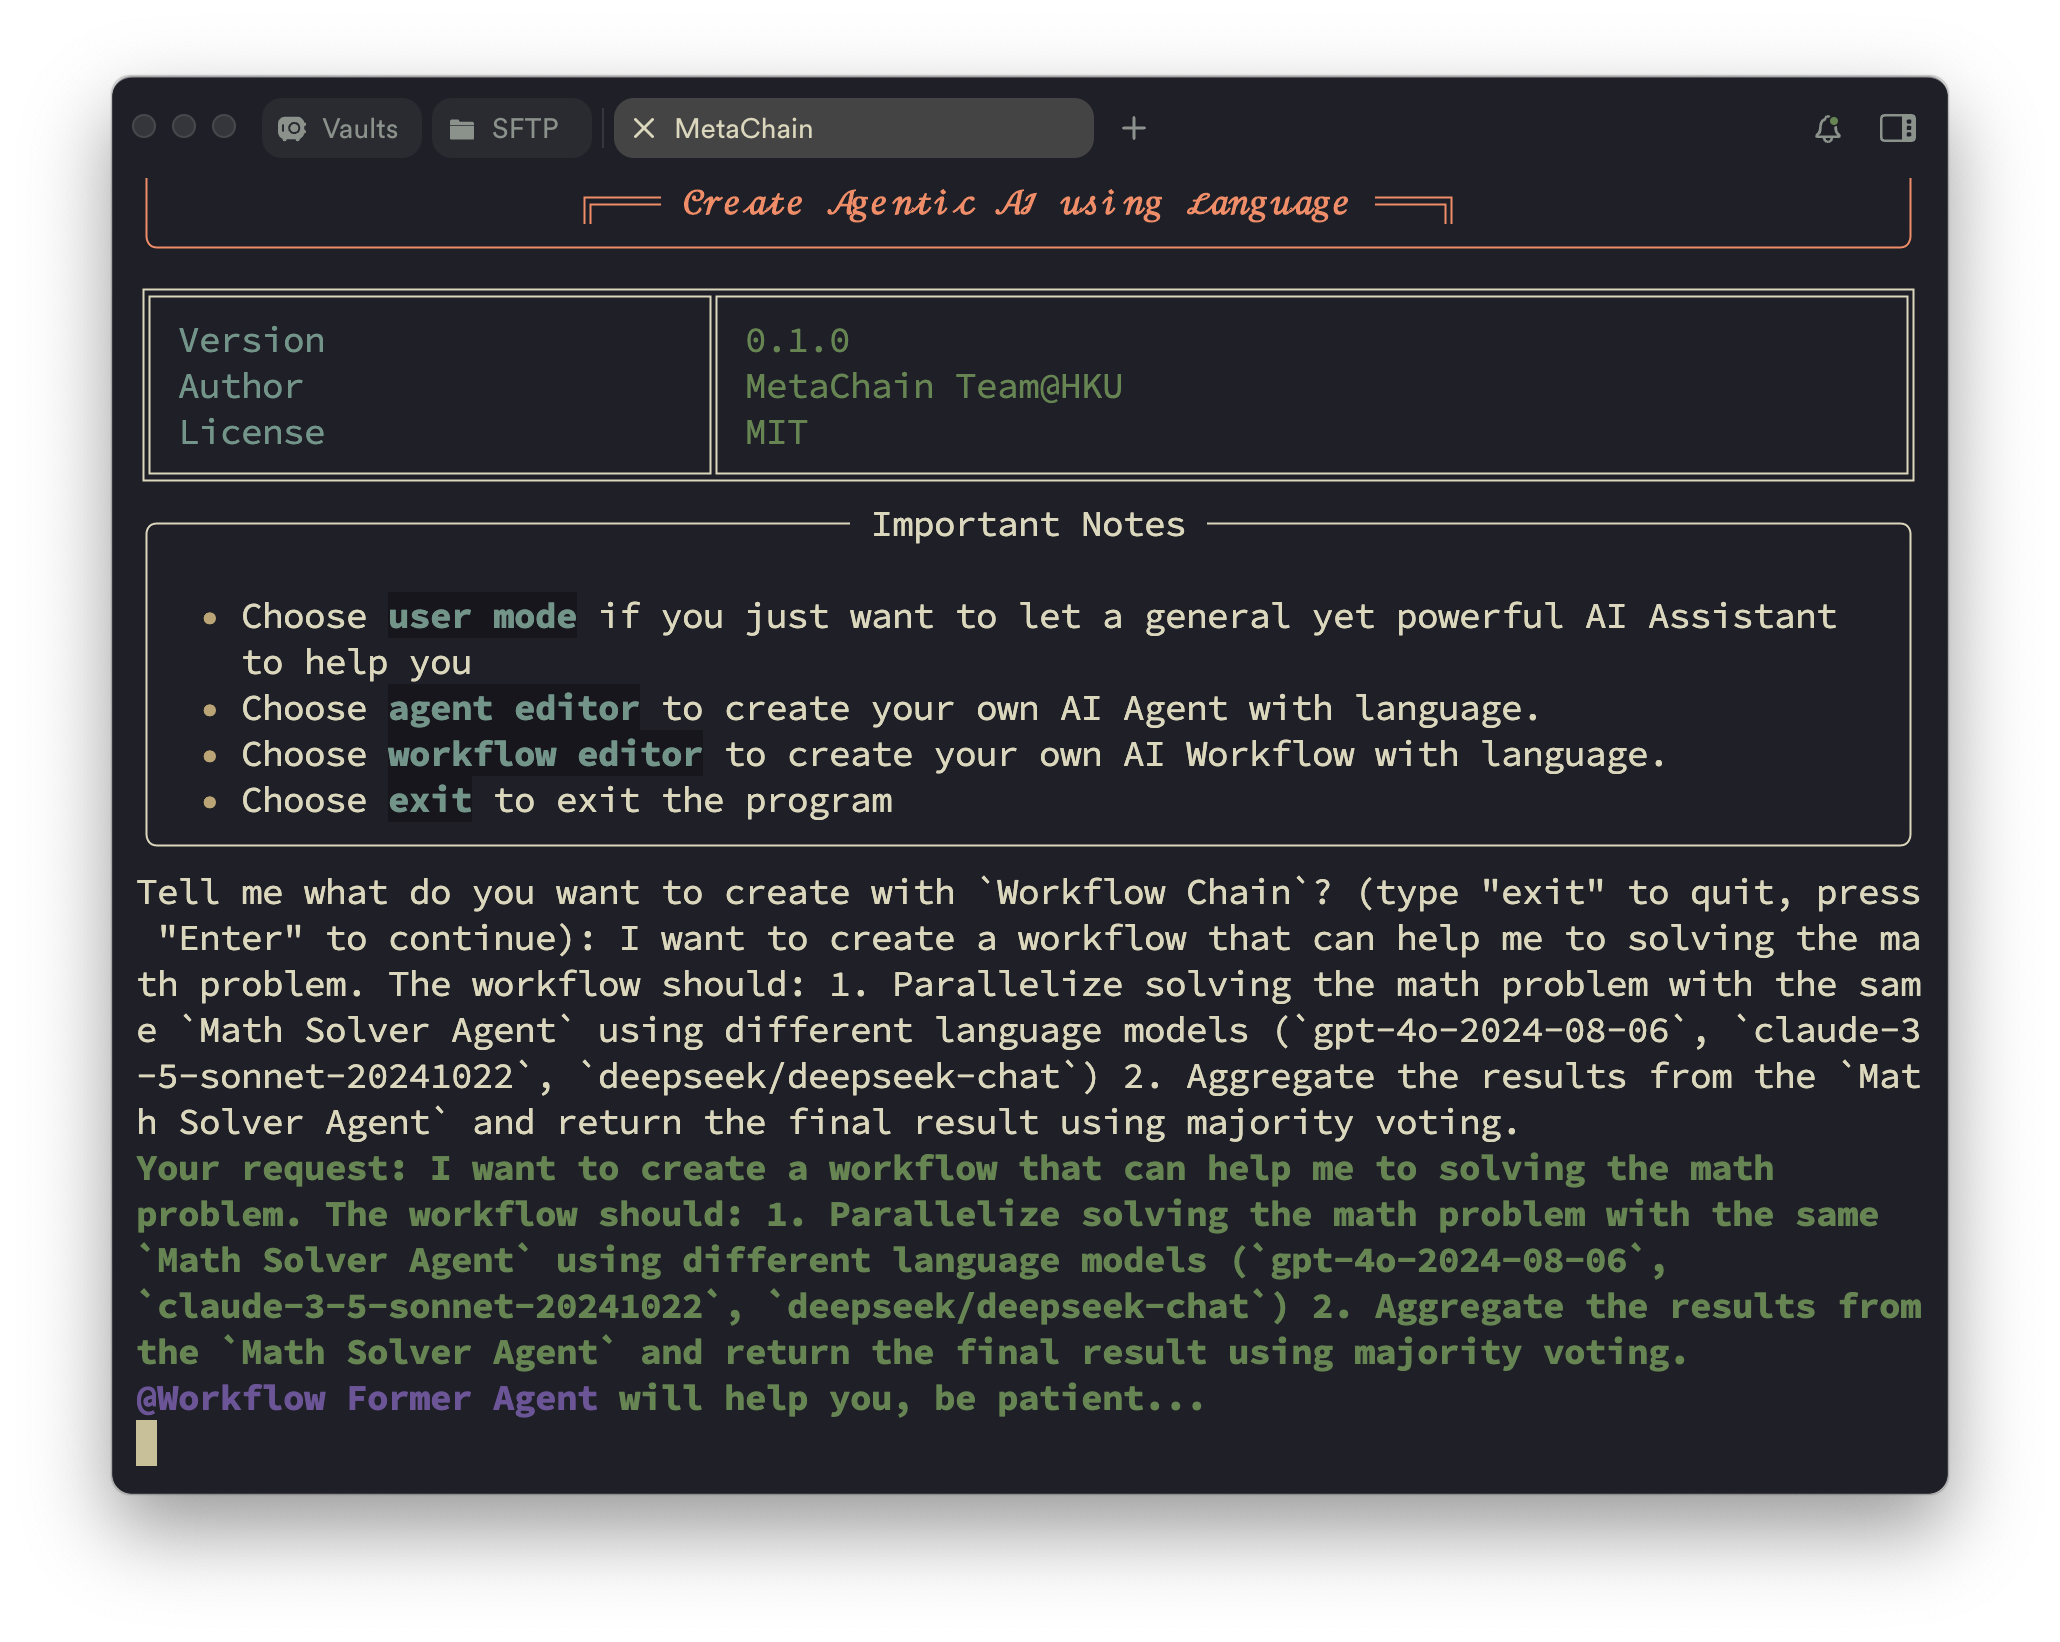
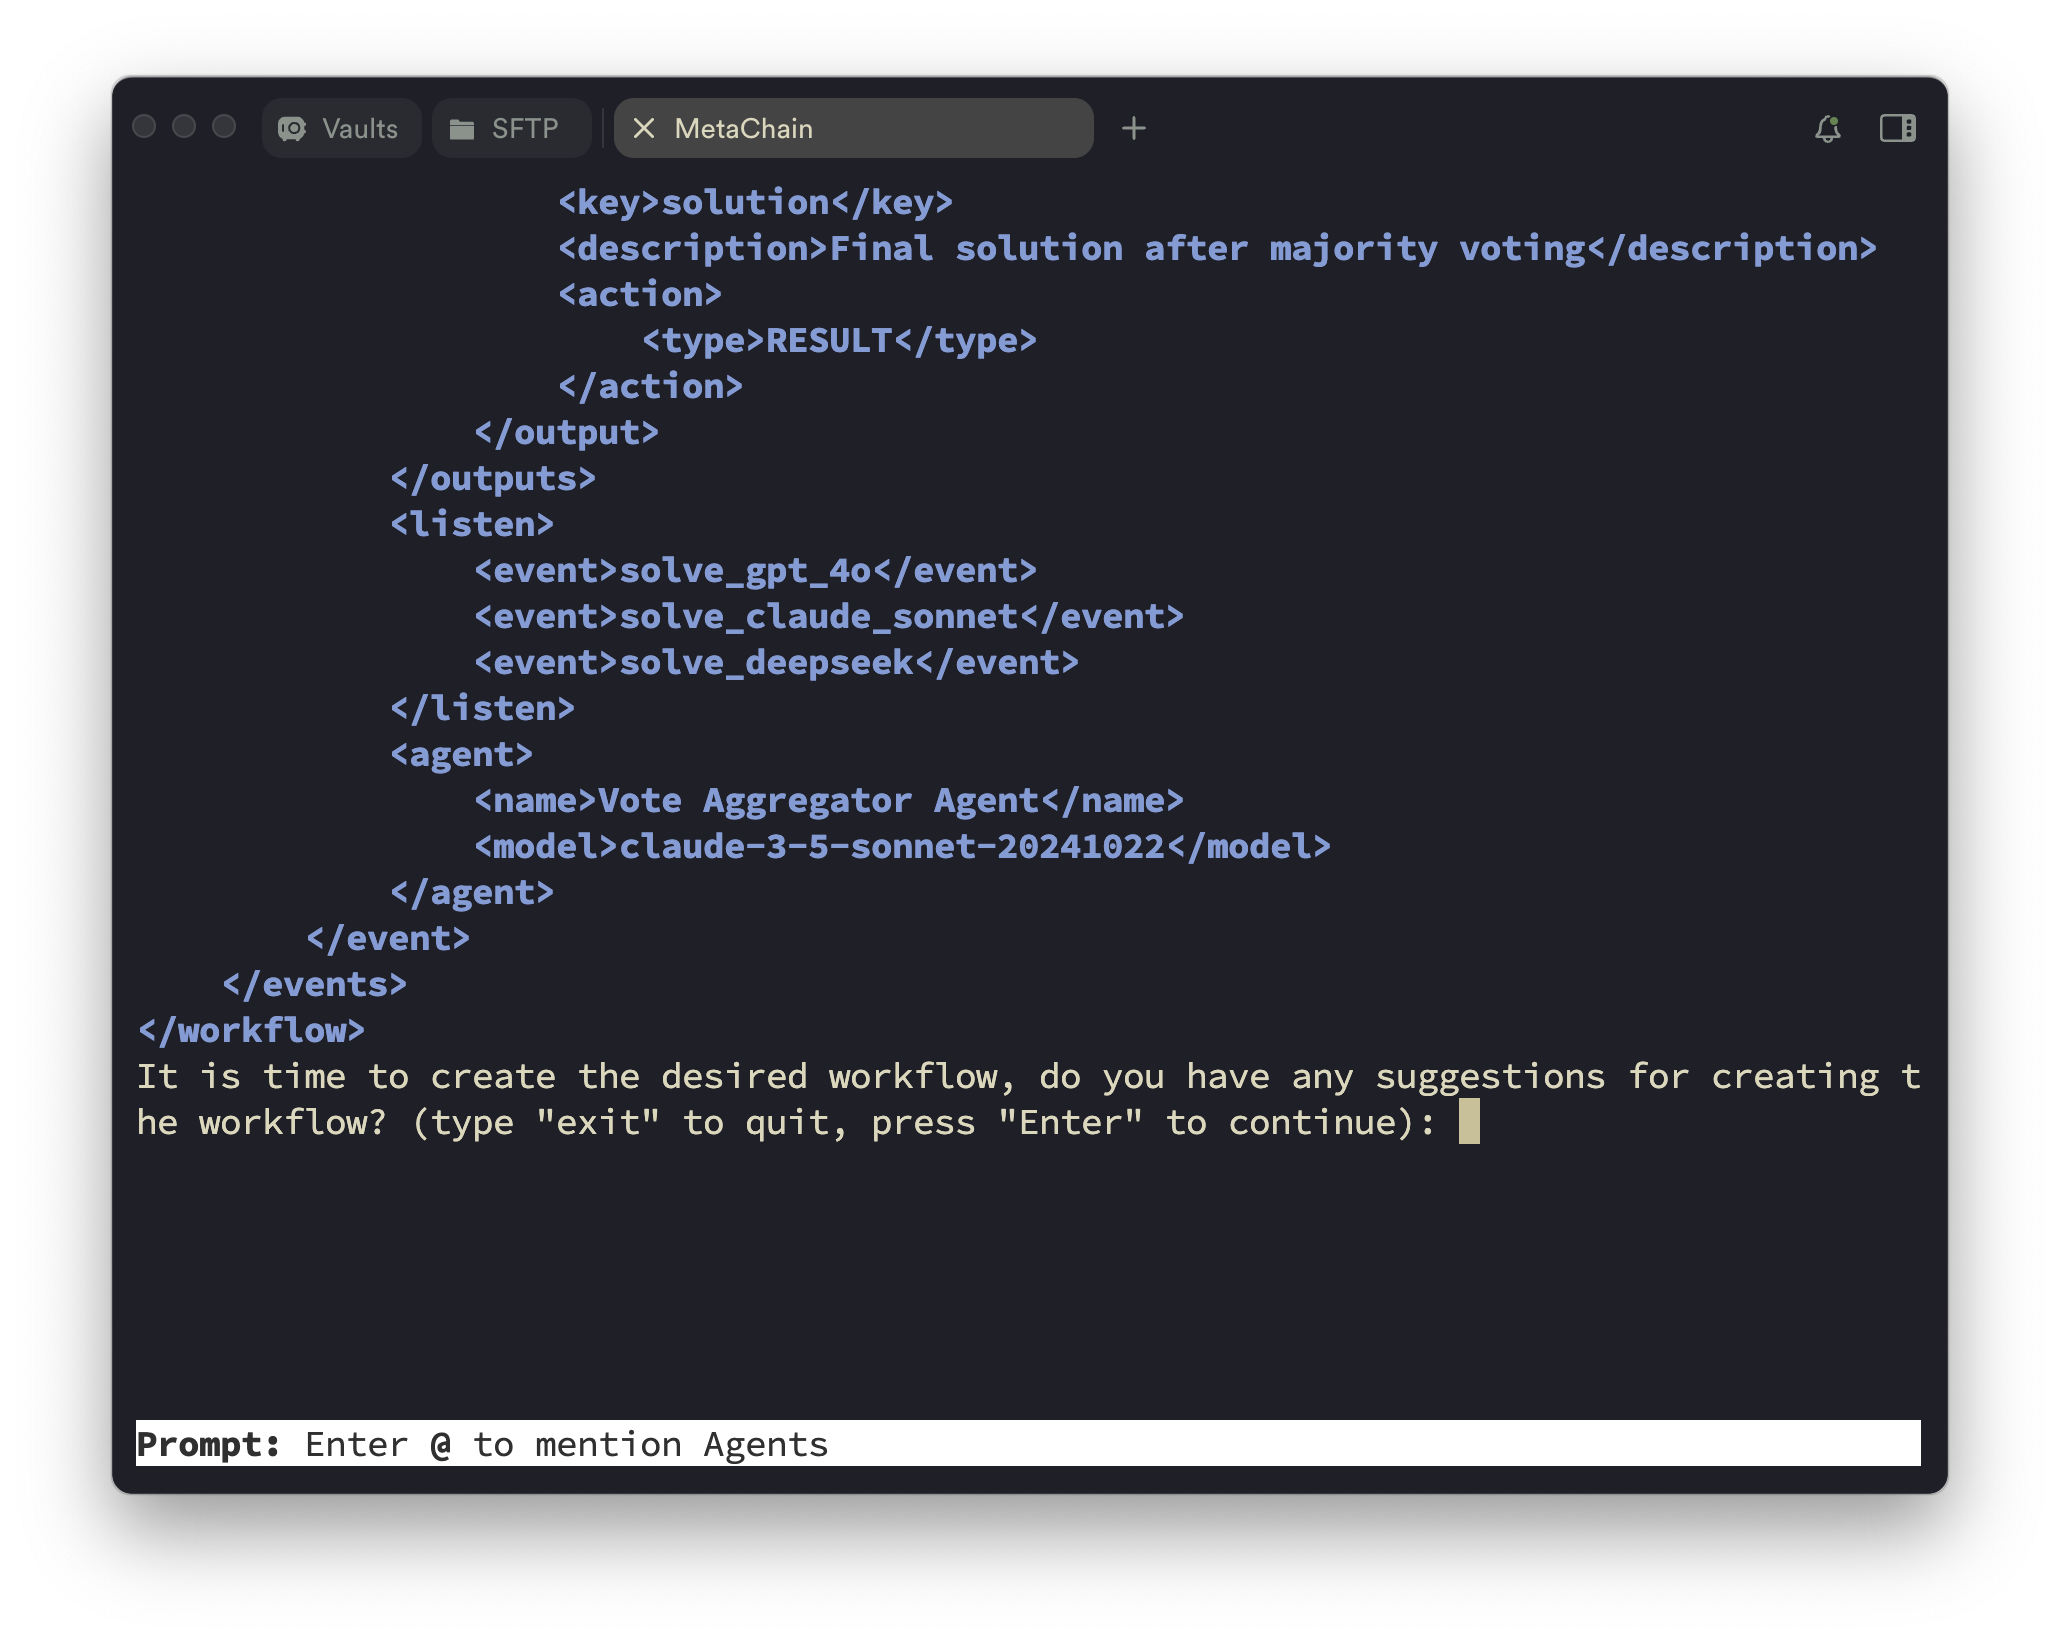
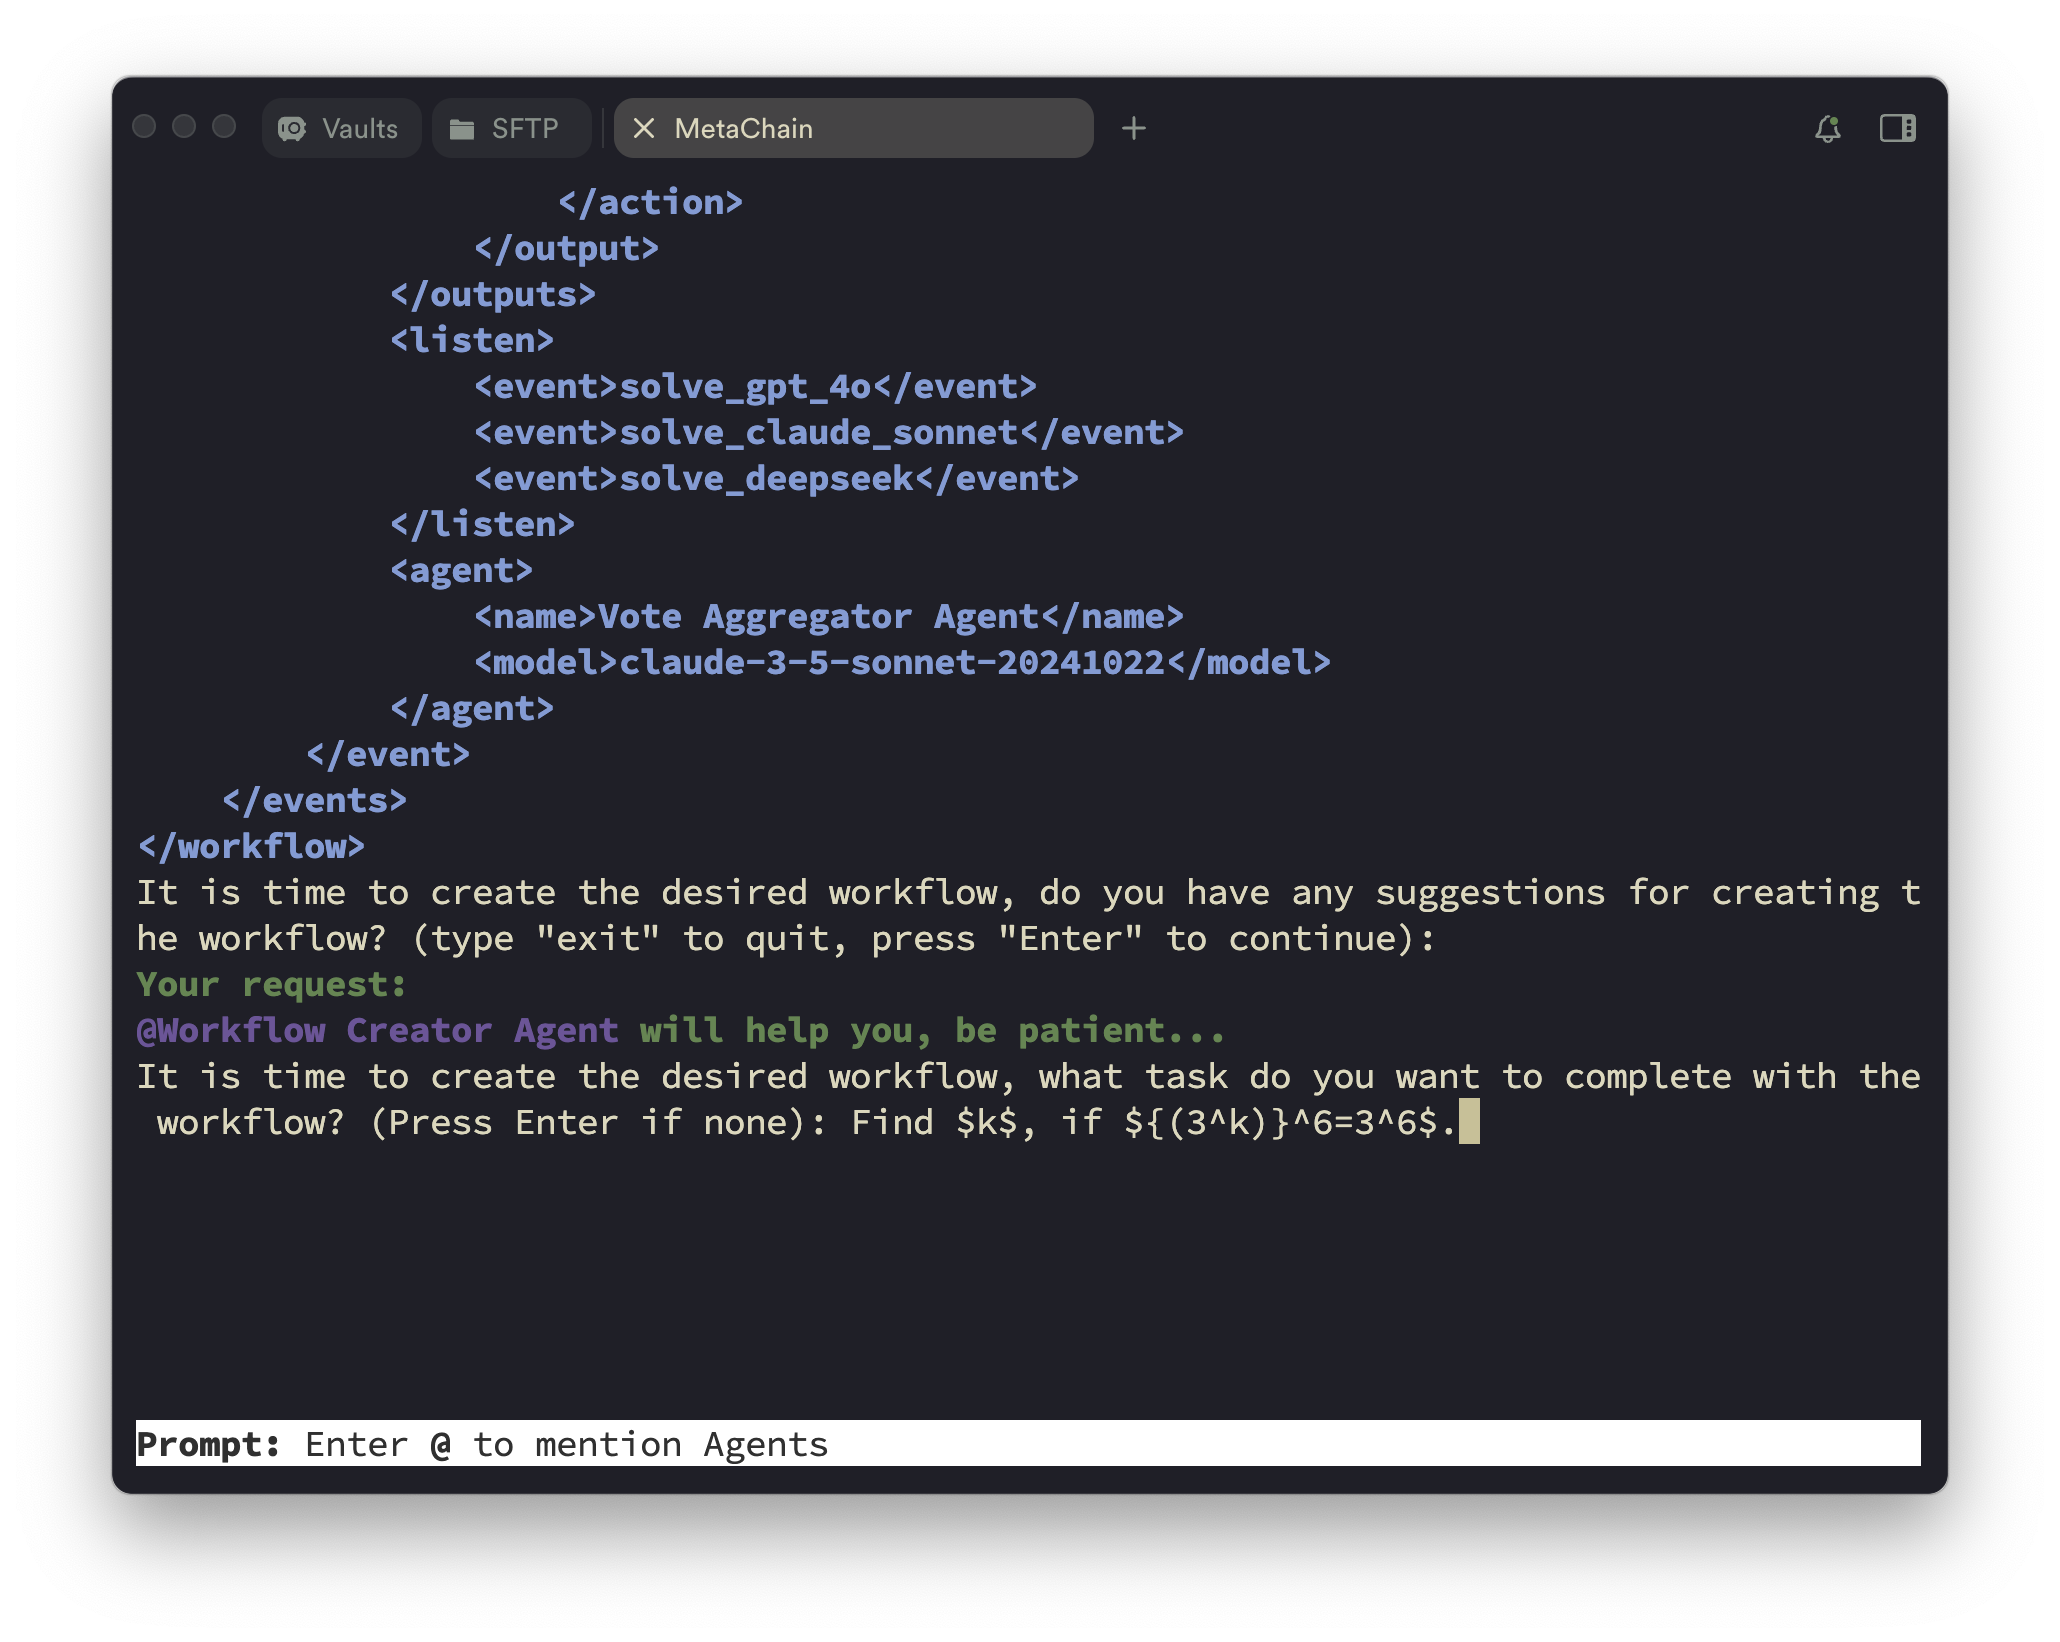
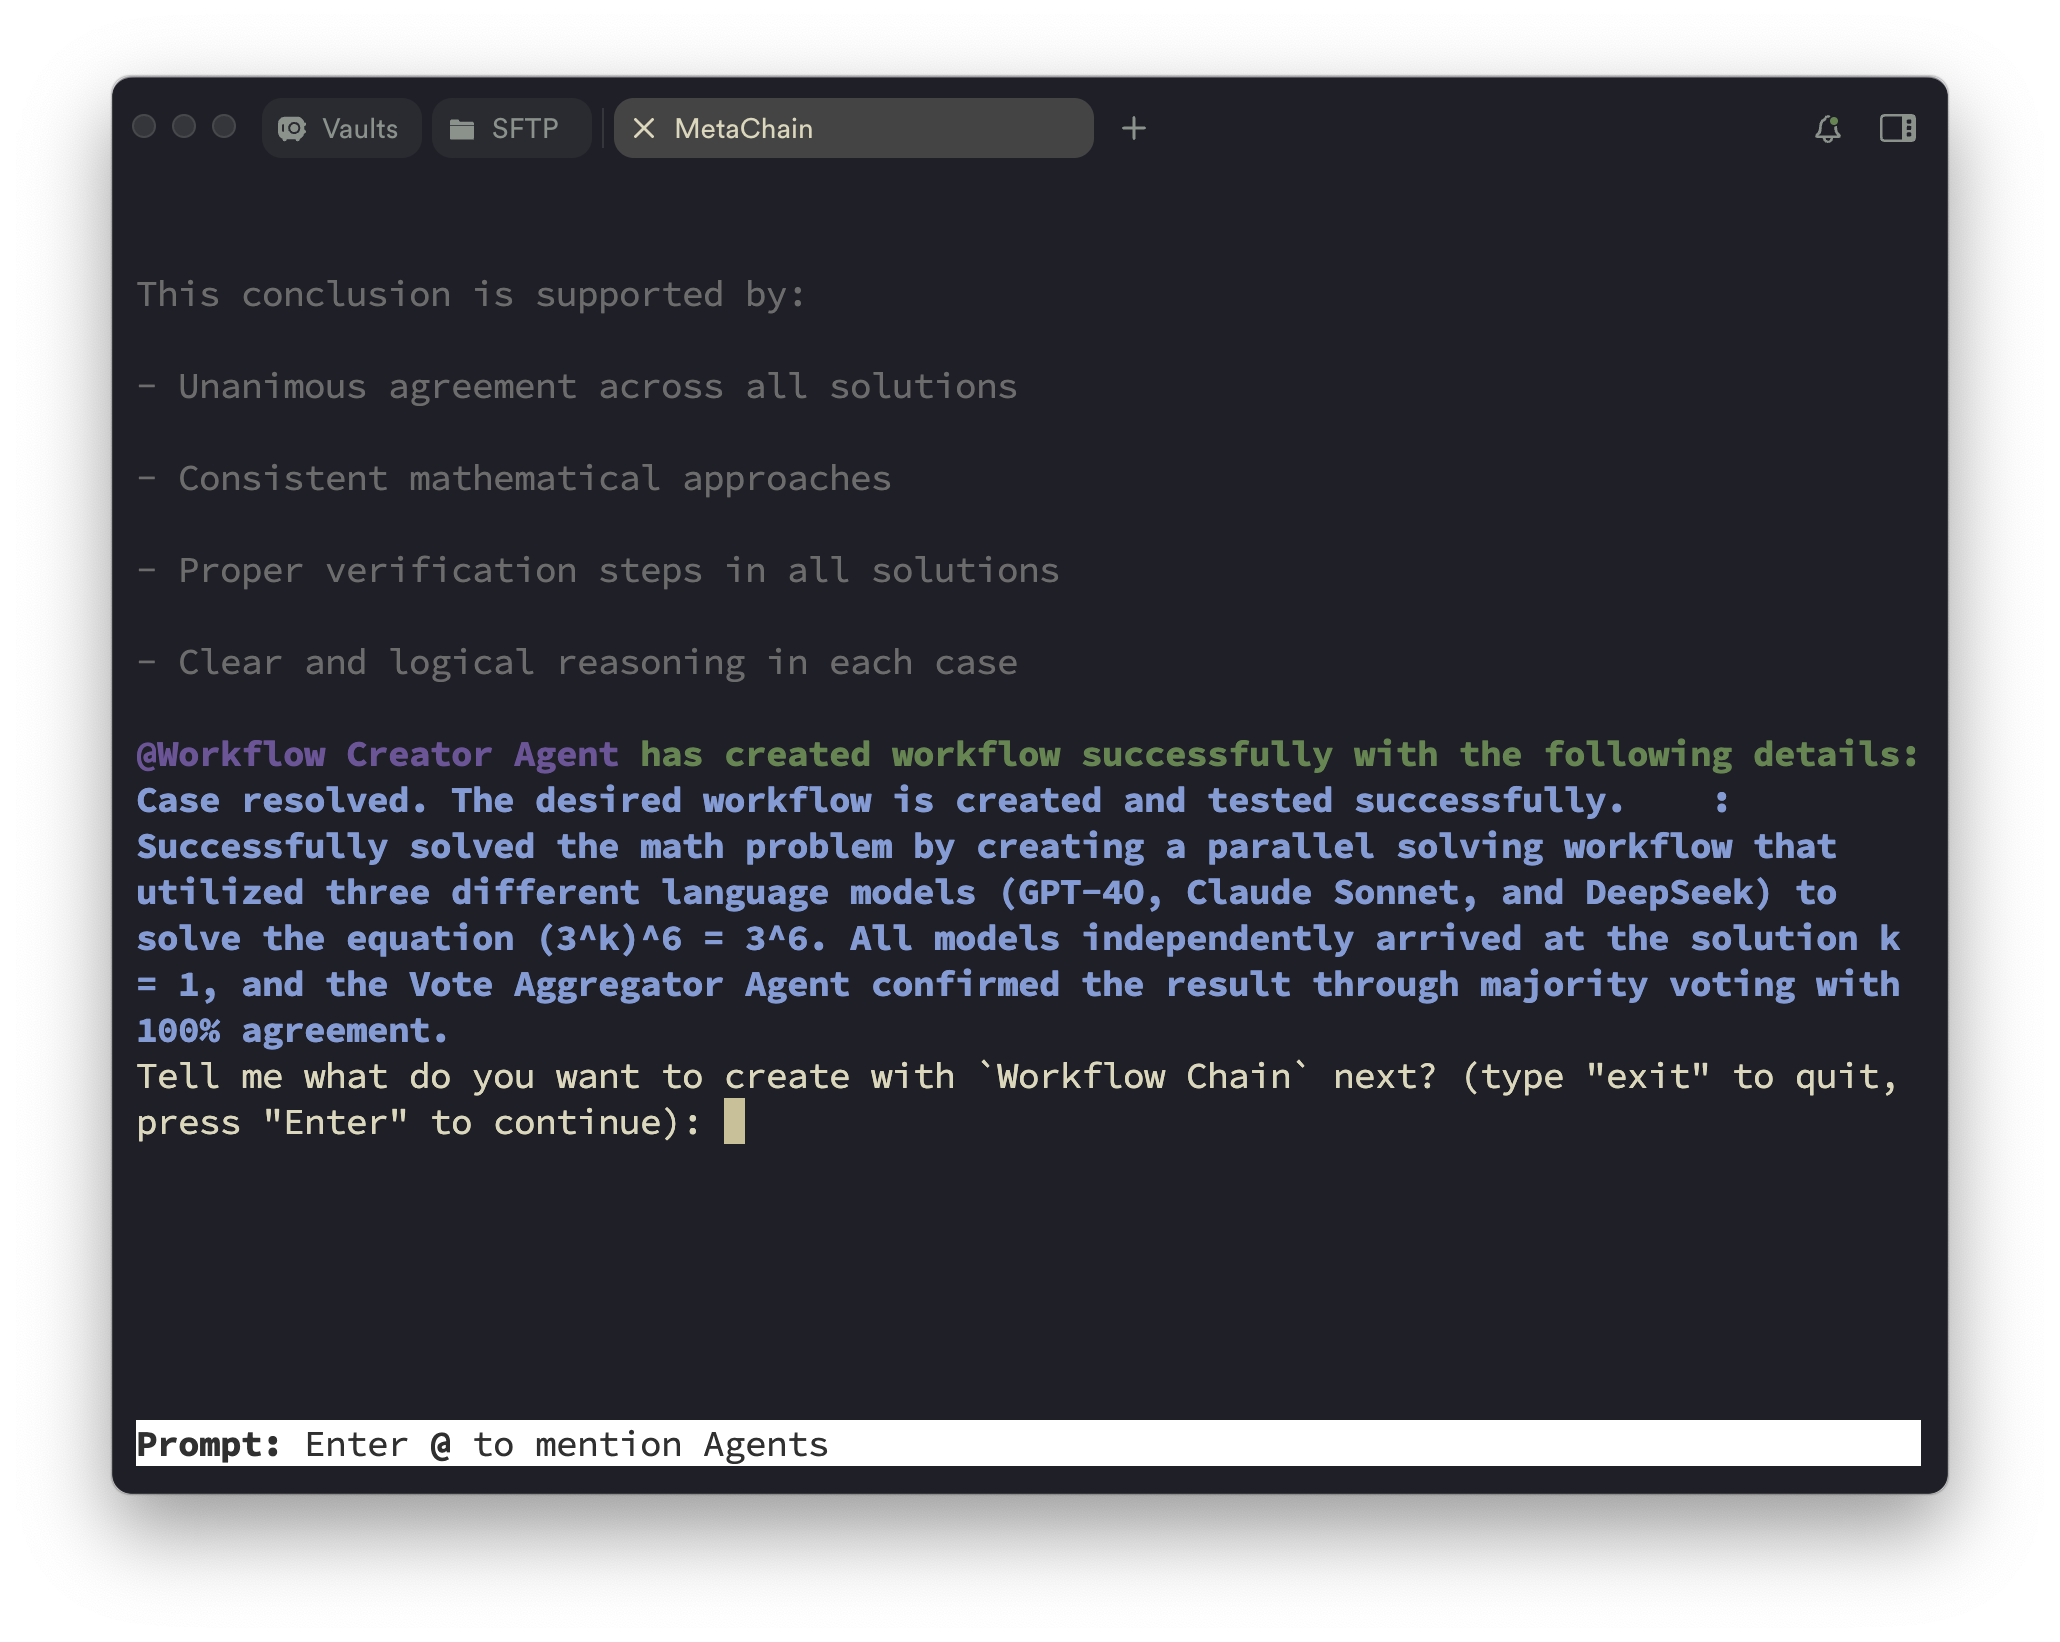
### 3. `workflow editor` (带工作流的 Agent 创建)
您也可以使用 `workflow editor` 模式,通过自然语言描述来创建 agent 工作流,如下图所示。(提示:此模式暂时不支持工具创建。)
Input what kind of workflow you want to create.
Automated workflow profiling.
Output the workflow profiles.
Input what do you want to complete with the workflow. (Optional)
Create the desired workflow(s) and go to the next step.
## ⚡ 快速开始
### 安装说明
#### AutoAgent 安装
```
git clone https://github.com/HKUDS/AutoAgent.git
cd AutoAgent
pip install -e .
```
#### Docker 安装
我们使用 Docker 来容器化 agent 交互环境。因此请先安装 [Docker](https://www.docker.com/)。您无需手动拉取预构建镜像,因为我们已经让 Auto-Deep-Research **根据您机器的架构自动拉取预构建镜像**。
### API Keys 设置
创建一个环境变量文件,就像 `.env.template` 一样,并为您想要使用的 LLM 设置 API keys。并非每个 LLM API Key 都是必需的,按需设置即可。
```
# Required Github Tokens of your own
GITHUB_AI_TOKEN=
# Optional API Keys
OPENAI_API_KEY=
DEEPSEEK_API_KEY=
ANTHROPIC_API_KEY=
GEMINI_API_KEY=
HUGGINGFACE_API_KEY=
GROQ_API_KEY=
XAI_API_KEY=
```
### 从 CLI 模式开始
#### 命令选项:
您可以运行 `auto main` 来启动 AutoAgent 的完整部分,包括 `user mode`、`agent editor` 和 `workflow editor`。此外,您也可以运行 `auto deep-research` 来启动更轻量级的 `user mode`,就像 [Auto-Deep-Research](https://github.com/HKUDS/Auto-Deep-Research) 项目一样。该命令的一些配置如下所示。
- `--container_name`:Docker 容器的名称(默认:'deepresearch')
- `--port`:容器的端口(默认:12346)
- `COMPLETION_MODEL`:指定要使用的 LLM 模型,您应该遵循 [Litellm](https://github.com/BerriAI/litellm) 的名称来设置模型名称。(默认:`claude-3-5-sonnet-20241022`)
- `DEBUG`:启用调试模式以获取详细日志(默认:False)
- `API_BASE_URL`:LLM 提供商的基础 URL(默认:None)
- `FN_CALL`:启用函数调用(默认:None)。大多数情况下,您可以忽略此选项,因为我们已经根据模型名称设置了默认值。
- `git_clone`:将 AutoAgent 仓库克隆到本地环境(仅支持 `auto main` 命令,默认:True)
- `test_pull_name`:测试 pull 的名称。(仅支持 `auto main` 命令,默认:'autoagent_mirror')
#### 关于 `git_clone` 和 `test_pull_name` 的更多细节
在 `agent editor` 和 `workflow editor` 模式下,我们应该将 AutoAgent 仓库的镜像克隆到本地 agent 交互环境中,并让我们的 **AutoAgent** 自动更新 AutoAgent 本身,例如创建新的工具、agents 和工作流。因此,如果您想使用 `agent editor` 和 `workflow editor` 模式,您应该将 `git_clone` 设置为 True,并将 `test_pull_name` 设置为 'autoagent_mirror' 或其他分支。
#### 配合不同 LLM 提供商使用 `auto main`
接下来我将向您展示如何使用 `auto main` 命令以及不同的 LLM 提供商来使用 AutoAgent 的完整功能。如果您想使用 `auto deep-research` 命令,可以参考 [Auto-Deep-Research](https://github.com/HKUDS/Auto-Deep-Research) 项目了解更多详情。
##### Anthropic
* 在 `.env` 文件中设置 `ANTHROPIC_API_KEY`。
```
ANTHROPIC_API_KEY=your_anthropic_api_key
```
* 运行以下命令以启动 Auto-Deep-Research。
```
auto main # default model is claude-3-5-sonnet-20241022
```
##### OpenAI
* 在 `.env` 文件中设置 `OPENAI_API_KEY`。
```
OPENAI_API_KEY=your_openai_api_key
```
* 运行以下命令以启动 Auto-Deep-Research。
```
COMPLETION_MODEL=gpt-4o auto main
```
##### Mistral
* 在 `.env` 文件中设置 `MISTRAL_API_KEY`。
```
MISTRAL_API_KEY=your_mistral_api_key
```
* 运行以下命令以启动 Auto-Deep-Research。
```
COMPLETION_MODEL=mistral/mistral-large-2407 auto main
```
##### Gemini - Google AI Studio
* 在 `.env` 文件中设置 `GEMINI_API_KEY`。
```
GEMINI_API_KEY=your_gemini_api_key
```
* 运行以下命令以启动 Auto-Deep-Research。
```
COMPLETION_MODEL=gemini/gemini-2.0-flash auto main
```
##### Huggingface
* 在 `.env` 文件中设置 `HUGGINGFACE_API_KEY`。
```
HUGGINGFACE_API_KEY=your_huggingface_api_key
```
* 运行以下命令以启动 Auto-Deep-Research。
```
COMPLETION_MODEL=huggingface/meta-llama/Llama-3.3-70B-Instruct auto main
```
##### Groq
* 在 `.env` 文件中设置 `GROQ_API_KEY`。
```
GROQ_API_KEY=your_groq_api_key
```
* 运行以下命令以启动 Auto-Deep-Research。
```
COMPLETION_MODEL=groq/deepseek-r1-distill-llama-70b auto main
```
##### OpenAI 兼容端点(例如 Grok)
* 在 `.env` 文件中设置 `OPENAI_API_KEY`。
```
OPENAI_API_KEY=your_api_key_for_openai_compatible_endpoints
```
* 运行以下命令以启动 Auto-Deep-Research。
```
COMPLETION_MODEL=openai/grok-2-latest API_BASE_URL=https://api.x.ai/v1 auto main
```
##### OpenRouter(例如 DeepSeek-R1)
我们推荐暂时使用 OpenRouter 作为 DeepSeek-R1 的 LLM 提供商。因为 DeepSeek-R1 的官方 API 无法被高效使用。
* 在 `.env` 文件中设置 `OPENROUTER_API_KEY`。
```
OPENROUTER_API_KEY=your_openrouter_api_key
```
* 运行以下命令以启动 Auto-Deep-Research。
```
COMPLETION_MODEL=openrouter/deepseek/deepseek-r1 auto main
```
##### DeepSeek
* 在 `.env` 文件中设置 `DEEPSEEK_API_KEY`。
```
DEEPSEEK_API_KEY=your_deepseek_api_key
```
* 运行以下命令以启动 Auto-Deep-Research。
```
COMPLETION_MODEL=deepseek/deepseek-chat auto main
```
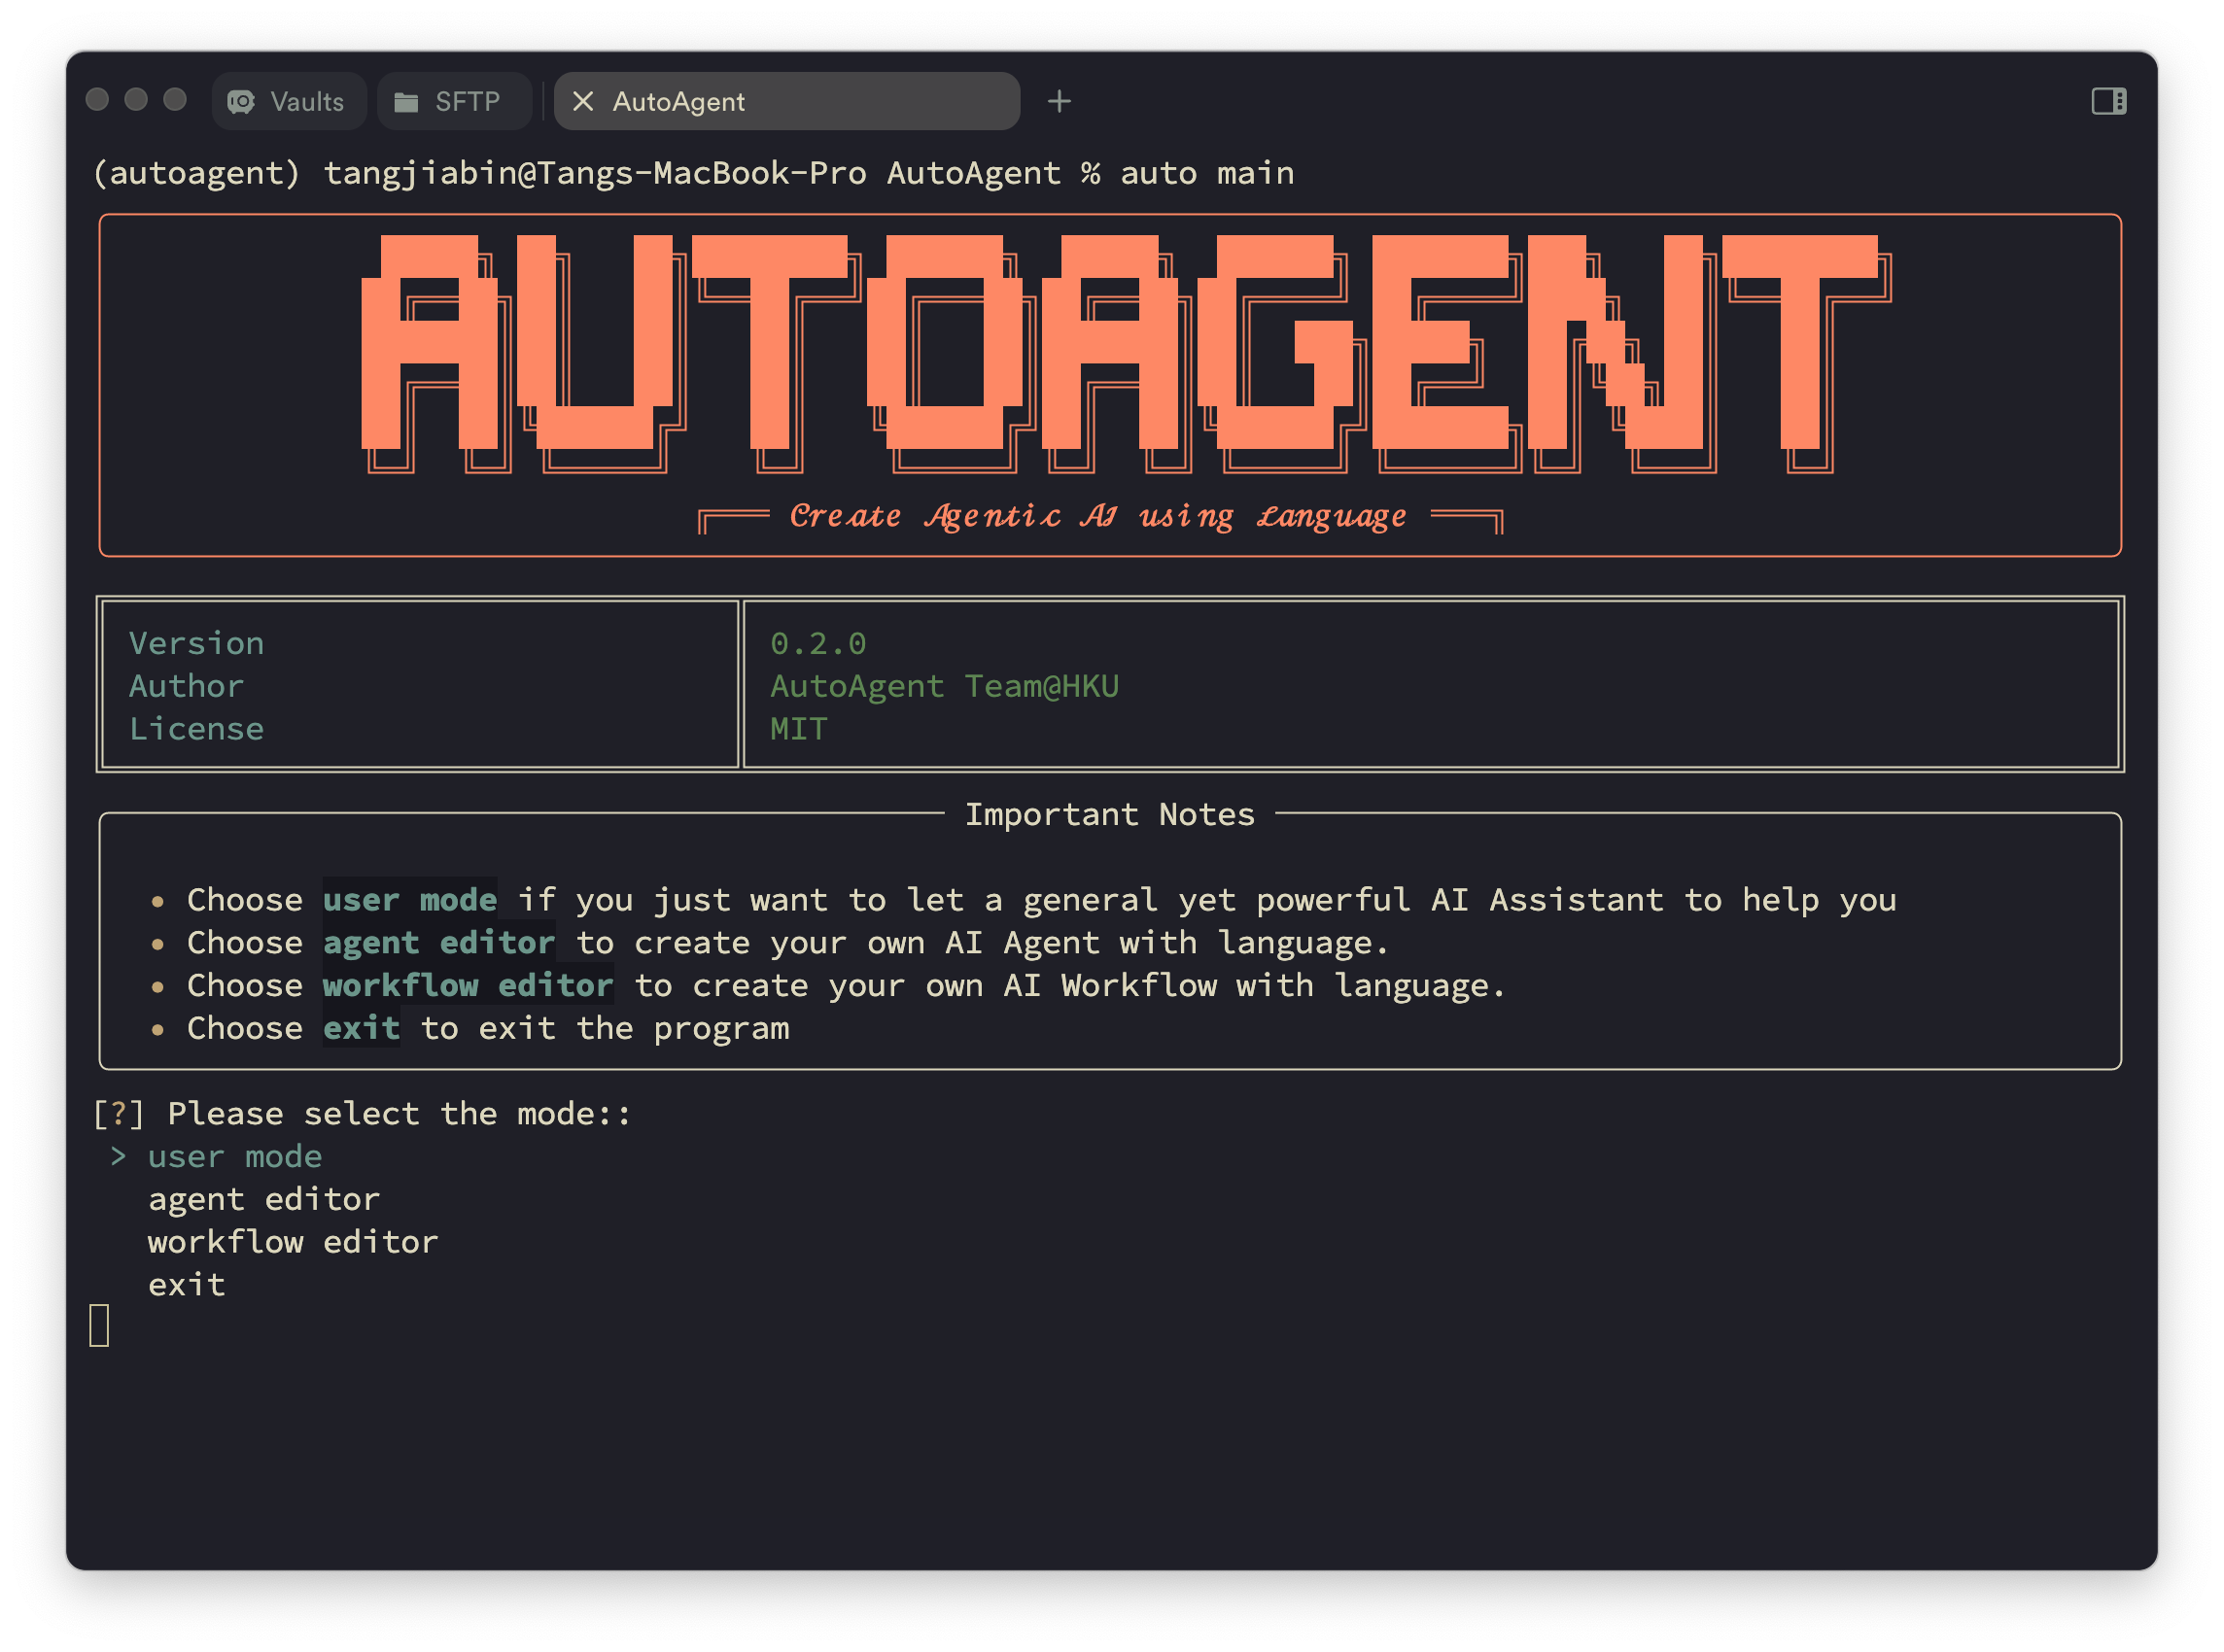
启动 CLI 模式后,您可以看到 AutoAgent 的起始页:
Start Page of AutoAgent.
### 提示
#### 将浏览器 cookies 导入浏览器环境
您可以将浏览器 cookies 导入浏览器环境,以便 agent 更好地访问某些特定网站。更多详情,请参阅 [cookies](./AutoAgent/environment/cookie_json/README.md) 文件夹。
#### 为第三方工具平台添加您自己的 API keys
如果您想从第三方工具平台(例如 RapidAPI)创建工具,您应该从平台订阅工具,并通过运行 [process_tool_docs.py](./process_tool_docs.py) 添加您自己的 API keys。
```
python process_tool_docs.py
```
更多功能即将推出!🚀 **Web GUI 界面** 正在开发中。
## ☑️ 待办事项
AutoAgent 正在持续演进!以下是即将推出的内容:
- 📊 **更多基准测试**:扩展评估至 **SWE-bench**、**WebArena** 等
- 🖥️ **GUI Agent**:支持带有 GUI 交互的 *Computer-Use* agents
- 🔧 **工具平台**:与更多平台集成,如 **Composio**
- 🏗️ **代码沙箱**:支持更多环境,如 **E2B**
- 🎨 **Web 界面**:开发全面的 GUI 以提升用户体验
有想法或建议吗?欢迎随时提出 issue!敬请期待更多激动人心的更新!🚀
## 🔬 如何复现论文中的结果
### GAIA 基准测试
对于 GAIA 基准测试,您可以运行以下命令来运行推理。
```
cd path/to/AutoAgent && sh evaluation/gaia/scripts/run_infer.sh
```
对于评估,您可以运行以下命令。
```
cd path/to/AutoAgent && python evaluation/gaia/get_score.py
```
### Agentic-RAG
对于 Agentic-RAG 任务,您可以运行以下命令来运行推理。
步骤 1. 转到 [此页面](https://huggingface.co/datasets/yixuantt/MultiHopRAG) 并下载。将它们保存到您的数据路径。
步骤 2. 运行以下命令来运行推理。
```
cd path/to/AutoAgent && sh evaluation/multihoprag/scripts/run_rag.sh
```
步骤 3. 结果将保存在 `evaluation/multihoprag/result.json` 中。
## 📖 文档
更详细的文档即将发布 🚀,我们将在 [文档](https://AutoAgent-ai.github.io/docs) 页面进行更新。
## 🤝 加入社区
我们希望为 AutoAgent 建立一个社区,并欢迎每个人加入我们。您可以通过以下方式加入我们的社区:
- [加入我们的 Slack 工作区](https://join.slack.com/t/AutoAgent-workspace/shared_invite/zt-2zibtmutw-v7xOJObBf9jE2w3x7nctFQ) - 在这里我们讨论研究、架构和未来开发。
- [加入我们的 Discord 服务器](https://discord.gg/z68KRvwB) - 这是一个社区运营的服务器,用于一般讨论、问题和反馈。
- [阅读或发布 Github Issues](https://github.com/HKUDS/AutoAgent/issues) - 查看我们正在处理的问题,或添加您自己的想法。
其他
[](https://github.com/HKUDS/AutoAgent/stargazers)
[](https://github.com/HKUDS/AutoAgent/network/members)
[](https://star-history.com/#HKUDS/AutoAgent&Date)
## 🙏 致谢
罗马非一日建成。AutoAgent 站在巨人的肩膀上,我们深深感激之前的杰出工作。我们的框架架构汲取了 [OpenAI Swarm](https://github.com/openai/swarm) 的灵感,而我们 user mode 的三 agent 设计受益于 [Magentic-one](https://github.com/microsoft/autogen/tree/main/python/packages/autogen-magentic-one) 的见解。我们还从 [OpenHands](https://github.com/All-Hands-AI/OpenHands) 的文档结构以及许多其他优秀的 agent-environment 交互设计项目中学习。我们对所有这些在塑造 AutoAgent 过程中起到重要作用的开创性工作表示由衷的感谢和敬意。
## 🌟 引用
```
@misc{AutoAgent,
title={{AutoAgent: A Fully-Automated and Zero-Code Framework for LLM Agents}},
author={Jiabin Tang, Tianyu Fan, Chao Huang},
year={2025},
eprint={202502.05957},
archivePrefix={arXiv},
primaryClass={cs.AI},
url={https://arxiv.org/abs/2502.05957},
}
```