tuanngocptn/nport
GitHub: tuanngocptn/nport
基于 Cloudflare 边缘网络的开源隧道工具,一条命令即可将本地端口暴露为带自定义子域名的公共 HTTPS 地址。
Stars: 671 | Forks: 127
#  NPort
[](https://github.com/tuanngocptn/nport)
[](https://www.npmjs.com/package/nport)
[](https://nport.link)
[](LICENSE)
[](https://www.typescriptlang.org/)
## 什么是 NPort?
[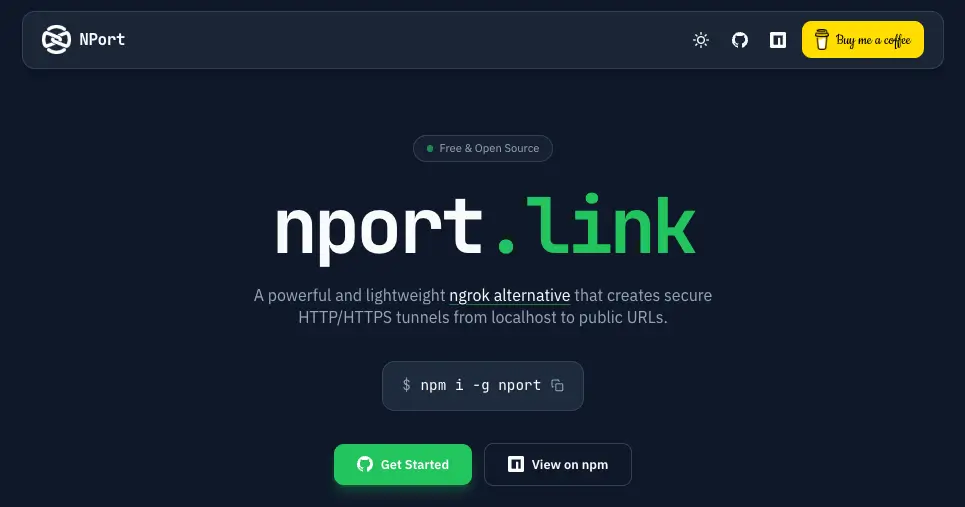](https://nport.link)
NPort 是一个强大且轻量级的 **ngrok 替代方案**,它使用 **Cloudflare 的全球边缘网络** 创建从你的 localhost 到公共 URL 的安全 HTTP/HTTPS 隧道。无需配置,无需账号,即可获得带有自定义子域名的即时隧道!
非常适合用于:
- 🚀 **开发环境** - 立即分享你的本地工作
- 🔒 **测试 Webhook** - 接收来自 GitHub、Stripe、PayPal 等的 webhook
- 📱 **移动设备测试** - 在真实设备上测试你的 Web 应用
- 🛠️ **API 开发** - 调试与外部服务的集成
- 👥 **向客户演示** - 无需部署即可展示你的进度
## ✨ 功能
- ⚡ **即时设置**:一条命令即可暴露你的 localhost
- 🌐 **自定义子域名**:选择你自己的 URL(例如 `myapp.nport.link`)
- 🔒 **自动 HTTPS**:通过 Cloudflare 进行 SSL/TLS 加密
- 🌍 **全球边缘网络**:通过 Cloudflare 实现全球快速连接
- 📡 **WebSocket 支持**:完全支持 WebSocket 和 Server-Sent Events
- 🎯 **零配置**:开箱即用
- 💻 **跨平台**:支持 Windows、macOS 和 Linux
- 🗣️ **多语言**:支持英语、越南语和西班牙语界面
- 🆓 **100% 免费**:无需账号、无限制、无付费墙
- 🔓 **开源**:采用 MIT 许可证
## 📦 安装
### 前置要求
- **Node.js** >= 20.0.0
- **npm** >= 10.0.0
检查你的版本:
```
node --version
npm --version
```
### NPM(推荐)
```
# 全局安装
npm install -g nport
# 或者使用 npx 而无需安装
npx nport 3000 -s myapp
```
### 从 GitHub 安装
```
npm install -g git+https://github.com/tuanngocptn/nport.git
```
## 🚀 快速开始
### 基本用法
使用随机子域名暴露端口 3000:
```
nport 3000
```
输出:
```
╭────────────────────────────────────────────────────────╮
│ N P O R T ⚡️ Free & Open Source from Vietnam │
╰────────────────────────────────────────────────────────╯
⠋ Creating tunnel for port 3000...
🚀 WE LIVE BABY!
👉 https://user-1234.nport.link 👈
───────────────────────────────────────────────────────
⏱️ Time: 4h remaining
✔ [1/2] Connection established...
✔ [2/2] Compression enabled...
───────────────────────────────────────────────────────
🔥 KEEP THE VIBE ALIVE?
(Made with ❤️ in Vietnam)
⭐️ Drop a Star: https://github.com/tuanngocptn/nport
☕️ Buy Coffee: https://buymeacoffee.com/tuanngocptn
```
### 自定义子域名
选择你自己的子域名:
```
nport 3000 -s myapp
# 创建:https://myapp.nport.link
```
或者使用完整形式:
```
nport 3000 --subdomain myapp
```
## 📖 用法示例
### Web 开发
```
# Next.js
npm run dev
nport 3000 -s my-nextjs-app
# React (Create React App)
npm start
nport 3000 -s my-react-app
# Vue.js
npm run dev
nport 8080 -s my-vue-app
# Express.js
node server.js
nport 3000 -s my-api
```
### Webhook 测试
```
# 启动你的本地 webhook 接收器
node webhook-receiver.js
# 将其暴露到互联网
nport 4000 -s my-webhooks
# 在 GitHub webhook 设置中使用:
# https://my-webhooks.nport.link/webhook
```
### 移动设备测试
```
# 启动你的本地 dev server
npm run dev
# 创建 tunnel
nport 3000 -s mobile-test
# 在你的手机上打开:
# https://mobile-test.nport.link
```
## 🎯 CLI 选项
```
nport
NPort
[](https://github.com/tuanngocptn/nport)
[](https://www.npmjs.com/package/nport)
[](https://nport.link)
[](LICENSE)
[](https://www.typescriptlang.org/)
## 什么是 NPort?
[](https://nport.link)
NPort 是一个强大且轻量级的 **ngrok 替代方案**,它使用 **Cloudflare 的全球边缘网络** 创建从你的 localhost 到公共 URL 的安全 HTTP/HTTPS 隧道。无需配置,无需账号,即可获得带有自定义子域名的即时隧道!
非常适合用于:
- 🚀 **开发环境** - 立即分享你的本地工作
- 🔒 **测试 Webhook** - 接收来自 GitHub、Stripe、PayPal 等的 webhook
- 📱 **移动设备测试** - 在真实设备上测试你的 Web 应用
- 🛠️ **API 开发** - 调试与外部服务的集成
- 👥 **向客户演示** - 无需部署即可展示你的进度
## ✨ 功能
- ⚡ **即时设置**:一条命令即可暴露你的 localhost
- 🌐 **自定义子域名**:选择你自己的 URL(例如 `myapp.nport.link`)
- 🔒 **自动 HTTPS**:通过 Cloudflare 进行 SSL/TLS 加密
- 🌍 **全球边缘网络**:通过 Cloudflare 实现全球快速连接
- 📡 **WebSocket 支持**:完全支持 WebSocket 和 Server-Sent Events
- 🎯 **零配置**:开箱即用
- 💻 **跨平台**:支持 Windows、macOS 和 Linux
- 🗣️ **多语言**:支持英语、越南语和西班牙语界面
- 🆓 **100% 免费**:无需账号、无限制、无付费墙
- 🔓 **开源**:采用 MIT 许可证
## 📦 安装
### 前置要求
- **Node.js** >= 20.0.0
- **npm** >= 10.0.0
检查你的版本:
```
node --version
npm --version
```
### NPM(推荐)
```
# 全局安装
npm install -g nport
# 或者使用 npx 而无需安装
npx nport 3000 -s myapp
```
### 从 GitHub 安装
```
npm install -g git+https://github.com/tuanngocptn/nport.git
```
## 🚀 快速开始
### 基本用法
使用随机子域名暴露端口 3000:
```
nport 3000
```
输出:
```
╭────────────────────────────────────────────────────────╮
│ N P O R T ⚡️ Free & Open Source from Vietnam │
╰────────────────────────────────────────────────────────╯
⠋ Creating tunnel for port 3000...
🚀 WE LIVE BABY!
👉 https://user-1234.nport.link 👈
───────────────────────────────────────────────────────
⏱️ Time: 4h remaining
✔ [1/2] Connection established...
✔ [2/2] Compression enabled...
───────────────────────────────────────────────────────
🔥 KEEP THE VIBE ALIVE?
(Made with ❤️ in Vietnam)
⭐️ Drop a Star: https://github.com/tuanngocptn/nport
☕️ Buy Coffee: https://buymeacoffee.com/tuanngocptn
```
### 自定义子域名
选择你自己的子域名:
```
nport 3000 -s myapp
# 创建:https://myapp.nport.link
```
或者使用完整形式:
```
nport 3000 --subdomain myapp
```
## 📖 用法示例
### Web 开发
```
# Next.js
npm run dev
nport 3000 -s my-nextjs-app
# React (Create React App)
npm start
nport 3000 -s my-react-app
# Vue.js
npm run dev
nport 8080 -s my-vue-app
# Express.js
node server.js
nport 3000 -s my-api
```
### Webhook 测试
```
# 启动你的本地 webhook 接收器
node webhook-receiver.js
# 将其暴露到互联网
nport 4000 -s my-webhooks
# 在 GitHub webhook 设置中使用:
# https://my-webhooks.nport.link/webhook
```
### 移动设备测试
```
# 启动你的本地 dev server
npm run dev
# 创建 tunnel
nport 3000 -s mobile-test
# 在你的手机上打开:
# https://mobile-test.nport.link
```
## 🎯 CLI 选项
```
nport [options]
```
| 选项 | 简写 | 描述 | 示例 |
|--------|-------|-------------|---------|
| `` | - | 要建立隧道映射的本地端口(默认:8080) | `nport 3000` |
| `--subdomain` | `-s` | 自定义子域名 | `nport 3000 -s myapp` |
| `--backend` | `-b` | 自定义后端 URL(临时) | `nport 3000 -b https://your-backend.com` |
| `--set-backend` | - | 永久保存后端 URL | `nport --set-backend https://your-backend.com` |
| `--language` | `-l` | 设置语言 (en/vi/es) 或弹出选择提示 | `nport 3000 -l es` |
| `--version` | `-v` | 显示版本信息 | `nport -v` |
### 语言选项
NPort 支持多种语言,并在首次运行时进行自动检测。
```
# 直接设置语言
nport 3000 --language en # English
nport 3000 -l vi # Vietnamese
nport 3000 -l es # Español
# 打开语言选择菜单
nport --language # Interactive prompt
nport -l # Interactive prompt
```
在首次运行或不带值地使用 `--language` 时,你会看到一个交互式的语言选择器。你的选择会自动保存,供将来使用。
### 后端 URL 选项
NPort 默认使用 `https://api.nport.link` 作为后端,但你也可以使用自己的后端服务器。
#### 临时后端(一次性使用)
仅在当前会话中使用自定义后端:
```
# 通过 CLI flag 使用自定义 backend
nport 3000 --backend https://your-backend.com
nport 3000 -b https://your-backend.com
# 通过环境变量使用自定义 backend
export NPORT_BACKEND_URL=https://your-backend.com
nport 3000
# 与其他选项结合使用
nport 3000 -s myapp -b https://your-backend.com
```
#### 永久后端(保存配置)
保存一个后端 URL,以便在以后的所有会话中自动使用:
```
# 永久保存 backend URL
nport --set-backend https://your-backend.com
# 现在所有未来的命令都将使用此 backend
nport 3000 # Uses saved backend
nport 3000 -s myapp # Uses saved backend
# 清除已保存的 backend(恢复默认)
nport --set-backend
# 临时覆盖已保存的 backend
nport 3000 -b https://different-backend.com
```
**配置优先级:**
1. CLI 标志(`--backend` 或 `-b`) - 最高优先级
2. 已保存的配置(`--set-backend`)
3. 环境变量(`NPORT_BACKEND_URL`)
4. 默认值(`https://api.nport.link`) - 最低优先级
**配置存储:**
你的后端偏好设置保存在 `~/.nport/config.json` 中
此功能在以下场景中非常有用:
- **自托管**:运行你自己的 NPort 后端(参见 [server/](server/) 目录)
- **开发**:针对本地后端进行测试
- **自定义域名**:为隧道 URL 使用你自己的域名
- **企业级**:使用公司托管的后端服务器
### 版本信息
```
# 检查当前版本和更新
nport -v
nport --version
```
## 🔧 工作原理
1. **你执行** `nport 3000 -s myapp`
2. **NPort 创建** 一个 Cloudflare Tunnel
3. **创建 DNS 记录**:`myapp.nport.link` → Cloudflare 边缘网络
4. **Cloudflared 二进制文件** 将你的 localhost:3000 连接到 Cloudflare
5. **流量流经** Cloudflare 的全球网络到达你的机器
6. **退出时**(Ctrl+C),隧道和 DNS 会自动清理
```
Internet → Cloudflare Edge → Cloudflare Tunnel → Your localhost:3000
(https://myapp.nport.link)
```
## 🏗️ 项目结构
```
nport/
├── src/ # TypeScript source files
│ ├── index.ts # Entry point
│ ├── tunnel.ts # Tunnel orchestration
│ ├── api.ts # Backend API client
│ ├── args.ts # CLI argument parser
│ ├── binary.ts # Cloudflared process manager
│ ├── ui.ts # Console UI components
│ ├── lang.ts # Multilingual support
│ ├── types/ # TypeScript type definitions
│ └── ...
│
├── tests/ # Unit tests (vitest)
├── dist/ # Compiled output
├── bin/ # cloudflared binary (downloaded)
│
├── server/ # Backend (Cloudflare Worker)
├── website/ # Static landing page
├── docs/ # Documentation
│ ├── ARCHITECTURE.md # Technical architecture
│ ├── API.md # API reference
│ └── CONTRIBUTING.md # Contribution guide
└── .ai/ # AI context files
```
## 🛡️ 安全性
- **默认 HTTPS**:所有隧道均使用 SSL/TLS 加密
- **Cloudflare 防护**:DDoS 防护及安全功能
- **自动清理**:当你停止进程时,隧道会被移除
- **无数据记录**:我们不存储或记录你的流量
- **隐私**:匿名分析(可通过设置 `NPORT_ANALYTICS=false` 禁用)
## 🆚 与 ngrok 的对比
| 功能 | NPort | ngrok |
|---------|-------|-------|
| 价格 | 100% 免费 | 免费层受限 |
| 自定义子域名 | ✅ 始终支持 | ❌ 仅限付费 |
| HTTPS | ✅ 始终支持 | ✅ |
| 是否需要账号 | ❌ 不需要 | ✅ 需要 |
| 时间限制 | ❌ 无限制(4小时自动清理) | ⚠️ 免费层受限 |
| 开源 | ✅ MIT | ❌ 专有 |
| 全球网络 | ✅ Cloudflare | ✅ ngrok Edge |
| 多语言 | ✅ EN/VI/ES | ❌ 仅英语 |
## 🧹 清理
NPort 会在你执行以下操作时自动清理资源:
- 按下 **Ctrl+C** 退出
- 终止进程
- 关闭终端
清理过程:
1. ✅ 删除 DNS 记录(`myapp.nport.link`)
2. ✅ 移除 Cloudflare Tunnel
3. ✅ 停止 cloudflared 进程
隧道还会在 **4 小时后** 自动清理,以防止资源浪费。
## 🐛 故障排除
### 找不到二进制文件
如果你看到 "Cloudflared binary not found":
```
npm install -g nport --force
```
### 端口已被占用
确保你的本地服务器正在指定端口上运行:
```
# 检查是否有程序正在监听 port 3000
lsof -i :3000 # macOS/Linux
netstat -ano | findstr :3000 # Windows
```
### 子域名已被占用
选择一个不同的子域名:
```
nport 3000 -s myapp-v2
```
### 连接问题
警告 `ERR Cannot determine default origin certificate path` 是无害的,可以忽略。它的出现是因为 cloudflared 检查了基于证书的身份验证(我们改为了基于 token 的方式)。
### 更改语言
要更改你的语言偏好:
```
nport --language
# 或者
nport -l
```
然后从菜单中选择你喜欢的语言。
## 🌍 支持的语言
- 🇺🇸 **英语** (`en`) - 默认
- 🇻🇳 **越南语** (`vi`) - Tiếng Việt
- 🇪🇸 **西班牙语** (`es`) - Español
想要添加你的语言吗?欢迎贡献代码!请查看[贡献指南](docs/CONTRIBUTING.md)。
## 📄 许可证
[MIT 许可证](LICENSE) - 随时在你的项目中使用 NPort!
## 🙏 致谢
- 由来自越南的 [Nick Pham](https://github.com/tuanngocptn) 创建
- 灵感来源于 [ngrok](https://ngrok.com) 和 [localtunnel](https://github.com/localtunnel/localtunnel)
- 由 [Cloudflare Tunnels](https://developers.cloudflare.com/cloudflare-one/connections/connect-apps/) 提供支持
 ## 🔗 链接
- 🌐 网站:[https://nport.link](https://nport.link)
- 📦 NPM:[https://www.npmjs.com/package/nport](https://www.npmjs.com/package/nport)
- 💻 GitHub:[https://github.com/tuanngocptn/nport](https://github.com/tuanngocptn/nport)
- 📧 邮箱:tuanngocptn@gmail.com
由来自越南的 [Nick Pham](https://github.com/tuanngocptn) 用 ❤️ 制作
## 🔗 链接
- 🌐 网站:[https://nport.link](https://nport.link)
- 📦 NPM:[https://www.npmjs.com/package/nport](https://www.npmjs.com/package/nport)
- 💻 GitHub:[https://github.com/tuanngocptn/nport](https://github.com/tuanngocptn/nport)
- 📧 邮箱:tuanngocptn@gmail.com
由来自越南的 [Nick Pham](https://github.com/tuanngocptn) 用 ❤️ 制作
NPort
[](https://github.com/tuanngocptn/nport)
[](https://www.npmjs.com/package/nport)
[](https://nport.link)
[](LICENSE)
[](https://www.typescriptlang.org/)
## 什么是 NPort?
[](https://nport.link)
NPort 是一个强大且轻量级的 **ngrok 替代方案**,它使用 **Cloudflare 的全球边缘网络** 创建从你的 localhost 到公共 URL 的安全 HTTP/HTTPS 隧道。无需配置,无需账号,即可获得带有自定义子域名的即时隧道!
非常适合用于:
- 🚀 **开发环境** - 立即分享你的本地工作
- 🔒 **测试 Webhook** - 接收来自 GitHub、Stripe、PayPal 等的 webhook
- 📱 **移动设备测试** - 在真实设备上测试你的 Web 应用
- 🛠️ **API 开发** - 调试与外部服务的集成
- 👥 **向客户演示** - 无需部署即可展示你的进度
## ✨ 功能
- ⚡ **即时设置**:一条命令即可暴露你的 localhost
- 🌐 **自定义子域名**:选择你自己的 URL(例如 `myapp.nport.link`)
- 🔒 **自动 HTTPS**:通过 Cloudflare 进行 SSL/TLS 加密
- 🌍 **全球边缘网络**:通过 Cloudflare 实现全球快速连接
- 📡 **WebSocket 支持**:完全支持 WebSocket 和 Server-Sent Events
- 🎯 **零配置**:开箱即用
- 💻 **跨平台**:支持 Windows、macOS 和 Linux
- 🗣️ **多语言**:支持英语、越南语和西班牙语界面
- 🆓 **100% 免费**:无需账号、无限制、无付费墙
- 🔓 **开源**:采用 MIT 许可证
## 📦 安装
### 前置要求
- **Node.js** >= 20.0.0
- **npm** >= 10.0.0
检查你的版本:
```
node --version
npm --version
```
### NPM(推荐)
```
# 全局安装
npm install -g nport
# 或者使用 npx 而无需安装
npx nport 3000 -s myapp
```
### 从 GitHub 安装
```
npm install -g git+https://github.com/tuanngocptn/nport.git
```
## 🚀 快速开始
### 基本用法
使用随机子域名暴露端口 3000:
```
nport 3000
```
输出:
```
╭────────────────────────────────────────────────────────╮
│ N P O R T ⚡️ Free & Open Source from Vietnam │
╰────────────────────────────────────────────────────────╯
⠋ Creating tunnel for port 3000...
🚀 WE LIVE BABY!
👉 https://user-1234.nport.link 👈
───────────────────────────────────────────────────────
⏱️ Time: 4h remaining
✔ [1/2] Connection established...
✔ [2/2] Compression enabled...
───────────────────────────────────────────────────────
🔥 KEEP THE VIBE ALIVE?
(Made with ❤️ in Vietnam)
⭐️ Drop a Star: https://github.com/tuanngocptn/nport
☕️ Buy Coffee: https://buymeacoffee.com/tuanngocptn
```
### 自定义子域名
选择你自己的子域名:
```
nport 3000 -s myapp
# 创建:https://myapp.nport.link
```
或者使用完整形式:
```
nport 3000 --subdomain myapp
```
## 📖 用法示例
### Web 开发
```
# Next.js
npm run dev
nport 3000 -s my-nextjs-app
# React (Create React App)
npm start
nport 3000 -s my-react-app
# Vue.js
npm run dev
nport 8080 -s my-vue-app
# Express.js
node server.js
nport 3000 -s my-api
```
### Webhook 测试
```
# 启动你的本地 webhook 接收器
node webhook-receiver.js
# 将其暴露到互联网
nport 4000 -s my-webhooks
# 在 GitHub webhook 设置中使用:
# https://my-webhooks.nport.link/webhook
```
### 移动设备测试
```
# 启动你的本地 dev server
npm run dev
# 创建 tunnel
nport 3000 -s mobile-test
# 在你的手机上打开:
# https://mobile-test.nport.link
```
## 🎯 CLI 选项
```
nport
## 🔗 链接
- 🌐 网站:[https://nport.link](https://nport.link)
- 📦 NPM:[https://www.npmjs.com/package/nport](https://www.npmjs.com/package/nport)
- 💻 GitHub:[https://github.com/tuanngocptn/nport](https://github.com/tuanngocptn/nport)
- 📧 邮箱:tuanngocptn@gmail.com
由来自越南的 [Nick Pham](https://github.com/tuanngocptn) 用 ❤️ 制作标签:Cloudflare, MITM代理, MITRE ATT&CK, ngrok替代, SOC Prime, TypeScript, 内网穿透, 安全插件, 开发工具, 程序员工具, 网络隧道, 自动化攻击, 跨平台