Genesis-Embodied-AI/genesis-world
GitHub: Genesis-Embodied-AI/genesis-world
面向通用机器人和具身智能的开源物理仿真平台,集成多物理引擎、照片级渲染与跨平台编译能力。
Stars: 29619 | Forks: 2821
# Genesis World
[](https://pypi.org/project/genesis-world/)
[](https://pepy.tech/projects/genesis-world)
[](https://genesis-world.readthedocs.io/en/latest/)
[](https://github.com/Genesis-Embodied-AI/genesis-world/issues)
[](https://github.com/Genesis-Embodied-AI/genesis-world/discussions)
[](https://discord.gg/nukCuhB47p)
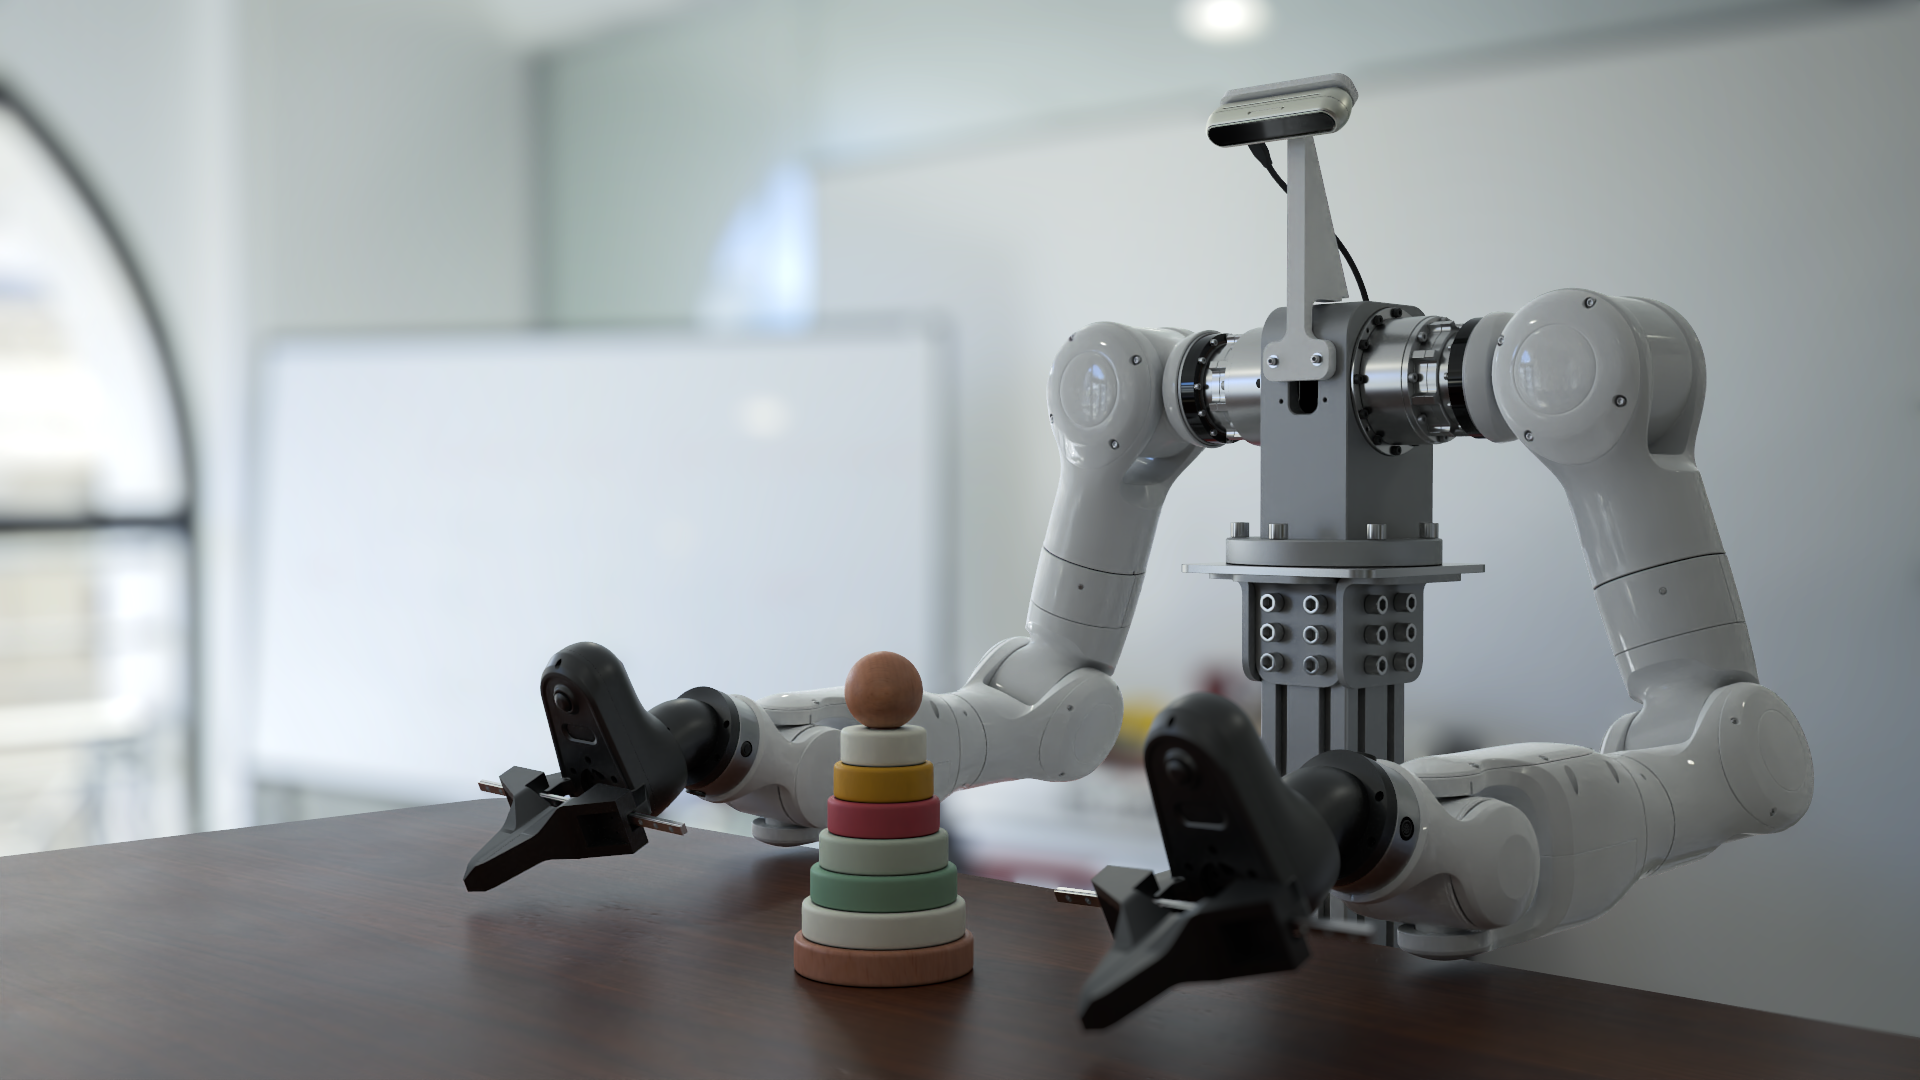
**Genesis World** 是一个用于物理 AI 开发的仿真平台。它将统一的多物理引擎、照片级真实感渲染器([Nyx](https://github.com/Genesis-Embodied-AI/genesis-nyx))以及跨平台编译器([Quadrants](https://github.com/Genesis-Embodied-AI/quadrants))整合在一个 Pythonic 仿真接口背后。Genesis World 旨在从单台笔记本电脑扩展到数据中心级 GPU,同时保持易于阅读、扩展并嵌入到研究代码中。
它以前被称为 **Genesis**,自 2024 年 12 月起作为一个学术项目启动,其开发现在由 [Genesis AI](https://www.genesis.ai/) 正式支持。
有关更多技术细节,请参阅我们的[博客文章](https://genesis.ai/blog/the-role-of-simulation-in-scalable-robotics-genesis-world-10-and-the-path-forward)。
## 目录
1. [什么是 Genesis World?](#what-is-genesis-world)
2. [目录清单](#catalogue)
3. [快速安装](#quick-installation)
4. [Docker](#docker)
5. [贡献](#contributing-to-genesis)
6. [支持](#support)
7. [许可与致谢](#license-and-acknowledgments)
8. [引用](#citation)
## 什么是 Genesis World?
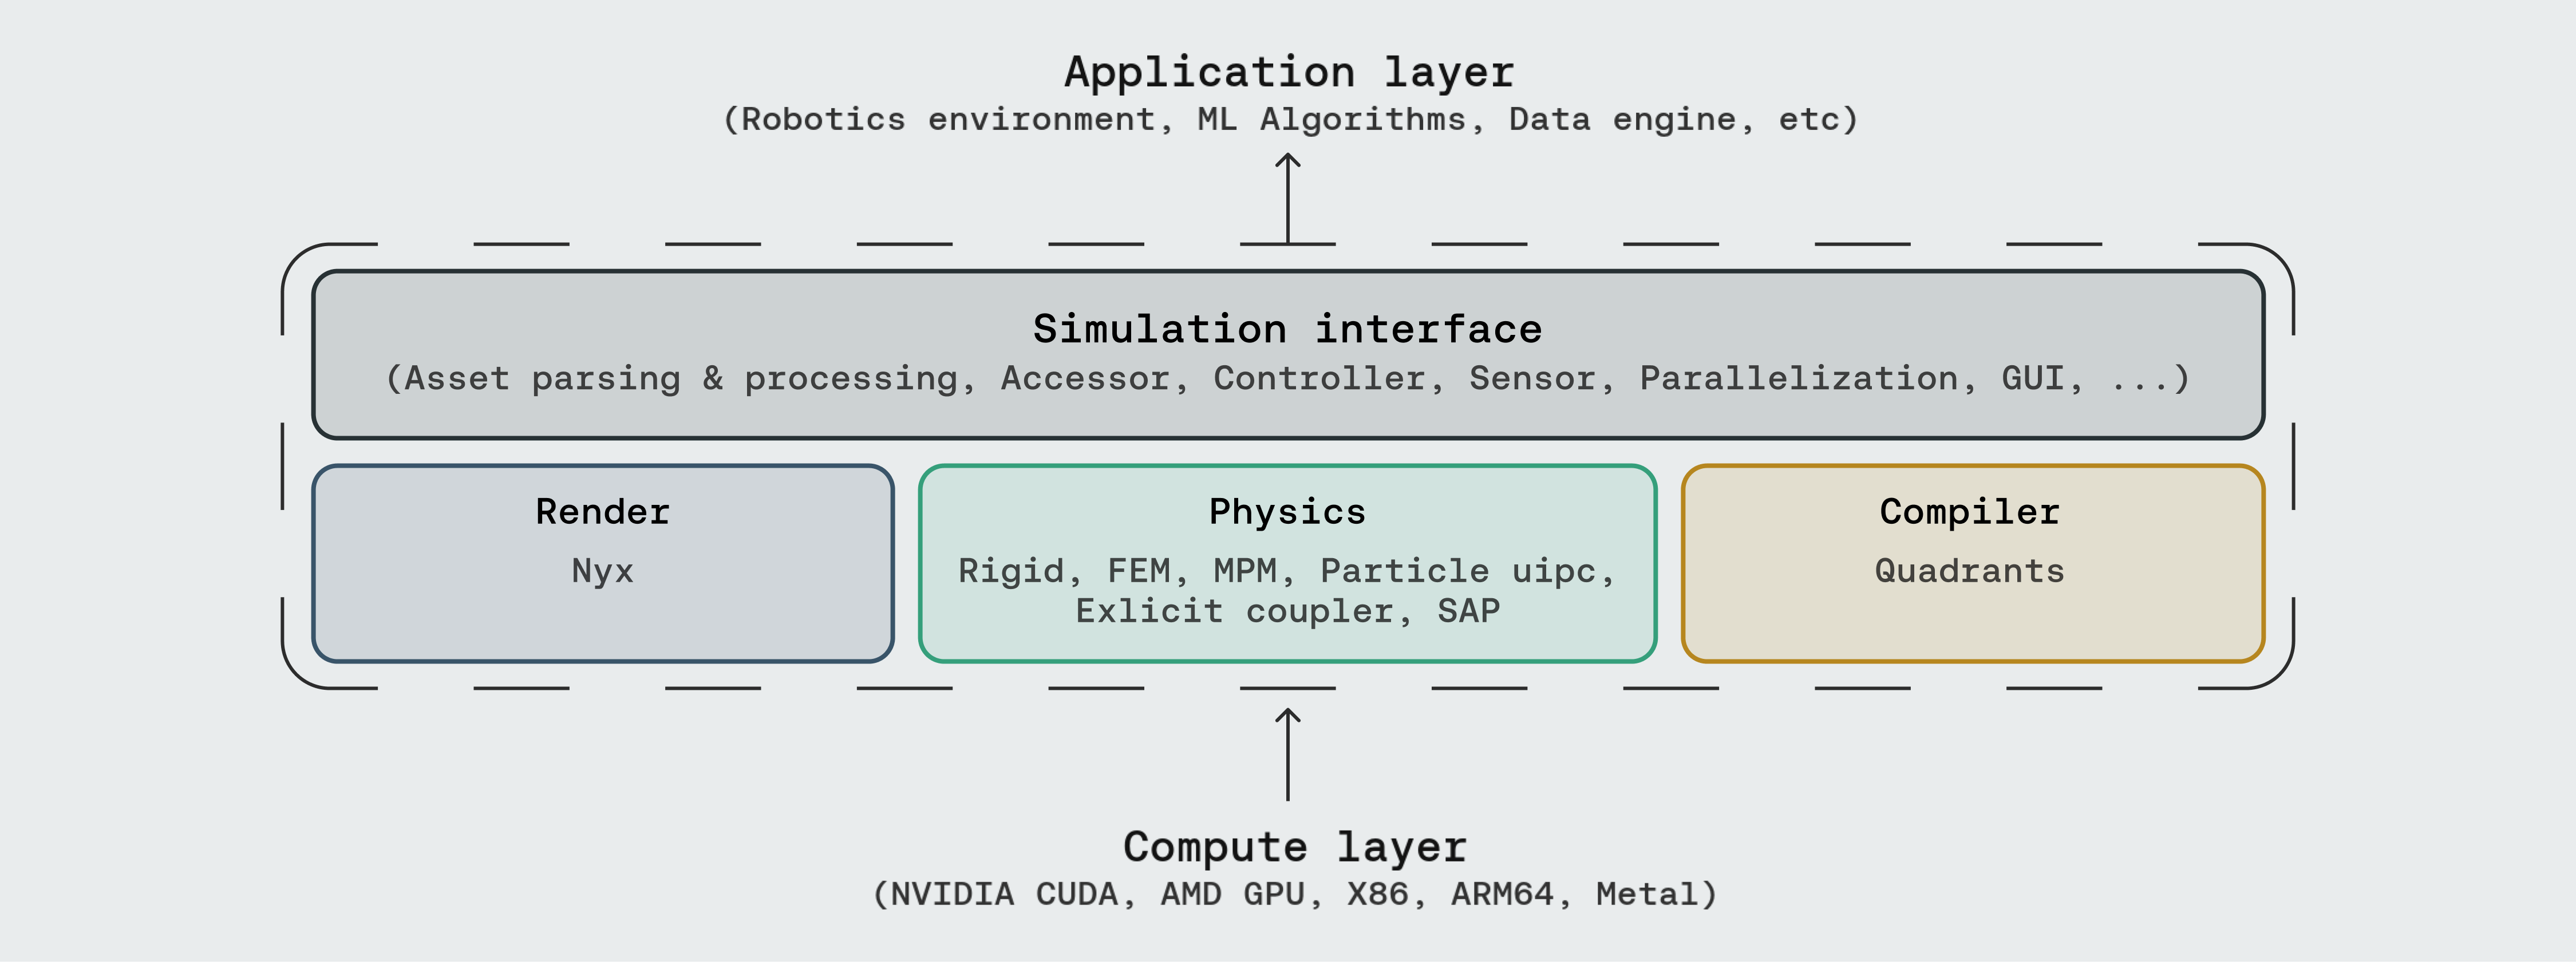
Genesis World 占据了虚线框内的四个层级。上方是您构建的任何内容(机器人环境、ML pipeline、数据生成、智能体仿真);下方是您拥有的任何计算后端。
- **仿真接口 (Simulation Interface)** —— 面向用户的 API:资产解析(URDF, MJCF, OBJ, GLB, USD, ...)、实体访问器、控制器、传感器、并行和异构环境以及内置 GUI。
- **物理 (Physics)** —— 一个统一的多物理引擎,集成了 Rigid、FEM、MPM、Particle (PBD / SPH)、[uipc](https://github.com/spiriMirror/libuipc)、显式耦合器以及 SAP,全部共享同一个场景和同一个状态。
- **渲染 (Render)** —— 作为相机传感器插入的三种渲染路径:**[Nyx](https://github.com/Genesis-Embodied-AI/genesis-nyx)**(我们专为机器人技术设计的内部渲染器)、Luisa(DSL 光线追踪器)和 Pyrender(光栅化器)。
- **编译器 (Compiler)** —— **[Quadrants](https://github.com/Genesis-Embodied-AI/quadrants)** 将 Python 内核代码降级为 CUDA、AMD ROCm、Apple Metal、Vulkan、x86 和 ARM64。它承载了 Genesis 的自动微分、GPU 图和 fastcache 机制。
### 文档
- [Genesis World](https://genesis-world.readthedocs.io/en/latest/)
- [Quadrants](https://genesis-embodied-ai.github.io/quadrants/index.html)
- [Nyx](https://genesis-embodied-ai.github.io/genesis-nyx/latest/)
## 目录清单
三个部分,反映了提供可运行演示的 Genesis 层级:**物理**(求解器和多求解器耦合)、**渲染**(代码仓库内的相机设置以及托管在 [genesis-nyx](https://github.com/Genesis-Embodied-AI/genesis-nyx) 中的 Nyx 演练)和**仿真接口**(传感器、GUI、控制器、并行/异构环境和教程)。大多数脚本在 `pip install -e ".[dev]"` 后即可端到端运行;依赖可选后端的演示(例如 IPC 和 Nyx 示例)需要[可选附加项](#optional-extras)中列出的附加组件。
### 物理
| | | |
|---|---|---|


| [Rigid:franka 方块](./examples/rigid/franka_cube.py) | [Rigid:碰撞塔](./examples/collision/tower.py) | [Rigid:contype](./examples/collision/contype.py) |
|  |
|  |
|  |
| [FEM:硬与软约束](./examples/fem_hard_and_soft_constraint.py) | [MPM:教程](./examples/tutorials/mpm.py) | [MPM:沙轮](./examples/coupling/sand_wheel.py) |
|
|
| [FEM:硬与软约束](./examples/fem_hard_and_soft_constraint.py) | [MPM:教程](./examples/tutorials/mpm.py) | [MPM:沙轮](./examples/coupling/sand_wheel.py) |
|  |
|  |
|  |
| [SPH:刚体](./examples/coupling/sph_rigid.py) | [SPH:+ MPM](./examples/coupling/sph_mpm.py) | [PBD:液体](./examples/pbd_liquid.py) |
|
|
| [SPH:刚体](./examples/coupling/sph_rigid.py) | [SPH:+ MPM](./examples/coupling/sph_mpm.py) | [PBD:液体](./examples/pbd_liquid.py) |
|  |
|  |
|  |


| [PBD:布料](./examples/tutorials/pbd_cloth.py) | [Stable Fluid:烟雾](./examples/smoke.py) | [IPC:机器人布料遥操作](./examples/IPC_Solver/ipc_robot_cloth_teleop.py) |
|
|
| [PBD:布料](./examples/tutorials/pbd_cloth.py) | [Stable Fluid:烟雾](./examples/smoke.py) | [IPC:机器人布料遥操作](./examples/IPC_Solver/ipc_robot_cloth_teleop.py) |
|  |
|  |
|  |



| [耦合器:刚体上的布料](./examples/coupling/cloth_on_rigid.py) | [耦合器:刚体 + MPM](./examples/coupling/rigid_mpm_attachment.py) | [耦合器:切割龙](./examples/coupling/cut_dragon.py) |
|
|
| [耦合器:刚体上的布料](./examples/coupling/cloth_on_rigid.py) | [耦合器:刚体 + MPM](./examples/coupling/rigid_mpm_attachment.py) | [耦合器:切割龙](./examples/coupling/cut_dragon.py) |
|  |
|  |
|  |



| [耦合器:水车](./examples/coupling/water_wheel.py) | [耦合器:冲刷方块](./examples/coupling/flush_cubes.py) | [SAP:Franka 抓取刚体方块](./examples/sap_coupling/franka_grasp_rigid_cube.py) |
|
|
| [耦合器:水车](./examples/coupling/water_wheel.py) | [耦合器:冲刷方块](./examples/coupling/flush_cubes.py) | [SAP:Franka 抓取刚体方块](./examples/sap_coupling/franka_grasp_rigid_cube.py) |
|  |
|  |
|  |
### 渲染



Genesis 暴露了三种作为相机传感器的渲染路径:内置(Nyx / Luisa / Pyrender)以及托管在 [genesis-nyx](https://github.com/Genesis-Embodied-AI/genesis-nyx/tree/main/examples) 中的详细 Nyx 演练。
| | | |
|---|---|---|
| [跟随实体](./examples/rendering/follow_entity.py) | [动画相机](./examples/rendering/moving_camera.py) | [Nyx:你好](https://github.com/Genesis-Embodied-AI/genesis-nyx/blob/main/examples/01_hello_nyx.py) |
|
|
### 渲染
Genesis 暴露了三种作为相机传感器的渲染路径:内置(Nyx / Luisa / Pyrender)以及托管在 [genesis-nyx](https://github.com/Genesis-Embodied-AI/genesis-nyx/tree/main/examples) 中的详细 Nyx 演练。
| | | |
|---|---|---|
| [跟随实体](./examples/rendering/follow_entity.py) | [动画相机](./examples/rendering/moving_camera.py) | [Nyx:你好](https://github.com/Genesis-Embodied-AI/genesis-nyx/blob/main/examples/01_hello_nyx.py) |
|  |
|  |
| 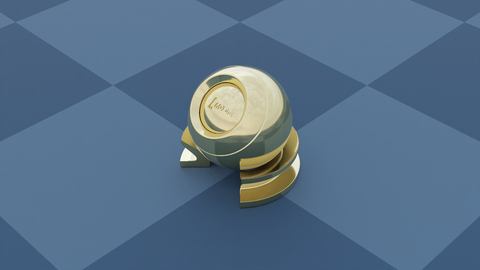 |
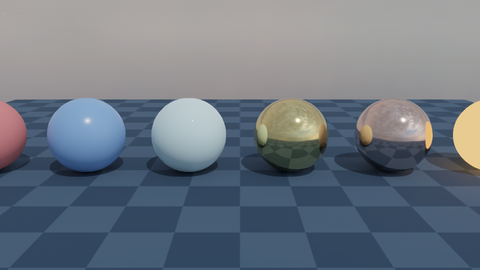
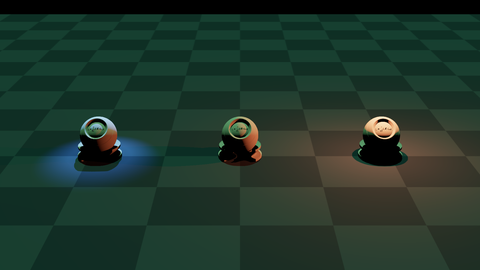
| [Nyx:附带相机](https://github.com/Genesis-Embodied-AI/genesis-nyx/blob/main/examples/02_attached_camera.py) | [Nyx:PBR 材质](https://github.com/Genesis-Embodied-AI/genesis-nyx/blob/main/examples/03_materials.py) | [Nyx:灯光类型](https://github.com/Genesis-Embodied-AI/genesis-nyx/blob/main/examples/04_light_types.py) |
|
|
| [Nyx:附带相机](https://github.com/Genesis-Embodied-AI/genesis-nyx/blob/main/examples/02_attached_camera.py) | [Nyx:PBR 材质](https://github.com/Genesis-Embodied-AI/genesis-nyx/blob/main/examples/03_materials.py) | [Nyx:灯光类型](https://github.com/Genesis-Embodied-AI/genesis-nyx/blob/main/examples/04_light_types.py) |
|  |
|  |
|  |
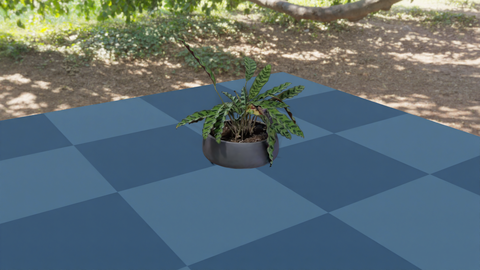
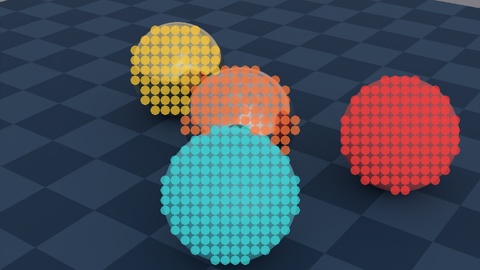
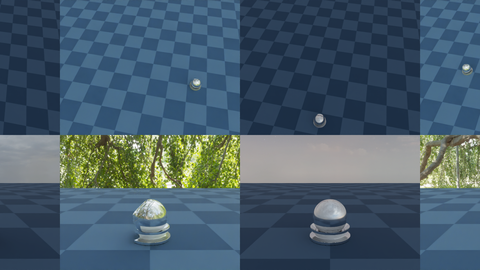
| [Nyx:3D 高斯泼溅](https://github.com/Genesis-Embodied-AI/genesis-nyx/blob/main/examples/05_gaussian_splat.py) | [Nyx:物体拾取](https://github.com/Genesis-Embodied-AI/genesis-nyx/blob/main/examples/06_object_picking.py) | [Nyx:多相机多环境](https://github.com/Genesis-Embodied-AI/genesis-nyx/blob/main/examples/07_multi_camera_multi_env.py) |
|
|
| [Nyx:3D 高斯泼溅](https://github.com/Genesis-Embodied-AI/genesis-nyx/blob/main/examples/05_gaussian_splat.py) | [Nyx:物体拾取](https://github.com/Genesis-Embodied-AI/genesis-nyx/blob/main/examples/06_object_picking.py) | [Nyx:多相机多环境](https://github.com/Genesis-Embodied-AI/genesis-nyx/blob/main/examples/07_multi_camera_multi_env.py) |
|  |
|  |
|  |
### 仿真接口
| | | |
|---|---|---|



| [控制机器人](./examples/tutorials/control_your_robot.py) | [GUI:ImGui 关节控制](./examples/gui/imgui_joint_control.py) | [异构环境](./examples/rigid/heterogeneous_simulation.py) |
|
|
### 仿真接口
| | | |
|---|---|---|
| [控制机器人](./examples/tutorials/control_your_robot.py) | [GUI:ImGui 关节控制](./examples/gui/imgui_joint_control.py) | [异构环境](./examples/rigid/heterogeneous_simulation.py) |
|  |
|  |
|  |



| [域随机化](./examples/rigid/domain_randomization.py) | [传感器:深度相机](./examples/sensors/depth_camera_custom_vverts.py) | [传感器:IMU](./examples/sensors/imu_franka.py) |
|
|
| [域随机化](./examples/rigid/domain_randomization.py) | [传感器:深度相机](./examples/sensors/depth_camera_custom_vverts.py) | [传感器:IMU](./examples/sensors/imu_franka.py) |
|  |
|  |
|  |



| [传感器:lidar](./examples/sensors/lidar_teleop.py) | [传感器:触觉沙盒](./examples/sensors/tactile_sandbox.py) | [传感器:接触力](./examples/sensors/contact_force_go2.py) |
|
|
| [传感器:lidar](./examples/sensors/lidar_teleop.py) | [传感器:触觉沙盒](./examples/sensors/tactile_sandbox.py) | [传感器:接触力](./examples/sensors/contact_force_go2.py) |
|  |
|  |
|  |




| [传感器:表面距离](./examples/sensors/surface_distance_shadowhand.py) | [传感器:温度网格](./examples/sensors/temperature_grid.py) | [GUI:调试绘制](./examples/tutorials/draw_debug.py) |
|
|
| [传感器:表面距离](./examples/sensors/surface_distance_shadowhand.py) | [传感器:温度网格](./examples/sensors/temperature_grid.py) | [GUI:调试绘制](./examples/tutorials/draw_debug.py) |
|  |
|  |
|  |
| [GUI:网格点拾取器](
|


| [GUI:网格点拾取器]() | [GUI:鼠标交互](./examples/viewer_plugin/mouse_interaction.py) | [Diff-IK 控制器](./examples/rigid/diffik_controller.py) |
|  |
|  |
|  |



| [批量 IK](./examples/tutorials/batched_IK.py) | [无人机](./examples/drone/hover_train.py) | [进阶:蠕虫](./examples/tutorials/advanced_worm.py) |
|
|
| [批量 IK](./examples/tutorials/batched_IK.py) | [无人机](./examples/drone/hover_train.py) | [进阶:蠕虫](./examples/tutorials/advanced_worm.py) |
|  |
|  |
|  |
## 快速安装
### 使用 pip
请先按照[官方说明](https://pytorch.org/get-started/locally/)安装 **PyTorch**。
然后,通过 PyPI 安装 Genesis:
```
pip install genesis-world # Requires Python>=3.10,<3.14;
```
要获取目前的最新版本,请通过 `pip install --upgrade pip` 确保您的 `pip` 是最新的,然后运行以下命令:
```
pip install git+https://github.com/Genesis-Embodied-AI/genesis-world.git
```
请注意,该包仍必须手动更新才能与 main 分支同步。
鼓励寻求贡献的用户以可编辑模式安装 Genesis。首先,确保已卸载 `genesis-world`,然后克隆代码仓库并在本地安装:
```
git clone https://github.com/Genesis-Embodied-AI/genesis-world.git
cd genesis-world
pip install -e ".[dev]"
```
建议在移动 HEAD 之后系统地执行 `pip install -e ".[dev]"` ,以确保所有依赖项和入口点都是最新的。
### 可选附加项
| | |
|---|---|
| IPC 求解器 (uipc 后端) | `pip install pyuipc` *(Linux / Windows x86, NVIDIA GPU)* |
| Nyx 渲染器 | `pip install gs-nyx` — 参见 [genesis-nyx](https://github.com/Genesis-Embodied-AI/genesis-nyx) |
Quadrants 会随 Genesis 自动捆绑;无需额外安装。独立 wheel 包(`pip install quadrants`)的文档位于 [Quadrants](https://github.com/Genesis-Embodied-AI/quadrants),供希望在 Genesis 之外使用该编译器的用户参考。
### 使用 uv
[uv](https://docs.astral.sh/uv/) 是一个快速的 Python 包和项目管理器。
**安装 uv:**
```
# 在 macOS 和 Linux 上
curl -LsSf https://astral.sh/uv/install.sh | sh
# 在 Windows 上
powershell -ExecutionPolicy ByPass -c "irm https://astral.sh/uv/install.ps1 | iex"
```
**使用 uv 快速开始:**
```
git clone https://github.com/Genesis-Embodied-AI/genesis-world.git
cd genesis-world
uv sync
```
然后为您的平台安装 PyTorch:
```
# NVIDIA GPU(以 CUDA 12.6 为例)
uv pip install torch --index-url https://download.pytorch.org/whl/cu126
# 仅 CPU (Linux/Windows)
uv pip install torch --index-url https://download.pytorch.org/whl/cpu
# Apple Silicon (Metal/MPS)
uv pip install torch
```
运行示例:
```
uv run examples/rigid/single_franka.py
```
## Docker
如果您想从 Docker 使用 Genesis,您可以首先构建 Docker 镜像,如下所示:
```
docker build -t genesis -f docker/Dockerfile docker
```
然后您可以运行 Docker 镜像(挂载到 `/workspace/examples`)内的示例:
```
xhost +local:root # Allow the container to access the display
docker run --gpus all --rm -it \
-e DISPLAY=$DISPLAY \
-e LOCAL_USER_ID="$(id -u)" \
-v /dev/dri:/dev/dri \
-v /tmp/.X11-unix/:/tmp/.X11-unix \
-v $(pwd):/workspace \
--name genesis genesis:latest
```
### AMD 用户
AMD 用户可以使用 `docker/Dockerfile.amdgpu` 文件来使用 Genesis,该文件通过运行以下命令构建:
```
docker build -t genesis-amd -f docker/Dockerfile.amdgpu docker
```
然后可以通过运行以下命令来使用:
```
docker run -it --network=host \
--device=/dev/kfd \
--device=/dev/dri \
--group-add=video \
--ipc=host \
--cap-add=SYS_PTRACE \
--security-opt seccomp=unconfined \
--shm-size 8G \
-v $PWD:/workspace \
-e DISPLAY=$DISPLAY \
genesis-amd
```
这些示例将可从 `/workspace/examples` 访问。注意:AMD 用户应使用 ROCm (HIP) 后端。这意味着您将需要调用 `gs.init(backend=gs.amdgpu)` 来初始化 Genesis。
## 支持
- 通过 GitHub [Issues](https://github.com/Genesis-Embodied-AI/genesis-world/issues) 报告错误或请求功能。
- 在 GitHub [Discussions](https://github.com/Genesis-Embodied-AI/genesis-world/discussions) 上加入讨论或提出问题。
- 实时聊天:[Discord](https://discord.gg/nukCuhB47p)。
## 许可与致谢
Genesis 源代码采用 Apache 2.0 授权。
Genesis 的开发得益于以下开源项目:
- [Taichi](https://github.com/taichi-dev/taichi):[Quadrants](https://github.com/Genesis-Embodied-AI/quadrants) 于 2025 年 6 月分叉的原始编译器。感谢 Taichi 团队多年来的技术支持。
- [libuipc](https://github.com/spiriMirror/libuipc):IPC 求解器后端。
- [FluidLab](https://github.com/zhouxian/FluidLab):参考 MPM 求解器实现。
- [SPH_Taichi](https://github.com/erizmr/SPH_Taichi):参考 SPH 求解器实现。
- [Ten Minute Physics](https://matthias-research.github.io/pages/tenMinutePhysics/index.html) 和 [PBF3D](https://github.com/WASD4959/PBF3D):参考 PBD 求解器实现。
- [MuJoCo](https://github.com/google-deepmind/mujoco):刚体动力学参考。
- [libccd](https://github.com/danfis/libccd):碰撞检测参考。
- [PyRender](https://github.com/mmatl/pyrender):基于光栅化的渲染器。
- [LuisaCompute](https://github.com/LuisaGroup/LuisaCompute) 和 [LuisaRender](https://github.com/LuisaGroup/LuisaRender):光线追踪 DSL。
- [Madrona](https://github.com/shacklettbp/madrona) 和 [Madrona-mjx](https://github.com/shacklettbp/madrona_mjx):批量渲染器后端
## 引用
如果您在研究中使用 Genesis,请考虑引用:
```
@article{
genesis2026genesisworld,
author = {Genesis AI Team},
title = {The Role of Simulation in Scalable Robotics, Genesis World 1.0, and the Path Forward},
journal = {Genesis AI Blog},
month = {May},
year = {2026},
url = {https://www.genesis.ai/blog/the-role-of-simulation-in-scalable-robotics-genesis-world-10-and-the-path-forward},
}
```
```
@misc{
Genesis,
author = {Genesis Authors},
title = {Genesis: A Generative and Universal Physics Engine for Robotics and Beyond},
month = {December},
year = {2024},
url = {https://github.com/Genesis-Embodied-AI/genesis-world}
}
```
|
## 快速安装
### 使用 pip
请先按照[官方说明](https://pytorch.org/get-started/locally/)安装 **PyTorch**。
然后,通过 PyPI 安装 Genesis:
```
pip install genesis-world # Requires Python>=3.10,<3.14;
```
要获取目前的最新版本,请通过 `pip install --upgrade pip` 确保您的 `pip` 是最新的,然后运行以下命令:
```
pip install git+https://github.com/Genesis-Embodied-AI/genesis-world.git
```
请注意,该包仍必须手动更新才能与 main 分支同步。
鼓励寻求贡献的用户以可编辑模式安装 Genesis。首先,确保已卸载 `genesis-world`,然后克隆代码仓库并在本地安装:
```
git clone https://github.com/Genesis-Embodied-AI/genesis-world.git
cd genesis-world
pip install -e ".[dev]"
```
建议在移动 HEAD 之后系统地执行 `pip install -e ".[dev]"` ,以确保所有依赖项和入口点都是最新的。
### 可选附加项
| | |
|---|---|
| IPC 求解器 (uipc 后端) | `pip install pyuipc` *(Linux / Windows x86, NVIDIA GPU)* |
| Nyx 渲染器 | `pip install gs-nyx` — 参见 [genesis-nyx](https://github.com/Genesis-Embodied-AI/genesis-nyx) |
Quadrants 会随 Genesis 自动捆绑;无需额外安装。独立 wheel 包(`pip install quadrants`)的文档位于 [Quadrants](https://github.com/Genesis-Embodied-AI/quadrants),供希望在 Genesis 之外使用该编译器的用户参考。
### 使用 uv
[uv](https://docs.astral.sh/uv/) 是一个快速的 Python 包和项目管理器。
**安装 uv:**
```
# 在 macOS 和 Linux 上
curl -LsSf https://astral.sh/uv/install.sh | sh
# 在 Windows 上
powershell -ExecutionPolicy ByPass -c "irm https://astral.sh/uv/install.ps1 | iex"
```
**使用 uv 快速开始:**
```
git clone https://github.com/Genesis-Embodied-AI/genesis-world.git
cd genesis-world
uv sync
```
然后为您的平台安装 PyTorch:
```
# NVIDIA GPU(以 CUDA 12.6 为例)
uv pip install torch --index-url https://download.pytorch.org/whl/cu126
# 仅 CPU (Linux/Windows)
uv pip install torch --index-url https://download.pytorch.org/whl/cpu
# Apple Silicon (Metal/MPS)
uv pip install torch
```
运行示例:
```
uv run examples/rigid/single_franka.py
```
## Docker
如果您想从 Docker 使用 Genesis,您可以首先构建 Docker 镜像,如下所示:
```
docker build -t genesis -f docker/Dockerfile docker
```
然后您可以运行 Docker 镜像(挂载到 `/workspace/examples`)内的示例:
```
xhost +local:root # Allow the container to access the display
docker run --gpus all --rm -it \
-e DISPLAY=$DISPLAY \
-e LOCAL_USER_ID="$(id -u)" \
-v /dev/dri:/dev/dri \
-v /tmp/.X11-unix/:/tmp/.X11-unix \
-v $(pwd):/workspace \
--name genesis genesis:latest
```
### AMD 用户
AMD 用户可以使用 `docker/Dockerfile.amdgpu` 文件来使用 Genesis,该文件通过运行以下命令构建:
```
docker build -t genesis-amd -f docker/Dockerfile.amdgpu docker
```
然后可以通过运行以下命令来使用:
```
docker run -it --network=host \
--device=/dev/kfd \
--device=/dev/dri \
--group-add=video \
--ipc=host \
--cap-add=SYS_PTRACE \
--security-opt seccomp=unconfined \
--shm-size 8G \
-v $PWD:/workspace \
-e DISPLAY=$DISPLAY \
genesis-amd
```
这些示例将可从 `/workspace/examples` 访问。注意:AMD 用户应使用 ROCm (HIP) 后端。这意味着您将需要调用 `gs.init(backend=gs.amdgpu)` 来初始化 Genesis。
## 支持
- 通过 GitHub [Issues](https://github.com/Genesis-Embodied-AI/genesis-world/issues) 报告错误或请求功能。
- 在 GitHub [Discussions](https://github.com/Genesis-Embodied-AI/genesis-world/discussions) 上加入讨论或提出问题。
- 实时聊天:[Discord](https://discord.gg/nukCuhB47p)。
## 许可与致谢
Genesis 源代码采用 Apache 2.0 授权。
Genesis 的开发得益于以下开源项目:
- [Taichi](https://github.com/taichi-dev/taichi):[Quadrants](https://github.com/Genesis-Embodied-AI/quadrants) 于 2025 年 6 月分叉的原始编译器。感谢 Taichi 团队多年来的技术支持。
- [libuipc](https://github.com/spiriMirror/libuipc):IPC 求解器后端。
- [FluidLab](https://github.com/zhouxian/FluidLab):参考 MPM 求解器实现。
- [SPH_Taichi](https://github.com/erizmr/SPH_Taichi):参考 SPH 求解器实现。
- [Ten Minute Physics](https://matthias-research.github.io/pages/tenMinutePhysics/index.html) 和 [PBF3D](https://github.com/WASD4959/PBF3D):参考 PBD 求解器实现。
- [MuJoCo](https://github.com/google-deepmind/mujoco):刚体动力学参考。
- [libccd](https://github.com/danfis/libccd):碰撞检测参考。
- [PyRender](https://github.com/mmatl/pyrender):基于光栅化的渲染器。
- [LuisaCompute](https://github.com/LuisaGroup/LuisaCompute) 和 [LuisaRender](https://github.com/LuisaGroup/LuisaRender):光线追踪 DSL。
- [Madrona](https://github.com/shacklettbp/madrona) 和 [Madrona-mjx](https://github.com/shacklettbp/madrona_mjx):批量渲染器后端
## 引用
如果您在研究中使用 Genesis,请考虑引用:
```
@article{
genesis2026genesisworld,
author = {Genesis AI Team},
title = {The Role of Simulation in Scalable Robotics, Genesis World 1.0, and the Path Forward},
journal = {Genesis AI Blog},
month = {May},
year = {2026},
url = {https://www.genesis.ai/blog/the-role-of-simulation-in-scalable-robotics-genesis-world-10-and-the-path-forward},
}
```
```
@misc{
Genesis,
author = {Genesis Authors},
title = {Genesis: A Generative and Universal Physics Engine for Robotics and Beyond},
month = {December},
year = {2024},
url = {https://github.com/Genesis-Embodied-AI/genesis-world}
}
```
| | |
| [FEM:硬与软约束](./examples/fem_hard_and_soft_constraint.py) | [MPM:教程](./examples/tutorials/mpm.py) | [MPM:沙轮](./examples/coupling/sand_wheel.py) |
| | | |
| [SPH:刚体](./examples/coupling/sph_rigid.py) | [SPH:+ MPM](./examples/coupling/sph_mpm.py) | [PBD:液体](./examples/pbd_liquid.py) |
| | | |
| [PBD:布料](./examples/tutorials/pbd_cloth.py) | [Stable Fluid:烟雾](./examples/smoke.py) | [IPC:机器人布料遥操作](./examples/IPC_Solver/ipc_robot_cloth_teleop.py) |
| | | |
| [耦合器:刚体上的布料](./examples/coupling/cloth_on_rigid.py) | [耦合器:刚体 + MPM](./examples/coupling/rigid_mpm_attachment.py) | [耦合器:切割龙](./examples/coupling/cut_dragon.py) |
| | | |
| [耦合器:水车](./examples/coupling/water_wheel.py) | [耦合器:冲刷方块](./examples/coupling/flush_cubes.py) | [SAP:Franka 抓取刚体方块](./examples/sap_coupling/franka_grasp_rigid_cube.py) |
| | | |
### 渲染
Genesis 暴露了三种作为相机传感器的渲染路径:内置(Nyx / Luisa / Pyrender)以及托管在 [genesis-nyx](https://github.com/Genesis-Embodied-AI/genesis-nyx/tree/main/examples) 中的详细 Nyx 演练。
| | | |
|---|---|---|
| [跟随实体](./examples/rendering/follow_entity.py) | [动画相机](./examples/rendering/moving_camera.py) | [Nyx:你好](https://github.com/Genesis-Embodied-AI/genesis-nyx/blob/main/examples/01_hello_nyx.py) |
| | | |
| [Nyx:附带相机](https://github.com/Genesis-Embodied-AI/genesis-nyx/blob/main/examples/02_attached_camera.py) | [Nyx:PBR 材质](https://github.com/Genesis-Embodied-AI/genesis-nyx/blob/main/examples/03_materials.py) | [Nyx:灯光类型](https://github.com/Genesis-Embodied-AI/genesis-nyx/blob/main/examples/04_light_types.py) |
| | | |
| [Nyx:3D 高斯泼溅](https://github.com/Genesis-Embodied-AI/genesis-nyx/blob/main/examples/05_gaussian_splat.py) | [Nyx:物体拾取](https://github.com/Genesis-Embodied-AI/genesis-nyx/blob/main/examples/06_object_picking.py) | [Nyx:多相机多环境](https://github.com/Genesis-Embodied-AI/genesis-nyx/blob/main/examples/07_multi_camera_multi_env.py) |
| | | |
### 仿真接口
| | | |
|---|---|---|
| [控制机器人](./examples/tutorials/control_your_robot.py) | [GUI:ImGui 关节控制](./examples/gui/imgui_joint_control.py) | [异构环境](./examples/rigid/heterogeneous_simulation.py) |
| | | |
| [域随机化](./examples/rigid/domain_randomization.py) | [传感器:深度相机](./examples/sensors/depth_camera_custom_vverts.py) | [传感器:IMU](./examples/sensors/imu_franka.py) |
| | | |
| [传感器:lidar](./examples/sensors/lidar_teleop.py) | [传感器:触觉沙盒](./examples/sensors/tactile_sandbox.py) | [传感器:接触力](./examples/sensors/contact_force_go2.py) |
| | | |
| [传感器:表面距离](./examples/sensors/surface_distance_shadowhand.py) | [传感器:温度网格](./examples/sensors/temperature_grid.py) | [GUI:调试绘制](./examples/tutorials/draw_debug.py) |
| | | |
| [GUI:网格点拾取器]( | | |
| [批量 IK](./examples/tutorials/batched_IK.py) | [无人机](./examples/drone/hover_train.py) | [进阶:蠕虫](./examples/tutorials/advanced_worm.py) |
| | | |
## 快速安装
### 使用 pip
请先按照[官方说明](https://pytorch.org/get-started/locally/)安装 **PyTorch**。
然后,通过 PyPI 安装 Genesis:
```
pip install genesis-world # Requires Python>=3.10,<3.14;
```
要获取目前的最新版本,请通过 `pip install --upgrade pip` 确保您的 `pip` 是最新的,然后运行以下命令:
```
pip install git+https://github.com/Genesis-Embodied-AI/genesis-world.git
```
请注意,该包仍必须手动更新才能与 main 分支同步。
鼓励寻求贡献的用户以可编辑模式安装 Genesis。首先,确保已卸载 `genesis-world`,然后克隆代码仓库并在本地安装:
```
git clone https://github.com/Genesis-Embodied-AI/genesis-world.git
cd genesis-world
pip install -e ".[dev]"
```
建议在移动 HEAD 之后系统地执行 `pip install -e ".[dev]"` ,以确保所有依赖项和入口点都是最新的。
### 可选附加项
| | |
|---|---|
| IPC 求解器 (uipc 后端) | `pip install pyuipc` *(Linux / Windows x86, NVIDIA GPU)* |
| Nyx 渲染器 | `pip install gs-nyx` — 参见 [genesis-nyx](https://github.com/Genesis-Embodied-AI/genesis-nyx) |
Quadrants 会随 Genesis 自动捆绑;无需额外安装。独立 wheel 包(`pip install quadrants`)的文档位于 [Quadrants](https://github.com/Genesis-Embodied-AI/quadrants),供希望在 Genesis 之外使用该编译器的用户参考。
### 使用 uv
[uv](https://docs.astral.sh/uv/) 是一个快速的 Python 包和项目管理器。
**安装 uv:**
```
# 在 macOS 和 Linux 上
curl -LsSf https://astral.sh/uv/install.sh | sh
# 在 Windows 上
powershell -ExecutionPolicy ByPass -c "irm https://astral.sh/uv/install.ps1 | iex"
```
**使用 uv 快速开始:**
```
git clone https://github.com/Genesis-Embodied-AI/genesis-world.git
cd genesis-world
uv sync
```
然后为您的平台安装 PyTorch:
```
# NVIDIA GPU(以 CUDA 12.6 为例)
uv pip install torch --index-url https://download.pytorch.org/whl/cu126
# 仅 CPU (Linux/Windows)
uv pip install torch --index-url https://download.pytorch.org/whl/cpu
# Apple Silicon (Metal/MPS)
uv pip install torch
```
运行示例:
```
uv run examples/rigid/single_franka.py
```
## Docker
如果您想从 Docker 使用 Genesis,您可以首先构建 Docker 镜像,如下所示:
```
docker build -t genesis -f docker/Dockerfile docker
```
然后您可以运行 Docker 镜像(挂载到 `/workspace/examples`)内的示例:
```
xhost +local:root # Allow the container to access the display
docker run --gpus all --rm -it \
-e DISPLAY=$DISPLAY \
-e LOCAL_USER_ID="$(id -u)" \
-v /dev/dri:/dev/dri \
-v /tmp/.X11-unix/:/tmp/.X11-unix \
-v $(pwd):/workspace \
--name genesis genesis:latest
```
### AMD 用户
AMD 用户可以使用 `docker/Dockerfile.amdgpu` 文件来使用 Genesis,该文件通过运行以下命令构建:
```
docker build -t genesis-amd -f docker/Dockerfile.amdgpu docker
```
然后可以通过运行以下命令来使用:
```
docker run -it --network=host \
--device=/dev/kfd \
--device=/dev/dri \
--group-add=video \
--ipc=host \
--cap-add=SYS_PTRACE \
--security-opt seccomp=unconfined \
--shm-size 8G \
-v $PWD:/workspace \
-e DISPLAY=$DISPLAY \
genesis-amd
```
这些示例将可从 `/workspace/examples` 访问。注意:AMD 用户应使用 ROCm (HIP) 后端。这意味着您将需要调用 `gs.init(backend=gs.amdgpu)` 来初始化 Genesis。
## 支持
- 通过 GitHub [Issues](https://github.com/Genesis-Embodied-AI/genesis-world/issues) 报告错误或请求功能。
- 在 GitHub [Discussions](https://github.com/Genesis-Embodied-AI/genesis-world/discussions) 上加入讨论或提出问题。
- 实时聊天:[Discord](https://discord.gg/nukCuhB47p)。
## 许可与致谢
Genesis 源代码采用 Apache 2.0 授权。
Genesis 的开发得益于以下开源项目:
- [Taichi](https://github.com/taichi-dev/taichi):[Quadrants](https://github.com/Genesis-Embodied-AI/quadrants) 于 2025 年 6 月分叉的原始编译器。感谢 Taichi 团队多年来的技术支持。
- [libuipc](https://github.com/spiriMirror/libuipc):IPC 求解器后端。
- [FluidLab](https://github.com/zhouxian/FluidLab):参考 MPM 求解器实现。
- [SPH_Taichi](https://github.com/erizmr/SPH_Taichi):参考 SPH 求解器实现。
- [Ten Minute Physics](https://matthias-research.github.io/pages/tenMinutePhysics/index.html) 和 [PBF3D](https://github.com/WASD4959/PBF3D):参考 PBD 求解器实现。
- [MuJoCo](https://github.com/google-deepmind/mujoco):刚体动力学参考。
- [libccd](https://github.com/danfis/libccd):碰撞检测参考。
- [PyRender](https://github.com/mmatl/pyrender):基于光栅化的渲染器。
- [LuisaCompute](https://github.com/LuisaGroup/LuisaCompute) 和 [LuisaRender](https://github.com/LuisaGroup/LuisaRender):光线追踪 DSL。
- [Madrona](https://github.com/shacklettbp/madrona) 和 [Madrona-mjx](https://github.com/shacklettbp/madrona_mjx):批量渲染器后端
## 引用
如果您在研究中使用 Genesis,请考虑引用:
```
@article{
genesis2026genesisworld,
author = {Genesis AI Team},
title = {The Role of Simulation in Scalable Robotics, Genesis World 1.0, and the Path Forward},
journal = {Genesis AI Blog},
month = {May},
year = {2026},
url = {https://www.genesis.ai/blog/the-role-of-simulation-in-scalable-robotics-genesis-world-10-and-the-path-forward},
}
```
```
@misc{
Genesis,
author = {Genesis Authors},
title = {Genesis: A Generative and Universal Physics Engine for Robotics and Beyond},
month = {December},
year = {2024},
url = {https://github.com/Genesis-Embodied-AI/genesis-world}
}
```