xterm-inator/MikroGuard
GitHub: xterm-inator/MikroGuard
MikroGuard 是一个基于 Web 的管理界面,用于简化 MikroTik 路由器上 WireGuard VPN 客户端的创建、撤销与实时监控。
Stars: 47 | Forks: 13
# MikroGuard
MikroGuard 是一个强大的基于 Web 的管理工具,旨在简化 MikroTik 路由器上 WireGuard VPN 客户端的管理。它简化了用户添加、访问撤销,并提供了实时连接统计信息。
| 登录 | 用户 | 连接 |
|----------------------------------------------------------------------------------------------------------|---------------------------------------------------------------------------------------------------------|---------------------------------------------------------------------------------------------------------------|
| 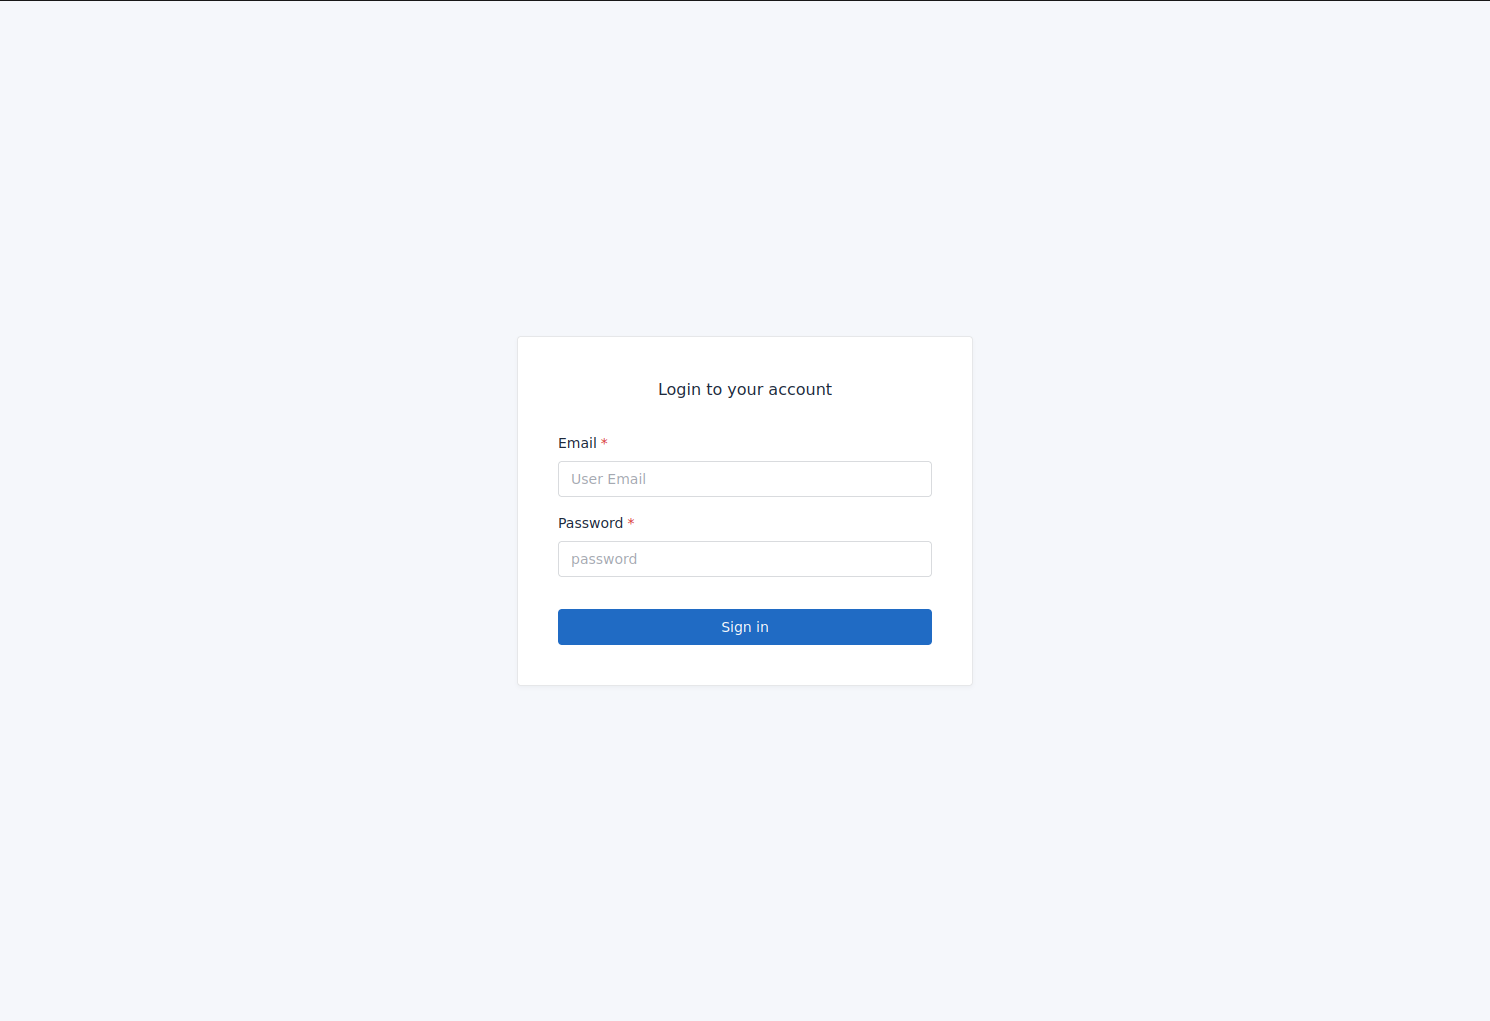 | 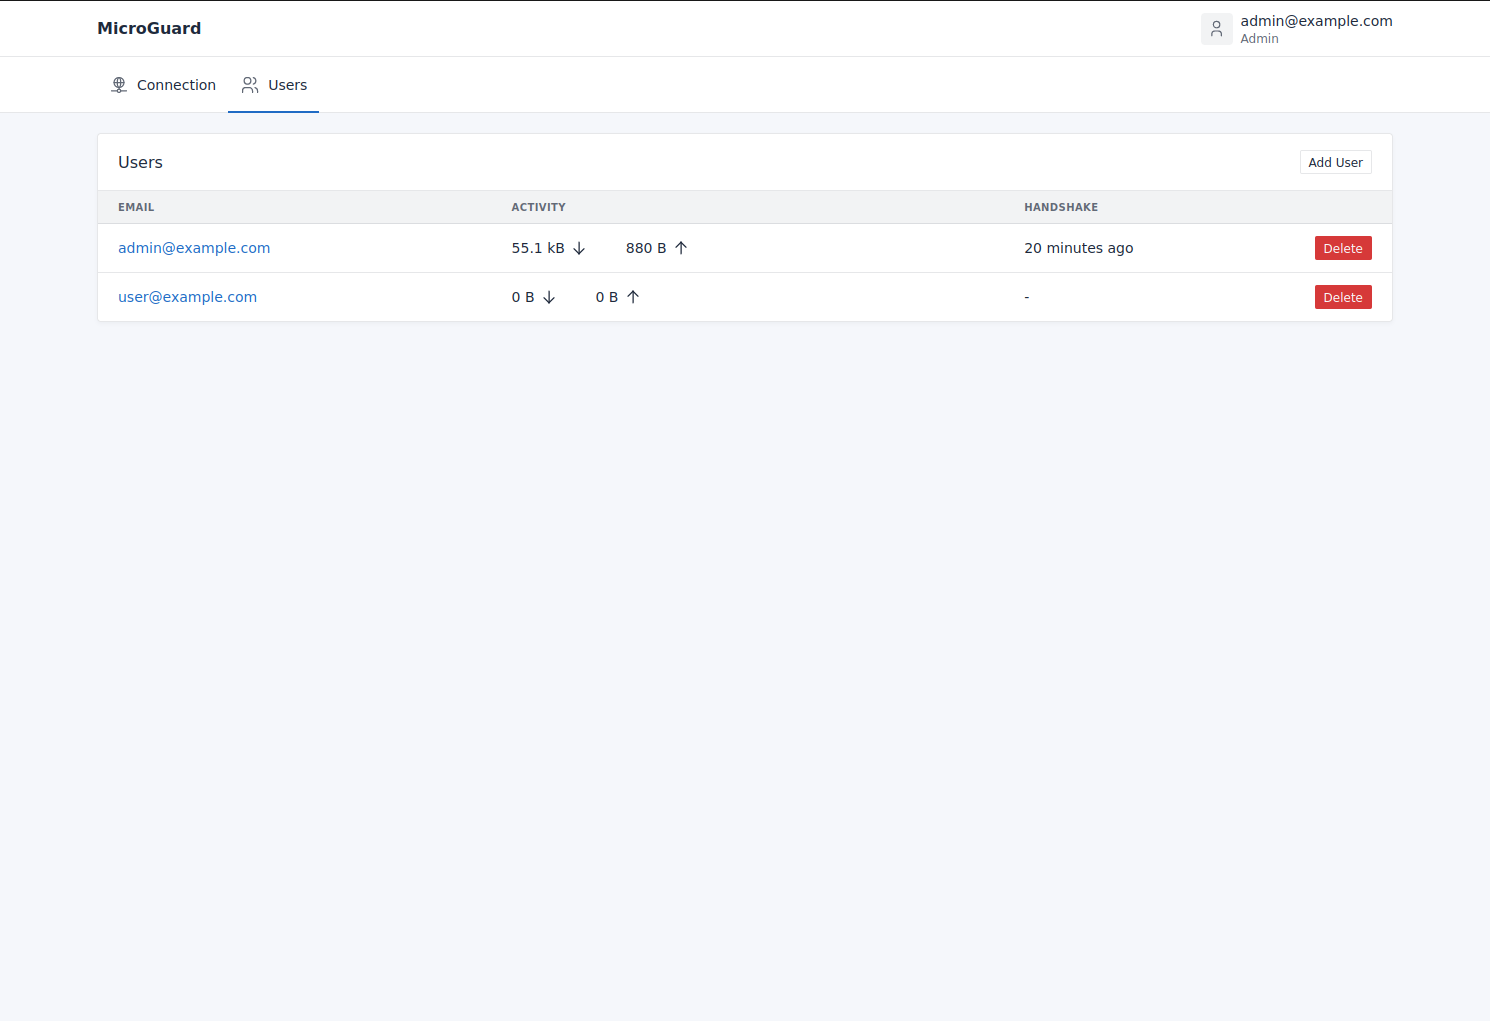 | 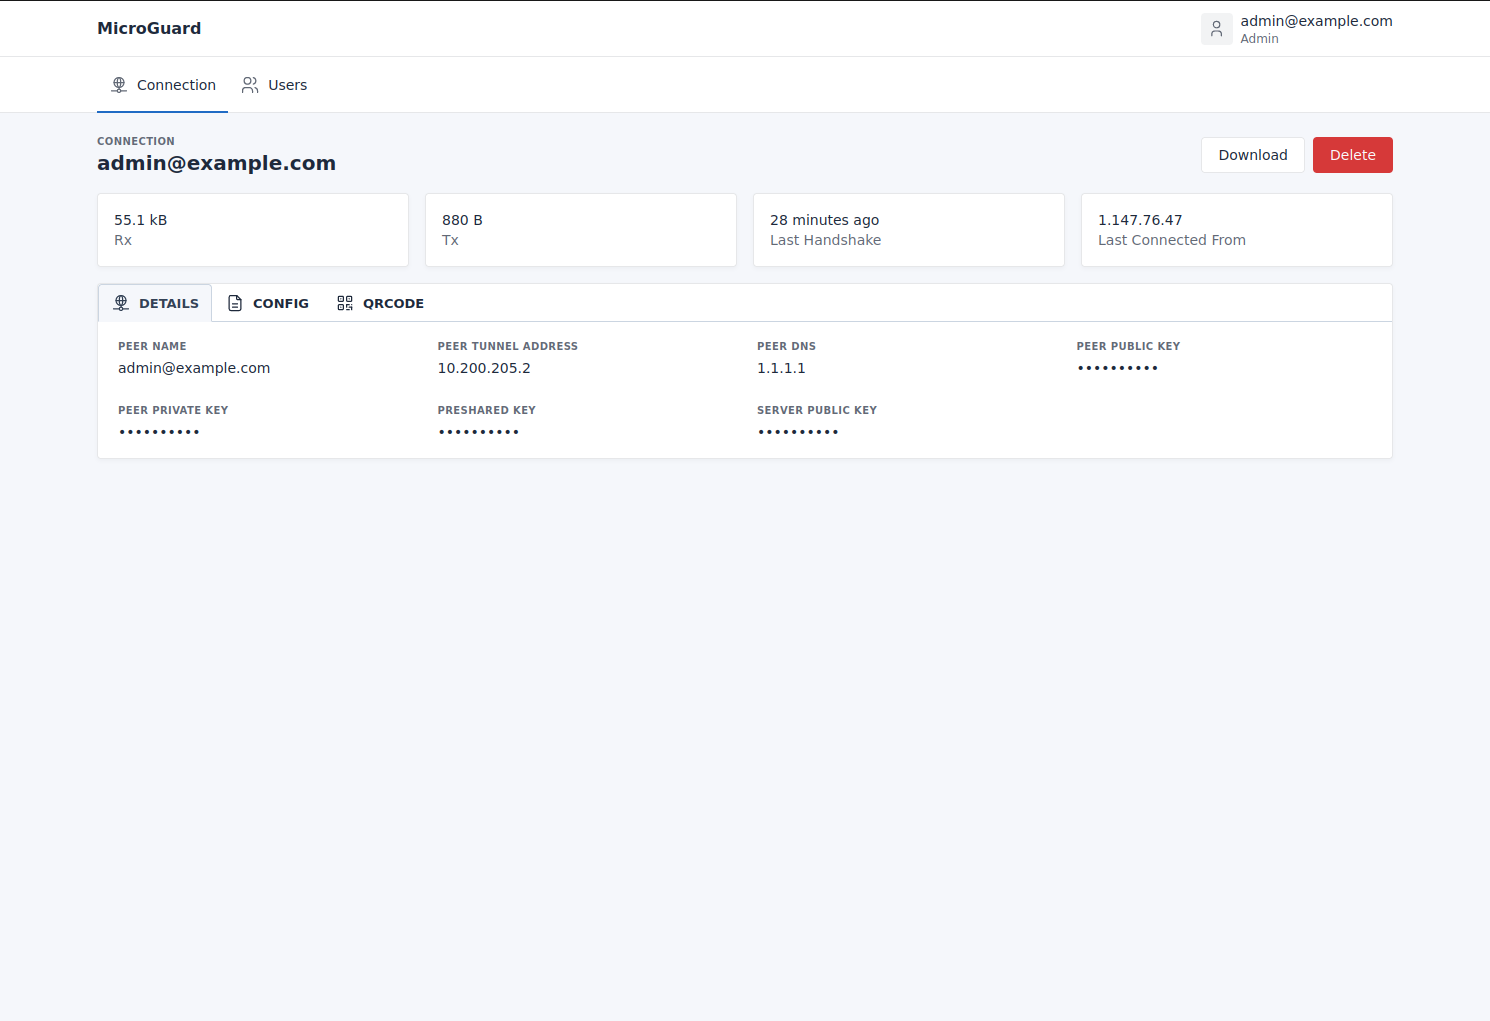 |
## 目录
- [功能](#features)
- [要求](#requirements)
- [安装说明](#setup)
- [为 MikroGuard 在 MikroTik 上添加用户](#adding-a-user-to-mikrotik-for-mikroguard)
- [为 MikroGuard 创建 Road Warrior WireGuard 接口](#creating-a-road-warrior-wireguard-interface-for-mikroguard)
- [服务端安装](#server-installation)
- [使用 Docker Compose 进行本地开发和测试](#local-development-and-testing-with-docker-compose)
- [故障排除](#troubleshooting)
- [贡献](#contributing)
- [许可证](#license)
## 功能
- **客户端管理**:简化 MikroTik 路由器上 WireGuard 客户端的创建和管理。
- **实时监控**:获取实时连接统计信息和使用洞察。
- **访问控制**:轻松授予或撤销单个客户端的访问权限。
- **Google SSO**:使用 Google 的单点登录 (SSO) 系统进行安全登录。
## 要求
- 运行 RouterOS 7.0 或更高版本的 MikroTik 路由器。
- 运行 MikroGuard 服务端的 Docker。
## 自检
如果您想在授予权限之前检查此程序将在您的路由器上运行哪些操作,请查看 'api/app/RouterOS/WireGuard.php' 和 'api/app/RouterOS/IPAddress.php' 文件。
这些文件包含了对路由器的所有访问操作,因此您可以查看所运行的命令。
## 安装说明
### 为 MikroGuard 在 MikroTik 上添加用户
**使用 Winbox**:
1. 使用 Winbox 登录到您的 MikroTik 路由器。
2. 导航到“System”菜单并选择“Users”。
3. 点击“Groups”选项卡。
4. 点击“Add New”按钮创建一个新的用户组。
5. 为该组输入一个名称,例如“MikroGuard-group”,然后点击“OK”按钮。
6. 在“Permissions”选项卡中,为该组选择所需的权限。对于 MikroGuard,该用户组应具有读取、写入和 API 访问权限。
7. 点击“Apply”按钮保存更改。
8. 点击“Users”选项卡。
9. 输入用户的详细信息,例如他们的用户名和密码。
11. 在“Groups”选项卡中,选择您刚刚创建的“MikroGuard-group”组。
12. 点击“Apply”按钮保存更改。
**使用命令行**:
要设置新的用户组和用户,请输入:
```
/user group add name=MikroGuard-group policy=local,read,write,test,api,winbox,password
```
输入以下命令以创建一个新用户:
```
/user add name=username group=MikroGuard-group password=userpassword
```
### 为 MikroGuard 创建 Road Warrior WireGuard 接口
1. 通过 Winbox 访问您的 MikroTik 路由器。
2. 转到“WireGuard”>“Add”。
3. 标记接口(例如“wireguard road warrior”)并点击 Apply。
4. 记录新创建的 WireGuard 服务器的公钥,以备后续使用。
5. 转到“IP”>“Address”>“New”。
6. 添加您希望 WireGuard 客户端使用的子网地址,并选择 WireGuard 接口。
### 服务端安装
1. 确保您的服务器上已安装并运行 Docker。
2. 通过 [此生成器](https://generate-random.org/laravel-key-generator) 生成一个 app key,以便在接下来的命令中使用。
3. 使用以下方式部署 MikroGuard:
**Docker 命令**
```
docker run -d
--name MikroGuard
-p 8000:8000
-v /path/to/data:/opt/app/storage
-e APP_KEY=
-e GOOGLE_CLIENT_ID=
-e GOOGLE_CLIENT_SECRET=
-e GOOGLE_REDIRECT_URL='https://my.public.address/api/auth/oauth/google/callback'
-e ROUTEROS_HOST='192.168.0.1'
-e ROUTEROS_PORT='8728'
-e ROUTEROS_USER='wireguard'
-e ROUTEROS_PASS='wireguard pass'
-e ROUTEROS_WIREGUARD_INTERFACE='wireguard' #wireguard interface name
-e ROUTEROS_WIREGUARD_ENDPOINT='192.168.0.1:13231' #ip:port for wireguard interface
-e APP_URL='https://my.public.address'
ghcr.io/xterm-inator/mikroguard:latest
```
**Docker Compose**:
```
version: '3.8'
services:
MikroGuard:
image: ghcr.io/xterm-inator/mikroguard:latest
container_name: MikroGuard
restart: always
ports:
- 8000:8000
volumes:
- /path/to/data:/opt/app/storage
environment:
- APP_KEY=
- GOOGLE_CLIENT_ID=
- GOOGLE_CLIENT_SECRET=
- GOOGLE_REDIRECT_URL=https://my.public.address/api/auth/oauth/google/callback
- ROUTEROS_HOST=192.168.0.1
- ROUTEROS_PORT=8728
- ROUTEROS_USER=wireguard
- ROUTEROS_PASS=wireguard pass
- ROUTEROS_WIREGUARD_INTERFACE=wireguard
- ROUTEROS_WIREGUARD_ENDPOINT=192.168.0.1:13231
- APP_URL=https://my.public.address
```
**环境变量**:
这是最有用的环境变量列表。要查看所有可用变量,请查阅 api/config 文件
| 变量 | 描述 | 默认值 |
|-----------------------------------------|-------------------------------------------------------------------------------------------------------------------------------------|-----------------------|
| APP_KEY* | 主要用于加密的 app key,使用 [此生成器](https://generate-random.org/laravel-key-generator) 进行设置 | |
| APP_URL* | 访问此实例的 URL,可以是 localhost、IP 地址或域名,例如:http://localhost:8000 | http://localhost:8000 |
| GOOGLE_CLIENT_ID | Google OAuth Client ID(仅在使用 Google 身份验证时需要) | |
| GOOGLE_CLIENT_SECRET | Google OAuth Client Secret(仅在使用 Google 身份验证时需要) | |
| GOOGLE_REDIRECT_URL | Google OAuth Redirect Url,例如:https://my.public.address/api/auth/oauth/google/callback(仅在使用 Google 身份验证时需要) | |
| ROUTEROS_HOST* | 您的 MikroTik 路由器的 IP 地址 | |
| ROUTEROS_PORT* | 用于访问路由器的 API 端口 | |
| ROUTEROS_USER* | 登录路由器的用户 | |
| ROUTEROS_PASS* | 登录路由器使用的密码 | |
| ROUTEROS_WIREGUARD_INTERFACE* | WireGuard 接口名称,必须与在 MikroTik 路由器上创建的 WireGuard 接口名称匹配,例如:wireguard Road Warrior | |
| ROUTEROS_WIREGUARD_ENDPOINT* | 客户端用于连接到您 MikroTik 路由器上 WireGuard 服务器的公网 IP 及端口,例如:123.123.123.123:12345 | |
| ROUTEROS_WIREGUARD_SERVER_NAME | 提供给客户端的默认服务器名称,可以是任何内容 | WireGuard Server |
| ROUTEROS_WIREGUARD_DNS | 客户端使用的 DNS 服务器 | 1.1.1.1 |
| ROUTEROS_WIREGUARD_ALLOWED_IPS | 要转发的客户端 IP,默认为所有地址 | 0.0.0.0/0 |
| ROUTEROS_WIREGUARD_PERSISTENT_KEEPALIVE | WireGuard Persistent Keepalive | |
*必填项
## 初始用户
要创建初始用户,请运行:(将 admin@xterm.me 替换为您的邮箱)
```
docker compose exec MikroGuard php artisan app:create-user admin@xterm.me admin
```
## 使用 Docker Compose 进行本地开发和测试
为了方便本地开发和测试,我们引入了 Docker Compose。这允许开发人员在无需复杂设置的情况下在本地运行整个 MikroGuard 技术栈。
### 前置条件:
- Docker
- Docker Compose
- Git
### 步骤:
1. 克隆仓库:
使用 Git 将 MikroGuard 仓库克隆到您的本地机器:
git clone git@github.com:xterm-inator/MikroGuard.git
# 进入仓库目录:
cd MikroGuard
2. 设置环境变量:
在使用 Docker Compose 启动服务之前,您可能需要配置一些环境变量。复制示例环境文件,并根据需要调整设置:
cp api/.env.example api/.env
使用适当的值编辑 .env 文件。确保生成并为必要的密钥设置值。
3. 构建 Containers:
docker compose build --parallel
4. 安装依赖:
使用 docker run 需要设置一些依赖项:
docker compose run api composer install
docker compose run api npm i
docker compose run api php artisan key:generate
docker compose run api php artisan migrate
docker compose run vue npm i
5. 创建初始用户:
docker compose run api php artisan app:create-user admin@email.com admin
6. 使用 Docker Compose 运行:
使用 Docker Compose 启动 MikroGuard 技术栈:
docker compose up
这将构建并启动所有必需的 containers。完成后,应该可以通过 http://localhost:3000 访问 MikroGuard 界面。
7. 关闭和清理:
完成本地开发/测试后,您可以停止 Docker Compose 服务:
docker compose down
## 故障排除
### 错误:Session store not set on request
当浏览器从与在环境变量中设置的 APP_URL 不同的地址访问服务器时,通常会导致此错误。
尝试将其设置为您正在使用的地址,可以是 localhost、IP 地址或域名,例如 http://localhost:8000
## 许可证
MikroGuard 基于 GNU General Public License v3.0 授权。详细信息请参见 [LICENSE.md](LICENSE.md) 文件。
## Star History
[](https://www.star-history.com/#xterm-inator/MikroGuard&type=date&legend=top-left)
标签:Docker 部署, ffuf, MikroTik, VPN管理, Web界面, WireGuard, 网络运维, 请求拦截, 路由器配置