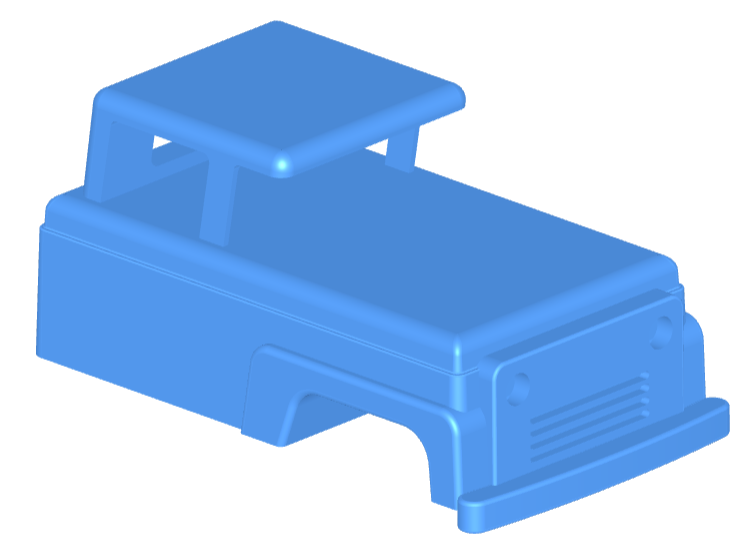
一个基于 Python 和 Open Cascade 内核的参数化 CAD 建模框架,让用户通过代码精确创建适用于 3D 打印、CNC 加工等制造场景的二维和三维模型。

[](https://build123d.readthedocs.io/en/latest/?badge=latest)
[](https://github.com/gumyr/build123d/actions/workflows/test.yml)
[](https://github.com/gumyr/build123d/actions/workflows/lint.yml)
[](https://github.com/gumyr/build123d/actions/workflows/mypy.yml)
[](https://codecov.io/gh/gumyr/build123d)

[](https://github.com/psf/black)
[](https://opensource.org/licenses/Apache-2.0)
[](https://pypi.org/project/build123d/)
[](https://pepy.tech/project/build123d)
[](https://pepy.tech/project/build123d)
[](https://pypi.org/project/build123d/)
[](https://zenodo.org/badge/latestdoi/510925389)
[文档](https://build123d.readthedocs.io/en/latest/index.html) |
[速查表](https://build123d.readthedocs.io/en/latest/cheat_sheet.html) |
[Discord](https://discord.com/invite/Bj9AQPsCfx) |
[讨论](https://github.com/gumyr/build123d/discussions) |
[问题](https://github.com/gumyr/build123d/issues ) |
[贡献](#contributing)
build123d 是一个基于 Python 的、参数化的 [边界表示][BREP] 建模框架,适用于 2D 和 3D CAD。它基于 [Open Cascade] 几何内核构建,提供了一个简洁且完全 Python 风格的接口,用于创建适用于 3D 打印、CNC 加工、激光切割和其他制造过程的精密模型。
## 特性
build123d 专为现代、可维护的“代码即 CAD”而设计,结合了清晰的架构与富有表现力的代数建模。它提供:
- 根据模式的不同,具有极少或没有内部状态,
- 具有明确定义操作的显式 1D、2D 和 3D 几何类,
- 通过子类化和函数组合实现可扩展性——无需猴子补丁,
- 符合标准的代码(PEP 8、mypy、pylint),并提供丰富的 pylance 类型提示,
- 深度 Python 集成——选择器作为列表,位置作为可迭代对象,以及自然转换(`Solid(shell)`、`tuple(Vector)`),
- 操作符驱动的建模(`obj += sub_obj`、`Plane.XZ * Pos(X=5) * Rectangle(1, 1)`),实现代数化、可读且可组合的设计逻辑,
- 支持导出为 [FreeCAD] 和 SolidWorks 等流行 CAD 工具的格式。
## 用法
尽管通配符导入通常是不良的做法,但 build123d 脚本通常是自包含的,因此将大量对象和方法导入到命名空间中是很常见的:
```
from build123d import *
```
### 构建 1D 形状
边、线(多条相连的边)和曲线(边和线的复合体)是 build123d 中可用的 1D 形状。可以通过带有两个类向量位置的 Line 对象来创建单条边:
```
line = Line((0, -3), (6, -3))
```
可以向初始线添加(或从中减去)额外的边和线。这些对象可以通过位置(`@`)和切线(`%`)操作符沿另一条线引用坐标,以指定输入向量:
```
line += JernArc(line @ 1, line % 1, radius=3, arc_size=180)
line += PolarLine(line @ 1, 6, direction=line % 1)
```
### 升级至 2D 和 3D
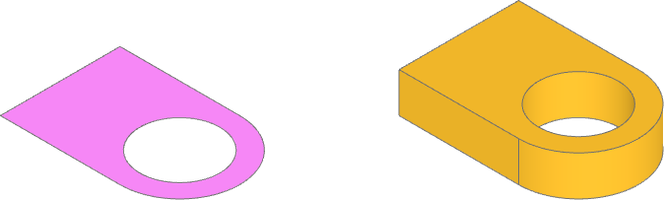
面、壳(多个相连的面)和草图(面和壳的复合体)是 build123d 中可用的 2D 形状。前面创建的线已被充分定义,可以通过 `make_hull` 闭合线并创建面:
```
sketch = make_hull(line.edges())
```
使用 `Pos`(一个类似于用于变换形状的 `Rot` 的位置对象)平移一个圆面,并从草图中减去。然后将此草图面拉伸为一个实体零件:
```
sketch -= Pos(6, 0, 0) * Circle(2)
part = extrude(sketch, amount= 2)
```
### 添加和修改零件
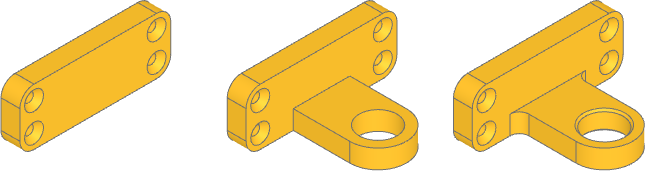
实体和零件(实体的复合体)是 build123d 中可用的 3D 形状。可以从额外的面创建第二个零件。平面也可用于定位和定向形状对象。许多对象提供了相对于对象原点对齐的便利功能:
```
plate_sketch = Plane.YZ * RectangleRounded(16, 6, 1.5, align=(Align.CENTER, Align.MIN))
plate = extrude(plate_sketch, amount=-2)
```
可以通过选择器从形状中提取形状拓扑,选择器会返回 ShapeList。ShapeList 提供了根据形状属性对形状进行排序、分组和过滤的方法,例如按面积查找面、沿轴选择位置,以及使用列表切片指定目标。从指定的面创建一个平面,以定位可迭代的位置,从而在第二个零件上放置多个对象,然后再将其添加到主体零件中:
```
plate_face = plate.faces().group_by(Face.area)[-1].sort_by(Axis.X)[-1]
plate -= Plane(plate_face) * GridLocations(13, 3, 2, 2) * CounterSinkHole(.5, 1, 2)
part += plate
```
ShapeList 选择器和操作符提供了强大的方法,可以通过长度/面积/体积、相对于轴或平面的方向以及几何类型等属性来指定形状特征:
```
part = fillet(part.edges().filter_by(lambda e: e.length == 2).filter_by(Axis.Z), 1)
bore = part.faces().filter_by(GeomType.CYLINDER).filter_by(lambda f: f.radius == 2)
part = chamfer(bore.edges(), .2)
```
### 构建器模式
前面的构造是通过**代数模式**接口完成的,该接口遵循无状态范式,其中每个对象都由代数操作符显式跟踪和修改。
**构建器模式**是 build123d 的一种替代接口,其中状态以类似于设计历史的方式被跟踪和结构化,并且每个维度都是独立的。操作能够感知来自 Build 上下文的挂起面和边,并且位置变换会应用于 Build 和 Locations 上下文中的所有子对象。虽然每个 Build 上下文都会跟踪状态,但像 `extrude` 这样的操作仍然可以选择接收显式的形状输入,而不是隐式使用挂起形状。构建器模式还为对象引入了 `mode` 参数,用于指定新形状如何与上下文结合:
```
with BuildPart() as part_context:
with BuildSketch() as sketch:
with BuildLine() as line:
l1 = Line((0, -3), (6, -3))
l2 = JernArc(l1 @ 1, l1 % 1, radius=3, arc_size=180)
l3 = PolarLine(l2 @ 1, 6, direction=l2 % 1)
l4 = Line(l1 @ 0, l3 @ 1)
make_face()
with Locations((6, 0, 0)):
Circle(2, mode=Mode.SUBTRACT)
extrude(amount=2)
with BuildSketch(Plane.YZ) as plate_sketch:
RectangleRounded(16, 6, 1.5, align=(Align.CENTER, Align.MIN))
plate = extrude(amount=-2)
with Locations(plate.faces().group_by(Face.area)[-1].sort_by(Axis.X)[-1]):
with GridLocations(13, 3, 2, 2):
CounterSinkHole(.5, 1)
fillet(edges().filter_by(lambda e: e.length == 2).filter_by(Axis.Z), 1)
bore = faces().filter_by(GeomType.CYLINDER).filter_by(lambda f: f.radius == 2)
chamfer(bore.edges(), .2)
```
### 扩展对象
可以从基础对象类创建新对象,以实现参数化的可重用性:
```
class Punch(BaseSketchObject):
def __init__(
self,
radius: float,
size: float,
blobs: float,
mode: Mode = Mode.ADD,
):
with BuildSketch() as punch:
if blobs == 1:
Circle(size)
else:
with PolarLocations(radius, blobs):
Circle(size)
if len(faces()) > 1:
raise RuntimeError("radius is too large for number and size of blobs")
add(Face(faces()[0].outer_wire()), mode=Mode.REPLACE)
super().__init__(obj=punch.sketch, mode=mode)
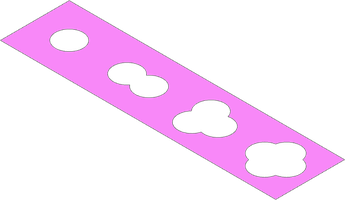
tape = Rectangle(20, 5)
for i, location in enumerate(GridLocations(5, 0, 4, 1)):
tape -= location * Punch(.8, 1, i + 1)
```
### 数据交换
build123d 可以导入和导出多种数据格式,以便与 2D 和 3D 设计工具、3D 打印切片软件和传统 CAM 进行数据交换:
```
svg = import_svg("spade.svg")
step = import_step("nema-17-bracket.step")
export_stl(part, "bracket.stl")
export_step(part_context.part, "bracket.step")
```
### 延伸阅读
更多[示例](https://build123d.readthedocs.io/en/latest/introductory_examples.html)和[教程](https://build123d.readthedocs.io/en/latest/tutorials.html)可在文档中找到。
## 安装
有关其他安装选项,请参阅[安装说明](https://build123d.readthedocs.io/en/latest/installation.html)
### 当前版本
建议大多数用户使用 `pip` 安装 build123d:
```
pip install build123d
```
如果收到有关依赖冲突的错误,请尝试将 pip 升级到最新版本后重新安装:
```
pip install --upgrade pip
```
### 预发布版本
build123d 正在积极开发中,最新的功能可在开发分支中找到:
```
pip install git+https://github.com/gumyr/build123d
```
### 查看器
build123d 最好配合查看器使用。最受欢迎的查看器是 [ocp_vscode](https://github.com/bernhard-42/vscode-ocp-cad-viewer),这是一个包含独立查看器和 VS Code 扩展的 Python 包。文档中还提供了其他[编辑器和查看器](https://build123d.readthedocs.io/en/latest/external.html#external)。
## 贡献
build123d 是一个快速发展的项目,我们欢迎所有贡献。无论您是想分享想法、报告错误还是实现新功能,我们都欢迎您的贡献!请参阅我们的 [CONTRIBUTING.md](CONTRIBUTING.md) 文件以开始。
## 致谢
build123d 源自 [CadQuery] 的部分内容,但经过了广泛的重新构建和重构,成为基于 [Open Cascade] 的独立框架。
## 许可证
本项目基于 [Apache License 2.0](LICENSE) 授权。