landaire/unfuck
GitHub: landaire/unfuck
unfuck 是一个 Python 2.7 字节码反混淆工具,通过污点追踪的虚拟机重新实现来清理混淆字节码,使后续反编译能够正常工作。
Stars: 203 | Forks: 11
# unfuck
遇到被搞乱的 Python 2.7 字节码?让我们用 `unfuck` 搞定它。
## 概述
unfuck 是一个用于反混淆 Python 2.7 字节码的实用工具和库。它本质上是一个带有污点追踪功能的 Python 虚拟机重新实现。unfuck 可以做的一些事情包括:
1. 移除不透明谓词
2. 死代码消除
3. 恢复部分丢失的函数名
4. 清理混淆的变量名
#1 和 #2 是 Python 反编译器在尝试重建原始 Python 源代码时最容易绊倒的两个最大难题。
unfuck 基本上可以让你的字节码从这样变成这样:
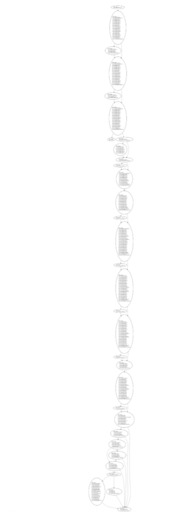
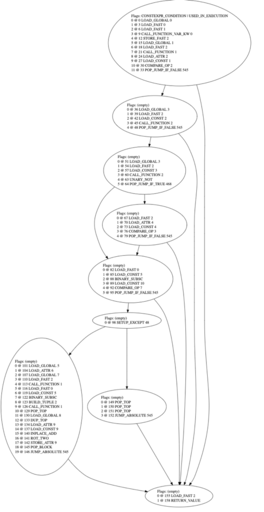
或者从这样变成这样:
[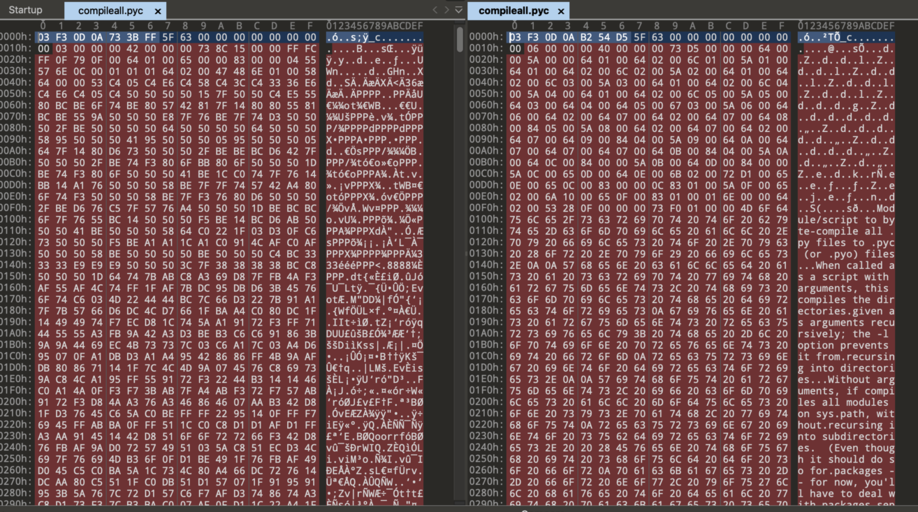](./img/obfuscated_bytecode.png)
没错,这些都是真实的现实案例。
### 实用 Wiki 资源
- [混淆技巧](https://github.com/landaire/unfuck/wiki/Obfuscation-Tricks)
- [反混淆步骤](https://github.com/landaire/unfuck/wiki/Deobfuscation-Passes)
- [调试失败的反编译](https://github.com/landaire/unfuck/wiki/Debugging-Failed-Decompilation)
## 用法
unfuck 既可以用作库,也可以用作命令行工具。
```
unfuck 0.2.0
USAGE:
unfuck [FLAGS] [OPTIONS] [graphs-dir] [SUBCOMMAND]
FLAGS:
--dry Dry run only -- do not write any files
-g Enable outputting code graphs to dot format
-h, --help Prints help information
-q Disable all logging
-V, --version Prints version information
-v Enable verbose logging
OPTIONS:
--decompiler Your favorite Python 2.7 bytecode decompiler. This program assumes the decompiler's
first positional argument is the file to decompile, and it prints the decompiled
output to stdout [env: UNFUCK_DECOMPILER=] [default: uncompyle6]
ARGS:
Input obfuscated file
Output file name or directory name. If this path is a directory, a file will be
created with the same name as the input. When the `strings-only` subcommand is
applied, this will be where the output strings file is placed
An optional directory for graphs to be written to [default: .]
SUBCOMMANDS:
help Prints this message or the help of the given subcommand(s)
strings-only
```
处理单个文件:
```
# deobfuscated.pyc 也可以是一个目录
unfuck obfuscated.pyc deobfuscated.pyc
```
你还可以提供额外的标志,将字符串转储到文件,或者转储可在 graphviz 中查看的 `dot` 图表:
```
# -g 用于打印 graphs
unfuck -g obfuscated.pyc deobfuscated.pyc
# 使用 strings-only 子命令仅用于 dumping 字符串 —— 不执行 deobfuscation
unfuck deobfuscated.pyc ./strings.csv strings-only
```
### 构建
unfuck 需要你的系统 `PATH` 中存在 Python 2.7。确保它存在后,你应该只需运行 `cargo build` 即可。如果由于某种原因找不到正确的解释器,请尝试将 `PYTHON_SYS_EXECUTABLE` 环境变量设置为你的 Python 2.7 解释器路径。
### 安装
`cargo install --force unfuck`
### 库用法
**注意:** unfuck 最初设计时并未考虑库的用法,因此它自带了多线程平台(在本例中为 Rayon)。
用法相当简单:
```
use std::convert::TryInto;
use std::fs::File;
let mut pyc_contents = vec![];
let pyc_file = File::open("obfuscated.pyc")?;
pyc_file.read_to_end(&mut pyc_contents)?;
// magic/moddate are specific to the PYC header and are required to be
// a valid PYC file
let magic = u32::from_le_bytes(pyc_contents[0..4].try_into().unwrap());
let moddate = u32::from_le_bytes(pyc_contents[4..8].try_into().unwrap());
let pyc_contents = &pyc_contents[8..];
// Use a standard Python 2.7 opcode table
let deobfuscator = unfuck::Deobfuscator::::new(pyc_contents);
let deobfuscator = if enable_graphs {
deobfuscator.enable_graphs()
} else {
deobfuscator
};
let deobfuscated_code = deobfuscator.deobfuscate()?;
let mut deobfuscated_file = File::create("deobfuscated.pyc")?;
deobfuscated_file.write_all(&magic.to_le_bytes()[..])?;
deobfuscated_file.write_all(&moddate.to_le_bytes()[..])?;
deobfuscated_file.write_all(deobfuscated_code.data.as_slice())?;
```
## 致谢
gabe_k, yrp, lpcvoid, 来自 WD disc 的小伙伴们, squif, ian, pie doom, saruhan
标签:Python, 云安全监控, 云资产清单, 代码分析, 凭证管理, 可视化界面, 字节码反混淆, 无后门, 逆向工程, 通知系统, 静态分析