c3rb3ru5d3d53c/binlex

GitHub: c3rb3ru5d3d53c/binlex

Binlex 是一款基于遗传学隐喻的二进制特征提取与相似性分析框架,用于大规模恶意软件样本的模式挖掘、YARA 规则生成和函数相似性比对。

Stars: 524 | Forks: 59

![build](https://static.pigsec.cn/wp-content/uploads/repos/2026/03/8896ef7159192230.svg) ![OS Linux](https://img.shields.io/badge/os-linux-brightgreen) ![OS Windows](https://img.shields.io/badge/os-windows-brightgreen) ![OS MacOS](https://img.shields.io/badge/os-macos-brightgreen) [![GitHub stars](https://img.shields.io/github/stars/c3rb3ru5d3d53c/binlex)](https://github.com/c3rb3ru5d3d53c/binlex/stargazers) [![Discord Status](https://img.shields.io/discord/915569998469144636?logo=discord)](https://discord.gg/UDBfRpxV3B) [![GitHub license](https://img.shields.io/github/license/c3rb3ru5d3d53c/binlex)](https://github.com/c3rb3ru5d3d53c/binlex/blob/master/LICENSE) ![GitHub all releases](https://img.shields.io/github/downloads/c3rb3ru5d3d53c/binlex/total)
Binlex logo

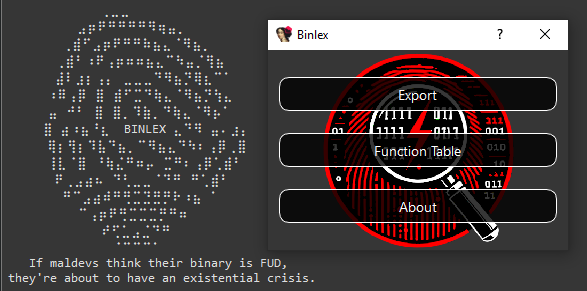
Binlex - A Binary Genetic Trait Lexer Framework

If maldevs think their binary is FUD, they're about to have an existential crisis.
**Binlex** 是一款供恶意软件分析人员和研究人员使用的工具,它从二进制文件中提取**指令**、**基本块**和**函数**,并将它们组织成由**基因组**、**染色体**、**等位基因对**和**基因**组成的结构化层次结构。🦠🔍 - 一个**基因组**代表二进制文件中的一条**指令**、一个**块**或一个**函数**。🧬 - 每个基因组包含一个或多个**染色体**,它们是指令、函数或块内的数据**模式**或**序列**。 - 一个**染色体**由**等位基因对**组成,每对代表**两个基因**,编码为一个**单字节**(拆分为两个**半字节**)。 - 一个**基因**是最小的单位,由一个**半字节**表示。 这种分层分解允许 **binlex** 通过将恶意软件的代码结构视为“DNA指纹”来分析和比较恶意软件二进制文件,从而更容易检测样本之间的模式、相似性和变异。 与依赖**纯 Python** 且速度较慢的工具不同🐢,**binlex** 的设计注重速度、简单性和灵活性。其**命令行界面**帮助分析人员在**成百上千个恶意软件样本**中搜索模式,从而节省**时间** ⏳ 和**资源** 💰。 对于恶意软件分析人员和逆向工程师,**binlex** 包含一个 IDA 插件和一个向量数据库(**binlex** 服务器),旨在识别相似的函数。 虽然 **BinDiff** 和 **Diaphora** 等工具擅长单文件比较,但 **binlex** 服务器的运作方式更像 **Lumina**,但采用了现代方法。**binlex** 服务器不依赖 FLIRT 签名,而是利用 **图神经网络 (GNN)** 的强大功能以及具有架构特定归一化的相似性哈希,以实现更高的精度和灵活性。 通过 **binlex** 服务器,您可以访问用户名、时间戳以及派生函数签名的样本哈希,这些是协作分析的关键洞察。 我们还为恶意软件分析人员和逆向工程师提供了一套命令行工具,以帮助加速威胁搜寻和检测中常见模式的搜寻工作。 对于开发者,**binlex** 提供了 **Rust API** 和 **Python 绑定**,以便在许可限制极少的情况下构建自定义工具。🔓 作为对抗恶意软件斗争的一部分,**binlex** 是免费使用的——只需从发布页面**下载二进制文件**即可。📥 ## 🚀 特性 最新版本的 **binlex** 提供以下令人惊叹的特性! | 特性 | 描述 | |---------------------------------|-------------------------------------------------------------------------------------------------| | 🌐 **平台** | - Windows 🪟
- MacOS 🍏
- Linux 🐧 | | 🌐 **格式** | - PE
- MachO
- ELF | | 🌐 **架构** | - AMD64
- I386
- CIL | | 🧵 **多线程** | - 🔒 线程安全的反汇编队列
- 🚄 高效的多线程工具以实现最大效率 | | ⚙️ **可定制的性能** | 开关特性以优化您的用例 | | 📉 **JSON 字符串压缩** | 通过 JSON 压缩节省内存 | | 🧩 **相似性哈希** | - 🔍 Minhash
- 🔒 TLSH
- 🔐 SHA256 | | 🧩 **函数符号** | - 使用 **blpdb**、**blelfsym** 或 **blmachosym** 或您自己的工具作为标准输入将函数符号传递给 **binlex** | | 🏷️ **标记** | 轻松组织的标记功能 | | 🎯 **通配符** | 非常适合生成 YARA 规则,现在分辨率已达半字节级别! | | **API** | - 🦀 Rust API
-Python API | | 🤖 **机器学习特性** | - 📊 归一化特征
- 🔍 向量数据库
- 📚 Jupyter Notebook
- 🧠 函数识别 | | 📂 **虚拟镜像** | - 虚拟镜像的高效映射缓存
- 🗄️ 兼容 ZFS / BTRFS
- 加速重复性任务和过滤
- 闪电般的速度 ⚡ | 通过缓存虚拟镜像,**binlex** 能够以更快的速度执行,使重复运行更快、更高效。 ## 构建 要构建 **binlex**,您需要 Rust。 ### Linux, MacOS 和 Windows 在 Linux 和 MacOS 上安装非常简单。 ``` cargo build --release ``` ### Python 绑定 ``` cd src/bindings/python/ virtualenv -p python3 venv/ source venv/bin/activate pip install maturin[patchelf] maturin develop python >> import binlex ``` ### 打包 要为各种平台构建包,请使用 `Makefile`。 ``` make zst # Make Arch Linux Package make deb # Make Debian Package make wheel # Make Python Wheel ``` 生成的包将位于 `target/` 目录中。 ### IDA 插件 安装 IDA 插件很容易,只需确保在 IDA 的 Python 环境中安装了 Python 绑定。 现在将 **binlex** 插件的目录复制到您的插件目录。 ``` mkdir -p ~/.idapro/plugins/ cp -r scripts/plugins/ida/binlex/ ~/.idapro/plugins/ cd ~/.idaapro/plugins/binlex/ pip install -r requirements.txt ``` 您还需要确保服务器正在运行,建议使用 GPU 硬件以加快 GNN 推理速度,但这并非必需。 ``` cd scripts/blserver/ make -C configs/ docker-compose up -d ``` 完成后,以下服务将可用。 | **服务名称** | **描述** | **URL** | |------------------------------|---------------------------------------------|-----------------------------------------| | Binlex Server | API 文档 | `https://127.0.0.1/swagger` | | Attu Milvus 向量数据库 | Attu Milvus 向量数据库 UI | `https://127.0.0.1:8443` | | MinIO | MinIO 对象存储 | `https://127.0.0.1:7443` | | JupyterHub | JupyterHub Web GUI | `https://127.0.0.1:6443` | 默认 API 密钥是 `39248239c8ed937d6333a41874f1c8e310c5070703af30c06e67b0d308cb82c5`,您可以将其与您的 IDA 插件一起使用。 打开 IDA 后,您应该会看到 **binlex** 的欢迎消息。

Binlex IDA Plugin

使用 IDA 插件,您拥有多种功能,可帮助您编写 YARA 规则和进行相似性分析。 **主菜单:** - 导出数据库(导出为 JSON) - 索引数据库 - 搜索数据库(搜索并应用函数名称) - 函数(函数表) - 导出字节颜色映射(将字节颜色映射保存为 SVG) - JSON 查询(在 IDA 内部进行 jq 查询) **反汇编上下文菜单:** - 复制 YARA 模式 - 复制 Hex - 从选择中复制 MinHash - 从选择中复制 TLSH - 扫描 MinHash - 扫描 TLSH 设置 API 密钥和 URL 后,它会保存在 IDA 注册表中,并在将来自动为您补全。 复制模式和复制 Hex 功能旨在帮助编写 YARA 规则,而复制相似性哈希和扫描则用于搜寻相似数据。 为了确保其他人可以使用同一服务器访问您的数据库,请单击 `Index Database`,这将把函数数据推送到服务器。 要查找函数名称,请单击 `Search Database`,一旦完成,它将填充一个表格,其中包含来自向量数据库的最佳匹配项,您可以将其应用到您的项目中。 ### 文档 ``` cargo doc ``` 您也可以打开文档。 ``` cargo doc --open ``` ## 二进制基因组、染色体、等位基因对和基因 在 **binlex** 中,使用了一组受遗传学启发的术语来描述和象征二进制代码的结构和特征。该术语反映了不同抽象与其遗传类比之间的关系: - **基因组**:代表正在分析的每个对象,例如函数或块。它封装了所有信息,包括元数据、染色体和其他属性。 - **染色体**:代表从块或函数中提取的核心模式或序列。染色体是识别二进制关键特征的蓝图,其中不包含内存寻址(由 `?` 等通配符表示,单个通配符代表单个基因)。 - **等位基因对**:染色体内部的一个单位,由**两个基因**组成。等位基因对是染色体的构建块,将基因组合成有意义的对。 - **基因**:遗传信息的最小单位,代表单个半字节数据(半字节)。 这些抽象之间的关系可以如下可视化: ``` Genome (function / block) └── Chromosome (pattern / sequence) └── AllelePair (two genes / single byte / two nibbles) └── Gene (single nibble) ``` ### 基因组示例 ``` { "type": "block", "architecture": "amd64", "address": 6442934577, "next": null, "to": [], "edges": 0, "prologue": false, "conditional": false, "chromosome": { "pattern": "4c8b47??498bc0", "feature": [4,12,8,11,4,7,4,9,8,11,12,0], "entropy": 2.2516291673878226, "sha256": "1f227bf409b0d9fbc576e747de70139a48e42edec60a18fe1e6efdacb598f551", "minhash": "09b8b1ad1142924519f601854444c6c904a3063942cda4da445721dd0703f290208f3e32451bf5d52741e381a13f12f9142b5de21828a00b2cf90cf77948aac4138443c60bf77ec31199247042694ebb2e4e14a41369eddc7d9f84351be34bcf61458425383a03a55f80cbad420bb6e638550c15876fd0c6208da7b50816847e62d72b2c13a896f4849aa6a36188be1d4a5333865eab570e3939fab1359cbd16758f36fa290164d0259f83c07333df535b2e38f148298db255ac05612cae04d60bb0dd810a91b80a7df9615381e9dc242969dd052691d044287ac2992f9092fa0a75d970100d48362f62b58f7f1d9ec594babdf52f58180c30f4cfca142e76bf", "tlsh": null }, "size": 7, "bytes": "4c8b4708498bc0", "functions": {}, "number_of_instructions": 3, "entropy": 2.5216406363433186, "sha256": "84d4485bfd833565fdf41be46c1a499c859f0a5f04c8c99ea9c34404729fd999", "minhash": "20c995de6a15c8a524fa7e325a6e42b217b636ab03b00812732f877f4739eeee41d7dde92ceac73525e541f9091d8dc928f6425b84a6f44b3f01d17912ec6e8c6f913a760229f685088d2528447e40c768c06d680afe63cb219a1b77a097f679122804dd5a1b9d990aa2579e75f8ef201eeb20d5650da5660efa3a281983a37f28004f9f2a57af8f81728c7d1b02949609c7ad5a30125ff836d8cc3106f2531f306e679a11cabf992556802a3cb2a75a7fe3773e37e3d5ab107a23bf22754aee15a5f41056859b06120f86cb5d39071425855ec90628687741aa0402030d73e04bc60adb0bd2430560442c4309ae258517fc1605438c95485ac4c8621026a1bb", "tlsh": null, "contiguous": true, "attributes": [ { "type": "tag", "value": "corpus:malware" }, { "type": "tag", "value": "malware:lummastealer" }, { "entropy": 6.55061550644311, "sha256": "ec1426109420445df8e9799ac21a4c13364dc12229fb16197e428803bece1140", "size": 725696, "tlsh": "T17AF48C12AF990595E9BBC23DD1974637FAB2B445232047CF426489BD0E1BBE4B73E381", "type": "file" } ] } ``` 鉴于此 JSON 基因组示例。 - **基因组**:描述块的 JSON 对象,包括其元数据、染色体和属性。 - **染色体**:由模式 `"4c8b47??498bc0"` 描述 - **等位基因对**:`"4c"` 或 `"8b"` - **基因**:`"4"` 或 `"c"` 使用 **binlex** API 可以突变这些染色体、它们的等位基因对和基因,以促进遗传编程。 这种情况下的遗传编程有几个好处,包括但不限于: - 在给定数据集中搜寻新样本 - YARA 规则生成 ## 命令行 最简单的入门方法是使用命令行,并利用像 `jq` 这样的 JSON 过滤工具。 以下命令使用 `16` 个线程反汇编 `sample.dll`,相关特征是 JSON 对象(每行一个),并通过管道传输到 `jq` 进行过滤和美化。 要查看使用 **binlex** 命令行时可用的选项,请使用 `-h` 或 `--help`。 ``` A Binary Pattern Lexer Version: 2.0.0 Usage: binlex [OPTIONS] --input Options: -i, --input -o, --output -a, --architecture [amd64, i386, cil] -c, --config -t, --threads --tags --minimal -d, --debug --enable-instructions --enable-block-instructions --disable-hashing --disable-disassembler-sweep --disable-heuristics --enable-mmap-cache --mmap-directory -h, --help Print help -V, --version Print version Author: @c3rb3ru5d3d53c ``` 下面提供了一个使用命令行的简单示例。 ``` binlex -i sample.dll --threads 16 | jq ``` 请注意,**binlex** 会为您检测文件格式,目前支持 `PE`、`ELF` 和 `MACHO` 二进制格式。 ### 配置 首次执行 **binlex** 时,它会将配置文件存储在您的配置目录中的 `binlex/binlex.toml`。 **binlex** 根据您的操作系统查找默认配置目录,如下表所示,用于其配置。 | OS | 环境变量 | 示例 Binlex 配置路径 | |----------|---------------------------------------|----------------------------------------------------------------| | Linux | `$XDG_CONFIG_HOME` 或 `$HOME/.config` | `/home/alice/.config/binlex/binlex.toml` | | macOS | `$HOME/Library/Application Support` | `/Users/Alice/Library/Application Support/binlex/binlex.toml` | | Windows | `{FOLDERID_RoamingAppData}` | `C:\Users\Alice\AppData\Roaming\binlex\binlex.toml` | 下面提供了 **binlex** 的默认配置名称 `binlex.toml`。 ``` [general] threads = 16 minimal = false debug = false [formats.file.hashing.sha256] enabled = true [formats.file.hashing.tlsh] enabled = true minimum_byte_size = 50 threshold = 200 [formats.file.hashing.minhash] enabled = true number_of_hashes = 64 shingle_size = 4 maximum_byte_size_enabled = false maximum_byte_size = 50 seed = 0 threshold = 0.75 [formats.file.heuristics.features] enabled = true [formats.file.heuristics.entropy] enabled = true [instructions] enabled = false [instructions.hashing.sha256] enabled = true [instructions.hashing.tlsh] enabled = true minimum_byte_size = 50 threshold = 200 [instructions.hashing.minhash] enabled = true number_of_hashes = 64 shingle_size = 4 maximum_byte_size_enabled = false maximum_byte_size = 50 seed = 0 threshold = 0.75 [instructions.heuristics.features] enabled = true [instructions.heuristics.entropy] enabled = true [blocks] enabled = true [blocks.instructions] enabled = false [blocks.hashing.sha256] enabled = true [blocks.hashing.tlsh] enabled = true minimum_byte_size = 50 threshold = 200 [blocks.hashing.minhash] enabled = true number_of_hashes = 64 shingle_size = 4 maximum_byte_size_enabled = false maximum_byte_size = 50 seed = 0 threshold = 0.75 [blocks.heuristics.features] enabled = true [blocks.heuristics.entropy] enabled = true [functions] enabled = true [functions.blocks] enabled = true [functions.hashing.sha256] enabled = true [functions.hashing.tlsh] enabled = true minimum_byte_size = 50 threshold = 200 [functions.hashing.minhash] enabled = true number_of_hashes = 64 shingle_size = 4 maximum_byte_size_enabled = false maximum_byte_size = 50 seed = 0 threshold = 0.75 [functions.heuristics.features] enabled = true [functions.heuristics.entropy] enabled = true [chromosomes.hashing.sha256] enabled = true [chromosomes.hashing.tlsh] enabled = true minimum_byte_size = 50 threshold = 200 [chromosomes.hashing.minhash] enabled = true number_of_hashes = 64 shingle_size = 4 maximum_byte_size_enabled = false maximum_byte_size = 50 seed = 0 threshold = 0.75 [chromosomes.heuristics.features] enabled = true [chromosomes.heuristics.entropy] enabled = true [chromosomes.homologues] enabled = true maximum = 4 [mmap] directory = "/tmp/binlex" [mmap.cache] enabled = false [disassembler.sweep] enabled = true ``` 如果命令行选项不够用,配置文件提供了对所有选项的最精细控制。 如果您希望覆盖默认配置文件并指定另一个配置文件,请使用命令行参数。 ``` binlex -c config.toml -i sample.dll ``` 运行 **binlex** 时,它会使用配置文件,并在使用相应的命令行参数时覆盖任何设置。 ### 制作 YARA 规则 这是一个制作 YARA 规则的通用入门工作流程,我们从给定样本中获取 10 个唯一的通配符 YARA hex 字符串。 ``` binlex -i sample.dll --threads 16 | jq -r 'select(.size >= 16 and .size <= 32 and .chromosome.pattern != null) | .chromosome.pattern' | sort | uniq | head -10 016b??8b4b??8bc74c6bd858433b4c0b2c0f83c5?????? 01835404????c6836a0400????837e04?? 03c04c8d05????????4863c8420fb60401460fb64401018942??85c074?? 03c38bf0488d140033c9ff15????????488bd84885c075?? 03c6488d55??41ffc58945a?41b804000000418bcce8b8fd01??eb?? 03c6488d55??41ffc58945a?41b804000000418bcce8e3fb01??eb?? 03f7488d05????????4883c310483bd87c?? 03fb4c8bc6498bd7498bcc448d0c7d04000000e89409????8bd84885f6 03fe448bc6488bd3418bcee8d8e501??85ed 03fe897c24??397c24??0f867301???? ``` 将模式发送到 `uniq` 后,您还可以通过此 `awk` 命令将它们发送,以将块和函数合并为单个模式。 ``` awk 'NR==1{n=length($0);first=$0;delete v;split(tolower($0),v,"");cnt=1;next}{L=length($0);if(L==n){split(tolower($0),b,"");for(i=1;i<=n;i++){c=b[i];if(c=="?"){v[i]="?";next}if(!(i in v)||v[i]==""){v[i]=c}else if(v[i]!="?"&&v[i]!=c){v[i]="?"}};cnt++}else{if(cnt==1)print first;else{out="";for(i=1;i<=n;i++)out=out (i in v?v[i]:"?");print out};n=L;first=$0;delete v;split(tolower($0),v,"");cnt=1}}END{if(NR){if(cnt==1)print first;else{out="";for(i=1;i<=n;i++)out=out (i in v?v[i]:"?");print out}}}' ``` 这将处理如下输出: ``` 4883ec??ff15????????85c079??8bc84883c4??48ff25????????33c04883c4??c3 4883ec??ff15????????85c079??8bc8e80b2cfd??33c0eb??b8010000004883c4??c3 4883ec??ff15????????85c079??8bc8e82bbafb??33c0eb??b8010000004883c4??c3 4883ec??ff15????????85c079??8bc8e83b29fd??33c0eb??b8010000004883c4??c3 4883ec??ff15????????85c079??8bc8e87b93fd??33c0eb??b8010000004883c4??c3 4883ec??ff15????????85c079??8bc8e8ab93fd??33c0eb??b8010000004883c4??c3 4883ec??ff15????????85c079??8bc8ff15????????33c0eb??b8010000004883c4??c3 ``` 并合并相同长度的模式: ``` 4883ec??ff15????????85c079??8bc84883c4??48ff25????????33c04883c4??c3 4883ec??ff15????????85c079??8bc8e80b2cfd??33c0eb??b8010000004883c4??c3 4883ec??ff15????????85c079??8bc8ff15????????33c0eb??b8010000004883c4??c3 ``` 为了更进一步,您可以通过 `blyara` 工具运行它,以制作快速的 YARA 签名。 ``` binlex -i sample.dll --threads 16 | jq -r 'select(.size >= 16 and .size <= 32 and .chromosome.pattern != null) | .chromosome.pattern' | sort | uniq | head -10 | blyara -n example rule example { strings: $trait_0 = {016b??8b4b??8bc74c6bd858433b4c0b2c0f83c5??????} $trait_1 = {01835404????c6836a0400????837e04??} $trait_2 = {03c04c8d05????????4863c8420fb60401460fb64401018942??85c074??} $trait_3 = {03c38bf0488d140033c9ff15????????488bd84885c075??} $trait_4 = {03c6488d55??41ffc58945a?41b804000000418bcce8b8fd01??eb??} $trait_5 = {03c6488d55??41ffc58945a?41b804000000418bcce8e3fb01??eb??} $trait_6 = {03f7488d05????????4883c310483bd87c??} $trait_7 = {03fb4c8bc6498bd7498bcc448d0c7d04000000e89409????8bd84885f6} $trait_8 = {03fe448bc6488bd3418bcee8d8e501??85ed} $trait_9 = {03fe897c24??397c24??0f867301????} condition: 1 of them ``` 为了获得更好的结果,如果您使用 **binlex** IDA 插件或通过其他方式导出了**基因组**,您可以过滤函数起始前缀,如 `mw::`(代表 `malware`),这很常见。 ``` cat dump.json | jq -r 'select(.type == "function" and .size > 32 and (.attributes[] | .type == "symbol" and (.name | startswith("mw::")))) | .blocks[] | select(.size > 32) | .chromosome.pattern' | blyara -n example ``` ### 结合 Ghidra 使用 Binlex 要将 **binlex** 与 ghidra 一起使用,请使用 scripts 目录中的 `blghidra/blghidra.py` 脚本。 要利用 `Ghidra` 项目中的函数名和虚拟地址并将其提供给 **binlex**,请使用 `Ghidra` 安装目录中的 `analyzeHeadless` 脚本。 ``` ./analyzeHeadless \ \ \ -process sample.dll \ -noanalysis \ -postscript blghidra.py 2>/dev/null | grep -P "^{\"type" | binlex -i sample.dll ``` 请注意,`analyzeHeadless 会将日志消息打印到 `stdout`,并将其他日志输出打印到 `stderr`,这对与其他命令行实用程序的互操作性没有用处。 因此,要收集脚本的输出,必须使用 `2>/dev/null | grep -P "^{\"type\"` 进行过滤。 ### 结合 Rizin 使用 Binlex 要在 **binlex** 中利用 Rizin 函数检测和函数命名的强大功能,请在您的项目上运行 `rizin`,使用 `aflj` 以 JSON 格式列出函数。 然后将此输出通过管道传输到 `blrizin`,它将 `rizin` JSON 解析为 **binlex** 可以理解的格式。 此外,您可以将其与其他工具(如 `blpdb`)结合使用,以解析 PDB 符号以获取函数地址和名称。 然后您可以像通常使用 `jq` 一样进行任何解析,在这个示例中,我们计算 **binlex** 处理的函数,以查看我们是否检测到更多的函数。 ``` rizin -c 'aaa;aflj;' -q sample.dll | \ blrizin | \ blpdb -i sample.pdb | \ binlex -i sample.dll | \ jq 'select(.type == "function") | .address' | wc -l ``` **注意**:目前 `blrizin` 也与使用 `blrizin` 的 `radare2` 输出兼容。 ### 收集机器学习特征 如果您想进行一些机器学习,您可以像这样从 binlex 获取代表半字节的特征(不包含内存寻址)。 ``` binlex -i sample.dll --threads 16 | jq -r -c 'select(.size >= 16 and .size <= 32 and .signature.feature != null)| .signature.feature' | head -10 [4,9,8,11,12,0,4,1,11,9,0,3,0,0,1,15,0,0,4,5,3,3,12,0,8,5,13,2,4,8,8,11,13,0,4,1,0,15,9,5,12,0,4,8,15,15,2,5] [4,4,8,11,5,1,4,5,3,3,12,0,3,3,12,0,4,8,8,3,12,1,3,0,4,1,0,15,10,3,12,2] [4,8,8,3,14,12,4,12,8,11,12,10,4,4,8,9,4,4,2,4,11,2,0,1,4,4,0,15,11,7,12,1,8,10,12,10,14,8,5,11,4,8,8,3,12,4,12,3] [4,8,8,3,14,12,4,4,8,9,4,4,2,4,4,12,8,11,12,10,4,4,0,15,11,7,12,1,11,2,0,1,3,3,12,9,14,8,0,11,4,8,8,3,12,4,12,3] [4,0,5,3,4,8,8,3,14,12,15,15,1,5,8,11,12,8,8,11,13,8,15,15,1,5,8,11,12,3,4,8,8,3,12,4,5,11,12,3] [11,9,2,0,0,3,15,14,7,15,4,8,8,11,8,11,0,4,2,5,4,8,0,15,10,15,12,1,4,8,12,1,14,8,1,8,12,3] [8,11,0,12,2,5,11,8,2,0,0,3,15,14,7,15,4,8,12,1,14,1,2,0,4,8,8,11,4,8,12,1,14,0,0,8,4,8,15,7,14,1,4,8,8,11,12,2,12,3] [4,8,8,11,0,5,4,8,8,5,12,0,7,5,12,3,4,8,15,15,2,5] [4,8,8,11,0,13,3,3,12,0,3,8,8,1,11,0,0,8,0,15,9,5,12,0,12,3] [4,8,8,11,0,5,4,8,8,5,12,0,7,5,12,3,4,8,15,15,2,5] ``` 如果您想通过将它们归一化为 0 到 1 之间的浮点值来为您的机器学习模型优化这些特征,binlex 通过 `blscaler` 工具为您提供支持。 ``` binlex -i sample.dll --threads 16 | jq -r -c 'select(.size >= 16 and .size <= 32 and .signature.feature != null)' | blscaler --threads 16 | jq -c -r '.signature.feature' | head -1 [0.26666666666666666,0.6,0.5333333333333333,0.7333333333333333,0.8,0.0,0.26666666666666666,0.06666666666666667,0.7333333333333333,0.6,0.0,0.2,0.0,0.0,0.06666666666666667,1.0,0.0,0.0,0.26666666666666666,0.3333333333333333,0.2,0.2,0.8,0.0,0.5333333333333333,0.3333333333333333,0.8666666666666667,0.13333333333333333,0.26666666666666666,0.5333333333333333,0.5333333333333333,0.7333333333333333,0.8666666666666667,0.0,0.26666666666666666,0.06666666666666667,0.0,1.0,0.6,0.3333333333333333,0.8,0.0,0.26666666666666666,0.5333333333333333,1.0,1.0,0.13333333333333333,0.3333333333333333] ``` ### 具有压缩功能的虚拟镜像文件映射缓存 利用文件映射的强大功能来减少内存使用,但仍然从虚拟镜像中受益。 ``` # 安装 BTRFS sudo pacman -S btrfs-progs compsize # 启动时启用 Kernel Module echo "btrfs" | sudo tee /etc/modules-load.d/btrfs.conf # 重启 reboot # 创建虚拟镜像 Cache Storage Pool dd if=/dev/zero of=btrfs.img bs=1M count=2048 # 将其制作为 BTRFS mkfs.btrfs btrfs.img # 在 /tmp/ 中创建 Cache 目录 mkdir -p /tmp/binlex/ # 挂载 Cache(支持多种压缩选项) sudo mount -o compress=lzo btrfs.img /tmp/binlex/ # 运行 Binlex binlex -i sample.dll --threads 16 --enable-file-mapping --file-mapping-directory /tmp/binlex/ --enable-file-mapping-cache sudo compsize ec1426109420445df8e9799ac21a4c13364dc12229fb16197e428803bece1140 # 虚拟镜像 6GB vs 存储大小 192MB # 已处理 1 个文件,49156 个常规扩展区(49156 个引用),0 个内联。 # 类型 百分比 磁盘占用 未压缩大小 引用大小 # TOTAL 3% 192M 6.0G 6.0G # none 100% 384K 384K 384K # lzo 3% 192M 6.0G 6.0G ``` 可以将其设置为在磁盘上,或者如果 `/tmp/` 目录映射到 RAM。 当映射到 RAM 时,我们利用了虚拟镜像反汇编的优势,但没有额外的 RAM 惩罚,重复性任务的处理速度几乎翻倍。 由于 `btrfs` 在内核中抽象了对映射文件的访问,我们能够像访问任何映射文件一样访问它,但具有压缩的好处。 为了节省时间,如果您选择此选项,请让 `btrfs` 池的挂载在启动时发生,并让您的 **binlex** 配置文件设置为在挂载的池目录中首选虚拟镜像缓存。这种方法确保您不必每次都依赖命令行参数。 ## Binlex API **binlex** 项目的理念侧重于安全性、简单性、速度和可扩展性。 其中一部分是为开发者提供 API,以便编写他们自己的检测和搜寻逻辑。 目前,**binlex** 提供 Rust 和 Python 绑定。 ### Rust API Rust API 让入门变得简单 #### 原生 PE ``` use std::process; use binlex::Config; use binlex::formats::PE; use binlex::disassemblers::capstone::Disassembler; use binlex::controlflow::Graph; // Get Default Configuration let mut config = Config(); // Use 16 Threads for Multi-Threaded Operations config.general.threads = 16; // Read PE File let pe = PE.new("./sample.dll", config) .unwrap_or_else(|error| { eprintln!("{}", error); process::exit(1); }); // To check if DotNet PE use pe.is_dotnet() // Get Memory Mapped File let mapped_file = pe.image() .unwrap_or_else(|error| { eprintln!("{}", error); process::exit(1) }); // Get Mapped File Virtual Image let image = mapped_file .mmap() .unwrap_or_else(|error| { eprintln!("{}", error); process::exit(1); }); // Create Disassembler let disassembler = Disassembler(pe.architecture(), &image, pe.executable_virtual_address_ranges(), config) .unwrap_or_else(|error| { eprintln!("{}", error); process::exit(1); }); // Create Control Flow Graph let cfg = Graph(pe.architecture(), config); // Disassemble Control Flow disassembler.disassemble_controlflow(pe.entrypoint_virtual_addresses(), &mut cfg); ``` #### .NET (MSIL/CIL) PE ``` use std::process; use binlex::Config; use binlex::formats::PE; use binlex::disassemblers::custom::cil::Disassembler; use binlex::controlflow::Graph; // Get Default Configuration let mut config = Config(); // Use 16 Threads for Multi-Threaded Operations config.general.threads = 16; // Read PE File let pe = PE.new("./sample.exe", config) .unwrap_or_else(|error| { eprintln!("{}", error); process::exit(1); }); // To check if DotNet PE use pe.is_dotnet() // Get Memory Mapped File let mapped_file = pe.image() .unwrap_or_else(|error| { eprintln!("{}", error); process::exit(1) }); // Get Mapped File Virtual Image let image = mapped_file .mmap() .unwrap_or_else(|error| { eprintln!("{}", error); process::exit(1); }); // Create Disassembler let disassembler = Disassembler(pe.architecture(), &image, pe.dotnet_metadata_token_virtual_addresses(), pe.dotnet_executable_virtual_address_ranges(), config) .unwrap_or_else(|error| { eprintln!("{}", error); process::exit(1); }); // Create Control Flow Graph let cfg = Graph(pe.architecture(), config); // Disassemble Control Flow disassembler.disassemble_controlflow(pe.dotnet_entrypoint_virtual_addresses(), &mut cfg); ``` #### ELF ``` use std::process; use binlex::Config; use binlex::formats::ELF; use binlex::disassemblers::custom::cil::Disassembler; use binlex::controlflow::Graph; // Get Default Configuration let mut config = Config(); // Use 16 Threads for Multi-Threaded Operations config.general.threads = 16; // Read PE File let elf = ELF.new("./sample.exe", config) .unwrap_or_else(|error| { eprintln!("{}", error); process::exit(1); }); // Get Memory Mapped File let mapped_file = elf.image() .unwrap_or_else(|error| { eprintln!("{}", error); process::exit(1) }); // Get Mapped File Virtual Image let image = mapped_file .mmap() .unwrap_or_else(|error| { eprintln!("{}", error); process::exit(1); }); // Create Disassembler let disassembler = Disassembler(elf.architecture(), &image, elf.executable_virtual_address_ranges(), config) .unwrap_or_else(|error| { eprintln!("{}", error); process::exit(1); }); // Create Control Flow Graph let cfg = Graph(elf.architecture(), config); // Disassemble Control Flow disassembler.disassemble_controlflow(elf.entrypoint_virtual_addresses(), &mut cfg); ``` #### MACHO ``` use std::process; use binlex::Config; use binlex::formats::MACHO; use binlex::disassemblers::custom::cil::Disassembler; use binlex::controlflow::Graph; // Get Default Configuration let mut config = Config(); // Use 16 Threads for Multi-Threaded Operations config.general.threads = 16; // Read PE File let macho = MACHO.new("./sample.app", config) .unwrap_or_else(|error| { eprintln!("{}", error); process::exit(1); }); // Iterate the MACHO Fat Binary Slices for index in macho.number_of_slices() { // Get Memory Mapped File let mapped_file = macho.image(index) .unwrap_or_else(|error| { eprintln!("{}", error); process::exit(1) }); // Get Mapped File Virtual Image let image = mapped_file .mmap() .unwrap_or_else(|error| { eprintln!("{}", error); process::exit(1); }); // Create Disassembler let disassembler = Disassembler(macho.architecture(index), &image, macho.executable_virtual_address_ranges(index), config) .unwrap_or_else(|error| { eprintln!("{}", error); process::exit(1); }); // Create Control Flow Graph let cfg = Graph(macho.architecture(index), config); // Disassemble Control Flow disassembler.disassemble_controlflow(macho.entrypoints(index), &mut cfg); } ``` #### 访问遗传特征 ``` use binlex::controlflow::Instruction; use binlex::controlflow::Block; use binlex::controlflow::Function; for address in cfg.instructions.valid_addresses() { // Read Instruction from Control Flow instruction = Instruction(address, &cfg); // Print Instruction from Control Flow instruction.print(); } for address in cfg.blocks.valid_addresses() { // Read Block from Control Flow block = Block(address, &cfg); // Print Block from Control Flow block.print(); } for address in cfg.functions.valid_addresses() { // Read Function from Control Flow function = Function(address, &cfg); // Print Function from Control Flow function.print(); } ``` ### Python API binlex Python API 现在设计为抽象反汇编器和控制流图。 要反汇编 PE 内存映射镜像,请使用以下示例。 `examples/python/` 目录中有更多示例。 ### IDA Pro Headless Python 现在也可以在 Headless 模式下利用 IDA 的反汇编器。 ``` import json from binlex import Config from binlex.controlflow import Graph, Function from binlex.disassemblers.ida import IDA, Disassembler config = Config() ida = IDA() ida.open_database('sample.i64', run_auto_analysis=False) image = ida.image() cfg = Graph(ida.architecture(), config) disassembler = Disassembler( ida.architecture(), image.mmap(), {0: image.size()}, config ) disassembler.disassemble_controlflow(cfg) for address in cfg.queue_functions.valid_addresses(): function = Function(address, cfg) function = function.to_dict() function['attributes'] = ida.attributes(address) print(json.dumps(function)) ida.close_database() ``` #### 原生 PE ``` from binlex.formats import PE from binlex.disassemblers.capstone.x86 import Disassembler from binlex.controlflow import Graph from binlex import Config # 获取默认配置 config = Config() # 使用 16 个线程进行多线程操作 config.general.threads = 16 # 打开 PE 文件 pe = PE('./sample.exe', config) # 检查是否为 DotNet PE,使用 ps.is_dotnet() # 获取 Memory Mapped File mapped_file = pe.image() # 获取 Memory Map image = mapped_file.mmap() # 在 Mapped PE Image 和 PE Architecture 上创建 Disassembler disassembler = Disassembler(pe.architecture(), image, pe.executable_virtual_address_ranges(), config) # 创建 Controlflow Graph cfg = Graph(pe.architecture(), config) # 递归反汇编 PE Image 入口点 disassembler.disassemble_controlflow(pe.entrypoint_virtual_addresses(), cfg) ``` #### .NET (MSIL/CIL) PE ``` from binlex.formats import PE from binlex.disassemblers.custom.cil import Disassembler from binlex.controlflow import Graph from binlex import Config # 获取默认配置 config = Config() # 使用 16 个线程进行多线程操作 config.general.threads = 16 # 打开 PE 文件 pe = PE('./sample.exe', config) # 检查是否为 DotNet PE,使用 ps.is_dotnet() # 获取 Memory Mapped File mapped_file = pe.image() # 获取 Memory Map image = mapped_file.mmap() # 在 Mapped PE Image 和 PE Architecture 上创建 Disassembler disassembler = Disassembler(pe.architecture(), image, pe.dotnet_metadata_token_virtual_addresses(), pe.dotnet_executable_virtual_address_ranges(), config) # 创建 Controlflow Graph cfg = Graph(pe.architecture(), config) # 递归反汇编 PE Image 入口点 disassembler.disassemble_controlflow(pe.dotnet_entrypoint_virtual_addresses(), cfg) ``` #### ELF ``` from binlex.formats import ELF from binlex.disassemblers.capstone.x86 import Disassembler from binlex.controlflow import Graph from binlex import Config # 获取默认配置 config = Config() # 使用 16 个线程进行多线程操作 config.general.threads = 16 # 打开 ELF 文件 elf = ELF('./sample.so', config) # 获取 Memory Mapped File mapped_file = pe.image() # 获取 Memory Map image = mapped_file.mmap() # 在 Mapped ELF Image 和 ELF Architecture 上创建 Disassembler disassembler = Disassembler(elf.architecture(), image, elf.executable_virtual_address_ranges(), config) # 创建 Controlflow Graph cfg = Graph(elf.architecture(), config) # 递归反汇编 PE Image 入口点 disassembler.disassemble_controlflow(elf.entrypoint_virtual_addresses(), cfg) ``` #### MACHO ``` from binlex.formats import MACHO from binlex.disassemblers.capstone.x86 import Disassembler from binlex.controlflow import Graph from binlex import Config # 获取默认配置 config = Config() # 使用 16 个线程进行多线程操作 config.general.threads = 16 # 打开 ELF 文件 macho = MACHO('./sample.app', config) # MachO Fat Binary 可支持多种架构 for index in macho.number_of_slices(): # Get the Memory Mapped File mapped_file = macho.image(index) # Get the Memory Map image = mapped_file.mmap() # Create Disassembler on Mapped MACHO Image and MACHO Architecture disassembler = Disassembler(macho.architecture(index), image, macho.executable_virtual_address_ranges(index), config) # Create the Controlflow Graph cfg = Graph(macho.architecture(index), config) # Disassemble the MACHO Image Entrypoints Recursively disassembler.disassemble_controlflow(macho.entrypoints(index), cfg) ``` #### 解析控制流图 有时可能需要解析生成的控制流图。 在这种情况下,您可以使用以下技术。 ``` from binlex.controlflow import Instruction from binlex.controlflow import Block from binlex.controlflow import Function # 迭代有效指令 for address in cfg.queue_instructions.valid_addresses(): # Read Instruction from Control Flow instruction = Instruction(address, cfg) # Print Instruction from Control Flow instruction.print() # 迭代有效块 for address in cfg.queue_blocks.valid_addresses(): # Read Block from Control Flow block = Block(address, cfg) # Print Block from Control Flow block.print() # 迭代有效函数 for address in cfg.queue_functions.valid_addresses(): # Read Function from Control Flow function = Function(address, cfg) # Print Function from Control Flow function.print() ``` #### 迭代控制流指令、块和函数 您可以更直接地访问指令、块和函数,而不是解析。 ``` for instruction in cfg.instructions(): instruction.print() for block in cfg.blocks(): block.print() for function in cfg.functions(): function.print() ``` #### 从函数迭代到指令 也可以从函数迭代到块,再到指令,再到等位基因对,再到基因。 这代表了从最高抽象级别到最低抽象级别。 ``` for function in cfg.functions(): for block in function.blocks(): for instruction in block.instructions(): for allelepair in instruction.chromosome().allelepairs(): for gene in allelepair.genes(): print(gene) ``` #### 比较函数相似性 在 **binlex** 中可以使用的最强大的工具之一是使用相似性哈希来比较函数、块和指令。 执行这些比较就像调用 `compare` 方法一样简单。 ``` for lhs in lhs_cfg.functions(): for rhs in rhs_cfg.functions(): similarity = lhs.compare(rhs) similarity.print() for lhs in lhs_cfg.blocks(): for rhs in rhs_cfg.blocks(): similarity = lhs.compare(rhs) similarity.print() for lhs in lhs_cfg.instructions(): for rhs in rhs_cfg.instructions(): similarity = lhs.compare(rhs) similarity.print() ``` 如果您的配置启用了支持的相似性哈希算法,则会计算它们。 尽管具有挑战性,**binlex** 支持使用自己的算法对非连续函数执行相似性分析,以找到最佳相似性匹配。 非连续函数的至少 75% 或更多的数据必须可哈希才能生成相似性哈希。 #### 访问遗传属性 每条指令、块和函数或**基因组**都有一个关联的染色体,可以通过 API 访问。 您可以深入这些抽象到等位基因对及其各自的基因。 ``` # 迭代 Block Chromosome chromosome = block.chromosome() for allelepair in chromosome.allelepairs(): for gene in allelepair.genes() gene.print() # 迭代 Block Chromosome chromosome = function.chromosome() for allelepair in chromosome.allelepairs(): for gene in allelepair.genes() gene.print() # 迭代 Block Chromosome chromosome = function.chromosome() for allelepair in chromosome.allelepairs(): for gene in allelepair.genes() gene.print() ``` #### 执行遗传突变 如果您希望执行遗传编程任务,您也可以突变染色体、等位基因对和基因,它们会跟踪自己的突变数量。 ``` chromosome = block.chromosome() chromosome.mutate('deadbe?f') chromosome.number_of_mutations() chromosome.print() for allelepair in chromosome.allelepairs(): allelepair.mutate('dead') allelepair.number_of_mutations() allelepair.print() for gene in allelepair.genes(): gene.mutate('d') gene.number_of_mutations() gene.print() ``` 这有助于您可能希望为您的用例采用的遗传算法进行突变。 ## 引用 如果您在期刊出版物或开源 AI 模型中使用 **binlex**,请使用以下引用。 ``` @misc{binlex, author = {c3rb3ru5d3d53c}, title = {binlex: A Binary Genetic Trait Lexer Framework}, year = {2025}, note = {Available at \url{https://github.com/c3rb3ru5d3d53c/binlex}} } ``` 如果 **binlex** 的用于企业、个人目的,或用于生成非开源 AI 模型的输出,则无需引用。 例如,如果您使用 **binlex** 创建 YARA 规则,则无需引用。 这确保 **binlex** 保持相关性,但也确保许可的企业和个人使用。
标签:Cloudflare Workers, DAST, DNS信息、DNS暴力破解, DNS 反向解析, FUD, Genetic Traits, Hakrawler, Malware, YARA规则, 二进制分析, 二进制词法分析, 云安全监控, 云安全运维, 云资产清单, 代码相似度, 函数识别, 可视化界面, 基因算法, 威胁情报, 开发者工具, 恶意软件分析, 指令图谱, 浏览器安全, 特征提取, 网络安全, 请求拦截, 逆向工具, 逆向工程, 通知系统, 隐私保护, 静态分析