fogleman/sdf
GitHub: fogleman/sdf
一个简洁的 Python 库,利用有符号距离函数和构造实体几何,通过少量代码快速生成可导出的 3D 网格模型。
Stars: 1995 | Forks: 169
# sdf
使用极其简单的 Python API,基于 SDF(有符号距离函数)生成 3D 网格。
- [3D 有符号距离函数](https://iquilezles.org/www/articles/distfunctions/distfunctions.htm)
- [2D 有符号距离函数](https://iquilezles.org/www/articles/distfunctions2d/distfunctions2d.htm)
## 示例
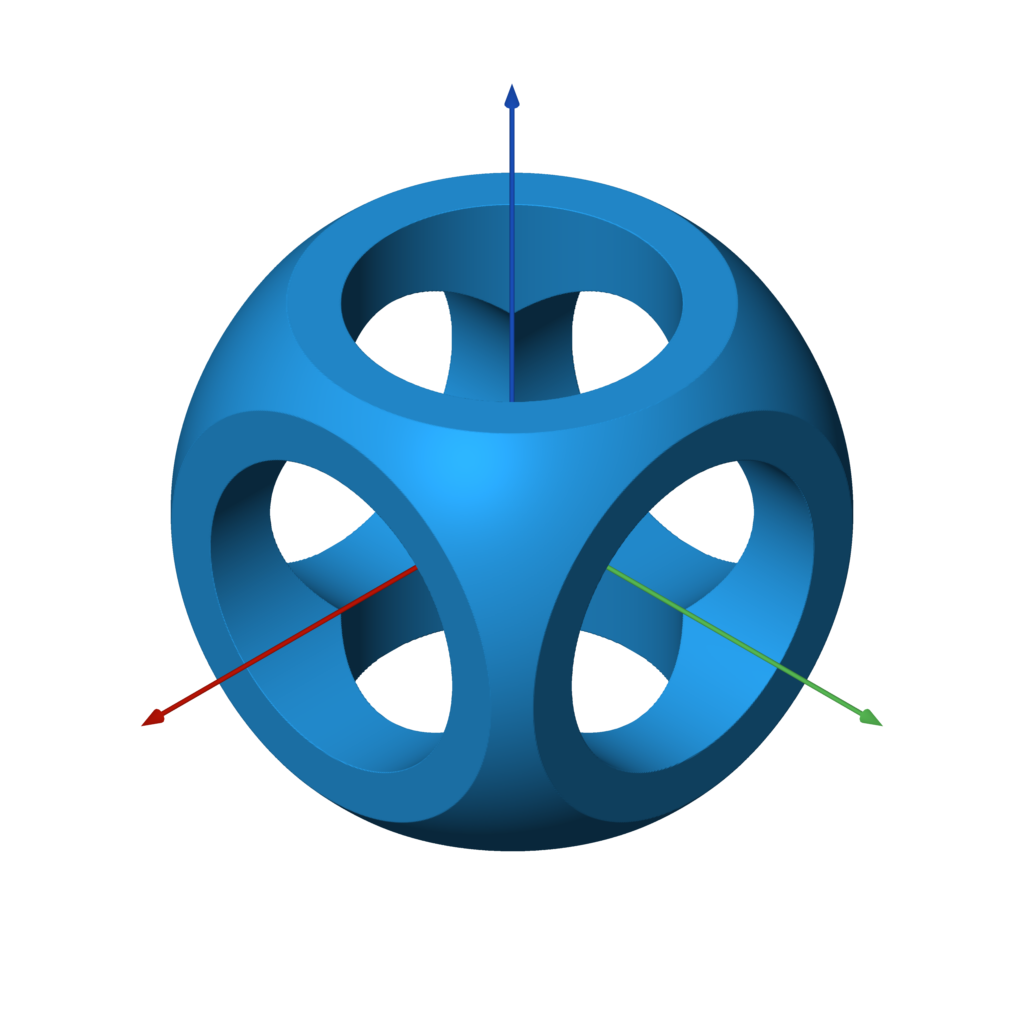 这是一个生成所示模型的完整示例。这是经典的[构造实体几何](https://en.wikipedia.org/wiki/Constructive_solid_geometry)示例。请注意使用运算符进行并集、交集和差集操作。
```
from sdf import *
f = sphere(1) & box(1.5)
c = cylinder(0.5)
f -= c.orient(X) | c.orient(Y) | c.orient(Z)
f.save('out.stl')
```
没错,这真的是全部代码!你可以对那个模型进行 3D 打印,或者在 3D 应用程序中使用它。
## 更多示例
有很酷的示例吗?提交一个 PR 吧!
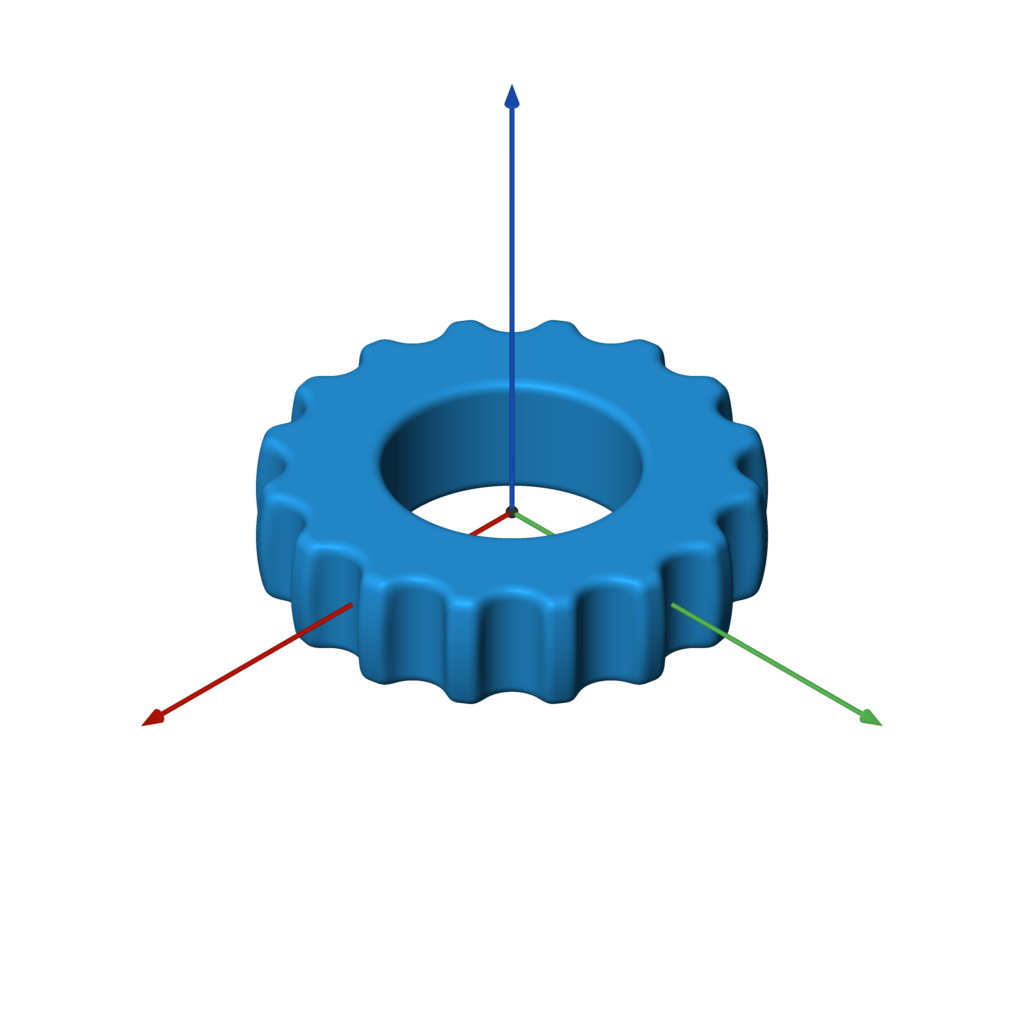
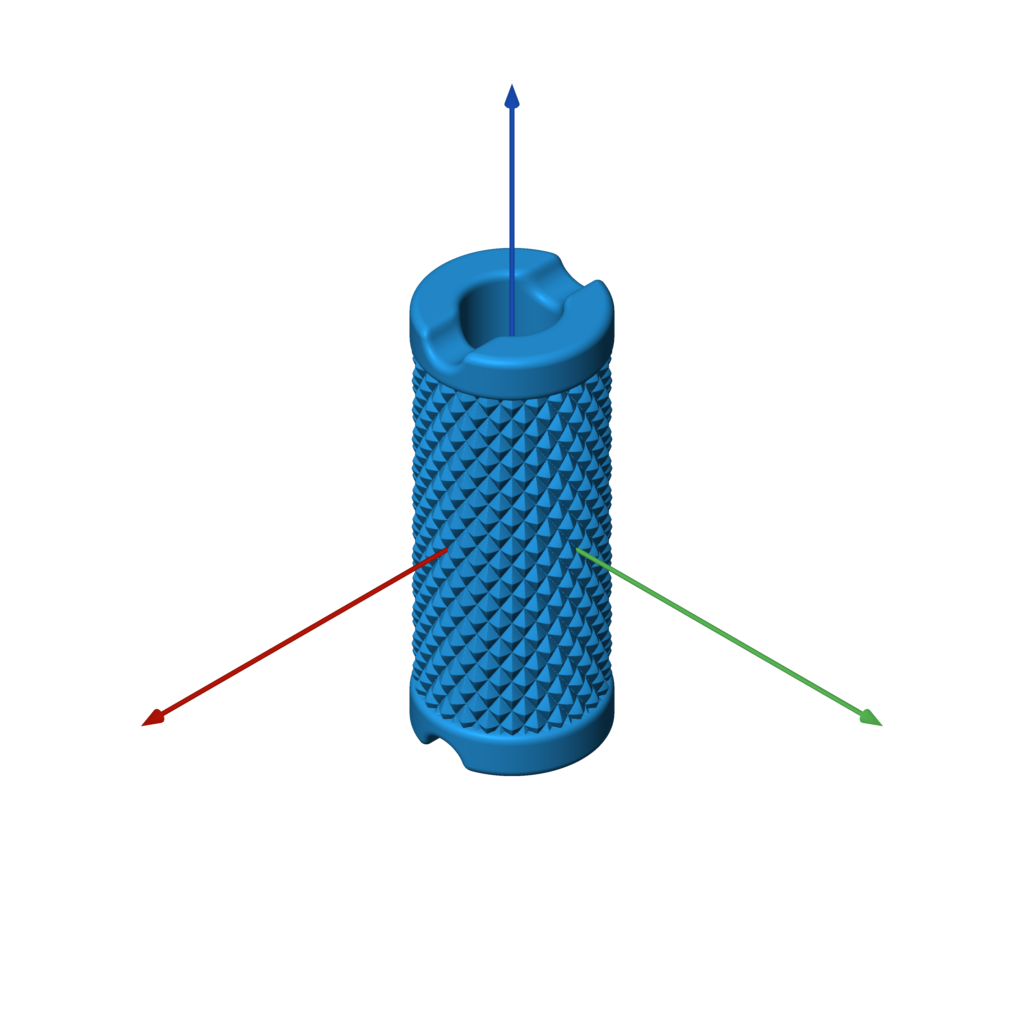
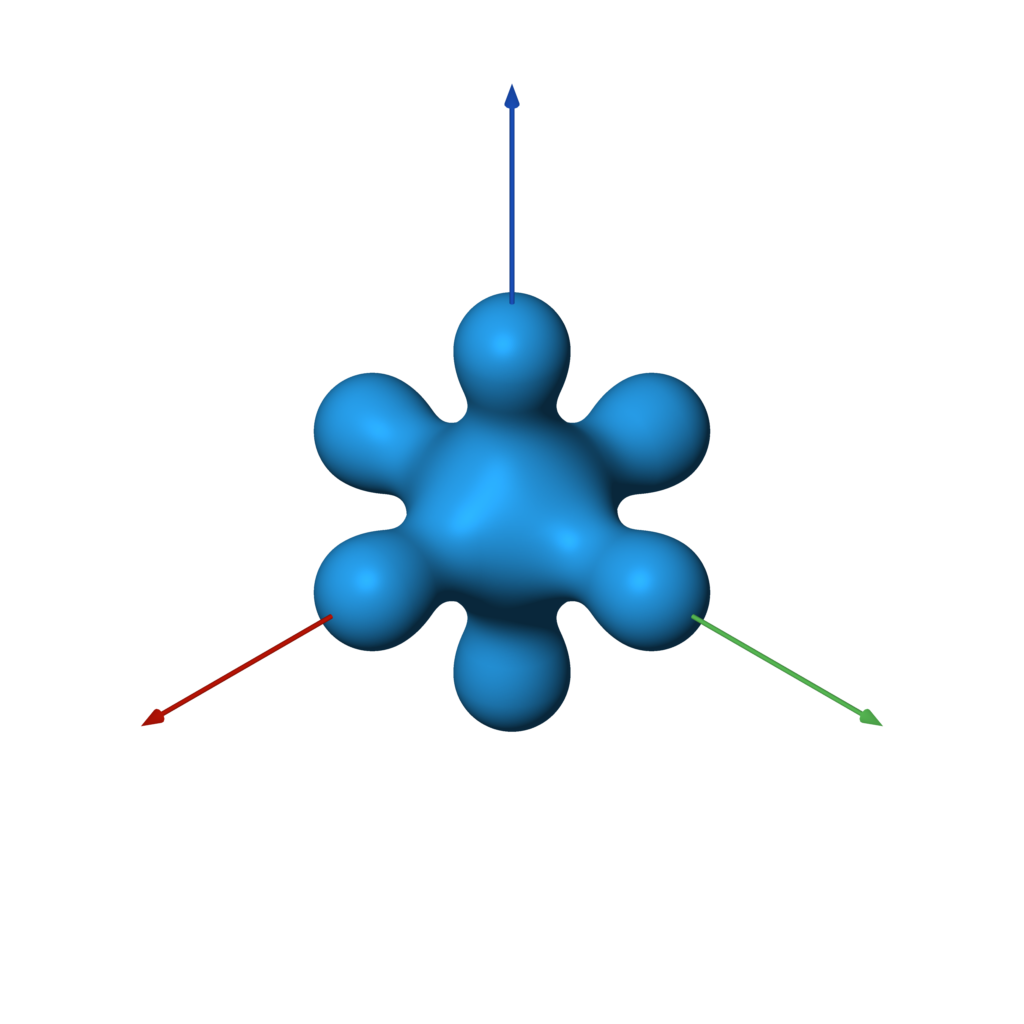
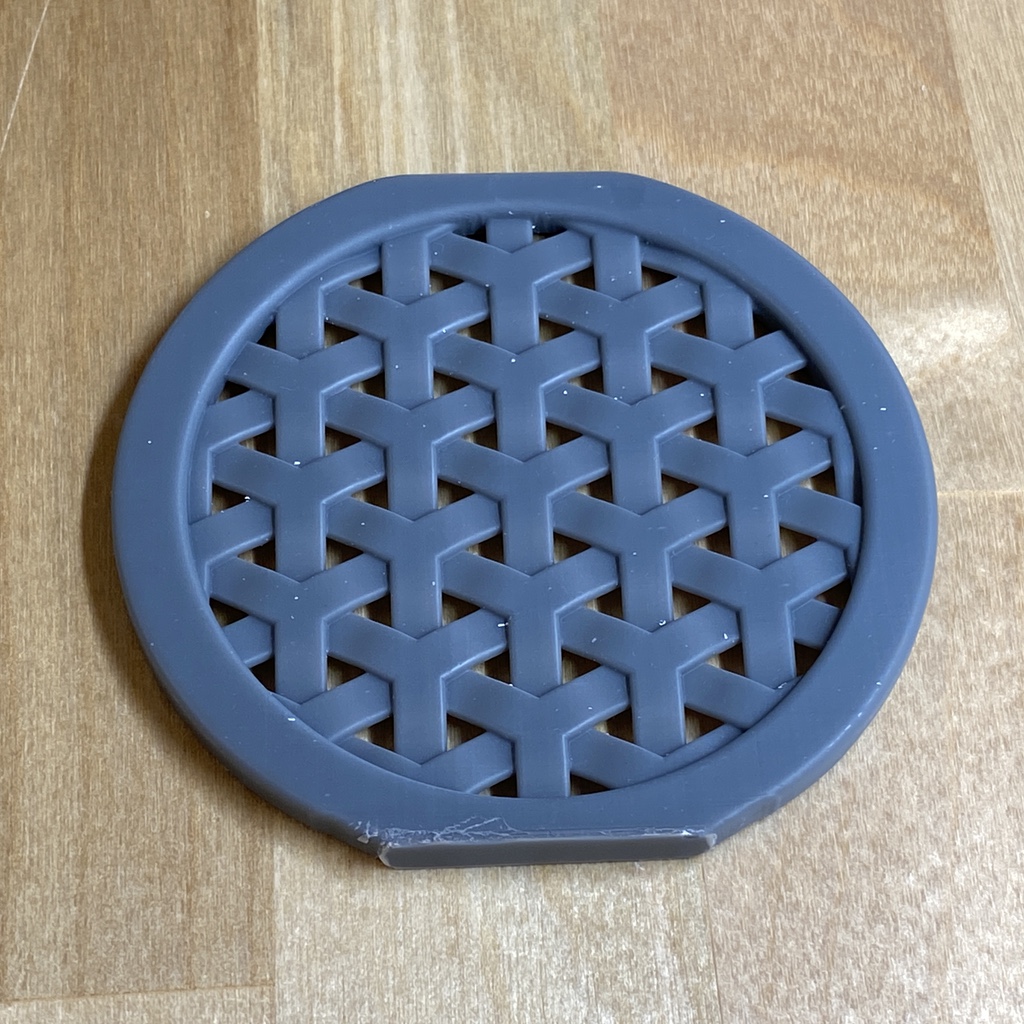
| [gearlike.py](examples/gearlike.py) | [knurling.py](examples/knurling.py) | [blobby.py](examples/blobby.py) | [weave.py](examples/weave.py) |
| --- | --- | --- | --- |
|  |  |  | 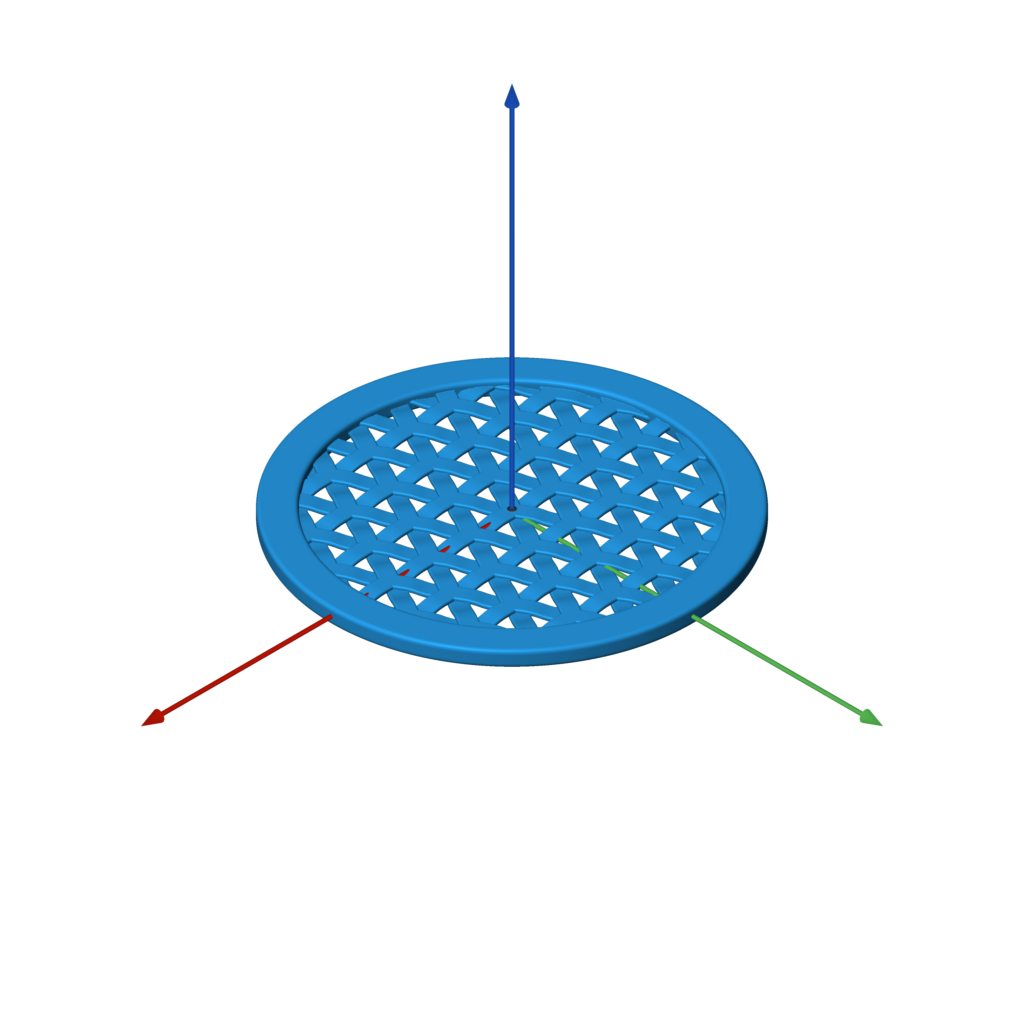 |
| 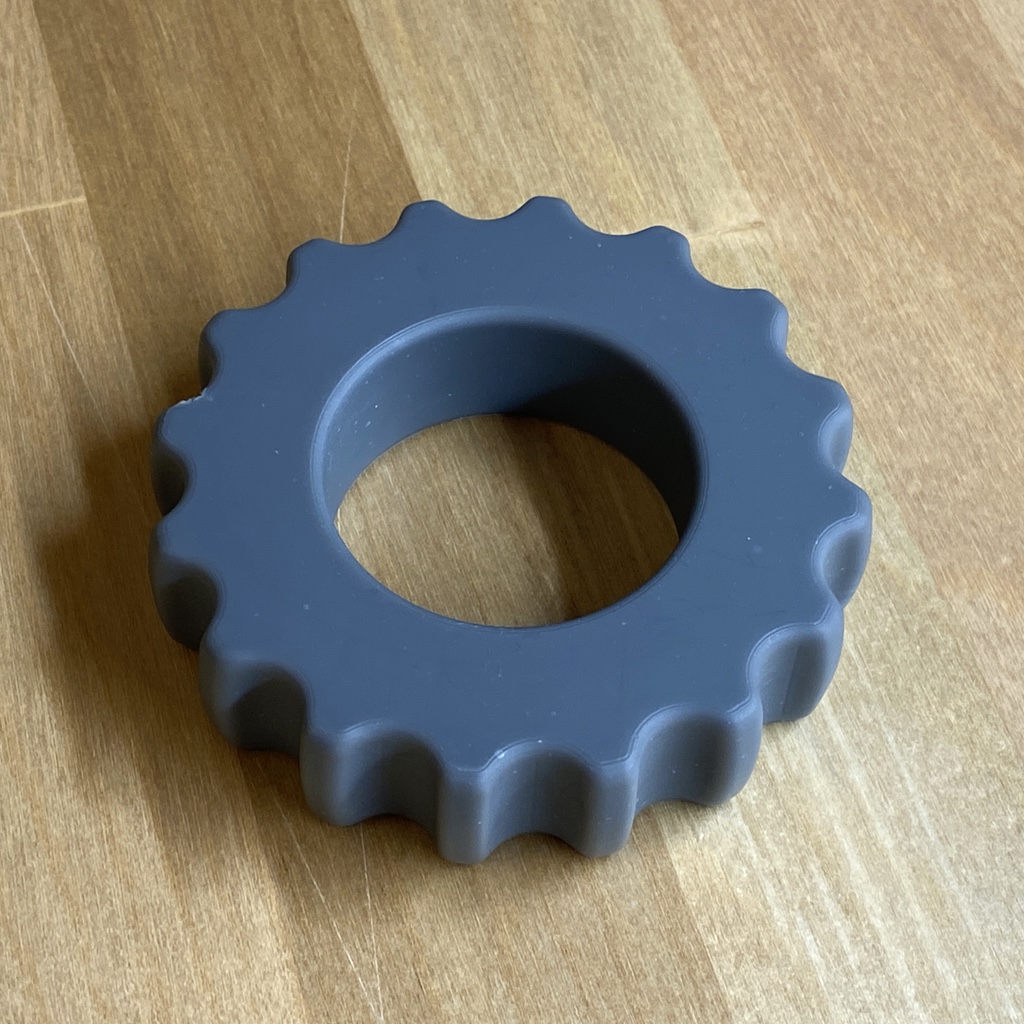 | 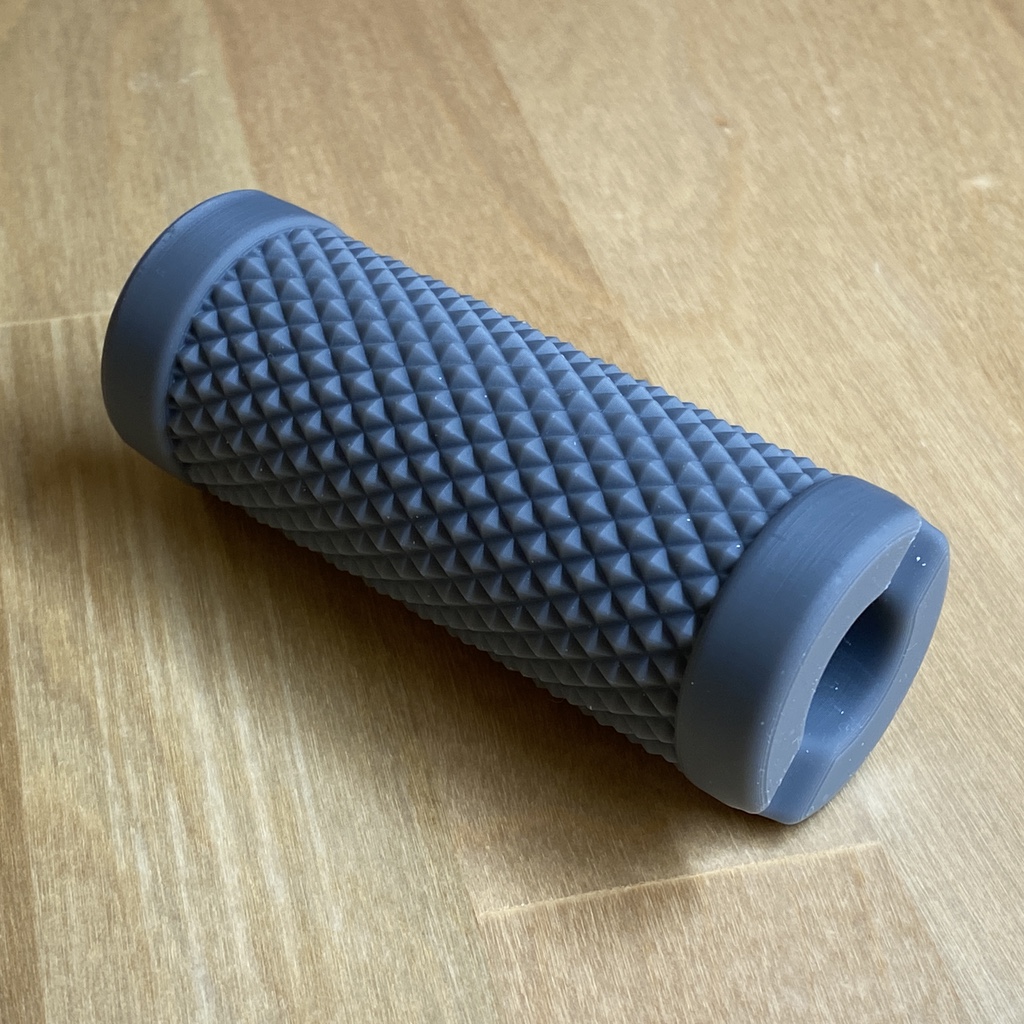 | 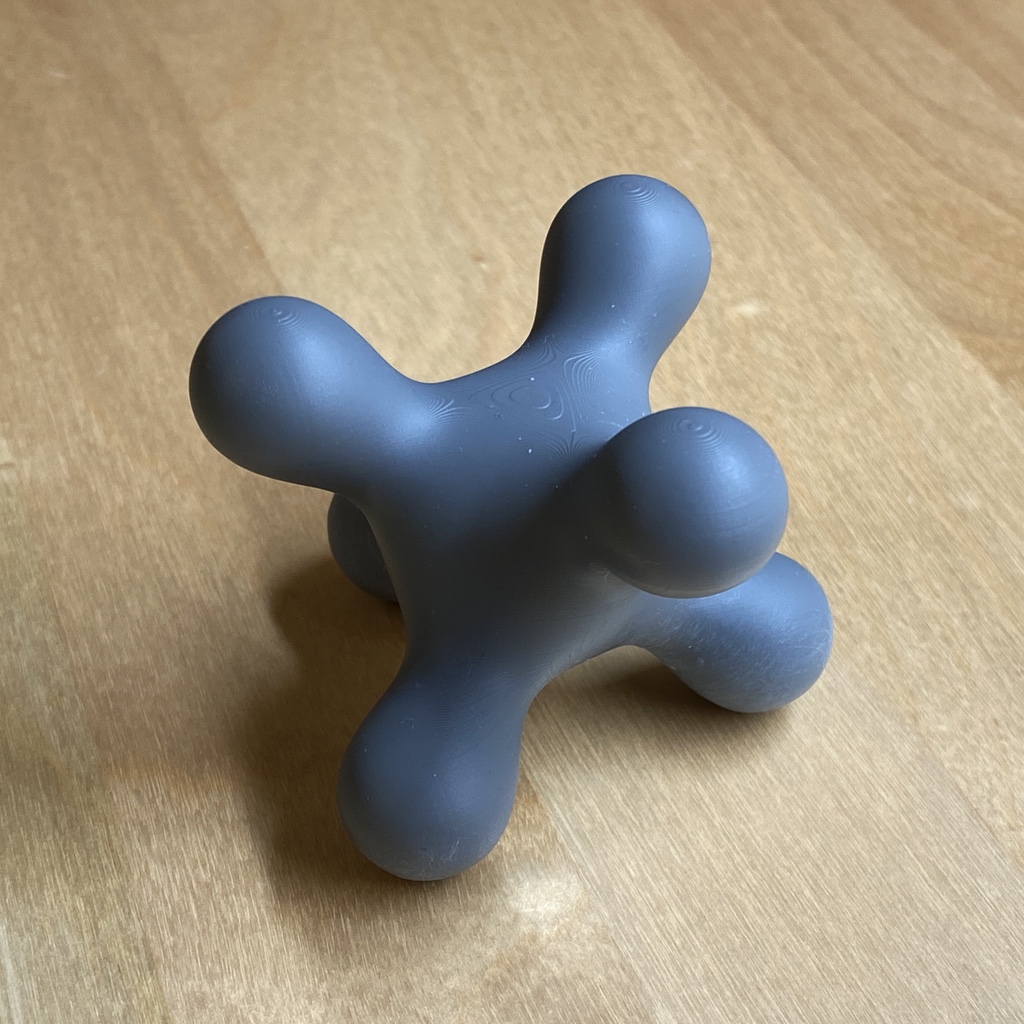 |  |
## 环境要求
请注意,按照以下说明操作时,依赖项将由 setup.py 自动安装。
- Python 3
- matplotlib
- meshio
- numpy
- Pillow
- scikit-image
- scipy
## 安装
使用以下命令克隆仓库并在 Python 虚拟环境中安装 `sdf` 库。
```
git clone https://github.com/fogleman/sdf.git
cd sdf
virtualenv env
. env/bin/activate
pip install -e .
```
确认其是否正常运行:
```
python examples/example.py # should generate a file named out.stl
```
如果你总是从根文件夹运行导入 `sdf` 的脚本,则可以跳过安装。
## OpenVDB
如果你想将网格用作 SDF,还需要 OpenVDB 及其 Python 模块。这似乎无法通过 pip 轻松安装。构建它的基本方法如下:
```
git clone https://github.com/AcademySoftwareFoundation/openvdb.git
cd openvdb
mkdir build
cd build
cmake -D OPENVDB_BUILD_PYTHON_MODULE=ON -D USE_NUMPY=ON ..
make -j8
cp openvdb/openvdb/python/pyopenvdb.* `python -c 'import site; print(site.getsitepackages()[0])'`
```
## 文件格式
`sdf` 原生写入二进制 STL 文件。对于其他格式,使用 [meshio](https://github.com/nschloe/meshio)(基于你的输出文件扩展名)。这增加了对 20 多种不同 3D 文件格式的支持,包括 OBJ、PLY、VTK 等等。
## 查看网格
这是一个生成所示模型的完整示例。这是经典的[构造实体几何](https://en.wikipedia.org/wiki/Constructive_solid_geometry)示例。请注意使用运算符进行并集、交集和差集操作。
```
from sdf import *
f = sphere(1) & box(1.5)
c = cylinder(0.5)
f -= c.orient(X) | c.orient(Y) | c.orient(Z)
f.save('out.stl')
```
没错,这真的是全部代码!你可以对那个模型进行 3D 打印,或者在 3D 应用程序中使用它。
## 更多示例
有很酷的示例吗?提交一个 PR 吧!
| [gearlike.py](examples/gearlike.py) | [knurling.py](examples/knurling.py) | [blobby.py](examples/blobby.py) | [weave.py](examples/weave.py) |
| --- | --- | --- | --- |
|  |  |  |  |
|  |  |  |  |
## 环境要求
请注意,按照以下说明操作时,依赖项将由 setup.py 自动安装。
- Python 3
- matplotlib
- meshio
- numpy
- Pillow
- scikit-image
- scipy
## 安装
使用以下命令克隆仓库并在 Python 虚拟环境中安装 `sdf` 库。
```
git clone https://github.com/fogleman/sdf.git
cd sdf
virtualenv env
. env/bin/activate
pip install -e .
```
确认其是否正常运行:
```
python examples/example.py # should generate a file named out.stl
```
如果你总是从根文件夹运行导入 `sdf` 的脚本,则可以跳过安装。
## OpenVDB
如果你想将网格用作 SDF,还需要 OpenVDB 及其 Python 模块。这似乎无法通过 pip 轻松安装。构建它的基本方法如下:
```
git clone https://github.com/AcademySoftwareFoundation/openvdb.git
cd openvdb
mkdir build
cd build
cmake -D OPENVDB_BUILD_PYTHON_MODULE=ON -D USE_NUMPY=ON ..
make -j8
cp openvdb/openvdb/python/pyopenvdb.* `python -c 'import site; print(site.getsitepackages()[0])'`
```
## 文件格式
`sdf` 原生写入二进制 STL 文件。对于其他格式,使用 [meshio](https://github.com/nschloe/meshio)(基于你的输出文件扩展名)。这增加了对 20 多种不同 3D 文件格式的支持,包括 OBJ、PLY、VTK 等等。
## 查看网格
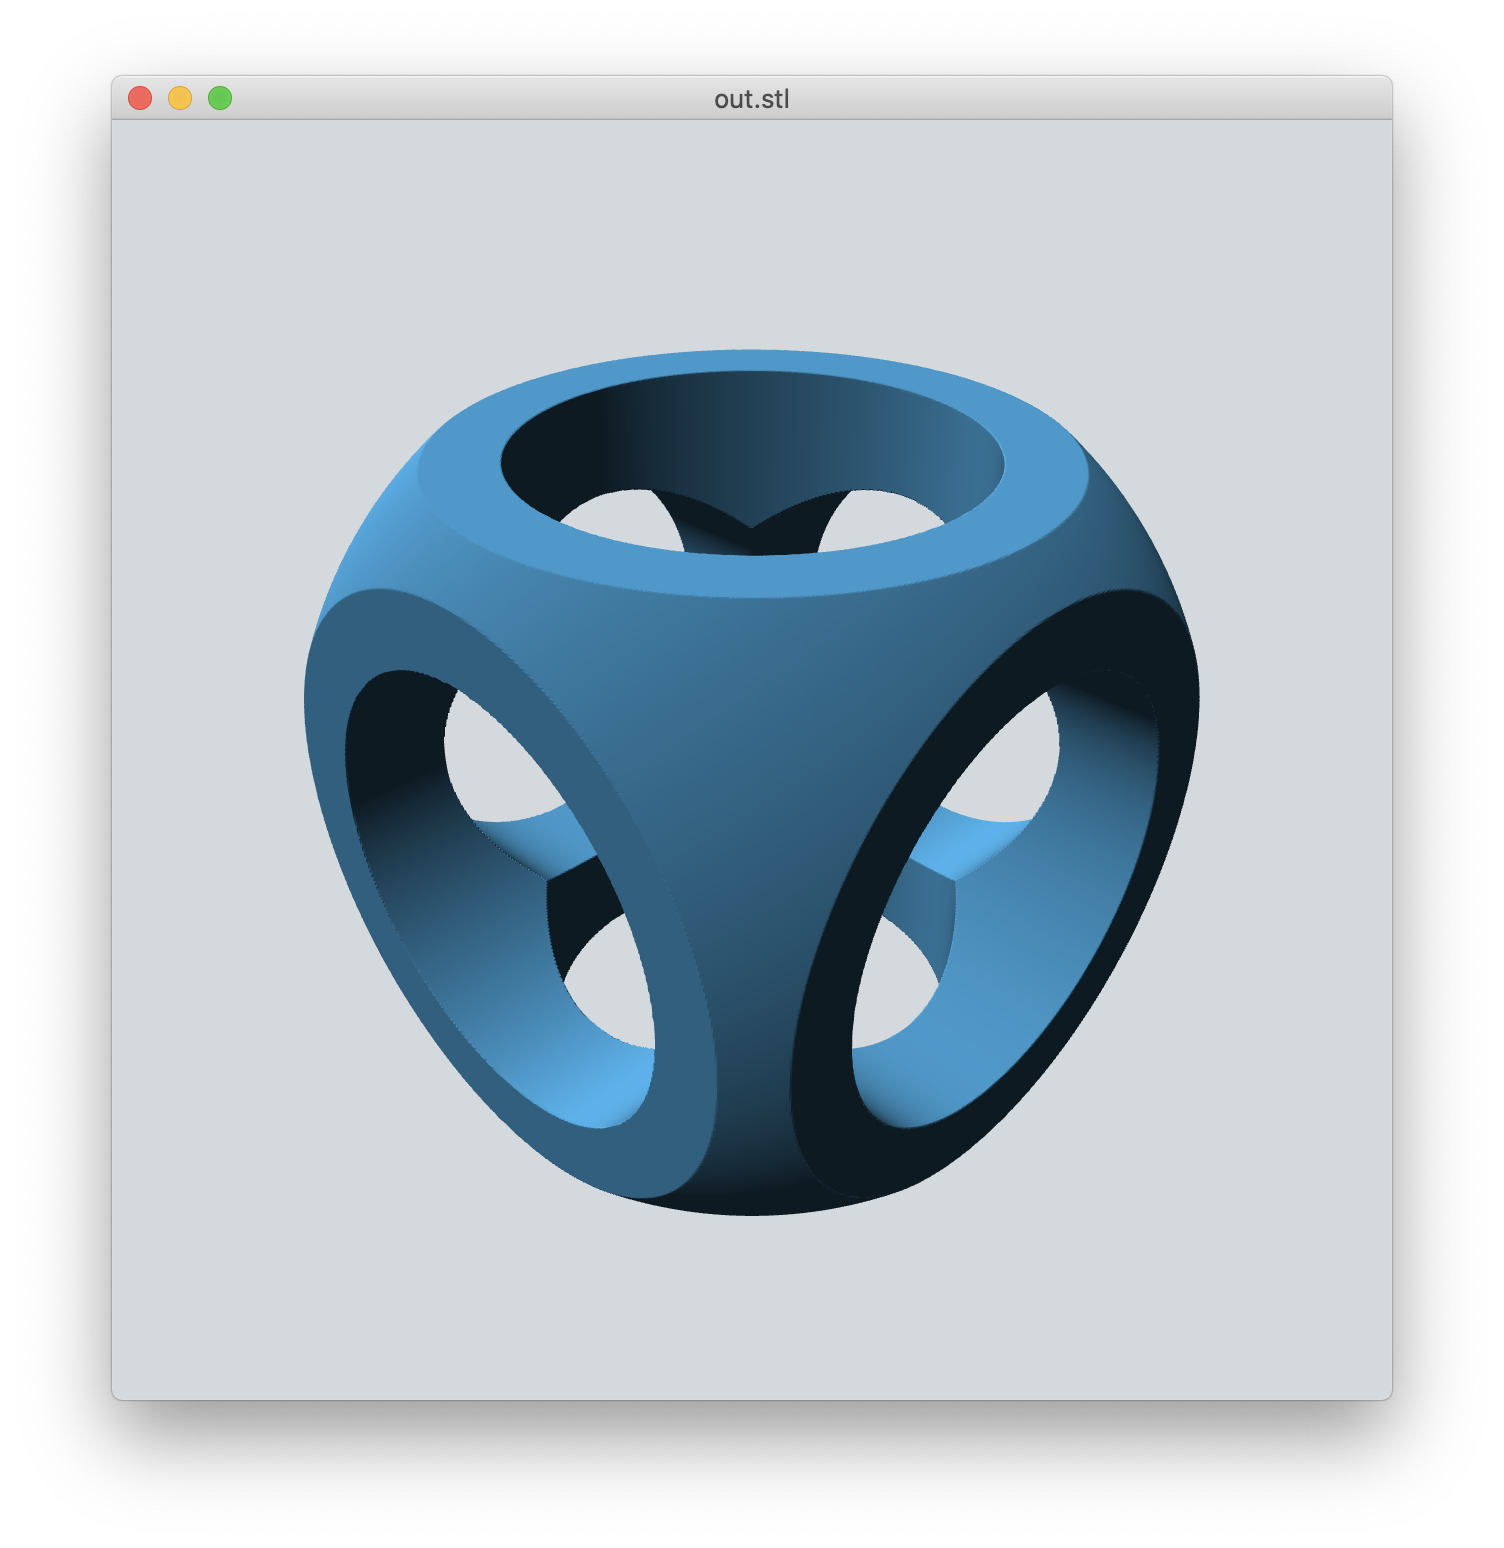 为你的平台查找并安装一个 3D 网格查看器,例如 [MeshLab](https://www.meshlab.net/)。
我开发并使用了自己的跨平台网格查看器,名为 [meshview](https://github.com/fogleman/meshview)(见截图)。如果你安装了 [Go](https://golang.org/) 和 [glfw](https://www.glfw.org/),安装就非常简单:
```
$ brew install go glfw # on macOS with homebrew
$ go get -u github.com/fogleman/meshview/cmd/meshview
```
然后你可以使用以下命令从命令行查看任何网格:
```
$ meshview your-mesh.stl
```
有关更完整的安装说明,请参阅 meshview 的 [README](https://github.com/fogleman/meshview)。
在 macOS 上,在紧要关头你可以直接使用内置的 Quick Look(在 Finder 中选择 STL 文件后按空格键)。
# API
在以下所有示例中,`f` 是任何 3D SDF,例如:
```
f = sphere()
```
## 边界
SDF 的边界框会自动估算。不精确的 SDF(例如非均匀缩放)可能会导致此过程出现问题。在这种情况下,你可以手动指定要采样的边界:
```
f.save('out.stl', bounds=((-1, -1, -1), (1, 1, 1)))
```
## 分辨率
网格的分辨率也是自动计算的。有两种方法可以指定分辨率。你可以使用 `step` 直接设置分辨率:
```
f.save('out.stl', step=0.01)
f.save('out.stl', step=(0.01, 0.02, 0.03)) # non-uniform resolution
```
或者你可以指定大致要采样的点数:
```
f.save('out.stl', samples=2**24) # sample about 16M points
```
默认情况下使用 `samples=2**22`。
*提示*:在开发 SDF 时使用默认分辨率。等完成后,再调高分辨率以生成最终输出。
## 批次
SDF 是分批次采样的。默认情况下,每批有 `32**3 = 32768` 个点。可以覆盖此批次大小:
```
f.save('out.stl', batch_size=64) # instead of 32
```
代码会尝试跳过任何远离网格表面的批次。不精确的 SDF(例如非均匀缩放)可能会导致此过程出现问题,从而导致输出网格中出现孔洞(即本不该跳过但被跳过的批次)。为避免这种情况,你可以禁用稀疏采样:
```
f.save('out.stl', sparse=False) # force all batches to be completely sampled
```
## 工作线程
SDF 使用工作线程分批进行采样。默认使用 `multiprocessing.cpu_count()` 个工作线程。这可以被覆盖:
```
f.save('out.stl', workers=1) # only use one worker thread
```
## 不保存文件
你当然可以在不将网格写入 STL 文件的情况下生成它:
```
points = f.generate() # takes the same optional arguments as `save`
print(len(points)) # print number of points (3x the number of triangles)
print(points[:3]) # print the vertices of the first triangle
```
如果你想在 `generate` 之后保存 STL,只需使用:
```
write_binary_stl(path, points)
```
## 可视化 SDF
为你的平台查找并安装一个 3D 网格查看器,例如 [MeshLab](https://www.meshlab.net/)。
我开发并使用了自己的跨平台网格查看器,名为 [meshview](https://github.com/fogleman/meshview)(见截图)。如果你安装了 [Go](https://golang.org/) 和 [glfw](https://www.glfw.org/),安装就非常简单:
```
$ brew install go glfw # on macOS with homebrew
$ go get -u github.com/fogleman/meshview/cmd/meshview
```
然后你可以使用以下命令从命令行查看任何网格:
```
$ meshview your-mesh.stl
```
有关更完整的安装说明,请参阅 meshview 的 [README](https://github.com/fogleman/meshview)。
在 macOS 上,在紧要关头你可以直接使用内置的 Quick Look(在 Finder 中选择 STL 文件后按空格键)。
# API
在以下所有示例中,`f` 是任何 3D SDF,例如:
```
f = sphere()
```
## 边界
SDF 的边界框会自动估算。不精确的 SDF(例如非均匀缩放)可能会导致此过程出现问题。在这种情况下,你可以手动指定要采样的边界:
```
f.save('out.stl', bounds=((-1, -1, -1), (1, 1, 1)))
```
## 分辨率
网格的分辨率也是自动计算的。有两种方法可以指定分辨率。你可以使用 `step` 直接设置分辨率:
```
f.save('out.stl', step=0.01)
f.save('out.stl', step=(0.01, 0.02, 0.03)) # non-uniform resolution
```
或者你可以指定大致要采样的点数:
```
f.save('out.stl', samples=2**24) # sample about 16M points
```
默认情况下使用 `samples=2**22`。
*提示*:在开发 SDF 时使用默认分辨率。等完成后,再调高分辨率以生成最终输出。
## 批次
SDF 是分批次采样的。默认情况下,每批有 `32**3 = 32768` 个点。可以覆盖此批次大小:
```
f.save('out.stl', batch_size=64) # instead of 32
```
代码会尝试跳过任何远离网格表面的批次。不精确的 SDF(例如非均匀缩放)可能会导致此过程出现问题,从而导致输出网格中出现孔洞(即本不该跳过但被跳过的批次)。为避免这种情况,你可以禁用稀疏采样:
```
f.save('out.stl', sparse=False) # force all batches to be completely sampled
```
## 工作线程
SDF 使用工作线程分批进行采样。默认使用 `multiprocessing.cpu_count()` 个工作线程。这可以被覆盖:
```
f.save('out.stl', workers=1) # only use one worker thread
```
## 不保存文件
你当然可以在不将网格写入 STL 文件的情况下生成它:
```
points = f.generate() # takes the same optional arguments as `save`
print(len(points)) # print number of points (3x the number of triangles)
print(points[:3]) # print the vertices of the first triangle
```
如果你想在 `generate` 之后保存 STL,只需使用:
```
write_binary_stl(path, points)
```
## 可视化 SDF
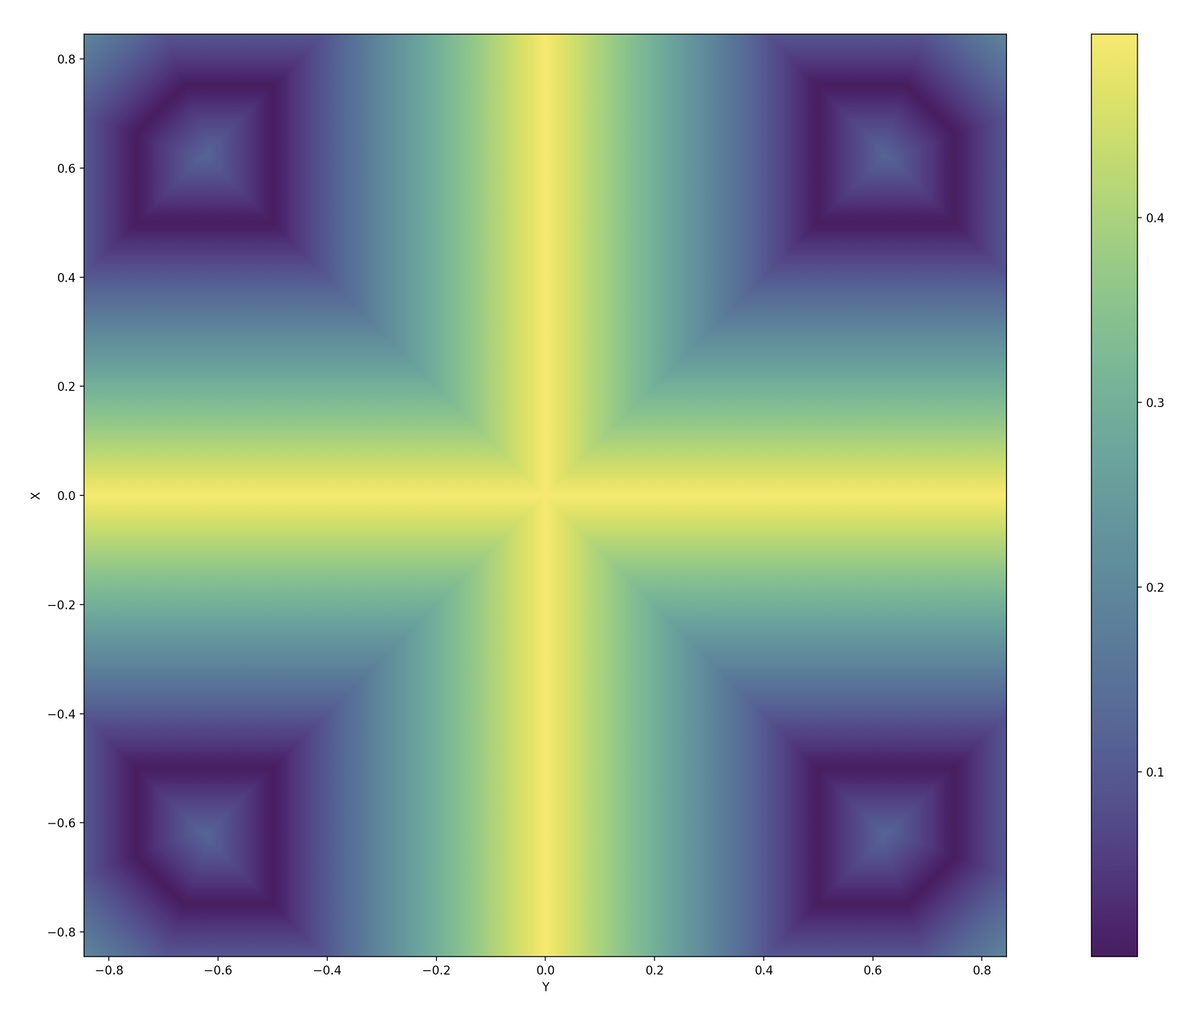 你可以使用 matplotlib 绘制 SDF 的 2D 切片可视化图。这对于调试非常有用。
```
f.show_slice(z=0)
f.show_slice(z=0, abs=True) # show abs(f)
```
你可以指定任意 X、Y 或 Z 坐标处的切片平面。你还可以指定要绘制的边界。
请注意,只有在调用此函数时才会导入 `matplotlib`,因此它并不是严格必需的依赖项。
你可以使用 matplotlib 绘制 SDF 的 2D 切片可视化图。这对于调试非常有用。
```
f.show_slice(z=0)
f.show_slice(z=0, abs=True) # show abs(f)
```
你可以指定任意 X、Y 或 Z 坐标处的切片平面。你还可以指定要绘制的边界。
请注意,只有在调用此函数时才会导入 `matplotlib`,因此它并不是严格必需的依赖项。
## 工作原理 代码只是简单地使用 [Marching Cubes](https://en.wikipedia.org/wiki/Marching_cubes)算法从[有符号距离函数](https://en.wikipedia.org/wiki/Signed_distance_function)生成网格。在 Python 中,这通常会非常慢。然而,使用 numpy 可以同时评估整批点的 SDF。此外,使用多个线程并行处理批次。结果是(对于 Marching Cubes 而言)速度惊人地快。细节精度足够的网格在三角形数量方面可能仍然会非常大。 `sdf` 库的核心“引擎”非常小,可以在 [core.py](https://github.com/fogleman/sdf/blob/main/sdf/core.py) 中找到。 简而言之,这里没有任何算法上的革命性突破。其目标是为我们最喜爱的 Python 语言提供一个简单、有趣且易于使用的 3D 模型生成 API。 ## 文件 - [sdf/core.py](https://github.com/fogleman/sdf/blob/main/sdf/core.py):核心网格生成引擎。还包括用于估算 SDF 边界框以及使用 matplotlib 绘制 SDF 2D 切片的代码。 - [sdf/d2.py](https://github.com/fogleman/sdf/blob/main/sdf/d2.py):2D 有符号距离函数 - [sdf/d3.py](https://github.com/fogleman/sdf/blob/main/sdf/d3.py):3D 有符号距离函数 - [sdf/dn.py](https://github.com/fogleman/sdf/blob/main/sdf/dn.py):与维度无关的有符号距离函数 - [sdf/ease.py](https://github.com/fogleman/sdf/blob/main/sdf/ease.py):作用于 numpy 数组的[缓动函数](https://easings.net/)。某些 SDF 将缓动函数作为参数。 - [sdf/mesh.py](https://github.com/fogleman/sdf/blob/main/sdf/mesh.py):用于加载网格并将其用作 SDF 的代码。 - [sdf/progress.py](https://github.com/fogleman/sdf/blob/main/sdf/progress.py):控制台进度条。 - [sdf/stl.py](https://github.com/fogleman/sdf/blob/main/sdf/stl.py):用于写入二进制 [STL 文件](https://en.wikipedia.org/wiki/STL_(file_format)的代码。 - [sdf/text.py](https://github.com/fogleman/sdf/blob/main/sdf/text.py):为文本生成 2D SDF(随后可以对其进行拉伸) - [sdf/util.py](https://github.com/fogleman/sdf/blob/main/sdf/util.py):实用常量和函数。 ## SDF 实现 除了内置库提供的 SDF 之外,编写自己的 SDF 也是合理的。浏览 SDF 的实现以了解它们是如何实现的。以下是一些简单的示例: ``` @sdf3 def sphere(radius=1, center=ORIGIN): def f(p): return np.linalg.norm(p - center, axis=1) - radius return f ``` SDF 只是一个函数,它接收一个形状为 `(N, 3)`(对于 3D SDF)或形状为 `(N, 2)`(对于 2D SDF)的点的 numpy 数组,并返回一个形状为 `(N, 1)` 的数组,其中包含这些点各自的有符号距离。它们由 `@sdf3` 装饰器(或用于 2D SDF 的 `@sdf2`)包装,这使得布尔运算符能够工作,添加了 `save` 方法,并添加了诸如 `translate` 之类的运算符等。 ``` @op3 def translate(other, offset): def f(p): return other(p - offset) return f ``` 作用于另一个 SDF 的 SDF(如上面的 `translate`)应该改用 `@op3` 装饰器。这将注册该函数,使得 SDF 可以像这样链接在一起: ``` f = sphere(1).translate((1, 2, 3)) ``` 而不是必须那样做: ``` f = translate(sphere(1), (1, 2, 3)) ``` ## 记住,这是 Python!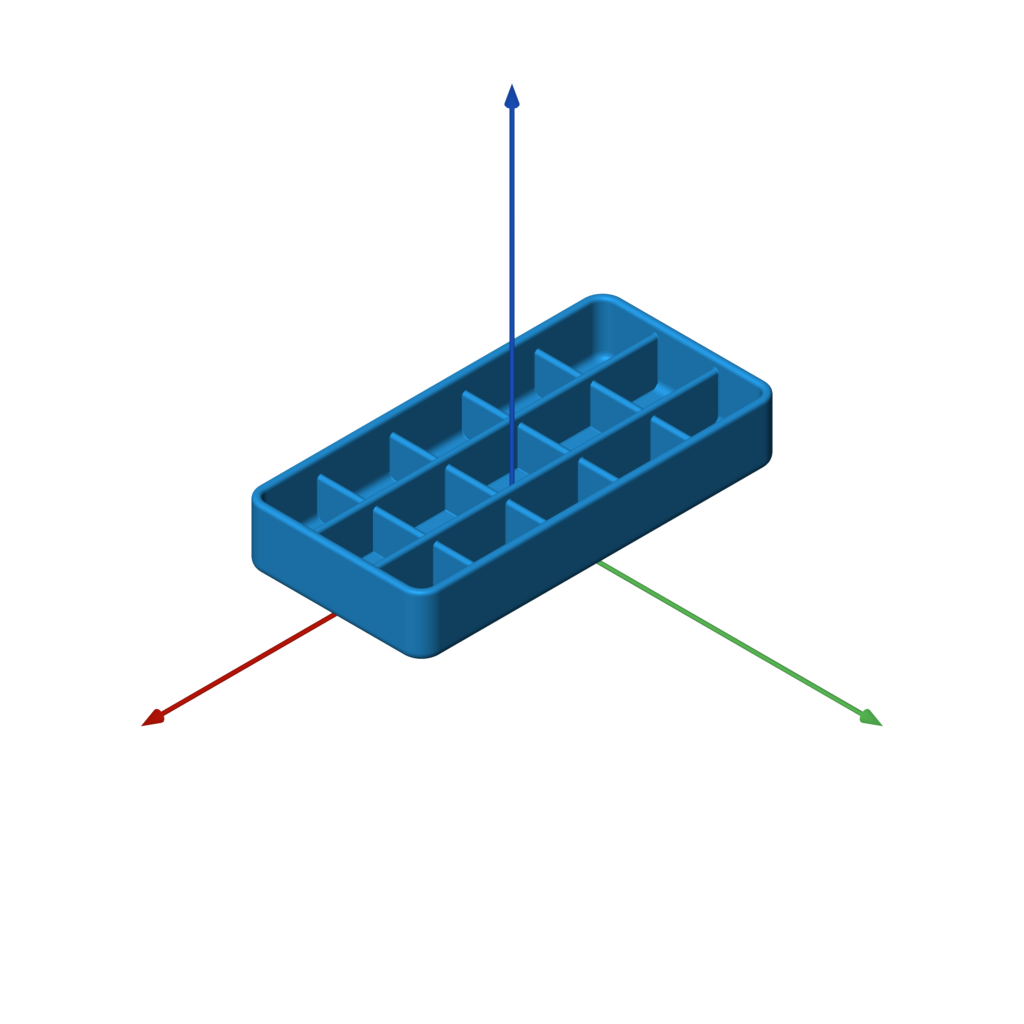 记住,这是 Python,所以它是完全可编程的。例如,你可以而且应该将你的模型拆分为参数化的子组件。你可以在任何适用的地方使用 for 循环和条件判断。天高任鸟飞!
查看[可定制的盒子示例](examples/customizable_box.py)以获取一些入门想法。
记住,这是 Python,所以它是完全可编程的。例如,你可以而且应该将你的模型拆分为参数化的子组件。你可以在任何适用的地方使用 for 循环和条件判断。天高任鸟飞!
查看[可定制的盒子示例](examples/customizable_box.py)以获取一些入门想法。
# 函数参考 ## 3D 图元 ### 球体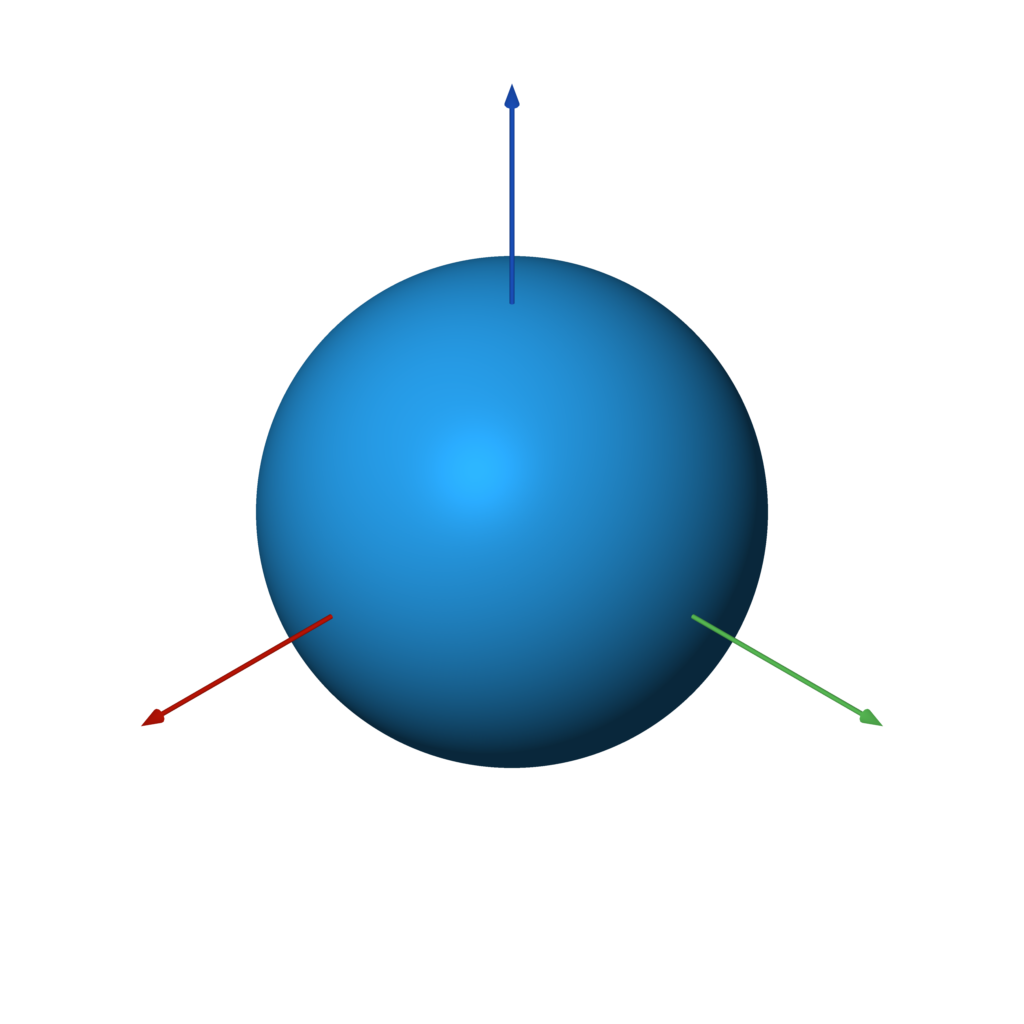 `sphere(radius=1, center=ORIGIN)`
```
f = sphere() # unit sphere
f = sphere(2) # specify radius
f = sphere(1, (1, 2, 3)) # translated sphere
```
### 长方体
`sphere(radius=1, center=ORIGIN)`
```
f = sphere() # unit sphere
f = sphere(2) # specify radius
f = sphere(1, (1, 2, 3)) # translated sphere
```
### 长方体
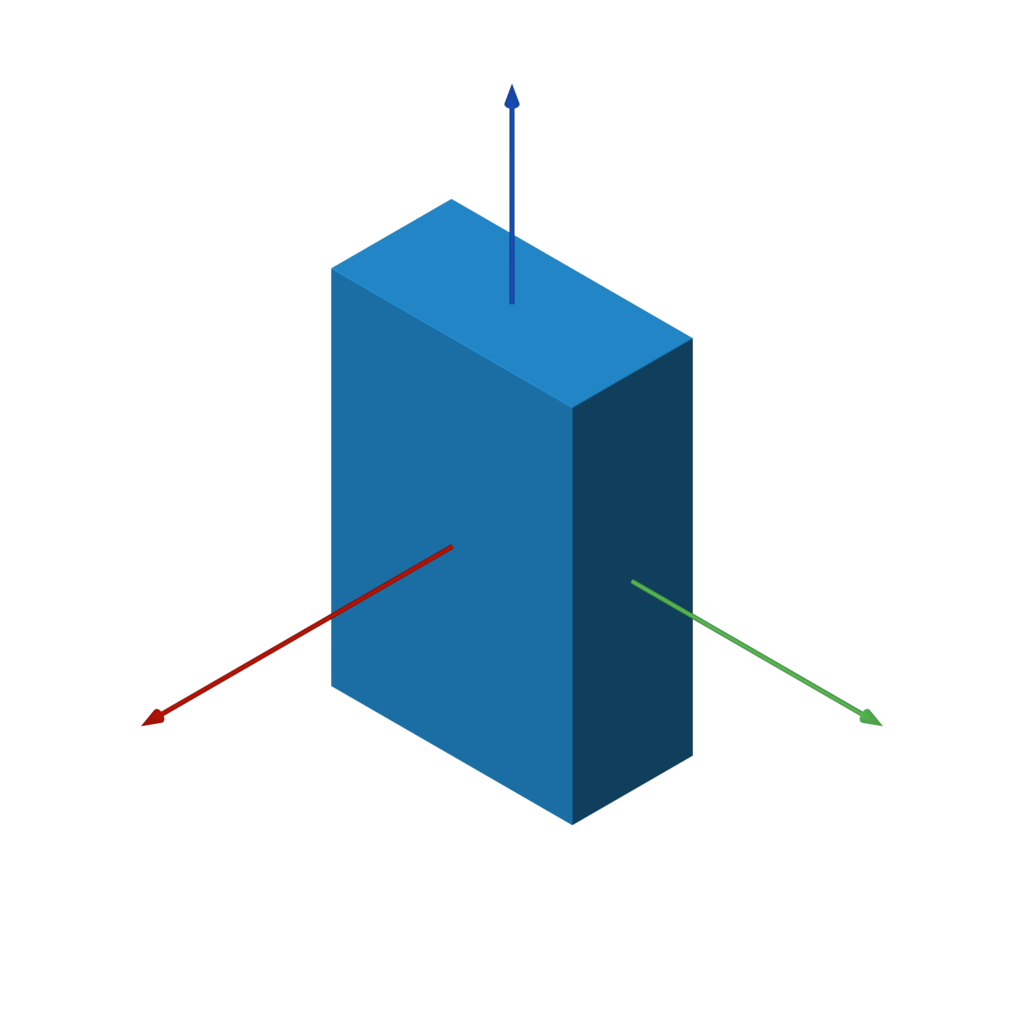 `box(size=1, center=ORIGIN, a=None, b=None)`
```
f = box(1) # all side lengths = 1
f = box((1, 2, 3)) # different side lengths
f = box(a=(-1, -1, -1), b=(3, 4, 5)) # specified by bounds
```
### 圆角长方体
`box(size=1, center=ORIGIN, a=None, b=None)`
```
f = box(1) # all side lengths = 1
f = box((1, 2, 3)) # different side lengths
f = box(a=(-1, -1, -1), b=(3, 4, 5)) # specified by bounds
```
### 圆角长方体
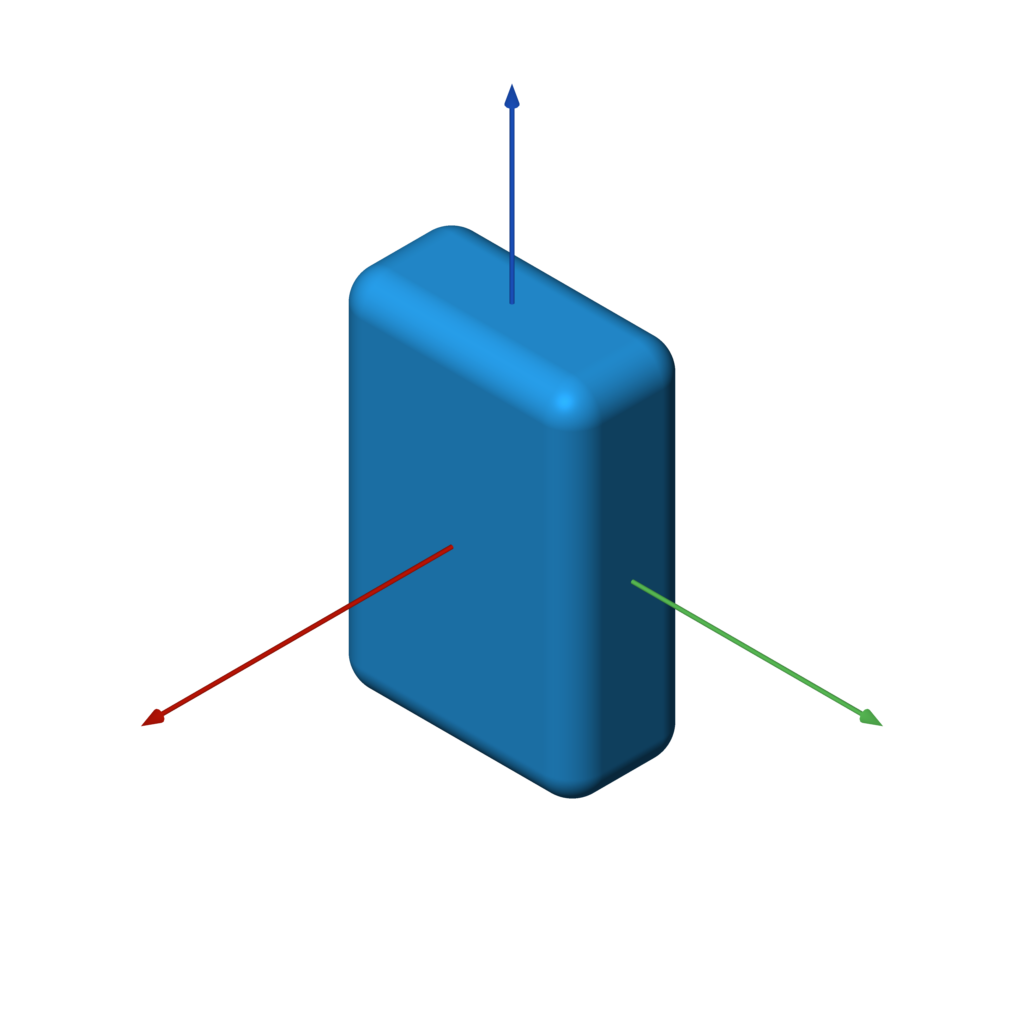 `rounded_box(size, radius)`
```
f = rounded_box((1, 2, 3), 0.25)
```
### 线框长方体
`rounded_box(size, radius)`
```
f = rounded_box((1, 2, 3), 0.25)
```
### 线框长方体
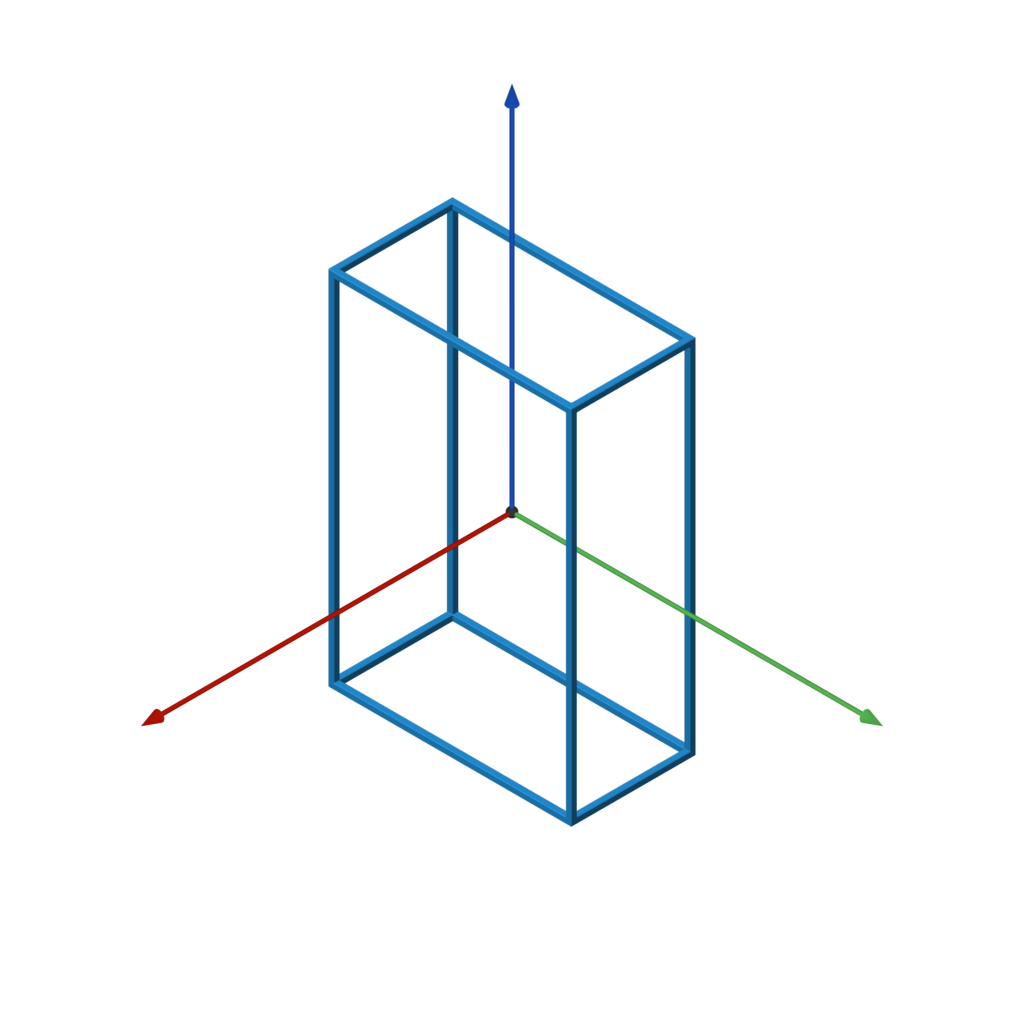 `wireframe_box(size, thickness)`
```
f = wireframe_box((1, 2, 3), 0.05)
```
### 圆环
`wireframe_box(size, thickness)`
```
f = wireframe_box((1, 2, 3), 0.05)
```
### 圆环
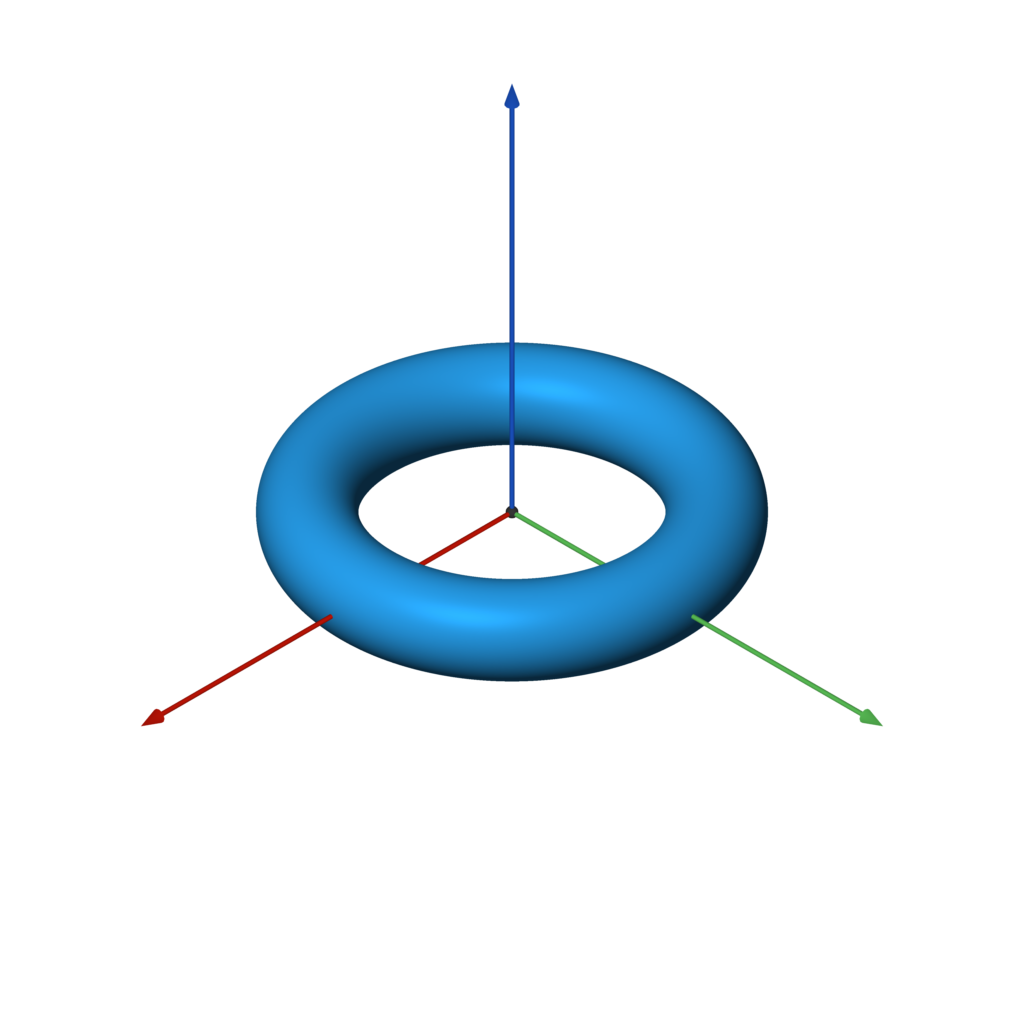 `torus(r1, r2)`
```
f = torus(1, 0.25)
```
### 胶囊体
`torus(r1, r2)`
```
f = torus(1, 0.25)
```
### 胶囊体
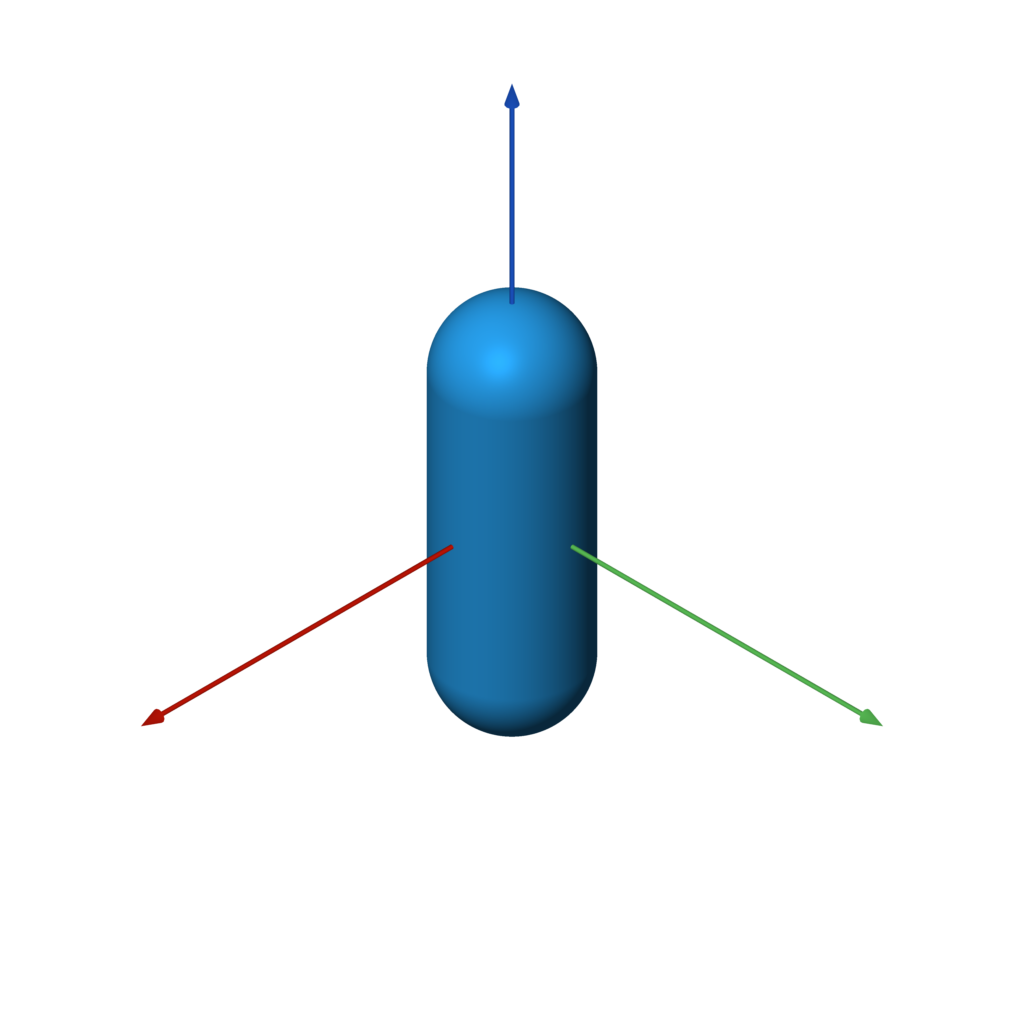 `capsule(a, b, radius)`
```
f = capsule(-Z, Z, 0.5)
```
### 带盖圆柱体
`capsule(a, b, radius)`
```
f = capsule(-Z, Z, 0.5)
```
### 带盖圆柱体
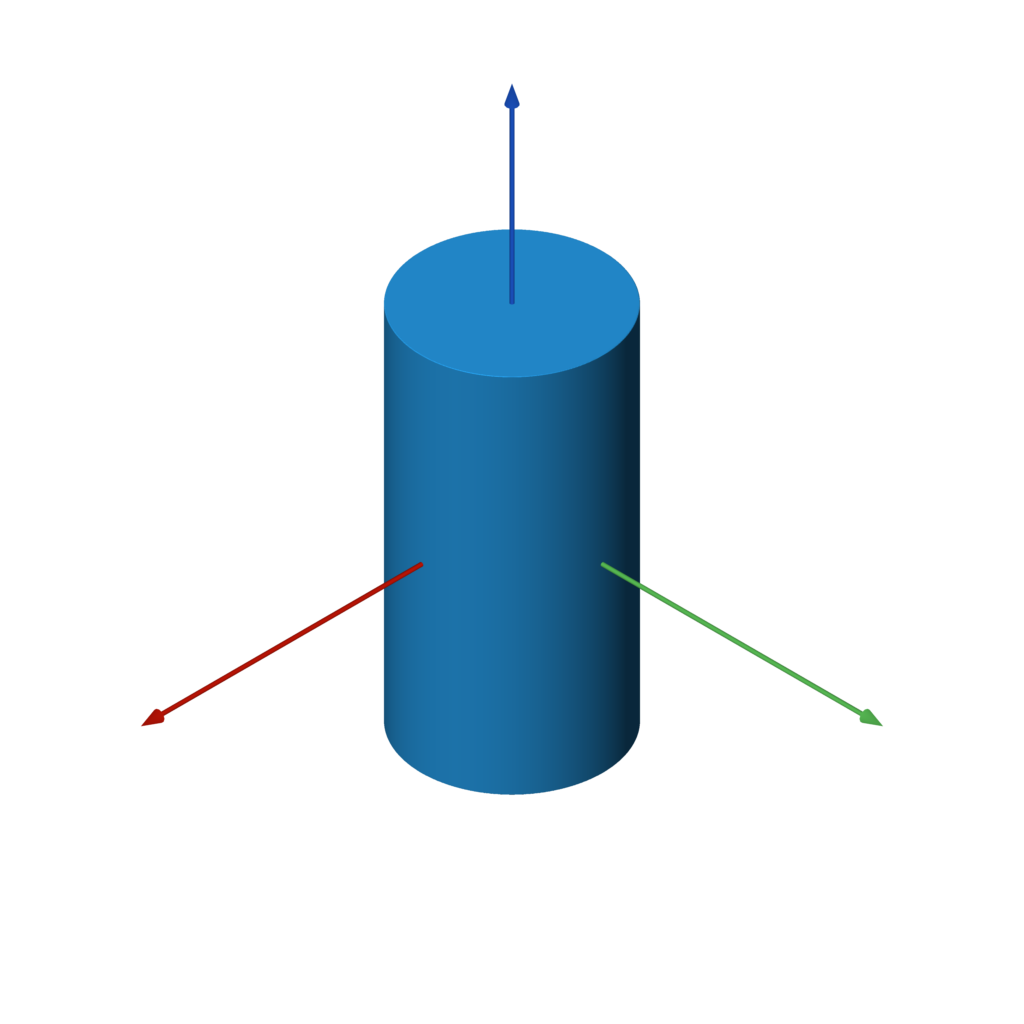 `capped_cylinder(a, b, radius)`
```
f = capped_cylinder(-Z, Z, 0.5)
```
### 圆角圆柱体
`capped_cylinder(a, b, radius)`
```
f = capped_cylinder(-Z, Z, 0.5)
```
### 圆角圆柱体
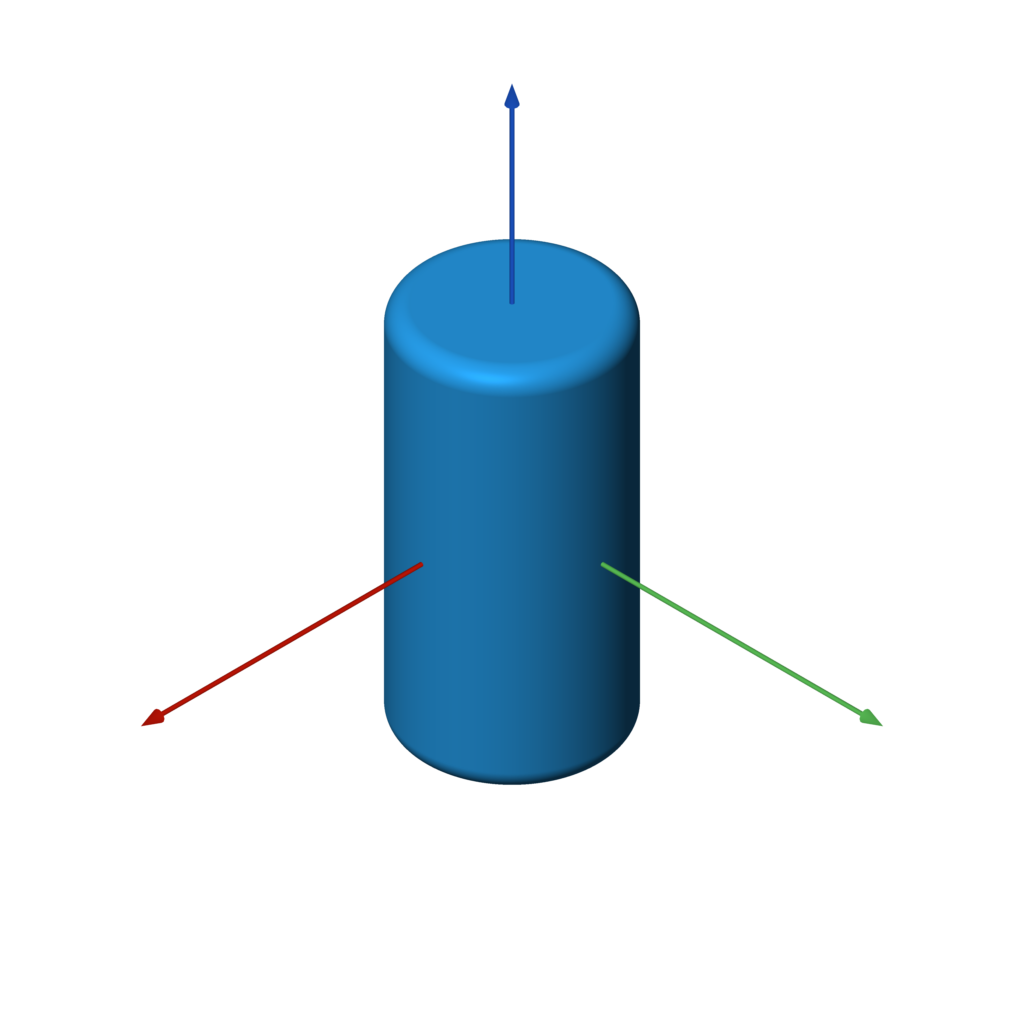 `rounded_cylinder(ra, rb, h)`
```
f = rounded_cylinder(0.5, 0.1, 2)
```
### 带盖圆锥体
`rounded_cylinder(ra, rb, h)`
```
f = rounded_cylinder(0.5, 0.1, 2)
```
### 带盖圆锥体
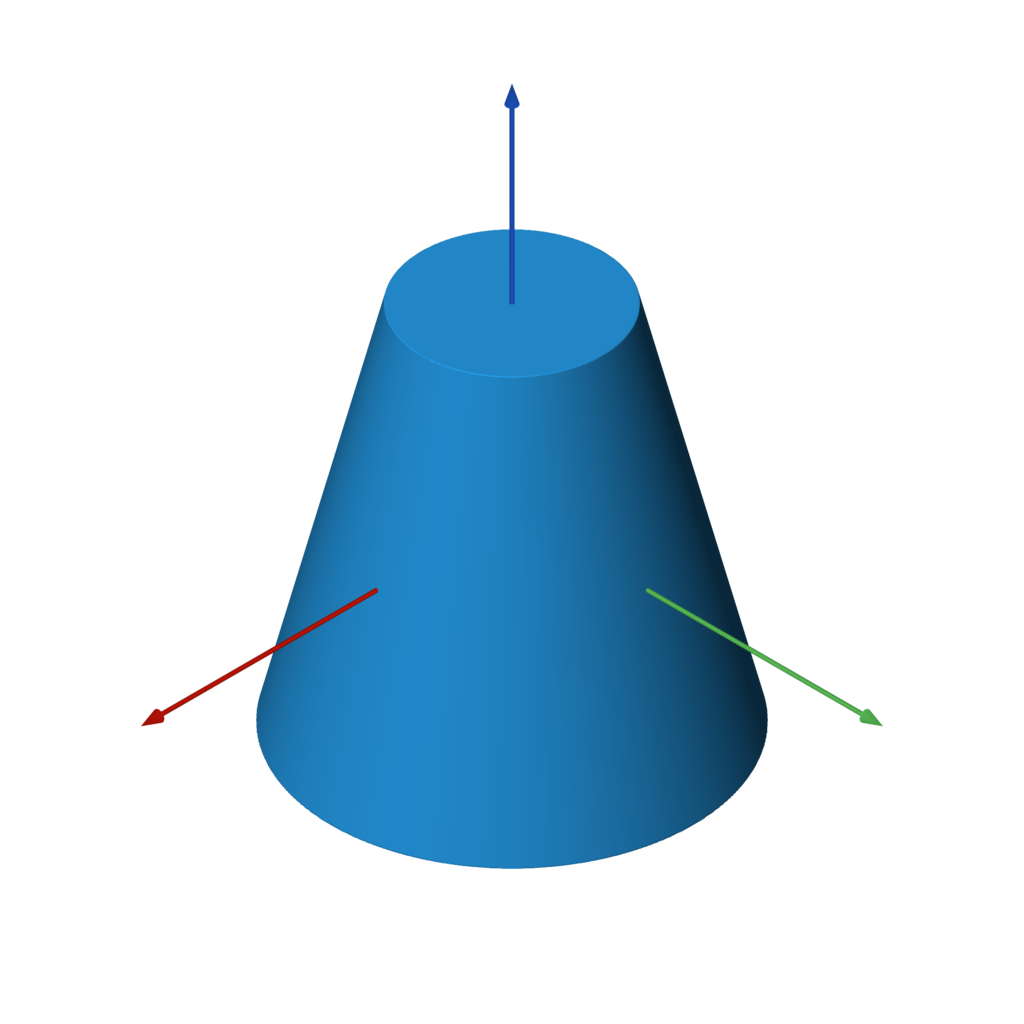 `capped_cone(a, b, ra, rb)`
```
f = capped_cone(-Z, Z, 1, 0.5)
```
### 圆角圆锥体
`capped_cone(a, b, ra, rb)`
```
f = capped_cone(-Z, Z, 1, 0.5)
```
### 圆角圆锥体
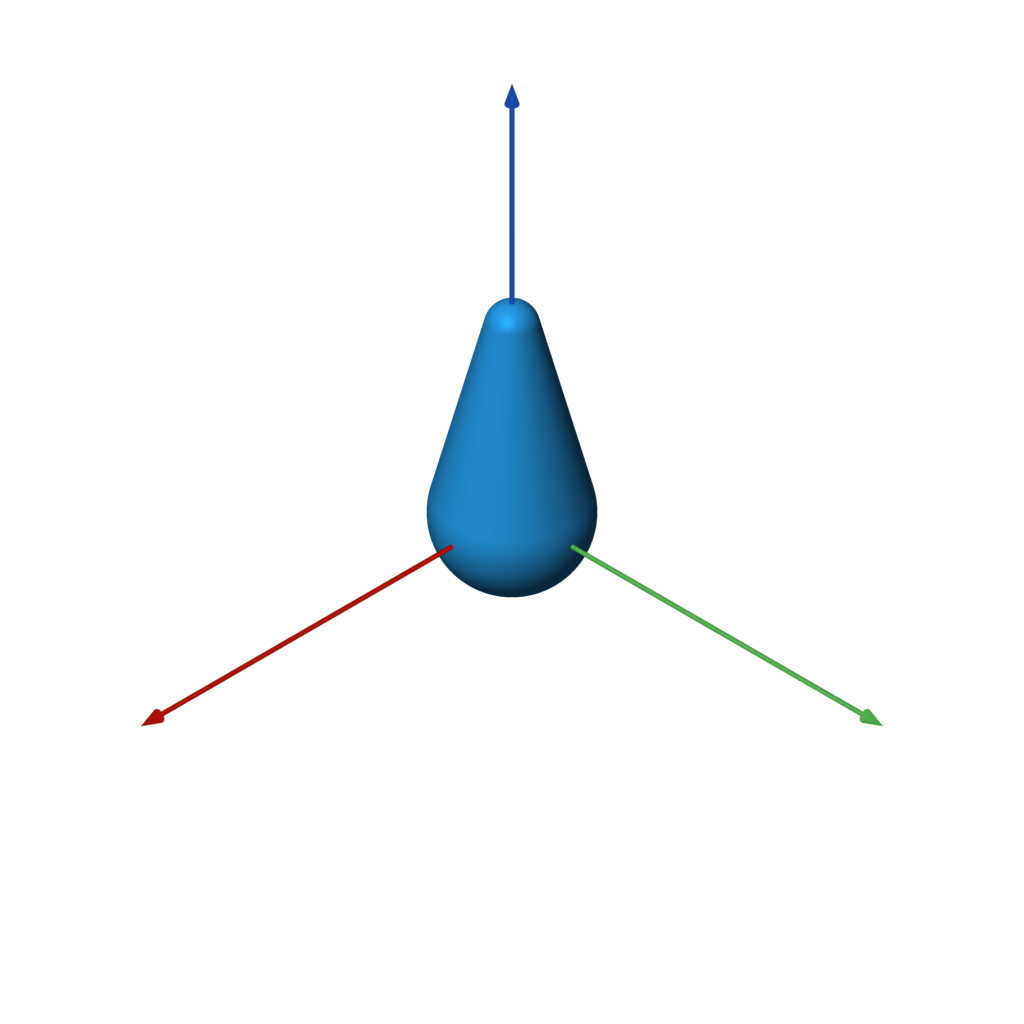 `rounded_cone(r1, r2, h)`
```
f = rounded_cone(0.75, 0.25, 2)
```
### 椭球体
`rounded_cone(r1, r2, h)`
```
f = rounded_cone(0.75, 0.25, 2)
```
### 椭球体
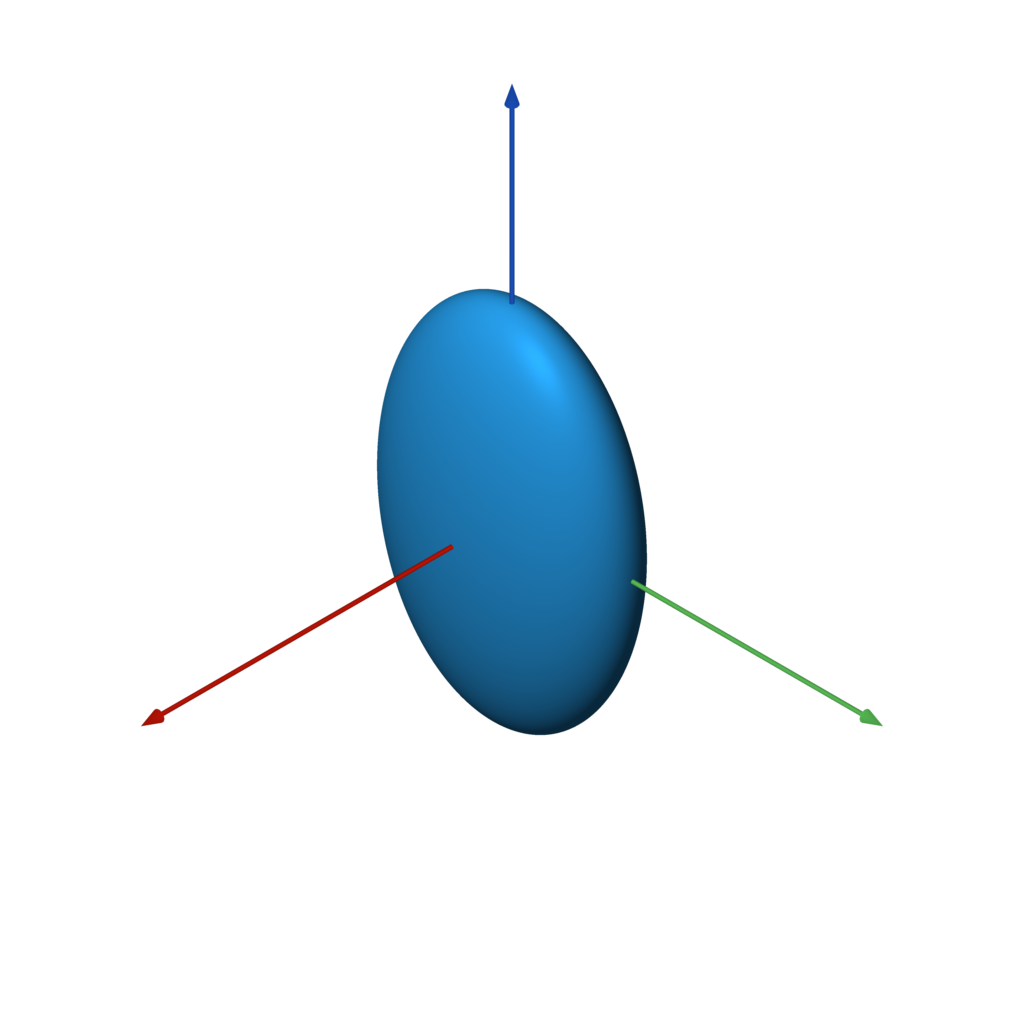 `ellipsoid(size)`
```
f = ellipsoid((1, 2, 3))
```
### 棱锥
`ellipsoid(size)`
```
f = ellipsoid((1, 2, 3))
```
### 棱锥
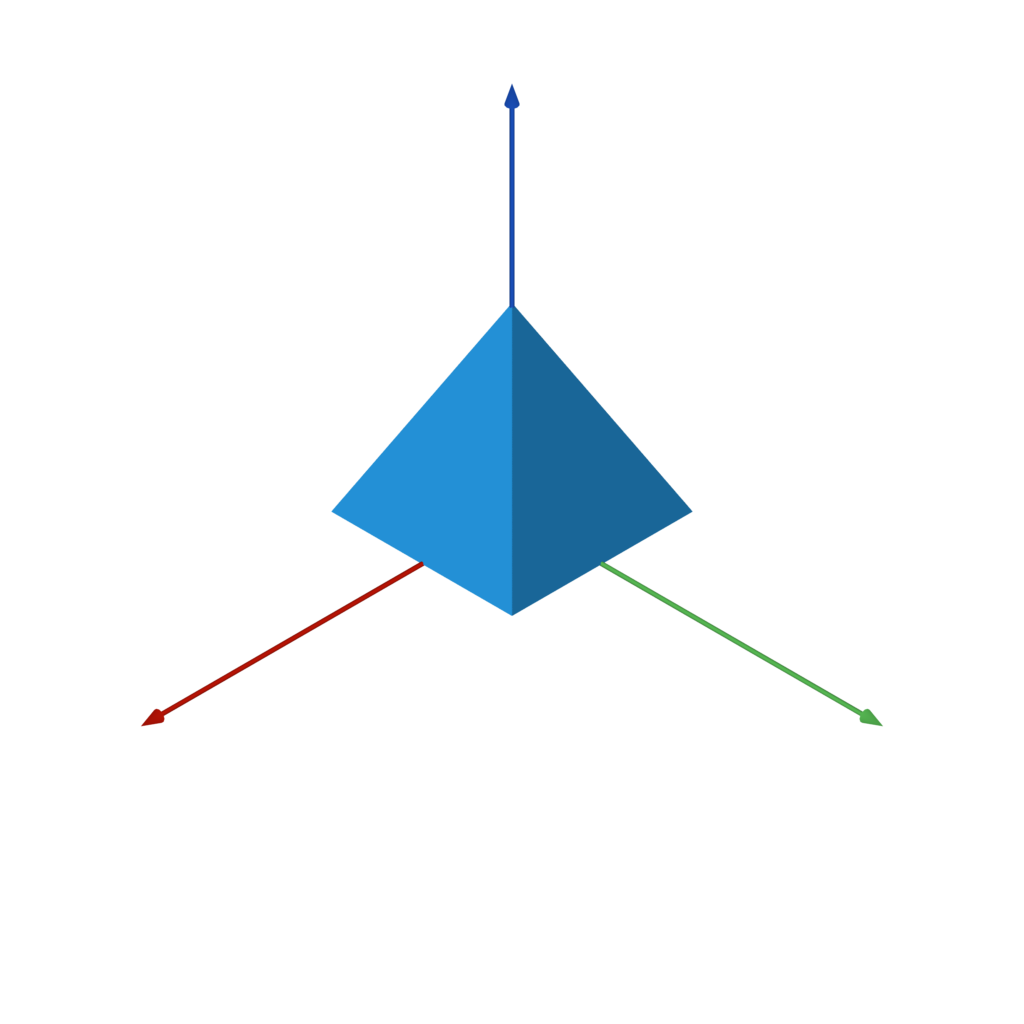 `pyramid(h)`
```
f = pyramid(1)
```
## 柏拉图立体
### 四面体
`pyramid(h)`
```
f = pyramid(1)
```
## 柏拉图立体
### 四面体
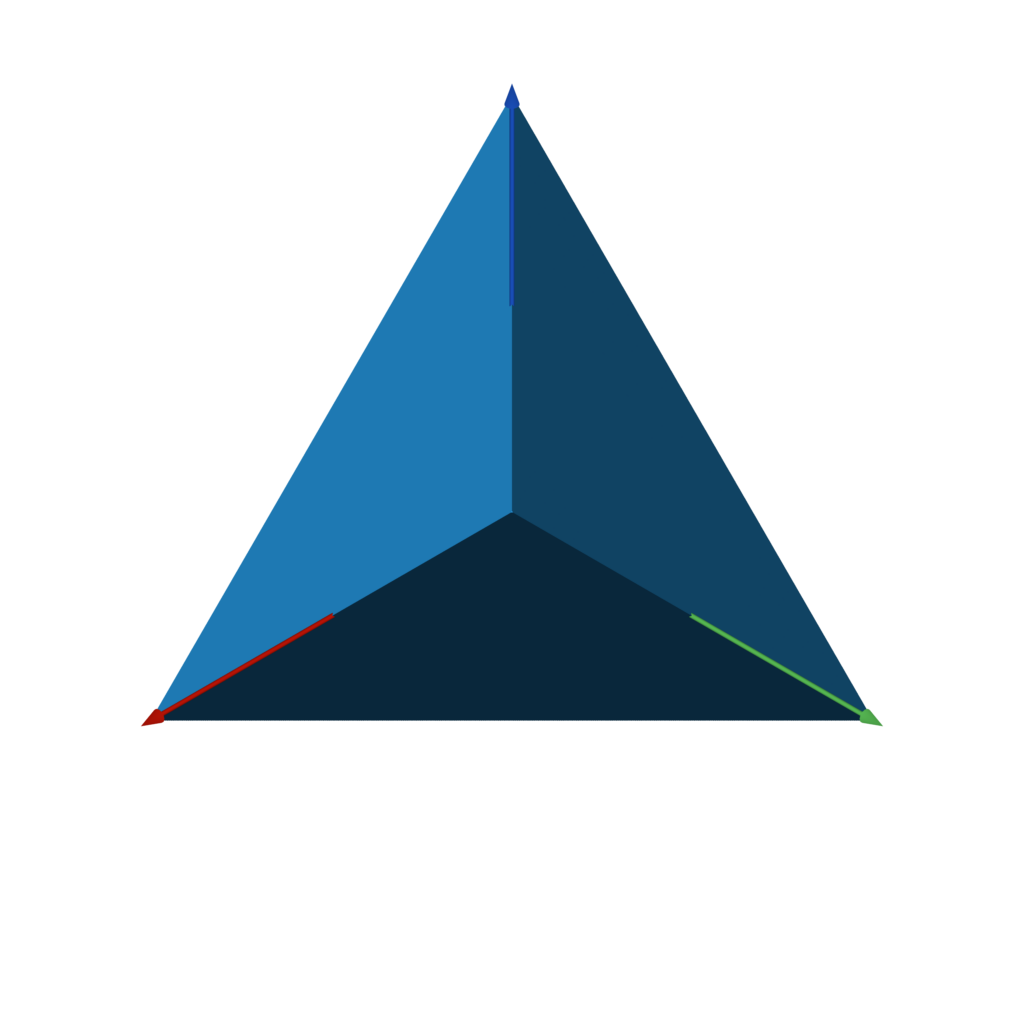 `tetrahedron(r)`
```
f = tetrahedron(1)
```
### 八面体
`tetrahedron(r)`
```
f = tetrahedron(1)
```
### 八面体
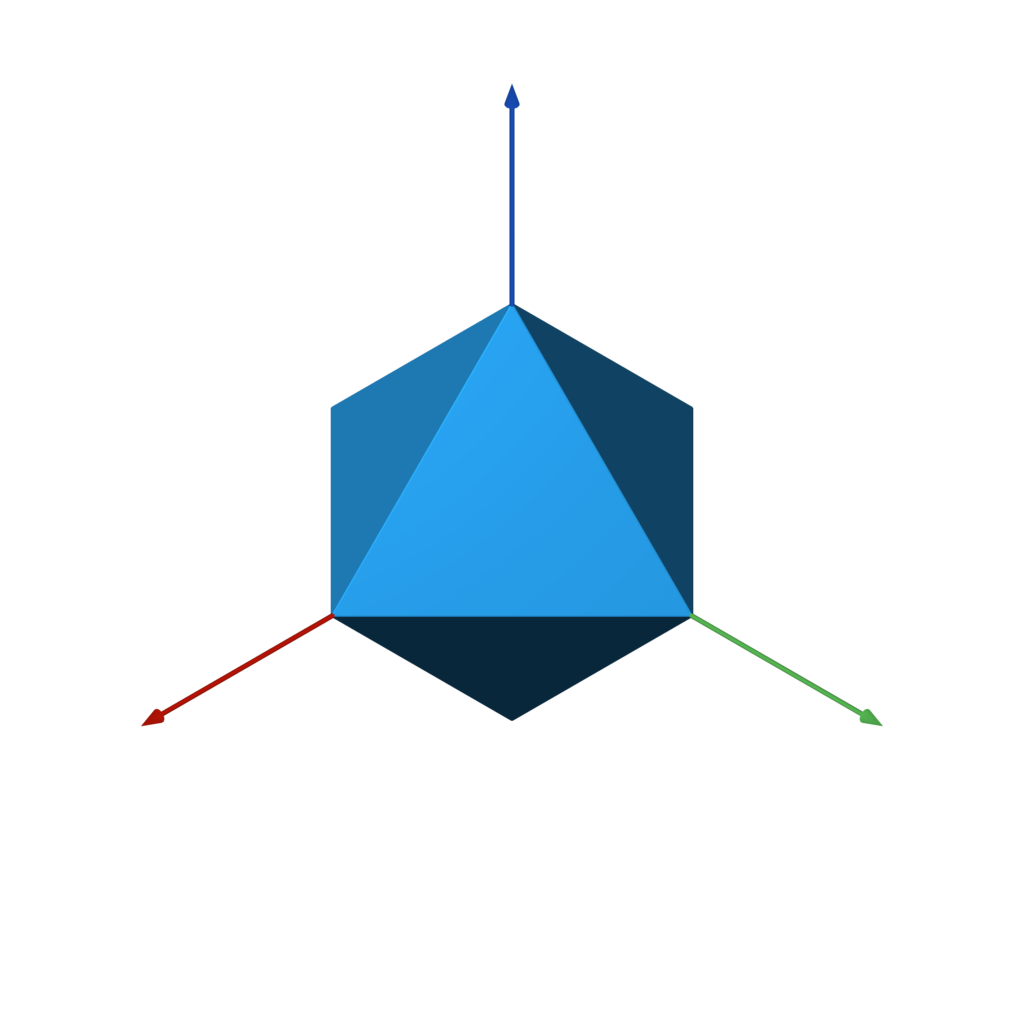 `octahedron(r)`
```
f = octahedron(1)
```
### 十二面体
`octahedron(r)`
```
f = octahedron(1)
```
### 十二面体
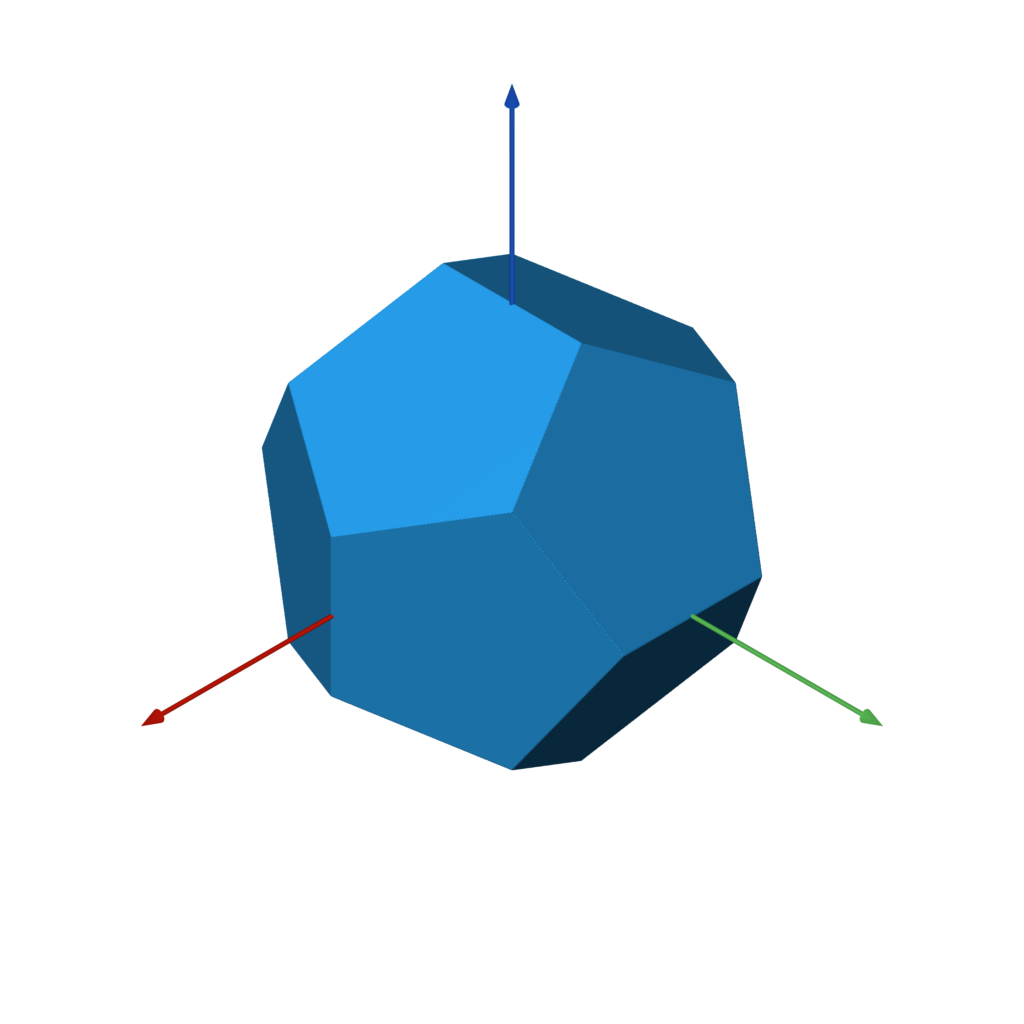 `dodecahedron(r)`
```
f = dodecahedron(1)
```
### 二十面体
`dodecahedron(r)`
```
f = dodecahedron(1)
```
### 二十面体
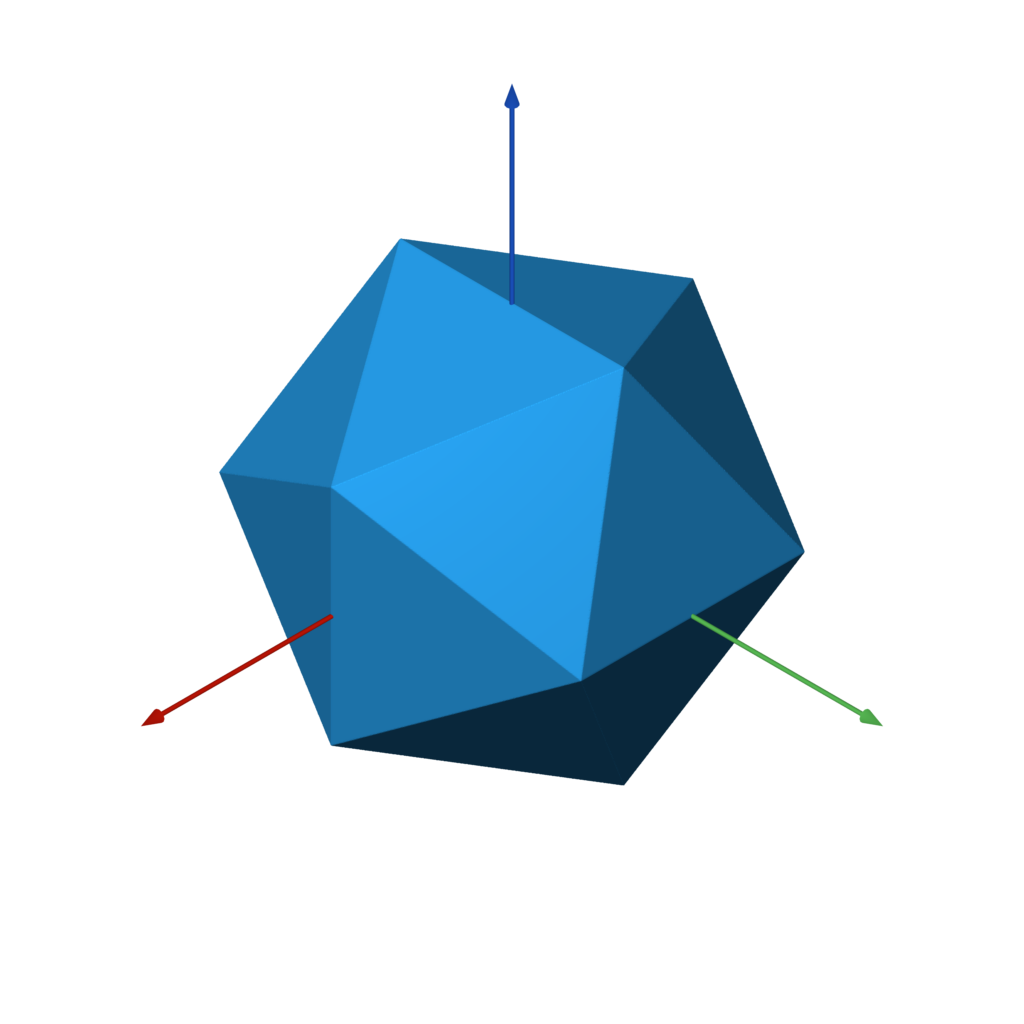 `icosahedron(r)`
```
f = icosahedron(1)
```
## 无限 3D 图元
以下 SDF 在某些或所有轴向上无限延伸。
它们只能在与其他形状结合时有效使用,如下面的示例所示。
### 平面
`icosahedron(r)`
```
f = icosahedron(1)
```
## 无限 3D 图元
以下 SDF 在某些或所有轴向上无限延伸。
它们只能在与其他形状结合时有效使用,如下面的示例所示。
### 平面
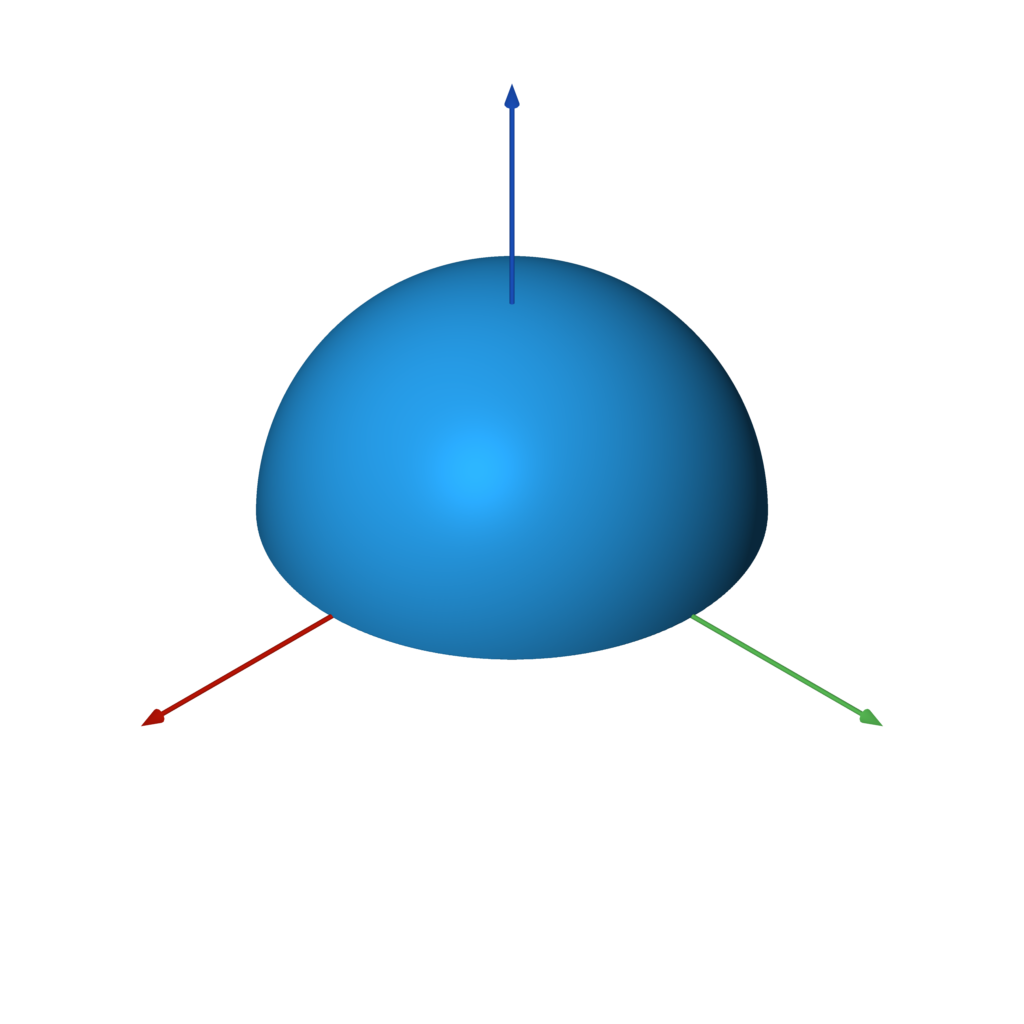 `plane(normal=UP, point=ORIGIN)`
`plane` 是一个无限平面,其中一侧为正(外部),另一侧为负(内部)。
```
f = sphere() & plane()
```
### 平板
`plane(normal=UP, point=ORIGIN)`
`plane` 是一个无限平面,其中一侧为正(外部),另一侧为负(内部)。
```
f = sphere() & plane()
```
### 平板
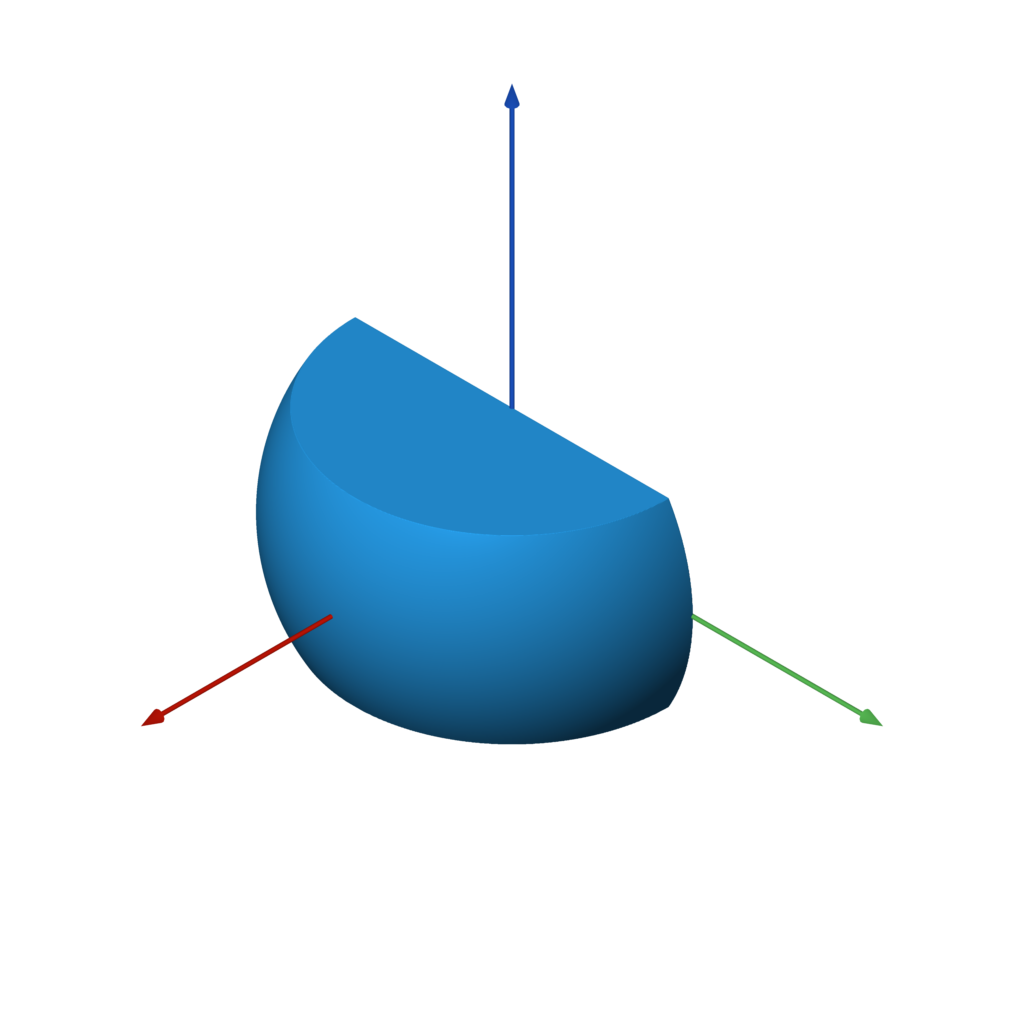 `slab(x0=None, y0=None, z0=None, x1=None, y1=None, z1=None, k=None)`
`slab` 可用于在一个或多个轴对齐的平面上切割形状。
```
f = sphere() & slab(z0=-0.5, z1=0.5, x0=0)
```
### 圆柱体
`slab(x0=None, y0=None, z0=None, x1=None, y1=None, z1=None, k=None)`
`slab` 可用于在一个或多个轴对齐的平面上切割形状。
```
f = sphere() & slab(z0=-0.5, z1=0.5, x0=0)
```
### 圆柱体
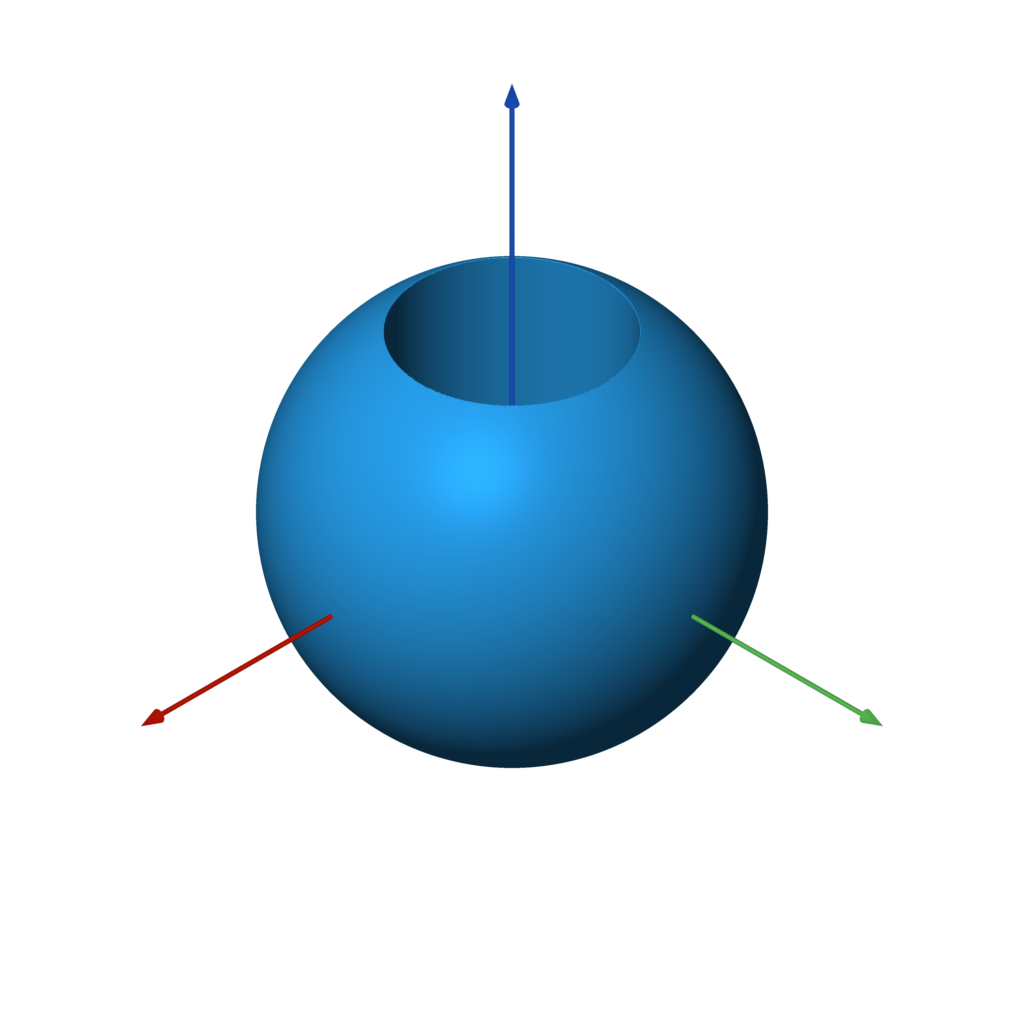 `cylinder(radius)`
`cylinder` 是一个沿 Z 轴的无限圆柱体。
```
f = sphere() - cylinder(0.5)
```
## 文本
是的,甚至支持文本!
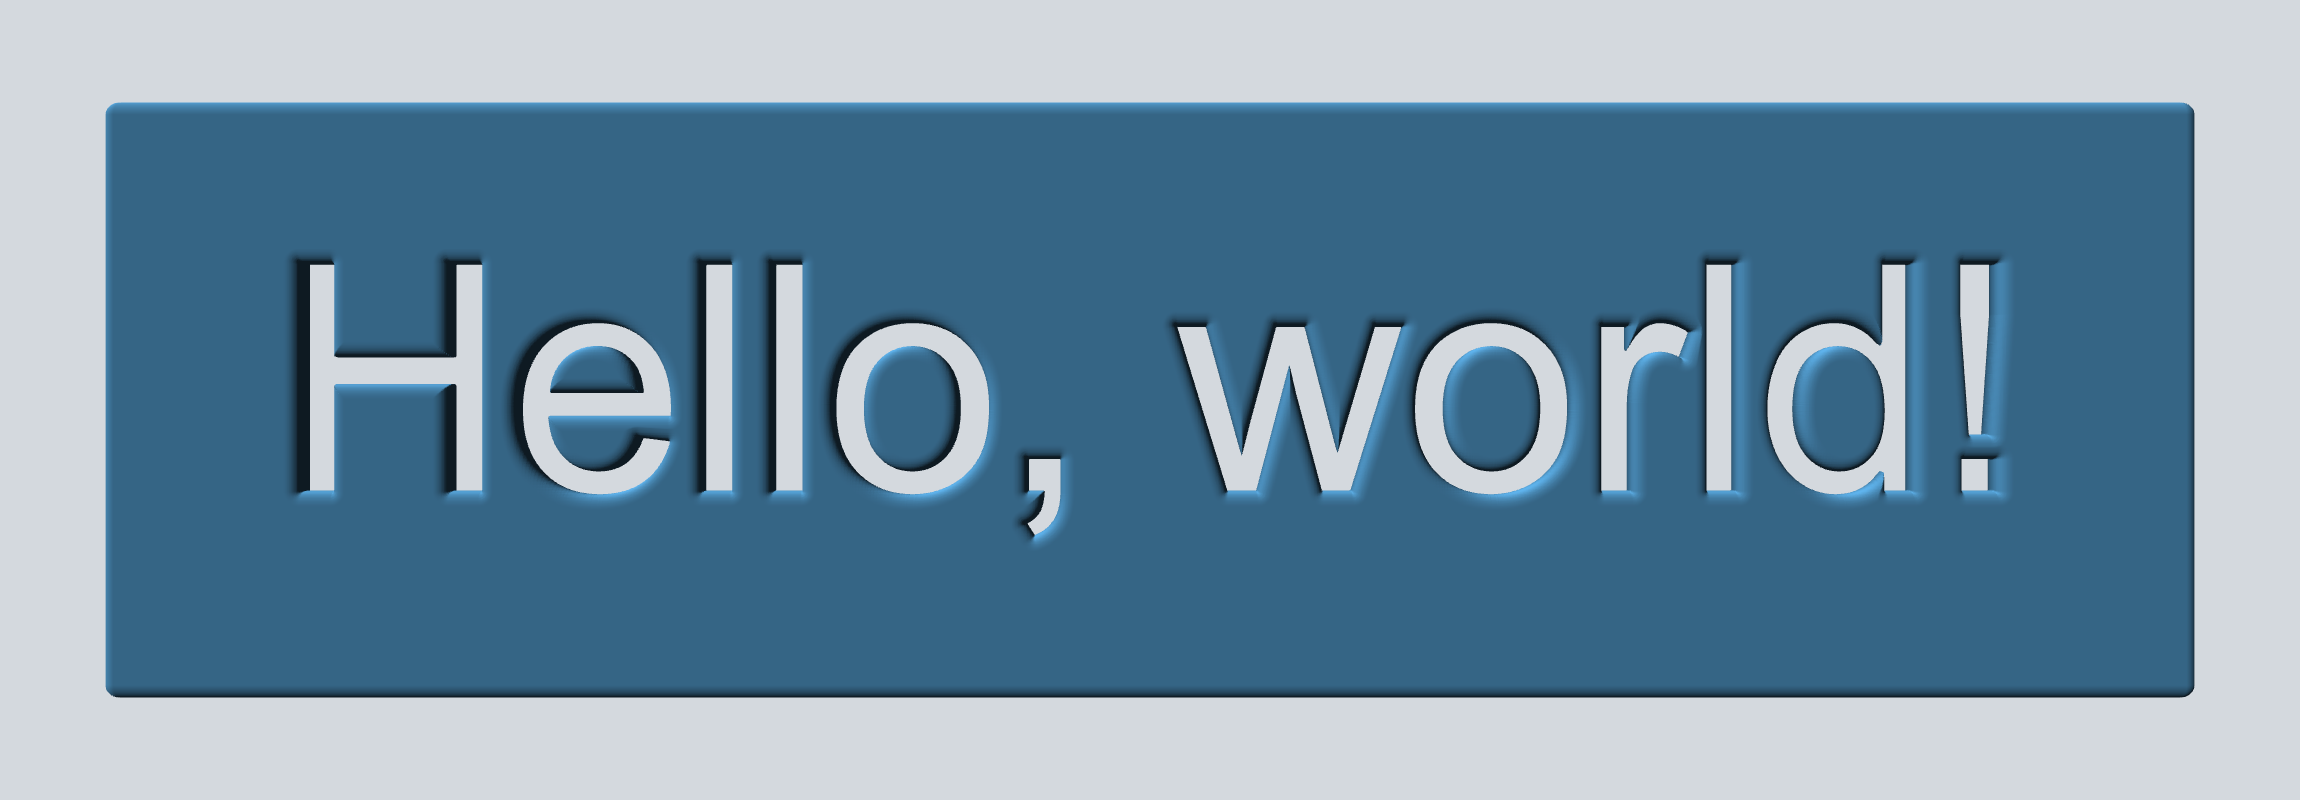
`text(font_name, text, width=None, height=None, pixels=PIXELS, points=512)`
```
FONT = 'Arial'
TEXT = 'Hello, world!'
w, h = measure_text(FONT, TEXT)
f = rounded_box((w + 1, h + 1, 0.2), 0.1)
f -= text(FONT, TEXT).extrude(1)
```
注意:[PIL.ImageFont](https://pillow.readthedocs.io/en/stable/reference/ImageFont.html),用于加载字体,并不是在所有操作系统上都按名称搜索字体。
例如,在 Ubuntu 上必须提供字体的完整路径。
(例如 `/usr/share/fonts/truetype/freefont/FreeMono.ttf`)
## 图像
图像蒙版可以拉伸并整合到你的 3D 模型中。
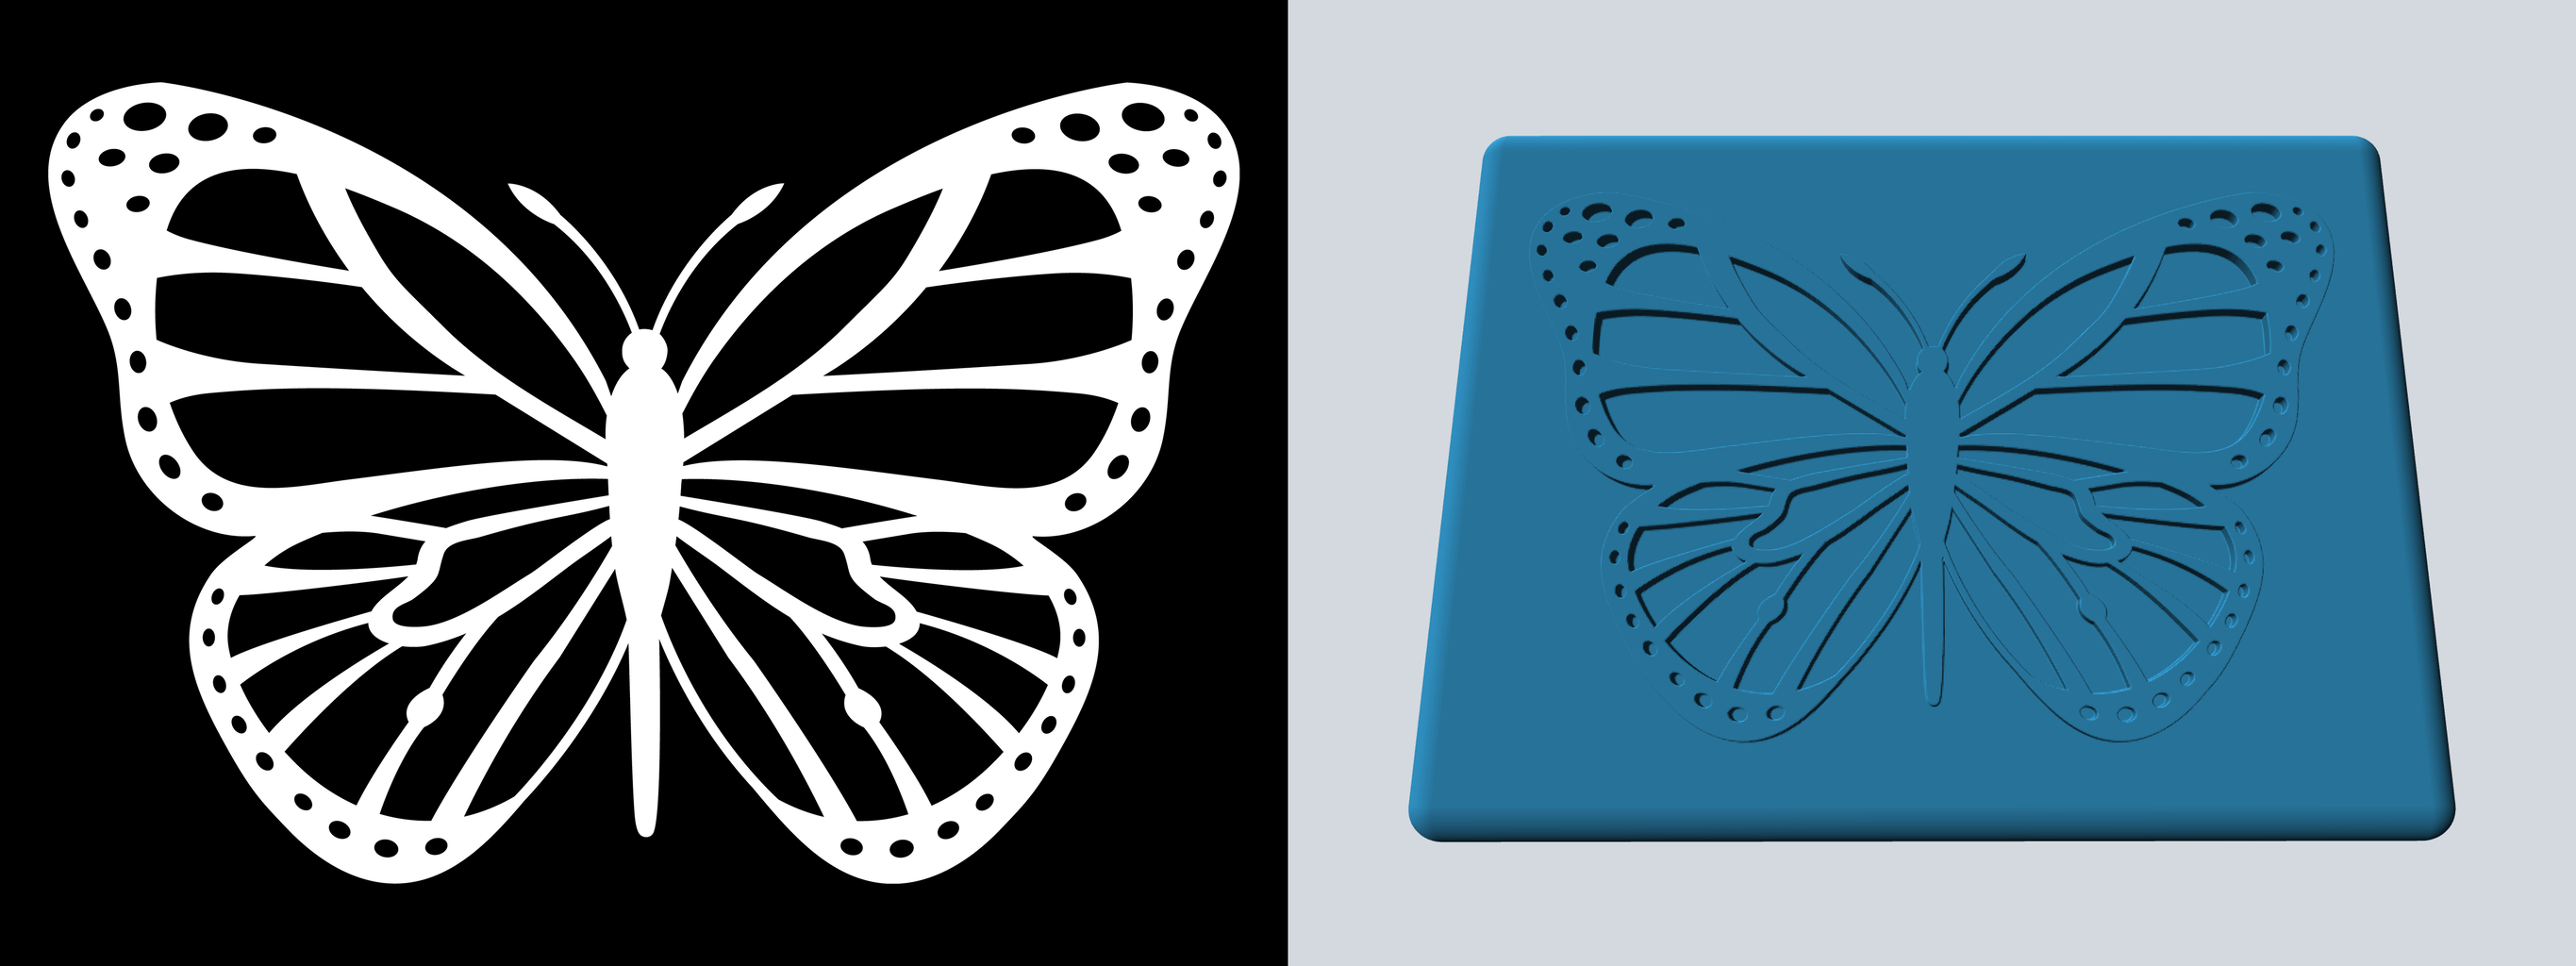
`image(path_or_array, width=None, height=None, pixels=PIXELS)`
```
IMAGE = 'examples/butterfly.png'
w, h = measure_image(IMAGE)
f = rounded_box((w * 1.1, h * 1.1, 0.1), 0.05)
f |= image(IMAGE).extrude(1) & slab(z0=0, z1=0.075)
```
## 定位
### 平移
`cylinder(radius)`
`cylinder` 是一个沿 Z 轴的无限圆柱体。
```
f = sphere() - cylinder(0.5)
```
## 文本
是的,甚至支持文本!

`text(font_name, text, width=None, height=None, pixels=PIXELS, points=512)`
```
FONT = 'Arial'
TEXT = 'Hello, world!'
w, h = measure_text(FONT, TEXT)
f = rounded_box((w + 1, h + 1, 0.2), 0.1)
f -= text(FONT, TEXT).extrude(1)
```
注意:[PIL.ImageFont](https://pillow.readthedocs.io/en/stable/reference/ImageFont.html),用于加载字体,并不是在所有操作系统上都按名称搜索字体。
例如,在 Ubuntu 上必须提供字体的完整路径。
(例如 `/usr/share/fonts/truetype/freefont/FreeMono.ttf`)
## 图像
图像蒙版可以拉伸并整合到你的 3D 模型中。

`image(path_or_array, width=None, height=None, pixels=PIXELS)`
```
IMAGE = 'examples/butterfly.png'
w, h = measure_image(IMAGE)
f = rounded_box((w * 1.1, h * 1.1, 0.1), 0.05)
f |= image(IMAGE).extrude(1) & slab(z0=0, z1=0.075)
```
## 定位
### 平移
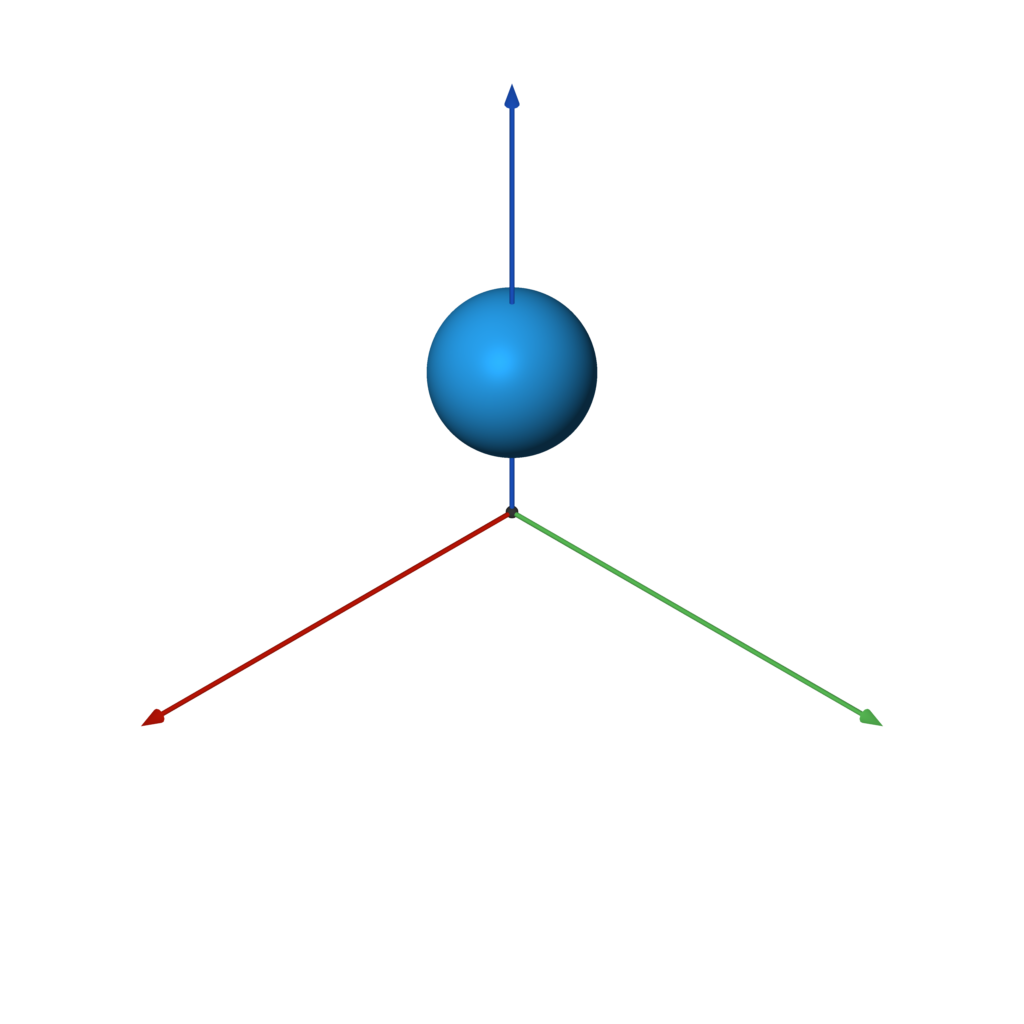 `translate(other, offset)`
```
f = sphere().translate((0, 0, 2))
```
### 缩放
`translate(other, offset)`
```
f = sphere().translate((0, 0, 2))
```
### 缩放
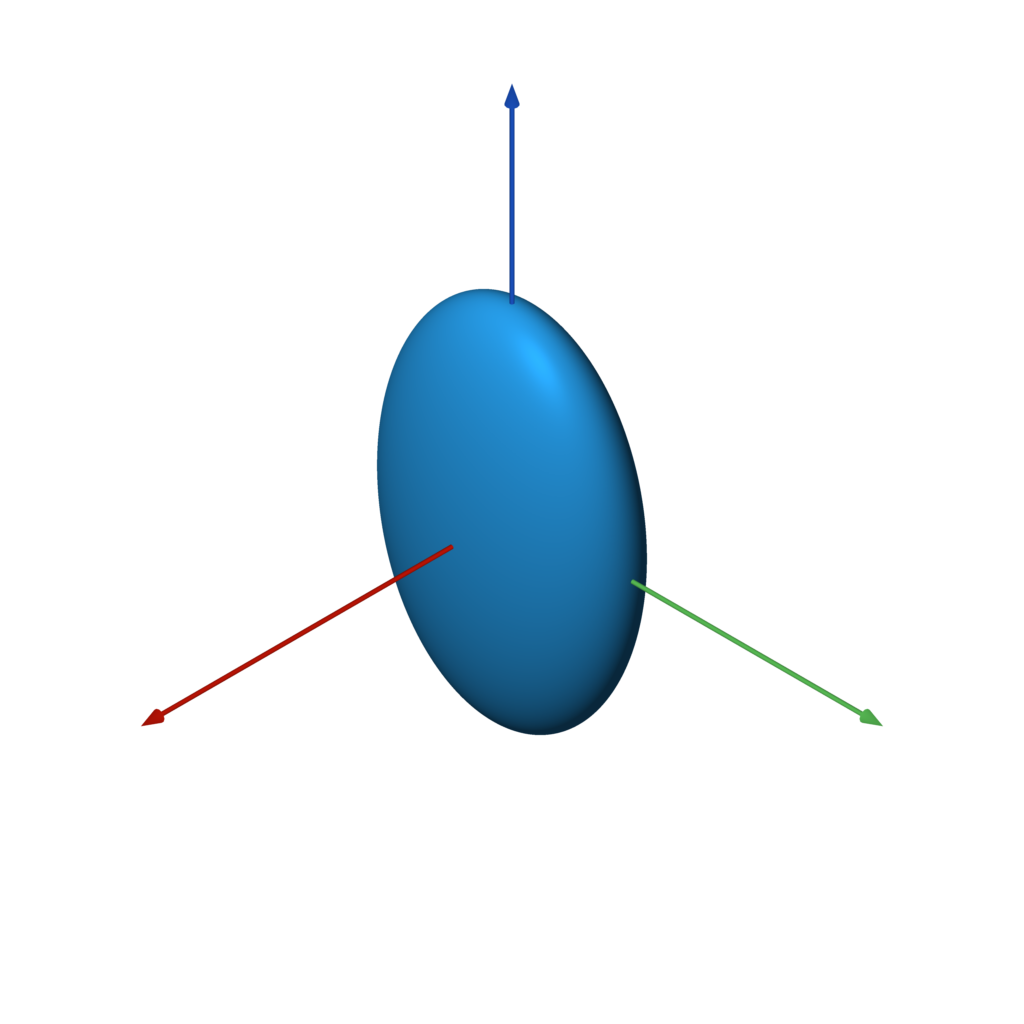 `scale(other, factor)`
请注意,非均匀缩放是不精确的 SDF。
```
f = sphere().scale(2)
f = sphere().scale((1, 2, 3)) # non-uniform scaling
```
### 旋转
`scale(other, factor)`
请注意,非均匀缩放是不精确的 SDF。
```
f = sphere().scale(2)
f = sphere().scale((1, 2, 3)) # non-uniform scaling
```
### 旋转
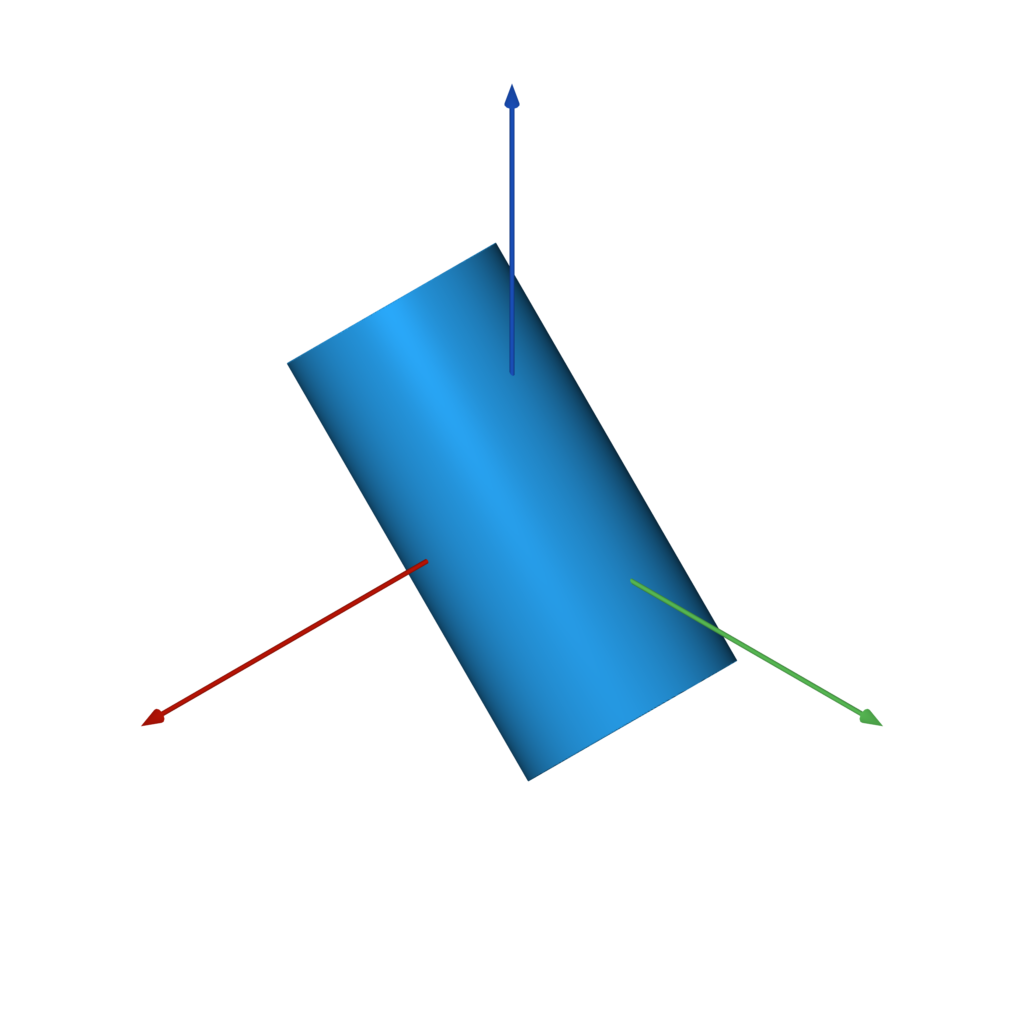 `rotate(other, angle, vector=Z)`
```
f = capped_cylinder(-Z, Z, 0.5).rotate(pi / 4, X)
```
### 定向
`rotate(other, angle, vector=Z)`
```
f = capped_cylinder(-Z, Z, 0.5).rotate(pi / 4, X)
```
### 定向
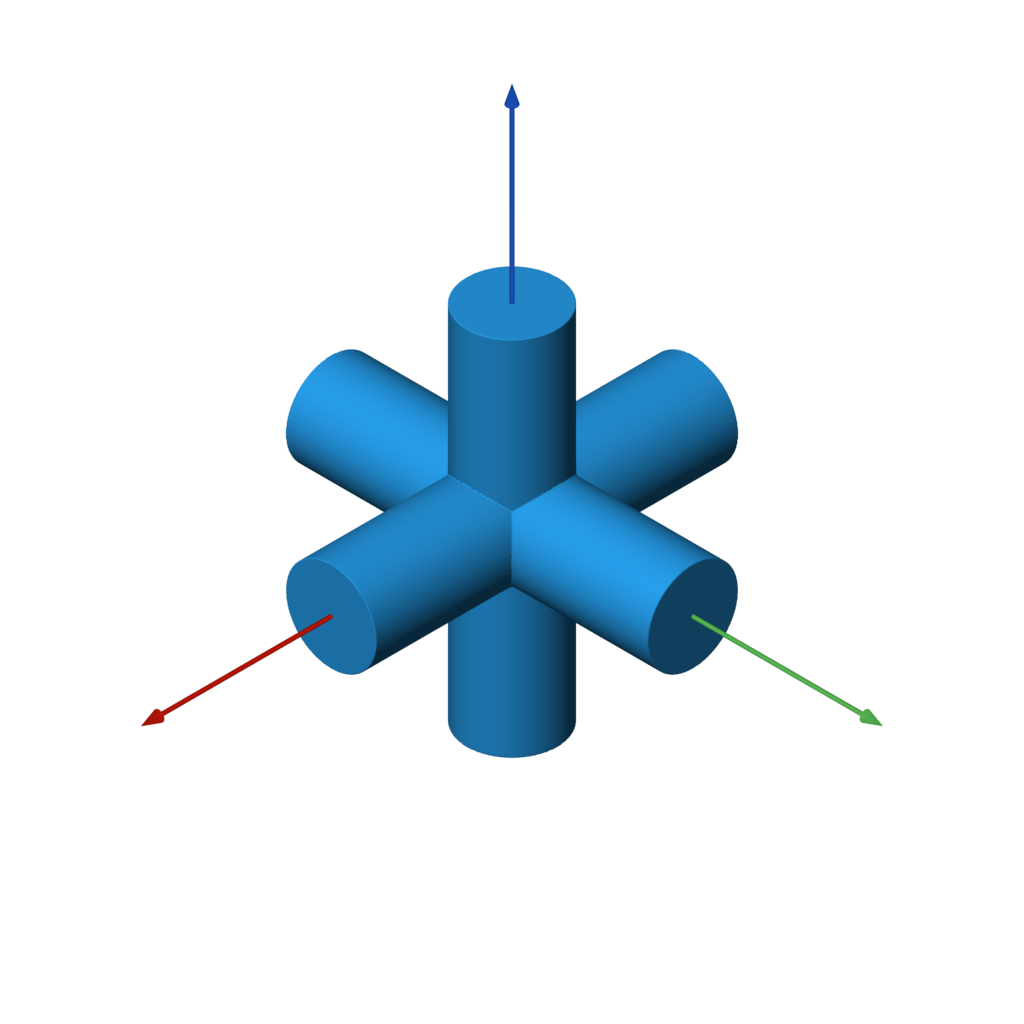 `orient(other, axis)`
`orient` 会旋转形状,使原来指向 +Z 方向的任何部分现在指向指定的方向。
```
c = capped_cylinder(-Z, Z, 0.25)
f = c.orient(X) | c.orient(Y) | c.orient(Z)
```
## 布尔运算
以下图元 `a` 和 `b` 用于所有以下布尔运算中。
```
a = box((3, 3, 0.5))
b = sphere()
```
命名版本(`union`、`difference`、`intersection`)都可以接受一个或多个 SDF 作为输入。它们都接受一个可选的 `k` 参数来定义要平滑量。使用运算符(`|`、`-`、`&`)时,仍然可以通过 `.k(...)` 函数应用平滑处理。
### 并集
`orient(other, axis)`
`orient` 会旋转形状,使原来指向 +Z 方向的任何部分现在指向指定的方向。
```
c = capped_cylinder(-Z, Z, 0.25)
f = c.orient(X) | c.orient(Y) | c.orient(Z)
```
## 布尔运算
以下图元 `a` 和 `b` 用于所有以下布尔运算中。
```
a = box((3, 3, 0.5))
b = sphere()
```
命名版本(`union`、`difference`、`intersection`)都可以接受一个或多个 SDF 作为输入。它们都接受一个可选的 `k` 参数来定义要平滑量。使用运算符(`|`、`-`、`&`)时,仍然可以通过 `.k(...)` 函数应用平滑处理。
### 并集
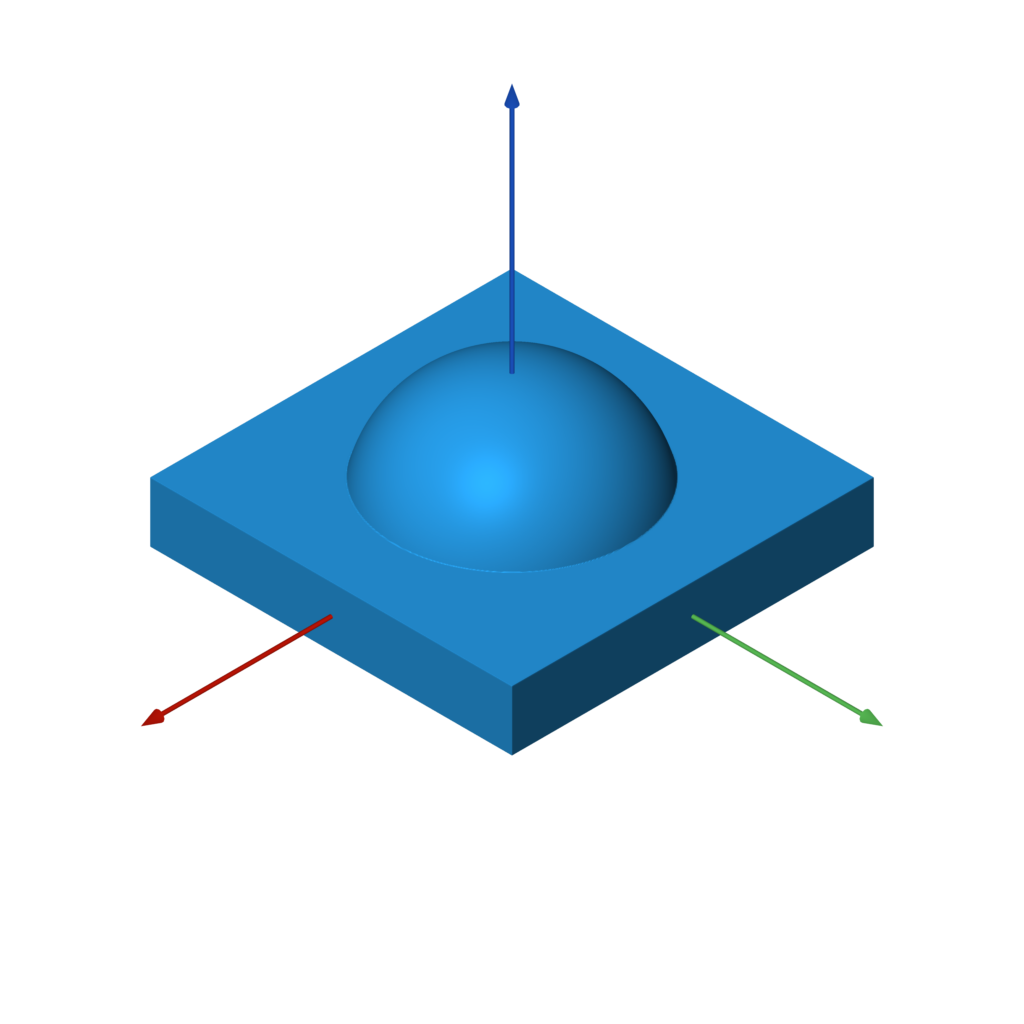 ```
f = a | b
f = union(a, b) # equivalent
```
```
f = a | b
f = union(a, b) # equivalent
```
### 差集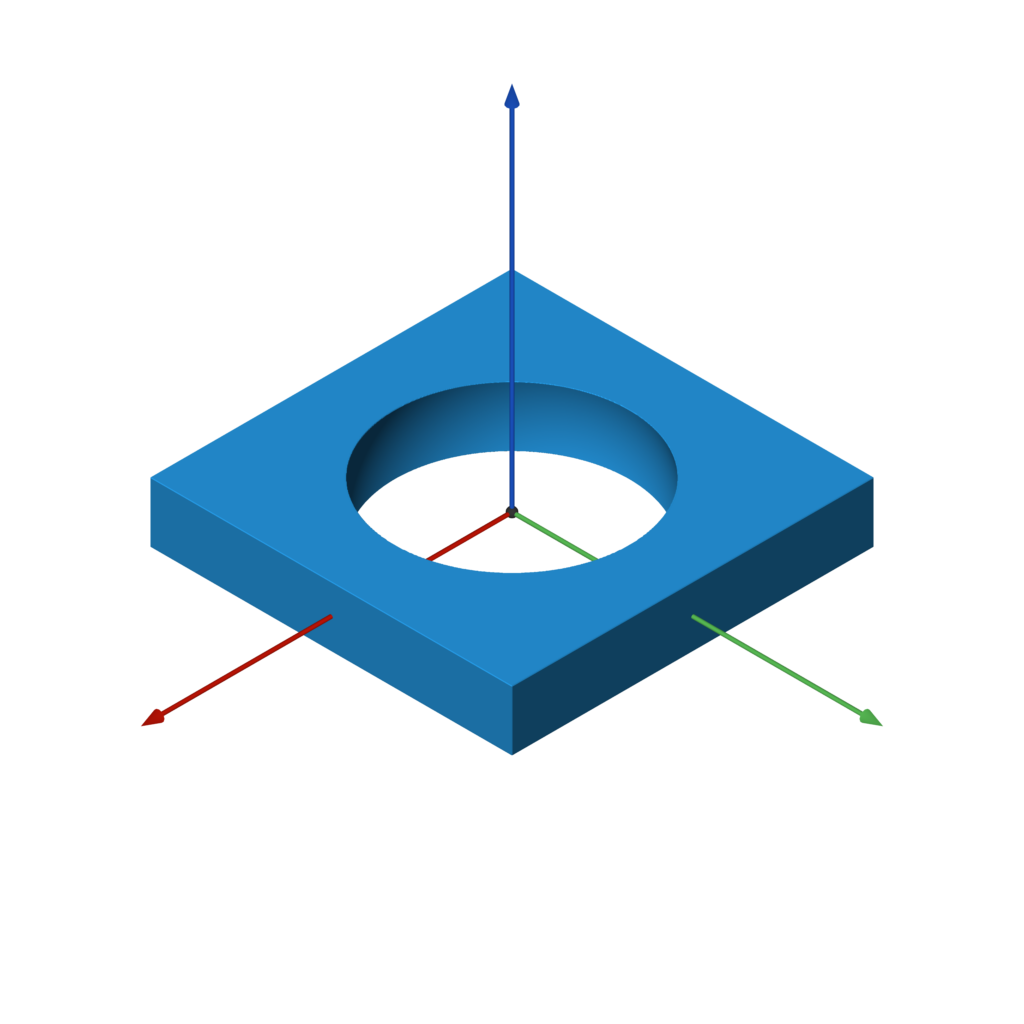 ```
f = a - b
f = difference(a, b) # equivalent
```
```
f = a - b
f = difference(a, b) # equivalent
```
### 交集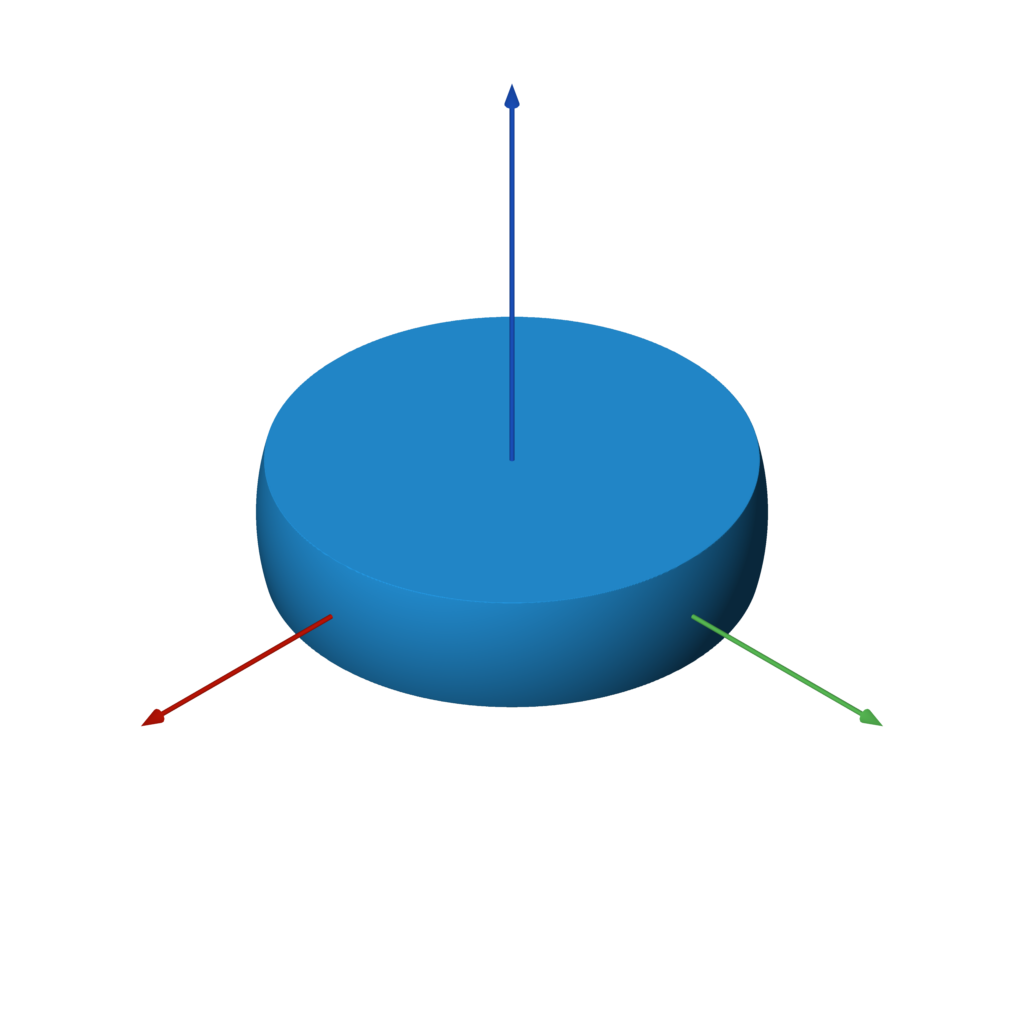 ```
f = a & b
f = intersection(a, b) # equivalent
```
```
f = a & b
f = intersection(a, b) # equivalent
```
### 平滑并集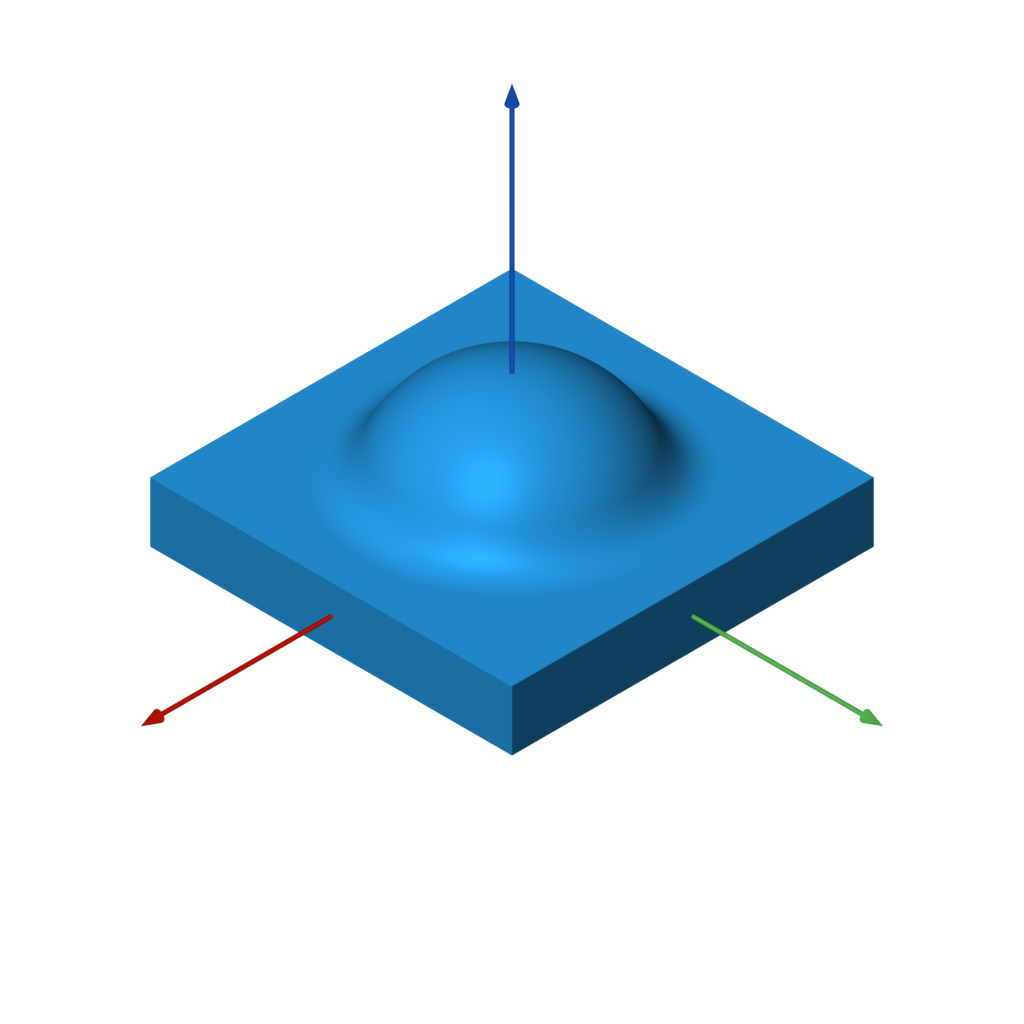 ```
f = a | b.k(0.25)
f = union(a, b, k=0.25) # equivalent
```
```
f = a | b.k(0.25)
f = union(a, b, k=0.25) # equivalent
```
### 平滑差集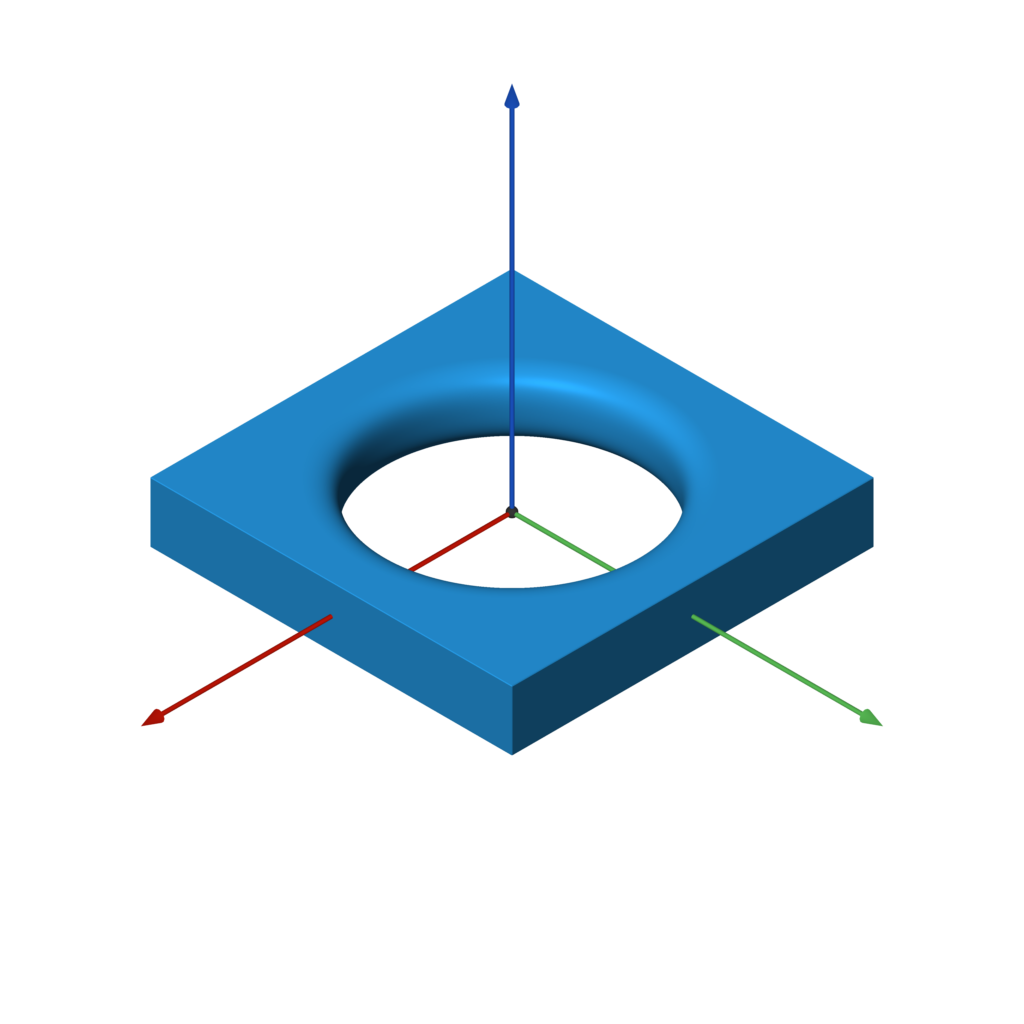 ```
f = a - b.k(0.25)
f = difference(a, b, k=0.25) # equivalent
```
```
f = a - b.k(0.25)
f = difference(a, b, k=0.25) # equivalent
```
### 平滑交集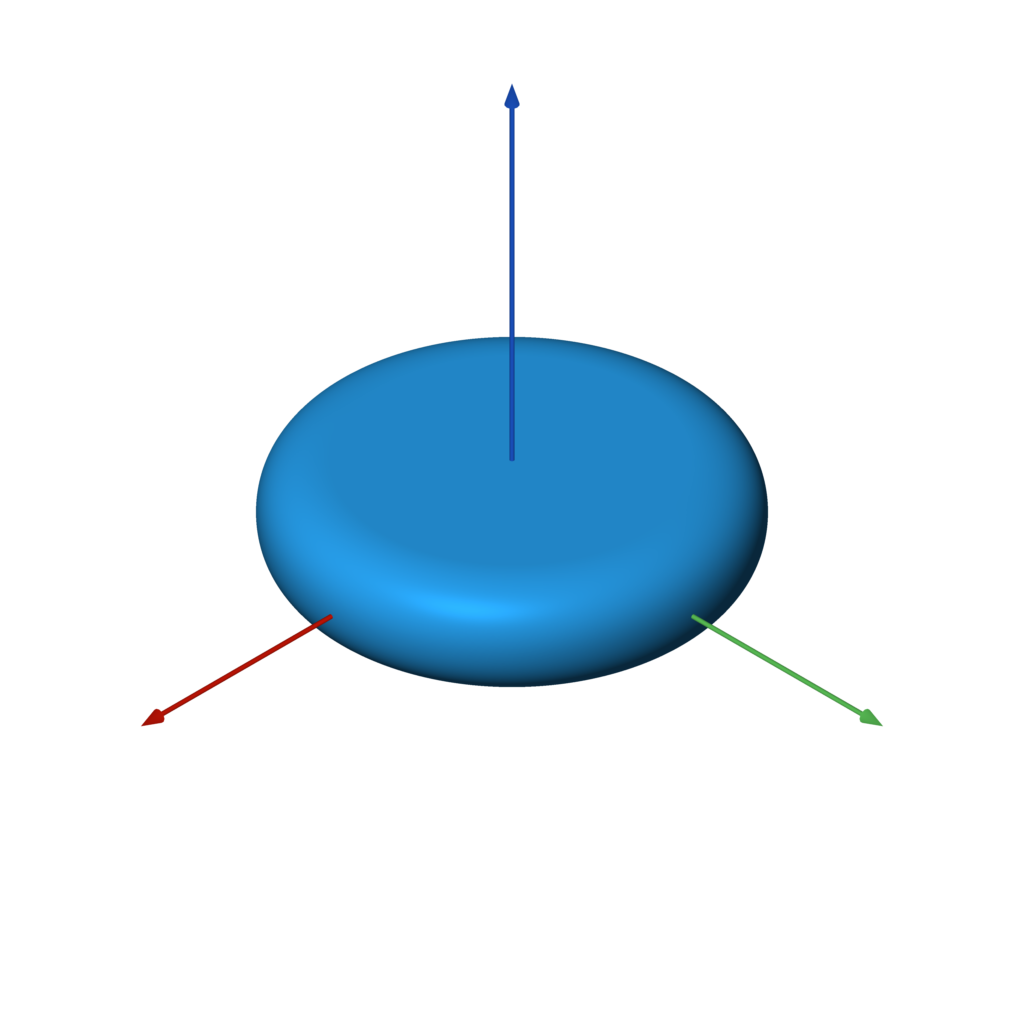 ```
f = a & b.k(0.25)
f = intersection(a, b, k=0.25) # equivalent
```
```
f = a & b.k(0.25)
f = intersection(a, b, k=0.25) # equivalent
```
## 重复 ### 重复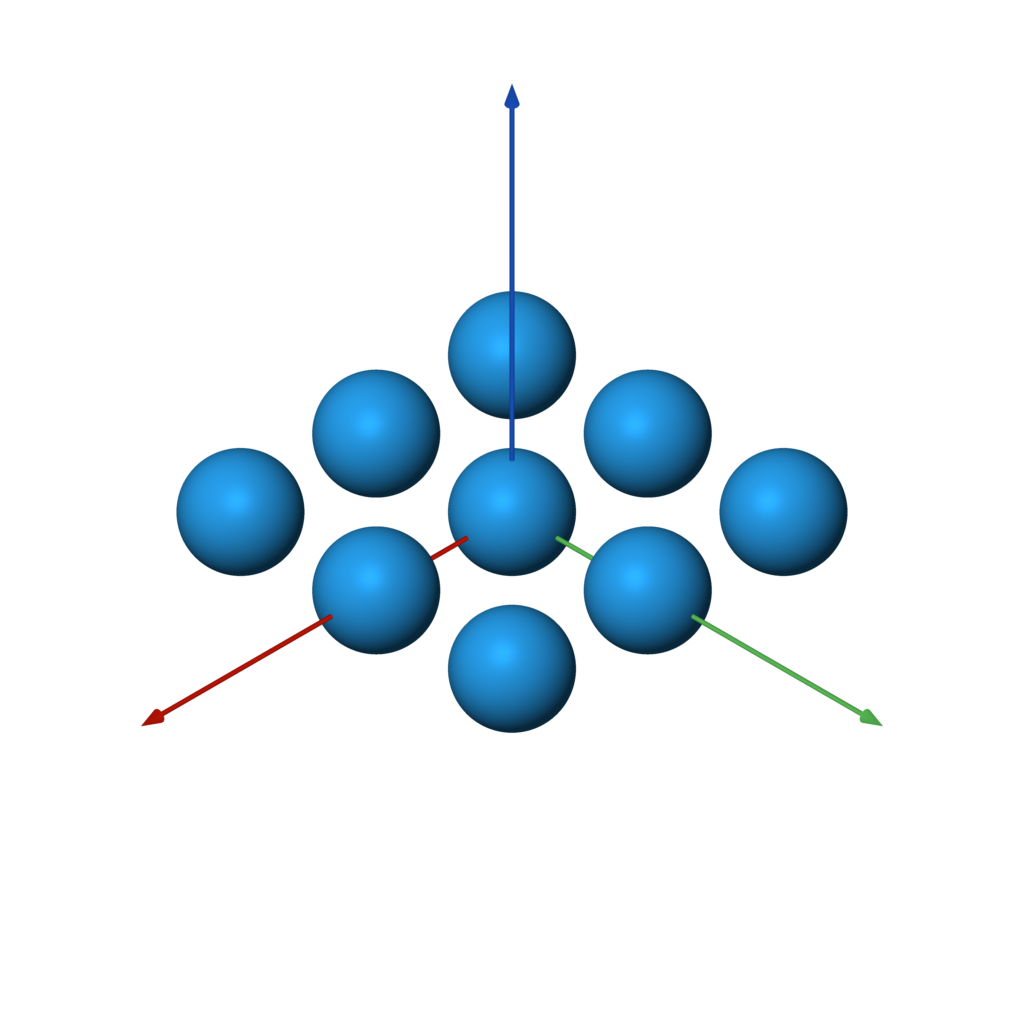 `repeat(other, spacing, count=None, padding=0)`
`repeat` 可以无限次或有限次地重复底层 SDF。如果是有限的,重复次数必须是奇数,因为 count 指定的是在原点每侧复制的数量。如果重复的元素重叠或靠得很近,你可能需要指定一个大于零的 `padding` 来计算正确的 SDF。
```
f = sphere().repeat(3, (1, 1, 0))
```
### 环形阵列
`repeat(other, spacing, count=None, padding=0)`
`repeat` 可以无限次或有限次地重复底层 SDF。如果是有限的,重复次数必须是奇数,因为 count 指定的是在原点每侧复制的数量。如果重复的元素重叠或靠得很近,你可能需要指定一个大于零的 `padding` 来计算正确的 SDF。
```
f = sphere().repeat(3, (1, 1, 0))
```
### 环形阵列
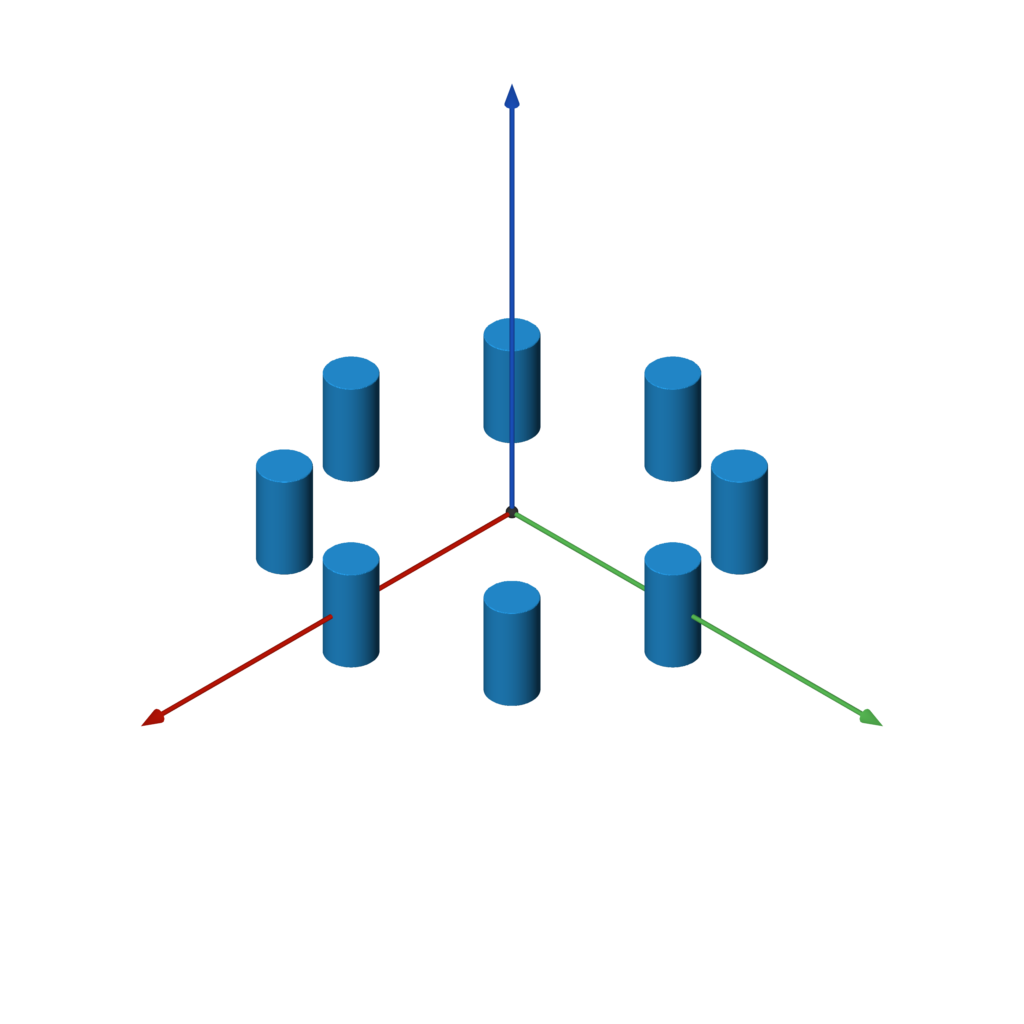 `circular_array(other, count, offset)`
`circular_array` 制作底层 SDF 的 `count` 个副本,并围绕 Z 轴排列成圆形。`offset` 指定在阵列前将形状沿 X 轴平移多远。底层 SDF 仅被评估两次(而不是 `count` 次),因此这比实例化 `count` 个形状副本的性能更高。
```
f = capped_cylinder(-Z, Z, 0.5).circular_array(8, 4)
```
## 杂项
### 混合
`circular_array(other, count, offset)`
`circular_array` 制作底层 SDF 的 `count` 个副本,并围绕 Z 轴排列成圆形。`offset` 指定在阵列前将形状沿 X 轴平移多远。底层 SDF 仅被评估两次(而不是 `count` 次),因此这比实例化 `count` 个形状副本的性能更高。
```
f = capped_cylinder(-Z, Z, 0.5).circular_array(8, 4)
```
## 杂项
### 混合
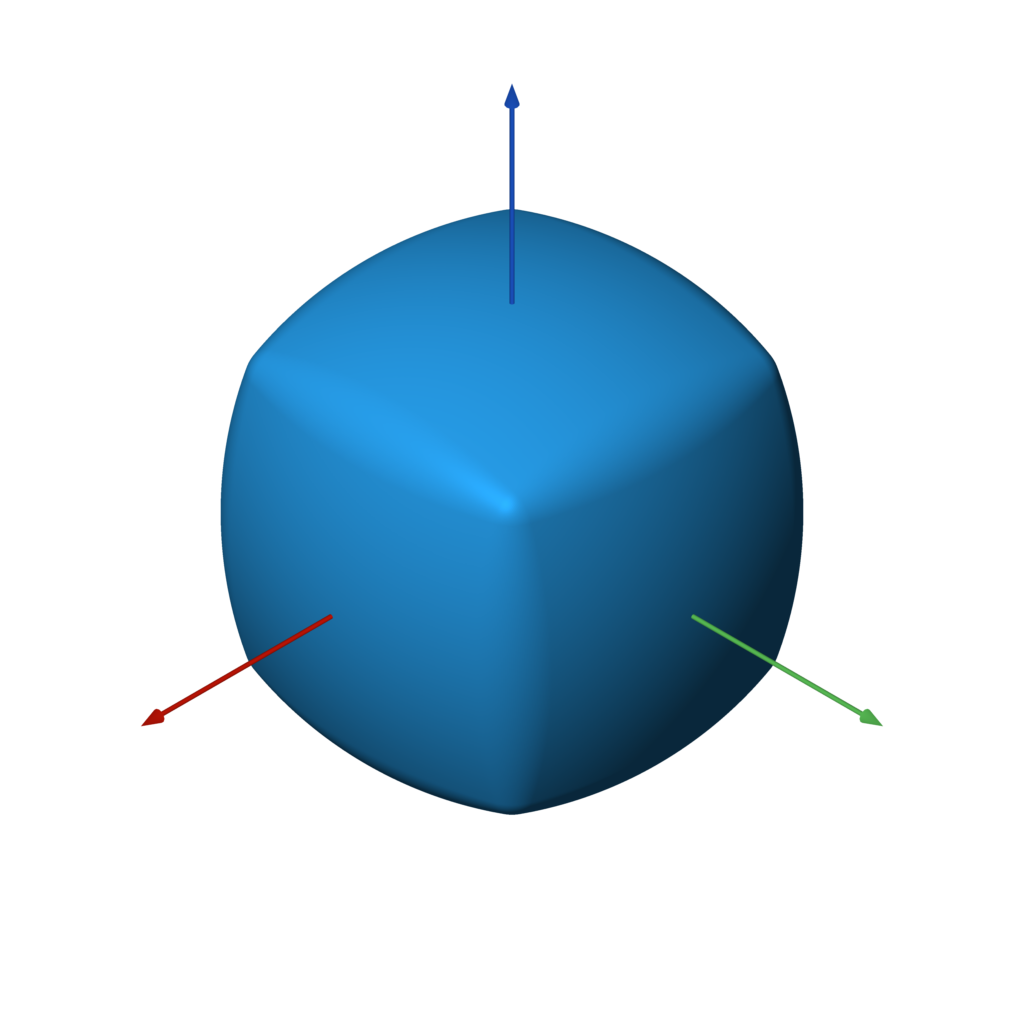 `blend(a, *bs, k=0.5)`
```
f = sphere().blend(box())
```
### 膨胀
`blend(a, *bs, k=0.5)`
```
f = sphere().blend(box())
```
### 膨胀
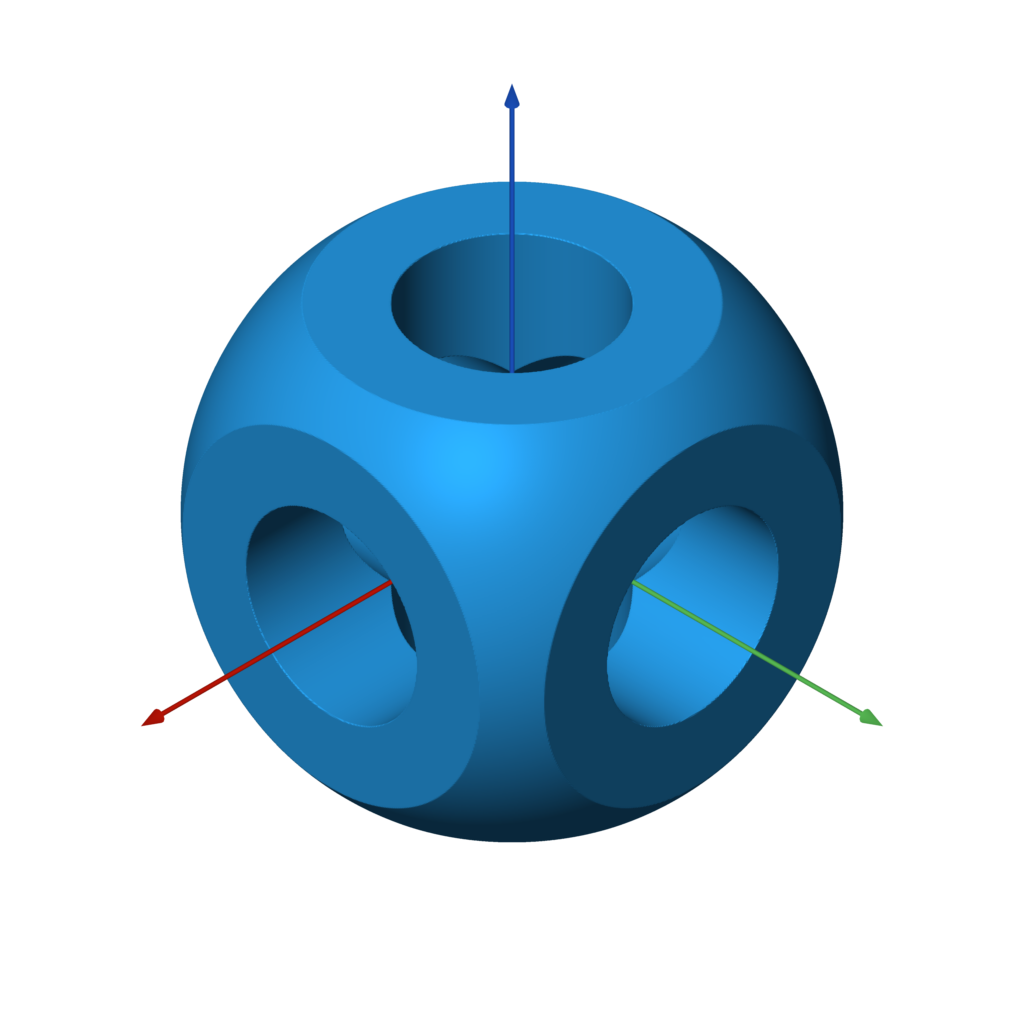 `dilate(other, r)`
```
f = example.dilate(0.1)
```
### 腐蚀
`dilate(other, r)`
```
f = example.dilate(0.1)
```
### 腐蚀
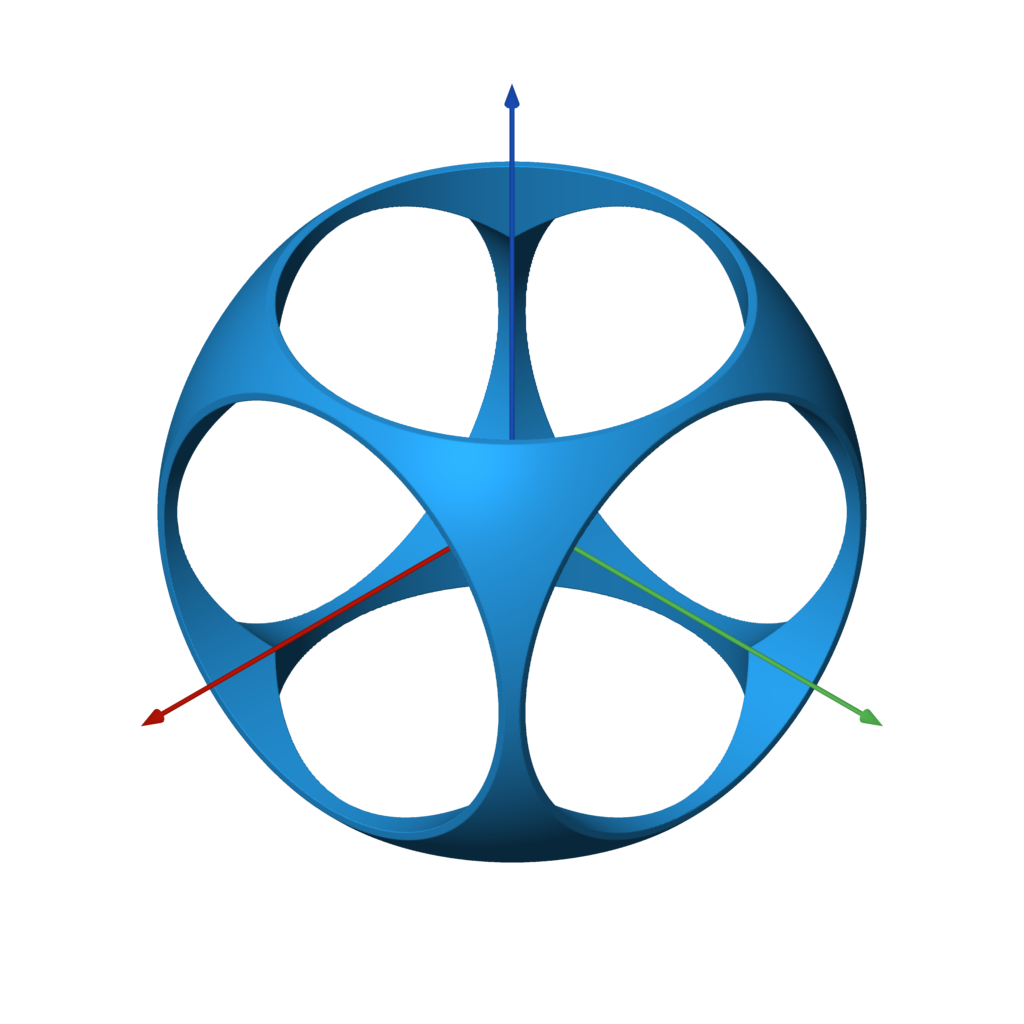 `erode(other, r)`
```
f = example.erode(0.1)
```
### 壳体
`erode(other, r)`
```
f = example.erode(0.1)
```
### 壳体
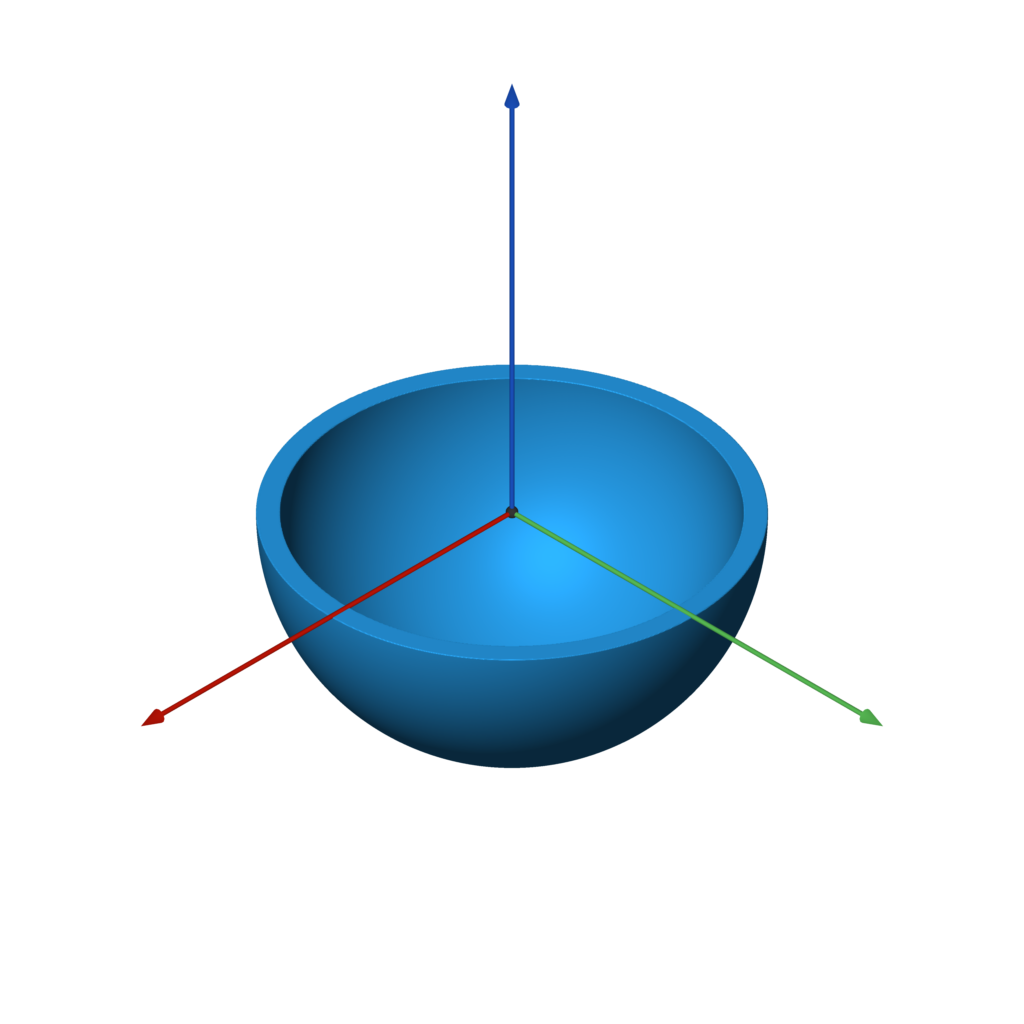 `shell(other, thickness)`
```
f = sphere().shell(0.05) & plane(-Z)
```
### 拉长
`shell(other, thickness)`
```
f = sphere().shell(0.05) & plane(-Z)
```
### 拉长
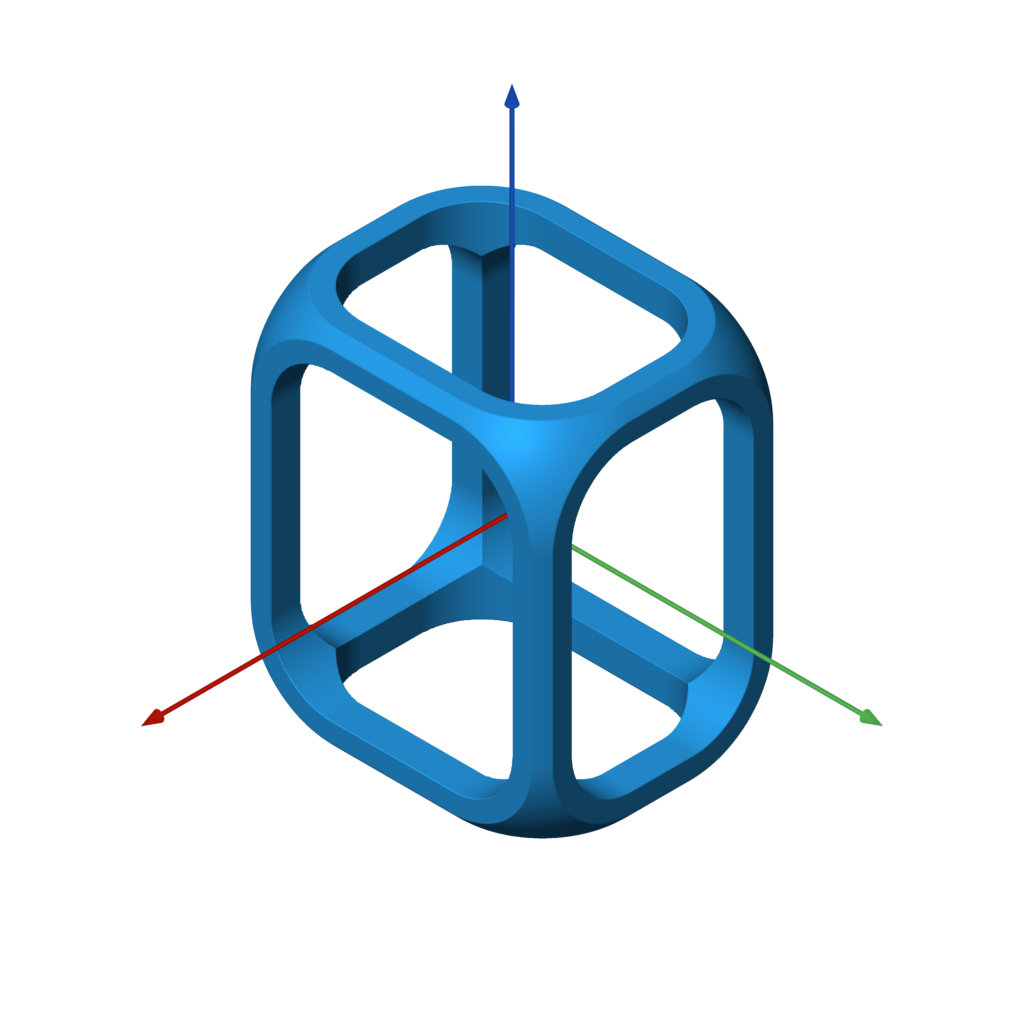 `elongate(other, size)`
```
f = example.elongate((0.25, 0.5, 0.75))
```
### 扭曲
`elongate(other, size)`
```
f = example.elongate((0.25, 0.5, 0.75))
```
### 扭曲
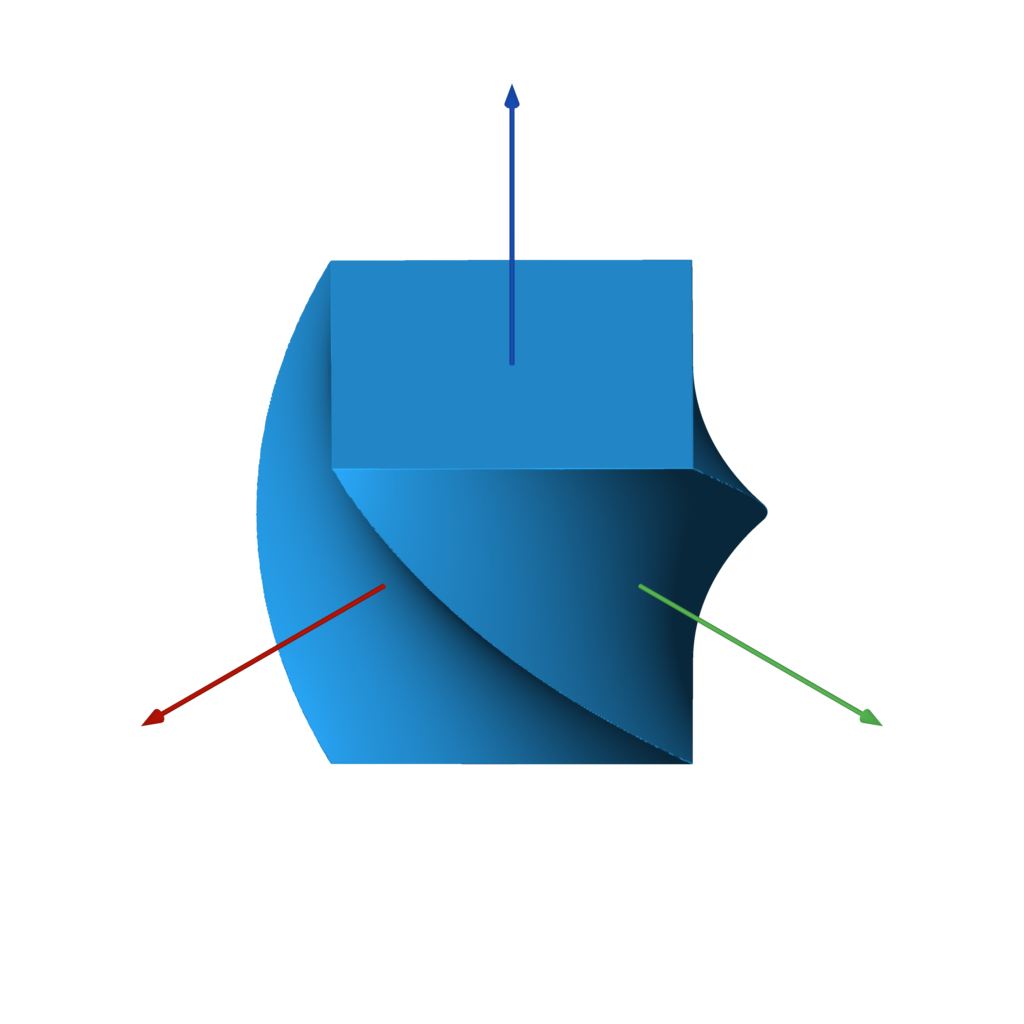 `twist(other, k)`
```
f = box().twist(pi / 2)
```
### 弯曲
`twist(other, k)`
```
f = box().twist(pi / 2)
```
### 弯曲
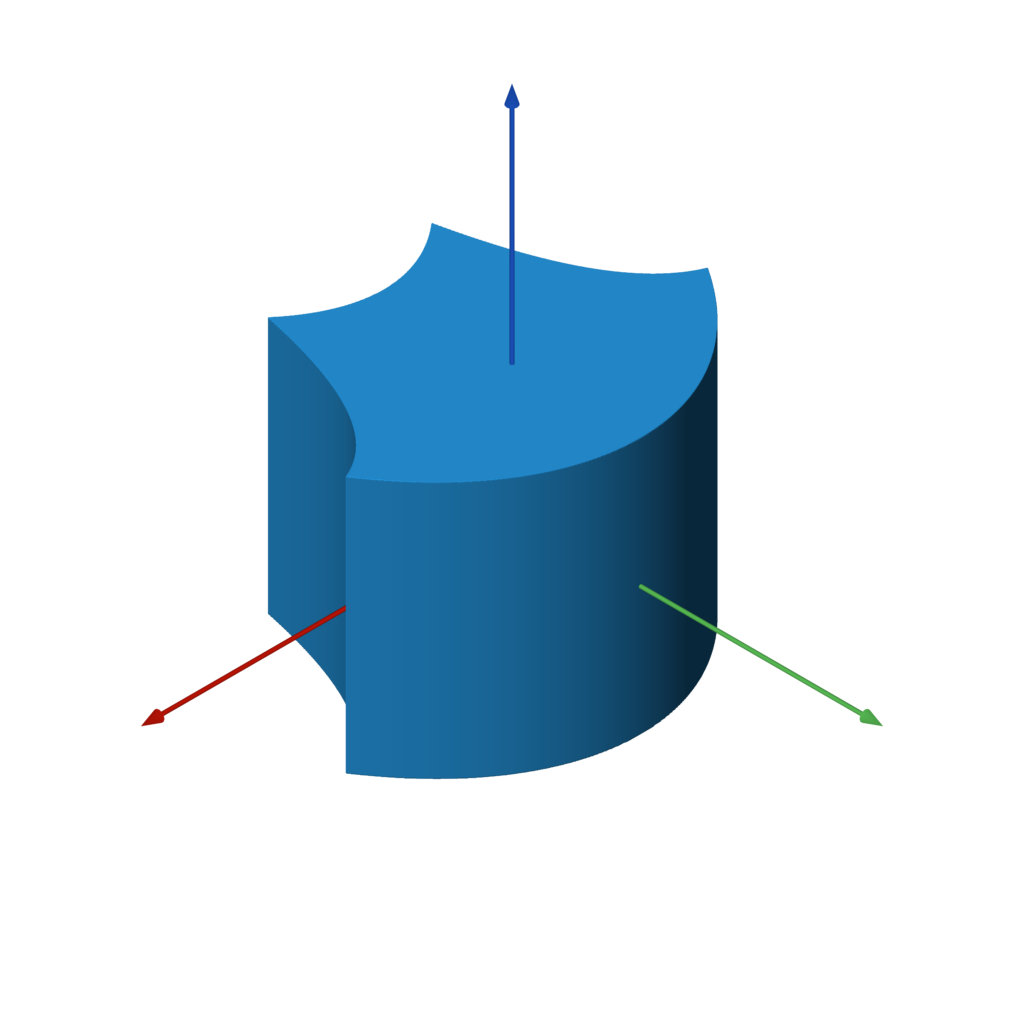 `bend(other, k)`
```
f = box().bend(1)
```
### 线性弯曲
`bend(other, k)`
```
f = box().bend(1)
```
### 线性弯曲
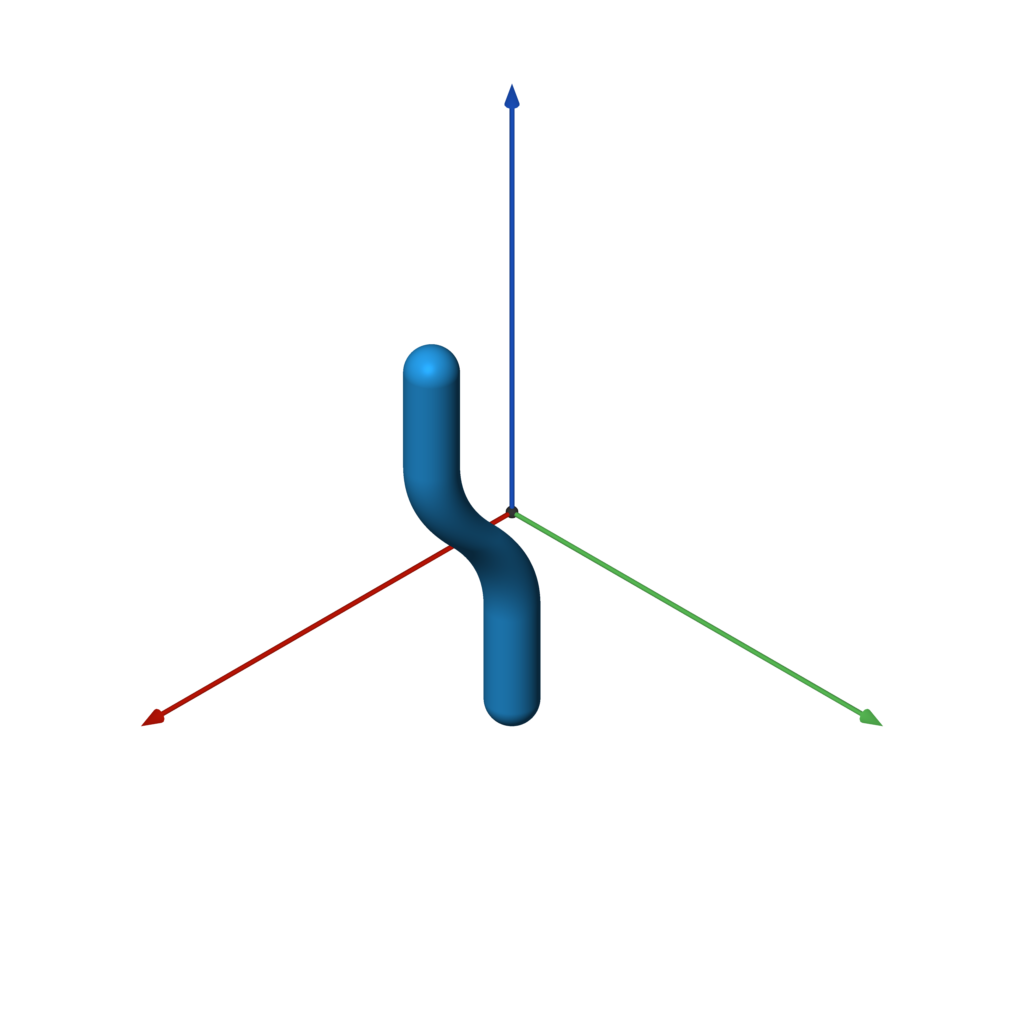 `bend_linear(other, p0, p1, v, e=ease.linear)`
```
f = capsule(-Z * 2, Z * 2, 0.25).bend_linear(-Z, Z, X, ease.in_out_quad)
```
### 径向弯曲
`bend_linear(other, p0, p1, v, e=ease.linear)`
```
f = capsule(-Z * 2, Z * 2, 0.25).bend_linear(-Z, Z, X, ease.in_out_quad)
```
### 径向弯曲
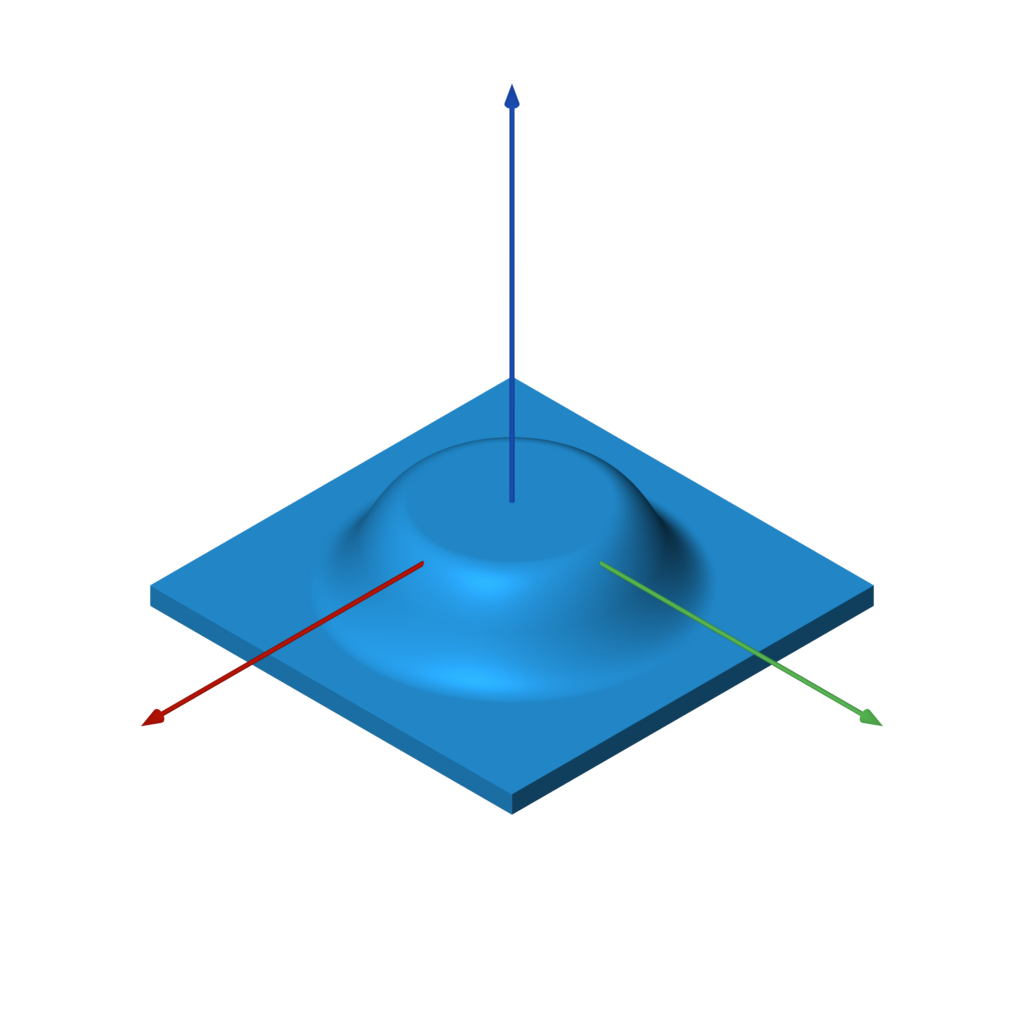 `bend_radial(other, r0, r1, dz, e=ease.linear)`
```
f = box((5, 5, 0.25)).bend_radial(1, 2, -1, ease.in_out_quad)
```
### 线性过渡
`bend_radial(other, r0, r1, dz, e=ease.linear)`
```
f = box((5, 5, 0.25)).bend_radial(1, 2, -1, ease.in_out_quad)
```
### 线性过渡
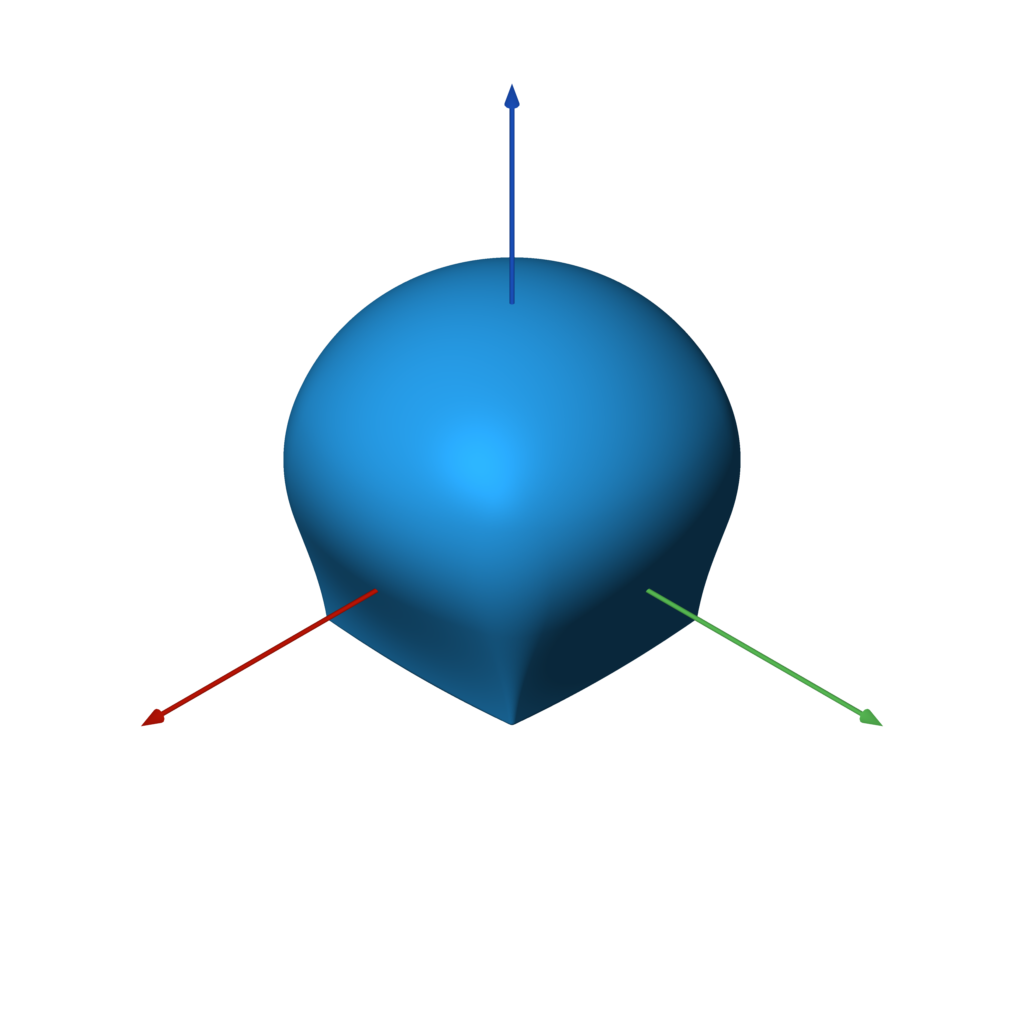 `transition_linear(f0, f1, p0=-Z, p1=Z, e=ease.linear)`
```
f = box().transition_linear(sphere(), e=ease.in_out_quad)
```
### 径向过渡
`transition_linear(f0, f1, p0=-Z, p1=Z, e=ease.linear)`
```
f = box().transition_linear(sphere(), e=ease.in_out_quad)
```
### 径向过渡
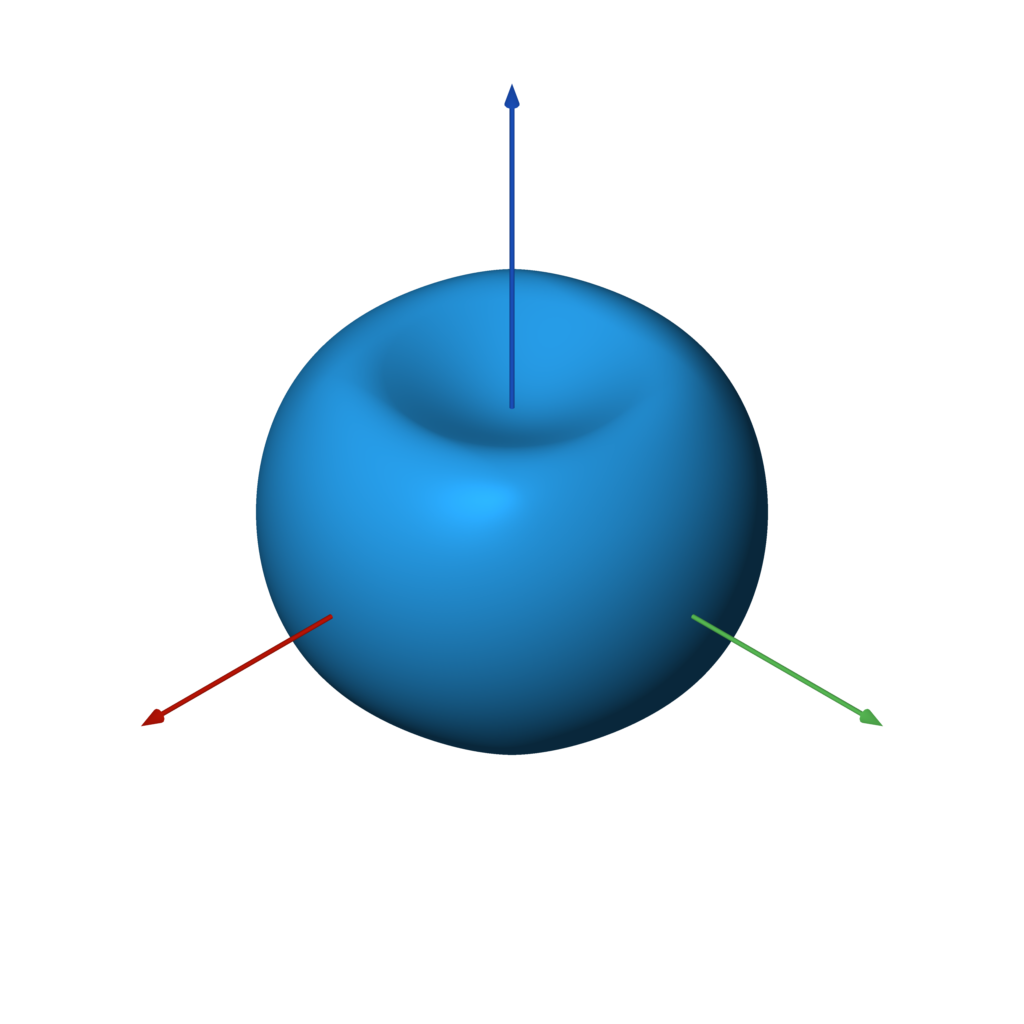 `transition_radial(f0, f1, r0=0, r1=1, e=ease.linear)`
```
f = box().transition_radial(sphere(), e=ease.in_out_quad)
```
### 环绕
`transition_radial(f0, f1, r0=0, r1=1, e=ease.linear)`
```
f = box().transition_radial(sphere(), e=ease.in_out_quad)
```
### 环绕
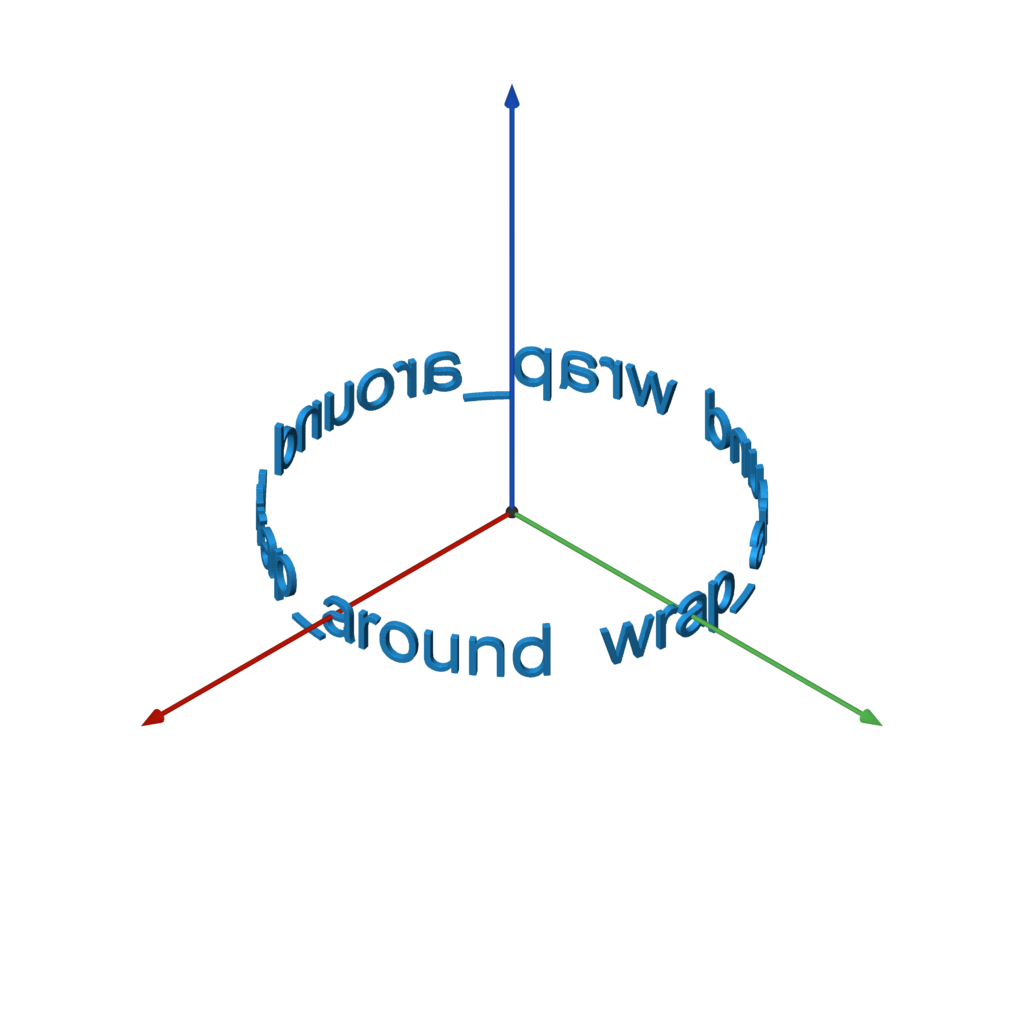 `wrap_around(other, x0, x1, r=None, e=ease.linear)`
```
FONT = 'Arial'
TEXT = ' wrap_around ' * 3
w, h = measure_text(FONT, TEXT)
f = text(FONT, TEXT).extrude(0.1).orient(Y).wrap_around(-w / 2, w / 2)
```
## 2D 到 3D 操作
### 拉伸
`wrap_around(other, x0, x1, r=None, e=ease.linear)`
```
FONT = 'Arial'
TEXT = ' wrap_around ' * 3
w, h = measure_text(FONT, TEXT)
f = text(FONT, TEXT).extrude(0.1).orient(Y).wrap_around(-w / 2, w / 2)
```
## 2D 到 3D 操作
### 拉伸
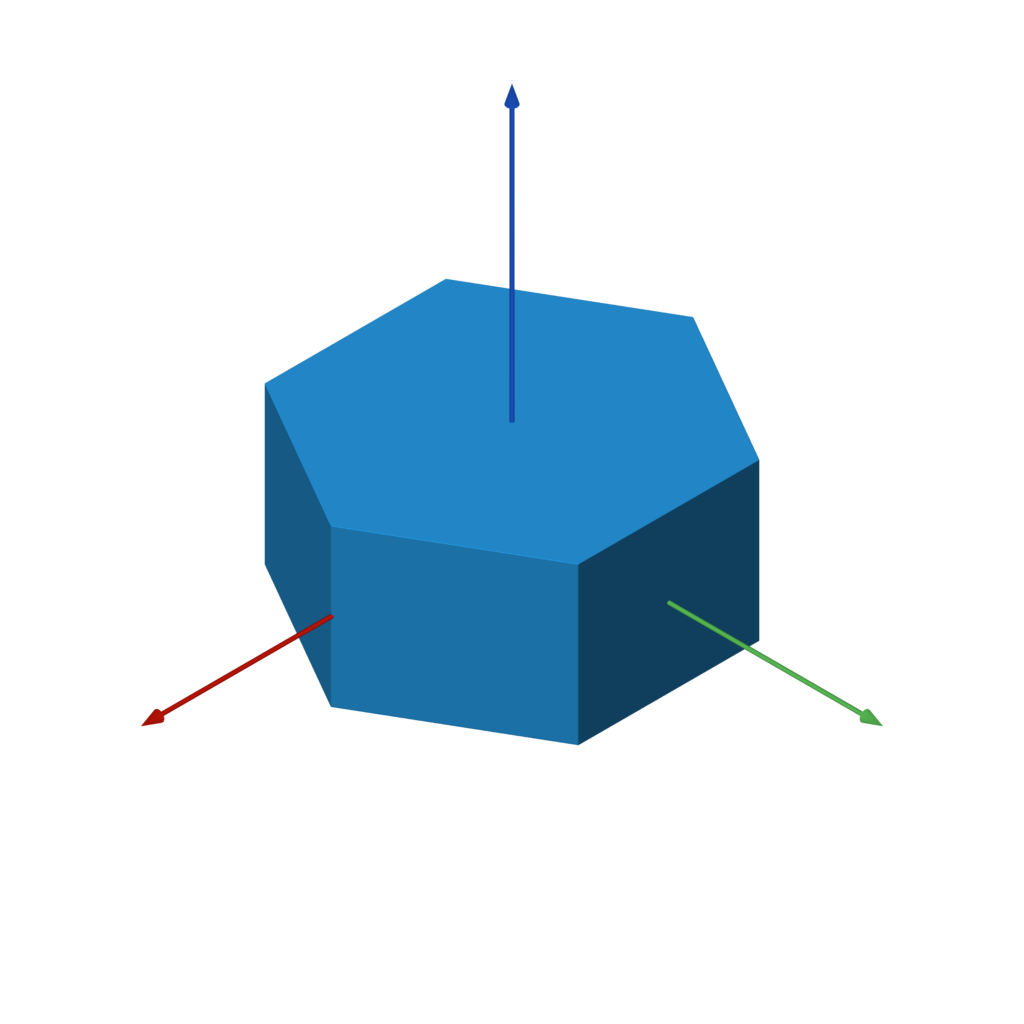 `extrude(other, h)`
```
f = hexagon(1).extrude(1)
```
### 拉伸至
`extrude(other, h)`
```
f = hexagon(1).extrude(1)
```
### 拉伸至
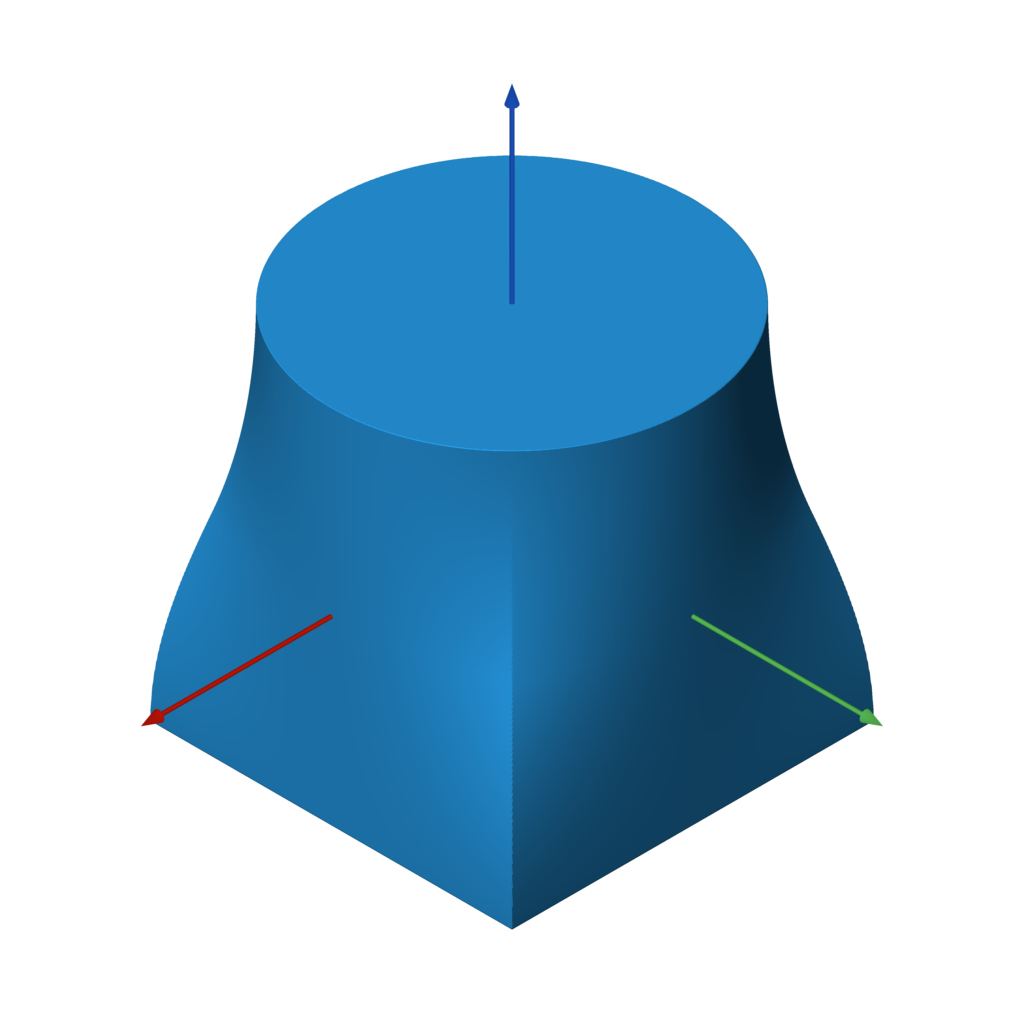 `extrude_to(a, b, h, e=ease.linear)`
```
f = rectangle(2).extrude_to(circle(1), 2, ease.in_out_quad)
```
### 旋转体
`extrude_to(a, b, h, e=ease.linear)`
```
f = rectangle(2).extrude_to(circle(1), 2, ease.in_out_quad)
```
### 旋转体
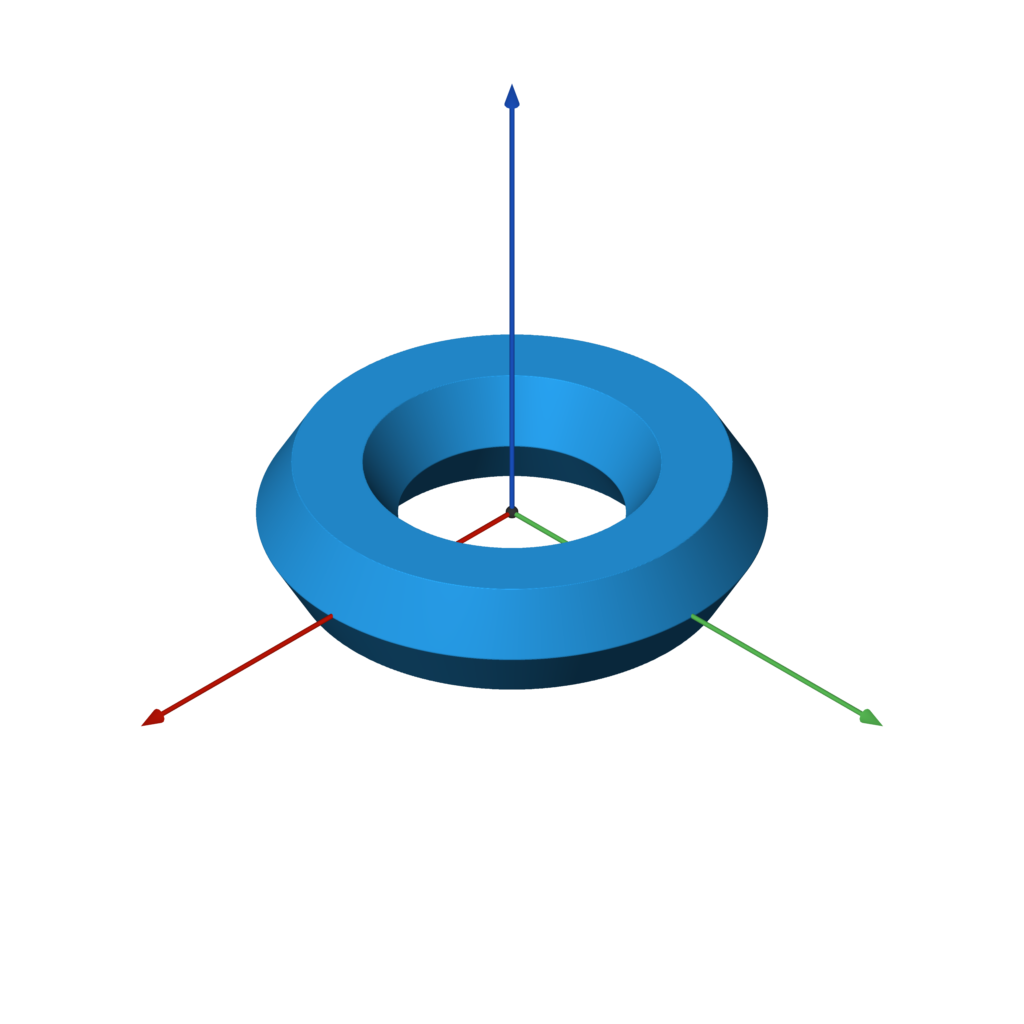 `revolve(other, offset=0)`
```
f = hexagon(1).revolve(3)
```
## 3D 到 2D 操作
### 切片
`revolve(other, offset=0)`
```
f = hexagon(1).revolve(3)
```
## 3D 到 2D 操作
### 切片
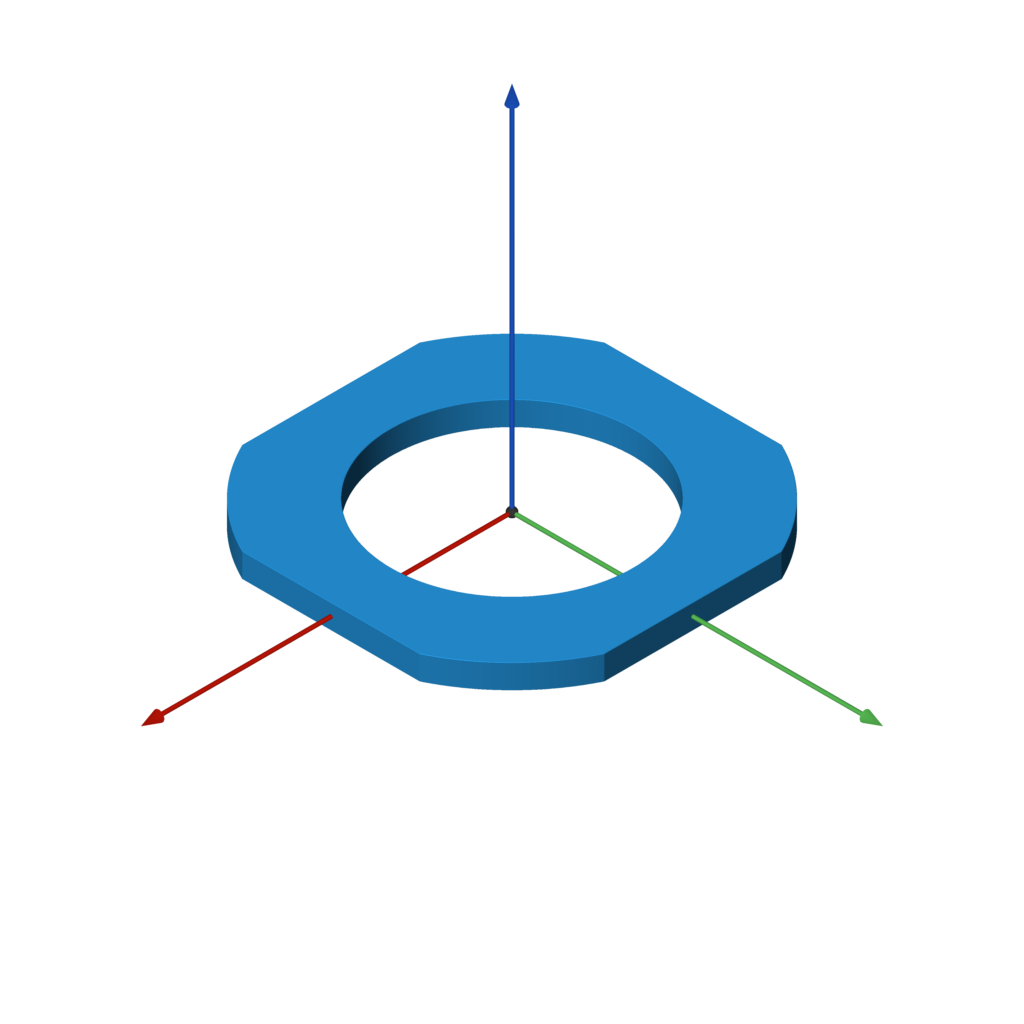 `slice(other)`
```
f = example.translate((0, 0, 0.55)).slice().extrude(0.1)
```
## 2D 图元
### 圆形
### 直线
### 矩形
### 圆角矩形
### 等边三角形
### 六边形
### 圆角 X 形
### 多边形
`slice(other)`
```
f = example.translate((0, 0, 0.55)).slice().extrude(0.1)
```
## 2D 图元
### 圆形
### 直线
### 矩形
### 圆角矩形
### 等边三角形
### 六边形
### 圆角 X 形
### 多边形
这是一个生成所示模型的完整示例。这是经典的[构造实体几何](https://en.wikipedia.org/wiki/Constructive_solid_geometry)示例。请注意使用运算符进行并集、交集和差集操作。
```
from sdf import *
f = sphere(1) & box(1.5)
c = cylinder(0.5)
f -= c.orient(X) | c.orient(Y) | c.orient(Z)
f.save('out.stl')
```
没错,这真的是全部代码!你可以对那个模型进行 3D 打印,或者在 3D 应用程序中使用它。
## 更多示例
有很酷的示例吗?提交一个 PR 吧!
| [gearlike.py](examples/gearlike.py) | [knurling.py](examples/knurling.py) | [blobby.py](examples/blobby.py) | [weave.py](examples/weave.py) |
| --- | --- | --- | --- |
|  |  |  |  |
|  |  |  |  |
## 环境要求
请注意,按照以下说明操作时,依赖项将由 setup.py 自动安装。
- Python 3
- matplotlib
- meshio
- numpy
- Pillow
- scikit-image
- scipy
## 安装
使用以下命令克隆仓库并在 Python 虚拟环境中安装 `sdf` 库。
```
git clone https://github.com/fogleman/sdf.git
cd sdf
virtualenv env
. env/bin/activate
pip install -e .
```
确认其是否正常运行:
```
python examples/example.py # should generate a file named out.stl
```
如果你总是从根文件夹运行导入 `sdf` 的脚本,则可以跳过安装。
## OpenVDB
如果你想将网格用作 SDF,还需要 OpenVDB 及其 Python 模块。这似乎无法通过 pip 轻松安装。构建它的基本方法如下:
```
git clone https://github.com/AcademySoftwareFoundation/openvdb.git
cd openvdb
mkdir build
cd build
cmake -D OPENVDB_BUILD_PYTHON_MODULE=ON -D USE_NUMPY=ON ..
make -j8
cp openvdb/openvdb/python/pyopenvdb.* `python -c 'import site; print(site.getsitepackages()[0])'`
```
## 文件格式
`sdf` 原生写入二进制 STL 文件。对于其他格式,使用 [meshio](https://github.com/nschloe/meshio)(基于你的输出文件扩展名)。这增加了对 20 多种不同 3D 文件格式的支持,包括 OBJ、PLY、VTK 等等。
## 查看网格
为你的平台查找并安装一个 3D 网格查看器,例如 [MeshLab](https://www.meshlab.net/)。
我开发并使用了自己的跨平台网格查看器,名为 [meshview](https://github.com/fogleman/meshview)(见截图)。如果你安装了 [Go](https://golang.org/) 和 [glfw](https://www.glfw.org/),安装就非常简单:
```
$ brew install go glfw # on macOS with homebrew
$ go get -u github.com/fogleman/meshview/cmd/meshview
```
然后你可以使用以下命令从命令行查看任何网格:
```
$ meshview your-mesh.stl
```
有关更完整的安装说明,请参阅 meshview 的 [README](https://github.com/fogleman/meshview)。
在 macOS 上,在紧要关头你可以直接使用内置的 Quick Look(在 Finder 中选择 STL 文件后按空格键)。
# API
在以下所有示例中,`f` 是任何 3D SDF,例如:
```
f = sphere()
```
## 边界
SDF 的边界框会自动估算。不精确的 SDF(例如非均匀缩放)可能会导致此过程出现问题。在这种情况下,你可以手动指定要采样的边界:
```
f.save('out.stl', bounds=((-1, -1, -1), (1, 1, 1)))
```
## 分辨率
网格的分辨率也是自动计算的。有两种方法可以指定分辨率。你可以使用 `step` 直接设置分辨率:
```
f.save('out.stl', step=0.01)
f.save('out.stl', step=(0.01, 0.02, 0.03)) # non-uniform resolution
```
或者你可以指定大致要采样的点数:
```
f.save('out.stl', samples=2**24) # sample about 16M points
```
默认情况下使用 `samples=2**22`。
*提示*:在开发 SDF 时使用默认分辨率。等完成后,再调高分辨率以生成最终输出。
## 批次
SDF 是分批次采样的。默认情况下,每批有 `32**3 = 32768` 个点。可以覆盖此批次大小:
```
f.save('out.stl', batch_size=64) # instead of 32
```
代码会尝试跳过任何远离网格表面的批次。不精确的 SDF(例如非均匀缩放)可能会导致此过程出现问题,从而导致输出网格中出现孔洞(即本不该跳过但被跳过的批次)。为避免这种情况,你可以禁用稀疏采样:
```
f.save('out.stl', sparse=False) # force all batches to be completely sampled
```
## 工作线程
SDF 使用工作线程分批进行采样。默认使用 `multiprocessing.cpu_count()` 个工作线程。这可以被覆盖:
```
f.save('out.stl', workers=1) # only use one worker thread
```
## 不保存文件
你当然可以在不将网格写入 STL 文件的情况下生成它:
```
points = f.generate() # takes the same optional arguments as `save`
print(len(points)) # print number of points (3x the number of triangles)
print(points[:3]) # print the vertices of the first triangle
```
如果你想在 `generate` 之后保存 STL,只需使用:
```
write_binary_stl(path, points)
```
## 可视化 SDF
你可以使用 matplotlib 绘制 SDF 的 2D 切片可视化图。这对于调试非常有用。
```
f.show_slice(z=0)
f.show_slice(z=0, abs=True) # show abs(f)
```
你可以指定任意 X、Y 或 Z 坐标处的切片平面。你还可以指定要绘制的边界。
请注意,只有在调用此函数时才会导入 `matplotlib`,因此它并不是严格必需的依赖项。
## 工作原理 代码只是简单地使用 [Marching Cubes](https://en.wikipedia.org/wiki/Marching_cubes)算法从[有符号距离函数](https://en.wikipedia.org/wiki/Signed_distance_function)生成网格。在 Python 中,这通常会非常慢。然而,使用 numpy 可以同时评估整批点的 SDF。此外,使用多个线程并行处理批次。结果是(对于 Marching Cubes 而言)速度惊人地快。细节精度足够的网格在三角形数量方面可能仍然会非常大。 `sdf` 库的核心“引擎”非常小,可以在 [core.py](https://github.com/fogleman/sdf/blob/main/sdf/core.py) 中找到。 简而言之,这里没有任何算法上的革命性突破。其目标是为我们最喜爱的 Python 语言提供一个简单、有趣且易于使用的 3D 模型生成 API。 ## 文件 - [sdf/core.py](https://github.com/fogleman/sdf/blob/main/sdf/core.py):核心网格生成引擎。还包括用于估算 SDF 边界框以及使用 matplotlib 绘制 SDF 2D 切片的代码。 - [sdf/d2.py](https://github.com/fogleman/sdf/blob/main/sdf/d2.py):2D 有符号距离函数 - [sdf/d3.py](https://github.com/fogleman/sdf/blob/main/sdf/d3.py):3D 有符号距离函数 - [sdf/dn.py](https://github.com/fogleman/sdf/blob/main/sdf/dn.py):与维度无关的有符号距离函数 - [sdf/ease.py](https://github.com/fogleman/sdf/blob/main/sdf/ease.py):作用于 numpy 数组的[缓动函数](https://easings.net/)。某些 SDF 将缓动函数作为参数。 - [sdf/mesh.py](https://github.com/fogleman/sdf/blob/main/sdf/mesh.py):用于加载网格并将其用作 SDF 的代码。 - [sdf/progress.py](https://github.com/fogleman/sdf/blob/main/sdf/progress.py):控制台进度条。 - [sdf/stl.py](https://github.com/fogleman/sdf/blob/main/sdf/stl.py):用于写入二进制 [STL 文件](https://en.wikipedia.org/wiki/STL_(file_format)的代码。 - [sdf/text.py](https://github.com/fogleman/sdf/blob/main/sdf/text.py):为文本生成 2D SDF(随后可以对其进行拉伸) - [sdf/util.py](https://github.com/fogleman/sdf/blob/main/sdf/util.py):实用常量和函数。 ## SDF 实现 除了内置库提供的 SDF 之外,编写自己的 SDF 也是合理的。浏览 SDF 的实现以了解它们是如何实现的。以下是一些简单的示例: ``` @sdf3 def sphere(radius=1, center=ORIGIN): def f(p): return np.linalg.norm(p - center, axis=1) - radius return f ``` SDF 只是一个函数,它接收一个形状为 `(N, 3)`(对于 3D SDF)或形状为 `(N, 2)`(对于 2D SDF)的点的 numpy 数组,并返回一个形状为 `(N, 1)` 的数组,其中包含这些点各自的有符号距离。它们由 `@sdf3` 装饰器(或用于 2D SDF 的 `@sdf2`)包装,这使得布尔运算符能够工作,添加了 `save` 方法,并添加了诸如 `translate` 之类的运算符等。 ``` @op3 def translate(other, offset): def f(p): return other(p - offset) return f ``` 作用于另一个 SDF 的 SDF(如上面的 `translate`)应该改用 `@op3` 装饰器。这将注册该函数,使得 SDF 可以像这样链接在一起: ``` f = sphere(1).translate((1, 2, 3)) ``` 而不是必须那样做: ``` f = translate(sphere(1), (1, 2, 3)) ``` ## 记住,这是 Python!
记住,这是 Python,所以它是完全可编程的。例如,你可以而且应该将你的模型拆分为参数化的子组件。你可以在任何适用的地方使用 for 循环和条件判断。天高任鸟飞!
查看[可定制的盒子示例](examples/customizable_box.py)以获取一些入门想法。
# 函数参考 ## 3D 图元 ### 球体
`sphere(radius=1, center=ORIGIN)`
```
f = sphere() # unit sphere
f = sphere(2) # specify radius
f = sphere(1, (1, 2, 3)) # translated sphere
```
### 长方体
`box(size=1, center=ORIGIN, a=None, b=None)`
```
f = box(1) # all side lengths = 1
f = box((1, 2, 3)) # different side lengths
f = box(a=(-1, -1, -1), b=(3, 4, 5)) # specified by bounds
```
### 圆角长方体
`rounded_box(size, radius)`
```
f = rounded_box((1, 2, 3), 0.25)
```
### 线框长方体
`wireframe_box(size, thickness)`
```
f = wireframe_box((1, 2, 3), 0.05)
```
### 圆环
`torus(r1, r2)`
```
f = torus(1, 0.25)
```
### 胶囊体
`capsule(a, b, radius)`
```
f = capsule(-Z, Z, 0.5)
```
### 带盖圆柱体
`capped_cylinder(a, b, radius)`
```
f = capped_cylinder(-Z, Z, 0.5)
```
### 圆角圆柱体
`rounded_cylinder(ra, rb, h)`
```
f = rounded_cylinder(0.5, 0.1, 2)
```
### 带盖圆锥体
`capped_cone(a, b, ra, rb)`
```
f = capped_cone(-Z, Z, 1, 0.5)
```
### 圆角圆锥体
`rounded_cone(r1, r2, h)`
```
f = rounded_cone(0.75, 0.25, 2)
```
### 椭球体
`ellipsoid(size)`
```
f = ellipsoid((1, 2, 3))
```
### 棱锥
`pyramid(h)`
```
f = pyramid(1)
```
## 柏拉图立体
### 四面体
`tetrahedron(r)`
```
f = tetrahedron(1)
```
### 八面体
`octahedron(r)`
```
f = octahedron(1)
```
### 十二面体
`dodecahedron(r)`
```
f = dodecahedron(1)
```
### 二十面体
`icosahedron(r)`
```
f = icosahedron(1)
```
## 无限 3D 图元
以下 SDF 在某些或所有轴向上无限延伸。
它们只能在与其他形状结合时有效使用,如下面的示例所示。
### 平面
`plane(normal=UP, point=ORIGIN)`
`plane` 是一个无限平面,其中一侧为正(外部),另一侧为负(内部)。
```
f = sphere() & plane()
```
### 平板
`slab(x0=None, y0=None, z0=None, x1=None, y1=None, z1=None, k=None)`
`slab` 可用于在一个或多个轴对齐的平面上切割形状。
```
f = sphere() & slab(z0=-0.5, z1=0.5, x0=0)
```
### 圆柱体
`cylinder(radius)`
`cylinder` 是一个沿 Z 轴的无限圆柱体。
```
f = sphere() - cylinder(0.5)
```
## 文本
是的,甚至支持文本!

`text(font_name, text, width=None, height=None, pixels=PIXELS, points=512)`
```
FONT = 'Arial'
TEXT = 'Hello, world!'
w, h = measure_text(FONT, TEXT)
f = rounded_box((w + 1, h + 1, 0.2), 0.1)
f -= text(FONT, TEXT).extrude(1)
```
注意:[PIL.ImageFont](https://pillow.readthedocs.io/en/stable/reference/ImageFont.html),用于加载字体,并不是在所有操作系统上都按名称搜索字体。
例如,在 Ubuntu 上必须提供字体的完整路径。
(例如 `/usr/share/fonts/truetype/freefont/FreeMono.ttf`)
## 图像
图像蒙版可以拉伸并整合到你的 3D 模型中。

`image(path_or_array, width=None, height=None, pixels=PIXELS)`
```
IMAGE = 'examples/butterfly.png'
w, h = measure_image(IMAGE)
f = rounded_box((w * 1.1, h * 1.1, 0.1), 0.05)
f |= image(IMAGE).extrude(1) & slab(z0=0, z1=0.075)
```
## 定位
### 平移
`translate(other, offset)`
```
f = sphere().translate((0, 0, 2))
```
### 缩放
`scale(other, factor)`
请注意,非均匀缩放是不精确的 SDF。
```
f = sphere().scale(2)
f = sphere().scale((1, 2, 3)) # non-uniform scaling
```
### 旋转
`rotate(other, angle, vector=Z)`
```
f = capped_cylinder(-Z, Z, 0.5).rotate(pi / 4, X)
```
### 定向
`orient(other, axis)`
`orient` 会旋转形状,使原来指向 +Z 方向的任何部分现在指向指定的方向。
```
c = capped_cylinder(-Z, Z, 0.25)
f = c.orient(X) | c.orient(Y) | c.orient(Z)
```
## 布尔运算
以下图元 `a` 和 `b` 用于所有以下布尔运算中。
```
a = box((3, 3, 0.5))
b = sphere()
```
命名版本(`union`、`difference`、`intersection`)都可以接受一个或多个 SDF 作为输入。它们都接受一个可选的 `k` 参数来定义要平滑量。使用运算符(`|`、`-`、`&`)时,仍然可以通过 `.k(...)` 函数应用平滑处理。
### 并集
```
f = a | b
f = union(a, b) # equivalent
```
### 差集
```
f = a - b
f = difference(a, b) # equivalent
```
### 交集
```
f = a & b
f = intersection(a, b) # equivalent
```
### 平滑并集
```
f = a | b.k(0.25)
f = union(a, b, k=0.25) # equivalent
```
### 平滑差集
```
f = a - b.k(0.25)
f = difference(a, b, k=0.25) # equivalent
```
### 平滑交集
```
f = a & b.k(0.25)
f = intersection(a, b, k=0.25) # equivalent
```
## 重复 ### 重复
`repeat(other, spacing, count=None, padding=0)`
`repeat` 可以无限次或有限次地重复底层 SDF。如果是有限的,重复次数必须是奇数,因为 count 指定的是在原点每侧复制的数量。如果重复的元素重叠或靠得很近,你可能需要指定一个大于零的 `padding` 来计算正确的 SDF。
```
f = sphere().repeat(3, (1, 1, 0))
```
### 环形阵列
`circular_array(other, count, offset)`
`circular_array` 制作底层 SDF 的 `count` 个副本,并围绕 Z 轴排列成圆形。`offset` 指定在阵列前将形状沿 X 轴平移多远。底层 SDF 仅被评估两次(而不是 `count` 次),因此这比实例化 `count` 个形状副本的性能更高。
```
f = capped_cylinder(-Z, Z, 0.5).circular_array(8, 4)
```
## 杂项
### 混合
`blend(a, *bs, k=0.5)`
```
f = sphere().blend(box())
```
### 膨胀
`dilate(other, r)`
```
f = example.dilate(0.1)
```
### 腐蚀
`erode(other, r)`
```
f = example.erode(0.1)
```
### 壳体
`shell(other, thickness)`
```
f = sphere().shell(0.05) & plane(-Z)
```
### 拉长
`elongate(other, size)`
```
f = example.elongate((0.25, 0.5, 0.75))
```
### 扭曲
`twist(other, k)`
```
f = box().twist(pi / 2)
```
### 弯曲
`bend(other, k)`
```
f = box().bend(1)
```
### 线性弯曲
`bend_linear(other, p0, p1, v, e=ease.linear)`
```
f = capsule(-Z * 2, Z * 2, 0.25).bend_linear(-Z, Z, X, ease.in_out_quad)
```
### 径向弯曲
`bend_radial(other, r0, r1, dz, e=ease.linear)`
```
f = box((5, 5, 0.25)).bend_radial(1, 2, -1, ease.in_out_quad)
```
### 线性过渡
`transition_linear(f0, f1, p0=-Z, p1=Z, e=ease.linear)`
```
f = box().transition_linear(sphere(), e=ease.in_out_quad)
```
### 径向过渡
`transition_radial(f0, f1, r0=0, r1=1, e=ease.linear)`
```
f = box().transition_radial(sphere(), e=ease.in_out_quad)
```
### 环绕
`wrap_around(other, x0, x1, r=None, e=ease.linear)`
```
FONT = 'Arial'
TEXT = ' wrap_around ' * 3
w, h = measure_text(FONT, TEXT)
f = text(FONT, TEXT).extrude(0.1).orient(Y).wrap_around(-w / 2, w / 2)
```
## 2D 到 3D 操作
### 拉伸
`extrude(other, h)`
```
f = hexagon(1).extrude(1)
```
### 拉伸至
`extrude_to(a, b, h, e=ease.linear)`
```
f = rectangle(2).extrude_to(circle(1), 2, ease.in_out_quad)
```
### 旋转体
`revolve(other, offset=0)`
```
f = hexagon(1).revolve(3)
```
## 3D 到 2D 操作
### 切片
`slice(other)`
```
f = example.translate((0, 0, 0.55)).slice().extrude(0.1)
```
## 2D 图元
### 圆形
### 直线
### 矩形
### 圆角矩形
### 等边三角形
### 六边形
### 圆角 X 形
### 多边形标签:3D建模, 3D打印, Python, 实体几何, 无后门, 有符号距离函数, 网格生成, 逆向工具