dolthub/dolt
GitHub: dolthub/dolt
Dolt 是一个兼容 MySQL 协议的 SQL 数据库,将 Git 的版本控制理念引入数据管理,支持对表结构和数据进行分支、合并、回滚等操作。
Stars: 23446 | Forks: 804

# Dolt 是数据的 Git!
Dolt 是一个 SQL 数据库,你可以像 Git 仓库一样对它进行
fork、clone、branch、merge、push 和 pull。
像连接任何 MySQL 数据库一样连接到 Dolt,以读取或修改
schema 和数据。版本控制功能通过系统
表、函数和存储过程在 SQL 中暴露。
或者,使用类 Git 的命令行接口来导入 CSV 文件,提交
你的更改,将它们推送到远程,或合并你队友的更改。
你熟知的所有 Git 命令在 Dolt 中的工作方式完全相同。
Git 对文件进行版本控制。Dolt 对表进行版本控制。这就像 Git 和 MySQL
生了个孩子。
我们还构建了 [DoltHub](https://www.dolthub.com),一个分享
Dolt 数据库的地方。我们免费托管公共数据。如果你想托管
你自己的 DoltHub 版本,我们有 [DoltLab](https://www.doltlab.com)。
如果你希望我们为你运行 Dolt 服务器,我们有 [Hosted Dolt](https://hosted.doltdb.com)。
更喜欢 Postgres 而不是 MySQL?试试 [Doltgres](https://github.com/dolthub/doltgresql),现在
已发布 Beta 版本。
[加入我们的 Discord](https://discord.com/invite/RFwfYpu) 打个招呼并
提问,或者 [查看我们的路线图](https://docs.dolthub.com/other/roadmap)
看看我们接下来在构建什么。
# 视频介绍
[](https://www.youtube.com/watch?v=H2iZy0Cme10)
# 它是用来做什么的?
很多事情!Dolt 是一个具有无数
用途的通用工具。但如果你想要一些想法,[这里是人们目前如何使用
它的](https://dolthub.com/blog/2024-10-15-dolt-use-cases/)。
Dolt 可以使用标准的 MySQL binlog replication [设置为
你现有 MySQL 的副本](https://www.dolthub.com/blog/2023-02-17-binlog-replication-preview/)。
每次写入都会成为一个 Dolt commit。这是获得 Dolt 版本控制
好处并保留现有 MySQL 数据库的好方法。
# Dolt CLI
`dolt` CLI 拥有与 `git` 相同的命令,以及一些额外的命令。
```
$ dolt
Valid commands for dolt are
init - Create an empty Dolt data repository.
status - Show the working tree status.
add - Add table changes to the list of staged table changes.
diff - Diff a table.
reset - Remove table changes from the list of staged table changes.
clean - Remove untracked tables from working set.
commit - Record changes to the repository.
sql - Run a SQL query against tables in repository.
sql-server - Start a MySQL-compatible server.
log - Show commit logs.
branch - Create, list, edit, delete branches.
checkout - Checkout a branch or overwrite a table from HEAD.
merge - Merge a branch.
conflicts - Commands for viewing and resolving merge conflicts.
cherry-pick - Apply the changes introduced by an existing commit.
revert - Undo the changes introduced in a commit.
clone - Clone from a remote data repository.
fetch - Update the database from a remote data repository.
pull - Fetch from a dolt remote data repository and merge.
push - Push to a dolt remote.
config - Dolt configuration.
remote - Manage set of tracked repositories.
backup - Manage a set of server backups.
login - Login to a dolt remote host.
creds - Commands for managing credentials.
ls - List tables in the working set.
schema - Commands for showing and importing table schemas.
table - Commands for copying, renaming, deleting, and exporting tables.
tag - Create, list, delete tags.
blame - Show what revision and author last modified each row of a table.
constraints - Commands for handling constraints.
migrate - Executes a database migration to use the latest Dolt data format.
read-tables - Fetch table(s) at a specific commit into a new dolt repo
gc - Cleans up unreferenced data from the repository.
filter-branch - Edits the commit history using the provided query.
merge-base - Find the common ancestor of two commits.
version - Displays the current Dolt cli version.
dump - Export all tables in the working set into a file.
```
# 安装
Dolt 是一个约 103 兆字节的单个程序。
```
dolt $ du -h /Users/timsehn/go/bin/dolt
103M /Users/timsehn/go/bin/dolt
```
安装非常简单。下载它并将其放在你的 `PATH` 中。
对于大多数平台,我们有多种方法可以让这变得更容易。
## 从最新版本安装
要在 Linux 或 Mac 系统上安装,请在你的
终端中运行此命令:
```
sudo bash -c 'curl -L https://github.com/dolthub/dolt/releases/latest/download/install.sh | bash'
```
这将下载最新的 `dolt` 版本并将其放在
`/usr/local/bin/` 中,该路径可能位于你的 `$PATH` 中。
安装脚本需要 sudo 才能将 `dolt` 放入 `/usr/local/bin`。如果你没有 root
权限或不习惯使用 root 权限运行脚本,你可以从
[最新版本](https://github.com/dolthub/dolt/releases)下载适用于你平台的 dolt 二进制文件,解压它,
并将二进制文件放在你的 `$PATH` 中的某个位置。
### Linux
#### Arch Linux
Dolt 已在 Arch Linux 的官方仓库中打包。
```
pacman -S dolt
```
### Mac
#### Homebrew
Dolt 位于 Homebrew 中,每次发布都会更新。
```
brew install dolt
```
#### MacPorts
在 macOS 上,Dolt 也可以通过 [MacPorts](https://www.macports.org) 的[社区管理端口](https://ports.macports.org/port/dolt/)安装:
```
sudo port install dolt
```
### Windows
下载 [releases](https://github.com/dolthub/dolt/releases) 中最新的 Microsoft 安装程序(`.msi` 文件)并运行
它。
有关在 Windows 上运行的信息,请参阅[此处](https://docs.dolthub.com/introduction/installation/windows)。
#### Chocolatey
你可以使用 [Chocolatey](https://chocolatey.org/) 安装 `dolt`:
```
choco install dolt
```
#### Docker
Dolt 有以下官方 Docker 镜像:
* [`dolthub/dolt`](https://hub.docker.com/r/dolthub/dolt) 用于将 Dolt 作为
CLI 工具运行。
* [`dolthub/dolt-sql-server`](https://hub.docker.com/r/dolthub/dolt-sql-server) 用于在服务器模式下运行 Dolt。
## 从源代码安装
确保你已安装 Go,并且 `go` 位于你的路径中。Dolt 依赖于 [cgo](https://pkg.go.dev/cmd/cgo),因此你还需要一个可用的 C 编译器和工具链。
克隆此仓库并 cd 进入 `go` 目录。然后运行:
```
go install ./cmd/dolt
```
输出将位于 `$GOPATH/bin` 中,默认为 `~/go/bin`。要测试你的构建,请尝试:
```
~/go/bin/dolt version
```
# 配置
通过在终端中运行 `dolt` 来验证你的安装是否成功。
```
$ dolt
Valid commands for dolt are
[...]
```
使用你的用户名和电子邮件配置 `dolt`,这是创建提交所必需的。
这些命令的工作方式与 git 完全相同。
```
$ dolt config --global --add user.email YOU@DOMAIN.COM
$ dolt config --global --add user.name "YOUR NAME"
```
# 入门
## 导航到你想存储数据的目录
Dolt 需要一个地方来存储你的数据库。我将把我的数据库放在 `~/dolt` 中。
```
% cd ~
% mkdir dolt
% cd dolt
```
你创建的任何数据库都将存储在此目录中。因此,对于此示例,一旦你运行 `create database getting_started`,就会在此处创建一个名为 `getting_started` 的目录。导航到 `~/dolt/getting_started` 将允许你使用 Dolt 命令行访问此数据库。
注意:对于此示例,`getting_started` 目录将在你在 [Create a schema section](#create-a-schema) 的 SQL shell 中运行 `create database getting_started;` 后创建。除了创建目录并导航到它之外,暂时不要做任何其他事情。
## 启动兼容 MySQL 的数据库服务器
Dolt 内置了一个兼容 MySQL 的数据库服务器。要启动它,你使用命令 `dolt sql-server`。运行此命令会在端口 3306 上启动服务器。
```
dolt sql-server
Starting server with Config HP="localhost:3306"|T="28800000"|R="false"|L="info"
```
你的终端会停在那里。这意味着服务器正在运行。任何错误都将打印在此终端中。只需将其留在那里并打开一个新终端。
## 使用 MySQL 客户端连接(最高版本 8.4)
在新终端中,我们现在将使用客户端连接到正在运行的数据库服务器。Dolt 也附带了一个兼容 MySQL 的客户端。
```
% dolt -u root -p "" sql
# 欢迎使用 Dolt MySQL 客户端。
# 语句必须以 ';' 结尾。
# 输入 "exit" 或 "quit" (或 Ctrl-D) 退出。
mysql>
```
在你运行 `dolt sql-server` 的另一个终端中,你将看到以下日志行。
```
2022-06-06T13:14:32-07:00 INFO [conn 1] NewConnection {DisableClientMultiStatements=false}
```
你已连接!
既然我们在这里,让我们获取一份 MySQL 的副本,以便我们可以使用该客户端进行连接。前往 [MySQL Getting Started](https://dev.mysql.com/doc/mysql-getting-started/en/) 文档并在你的机器上安装 MySQL。我使用 [Homebrew](https://brew.sh/) 在我的 Mac 上安装 MySQL:`brew install mysql@8.4`。或者,你可以通过运行 `brew install mysql-client@8.4` 仅安装客户端组件。
注意:确保你安装的是 MySQL 8.4 版本。MySQL 8.4 是当前的长期支持 (LTS) 版本,这意味着这是 MySQL 的稳定且受支持的版本。MySQL 9.0 也可用,但是一个“创新”版本,这意味着它具有更多最新的更改和功能,但可能不如 LTS 版本稳定。9.0 版本更改了身份验证支持,默认情况下无法连接到 Dolt SQL server。你可以通过运行 `brew install mysql@8.4` 使用 Homebrew 安装 MySQL 8.4。如果你确实想使用 MySQL-9.0,请阅读[我们关于如何配置 Dolt 进行 `caching_sha2_password` 身份验证的文章](https://www.dolthub.com/blog/2024-12-11-mysql9-and-caching-sha2-auth-support/)。
MySQL 附带一个名为 `mysqld` 的 MySQL 服务器和一个名为 `mysql` 的 MySQL 客户端。你只对客户端感兴趣。按照 MySQL 文档中的说明操作后,确保你的路径上有 `mysql` 客户端的副本:
```
% mysql --version
mysql Ver 8.0.29 for macos12.2 on x86_64 (Homebrew)
```
现在,要将 `mysql` 客户端连接到 Dolt,你需要通过传入主机和端口强制 MySQL 客户端使用 TCP 接口。默认是 socket 接口,Dolt 支持该接口,但仅在 `localhost` 上可用。因此,最好展示 TCP 接口。MySQL 客户端还要求你指定一个用户,在本例中为 `root`。
```
% mysql --host 127.0.0.1 --port 3306 -uroot
Welcome to the MySQL monitor. Commands end with ; or \g.
Your MySQL connection id is 2
Server version: 5.7.9-Vitess
Copyright (c) 2000, 2022, Oracle and/or its affiliates.
Oracle is a registered trademark of Oracle Corporation and/or its
affiliates. Other names may be trademarks of their respective
owners.
Type 'help;' or '\h' for help. Type '\c' to clear the current input statement.
mysql>
```
同样,为了确保客户端实际连接,你应该在 `dolt sql-server` 终端中看到以下内容
```
2022-06-06T13:26:55-07:00 INFO [conn 2] NewConnection {DisableClientMultiStatements=false}
```
如你所见,Dolt 支持任何兼容 MySQL 的客户端。Dolt 附带一个客户端,但你可以使用任何 MySQL 客户端,例如 MySQL 附带的客户端。
## 创建 Schema
现在我们实际上已经准备好做一些有趣的事情了。我将留在 `mysql` 客户端中并执行以下 SQL 语句以创建一个名为 `getting_started` 的数据库。`getting_started` 数据库将包含三个表:`employees`、`teams` 和 `employees_teams`。
```
mysql> create database getting_started;
Query OK, 1 row affected (0.04 sec)
mysql> use getting_started;
Database changed
mysql> create table employees (
id int,
last_name varchar(255),
first_name varchar(255),
primary key(id));
Query OK, 0 rows affected (0.01 sec)
mysql> create table teams (
id int,
team_name varchar(255),
primary key(id));
Query OK, 0 rows affected (0.00 sec)
mysql> create table employees_teams(
team_id int,
employee_id int,
primary key(team_id, employee_id),
foreign key (team_id) references teams(id),
foreign key (employee_id) references employees(id));
Query OK, 0 rows affected (0.01 sec)
mysql> show tables;
+---------------------------+
| Tables_in_getting_started |
+---------------------------+
| employees |
| employees_teams |
| teams |
+---------------------------+
3 rows in set (0.00 sec)
```
Dolt 支持 foreign keys、secondary indexes、triggers、check constraints 和 stored procedures。它是一个现代的、功能丰富的 SQL 数据库。
## 进行 Dolt commit
是时候使用你的第一个 Dolt 功能了。我们将进行一次 Dolt [commit](https://docs.dolthub.com/concepts/dolt/commits)。Dolt commit 允许你进行时间旅行并查看沿袭。每当你想要恢复或与此时此点进行比较时,都进行一次 Dolt commit。
Dolt 通过 Git 风格的接口暴露版本控制功能。在命令行上,Dolt 命令与其 Git 等效命令完全映射,只是目标是表而不是文件。在 SQL 中,Dolt 将版本控制读取操作作为 [system tables](https://docs.dolthub.com/sql-reference/version-control/dolt-system-tables) 暴露,将版本控制写入操作作为 [stored procedures](https://docs.dolthub.com/sql-reference/version-control/dolt-sql-procedures) 暴露。
系统表和存储过程的命名遵循 `dolt_
` 模式。因此,CLI 上的 `dolt add` 变成了存储过程 `dolt_add`。传递选项也遵循命令行模型。例如,要指定要添加的表,请将表名作为选项发送到 `dolt_add` 过程。对于命名参数,例如将消息发送到 `dolt_commit` 命令,请按顺序使用两个参数,如 `('-m', 'This is a message')`。如果你了解 Git,版本控制过程和系统表应该会感觉很熟悉。
所以,我们像这样添加并提交我们的新 schema。
```
mysql> call dolt_add('teams', 'employees', 'employees_teams');
+--------+
| status |
+--------+
| 0 |
+--------+
1 row in set (0.03 sec)
mysql> call dolt_commit('-m', 'Created initial schema');
+----------------------------------+
| hash |
+----------------------------------+
| ne182jemgrlm8jnjmoubfqsstlfi1s98 |
+----------------------------------+
1 row in set (0.02 sec)
mysql> select * from dolt_log;
+----------------------------------+-----------+-----------------+-------------------------+----------------------------+
| commit_hash | committer | email | date | message |
+----------------------------------+-----------+-----------------+-------------------------+----------------------------+
| ne182jemgrlm8jnjmoubfqsstlfi1s98 | Tim Sehn | tim@dolthub.com | 2022-06-07 16:35:49.277 | Created initial schema |
| vluuhvd0bn59598utedt77ed9q5okbcb | Tim Sehn | tim@dolthub.com | 2022-06-07 16:33:59.531 | Initialize data repository |
+----------------------------------+-----------+-----------------+-------------------------+----------------------------+
2 rows in set (0.01 sec)
```
就是这样。你的 schema 已创建,并且你有一个 Dolt commit 跟踪该创建,如 `dolt_log` 系统表所示。
注意,Dolt commit 与标准 SQL 事务 `COMMIT` 不同。在这种情况下,我在开启 [`AUTOCOMMIT`](https://dev.mysql.com/doc/refman/5.6/en/innodb-autocommit-commit-rollback.html) 的情况下运行数据库,因此每个 SQL 语句都会自动生成一个事务 `COMMIT`。如果你希望系统为每个事务生成一个 Dolt commit,请使用系统变量 [`@@dolt_transaction_commit`](https://docs.dolthub.com/sql-reference/version-control/dolt-sysvars#dolt_transaction_commit)。
## 插入一些数据
现在,我将用 DoltHub 这里的几名员工填充数据库。然后,我将员工分配到两个团队:engineering 和 sales。CEO 在初创公司身兼数职,因此他将被分配到多个团队。
```
mysql> insert into employees values
(0, 'Sehn', 'Tim'),
(1, 'Hendriks', 'Brian'),
(2, 'Son','Aaron'),
(3, 'Fitzgerald', 'Brian');
Query OK, 4 rows affected (0.01 sec)
mysql> select * from employees where first_name='Brian';
+------+------------+------------+
| id | last_name | first_name |
+------+------------+------------+
| 1 | Hendriks | Brian |
| 3 | Fitzgerald | Brian |
+------+------------+------------+
2 rows in set (0.00 sec)
mysql> insert into teams values
(0, 'Engineering'),
(1, 'Sales');
Query OK, 2 rows affected (0.00 sec)
mysql> insert into employees_teams values
(0,0),
(1,0),
(2,0),
(0,1),
(3,1);
ERROR 1452 (HY000): cannot add or update a child row - Foreign key violation on fk: `rv9ek7ft`, table: `employees_teams`, referenced table: `teams`, key: `[2]`
```
哎呀,我违反了约束。看起来我是在 employees 之前创建了 teams 表。插入时你应该始终指定列,而不是依赖自然排序。我真是活该!Dolt 拥有现代 SQL 关系数据库的全部功能来确保数据完整性。
```
mysql> insert into employees_teams(employee_id, team_id) values
(0,0),
(1,0),
(2,0),
(0,1),
(3,1);
Query OK, 5 rows affected (0.01 sec)
mysql> select first_name, last_name, team_name from employees
join employees_teams on (employees.id=employees_teams.employee_id)
join teams on (teams.id=employees_teams.team_id)
where team_name='Engineering';
+------------+-----------+-------------+
| first_name | last_name | team_name |
+------------+-----------+-------------+
| Tim | Sehn | Engineering |
| Brian | Hendriks | Engineering |
| Aaron | Son | Engineering |
+------------+-----------+-------------+
3 rows in set (0.00 sec)
```
看起来一切都已正确插入。我能够使用那个三表 `JOIN` 列出 engineering 团队的成员。Dolt 支持最多十二个表的 `JOIN`。同样,Dolt 是一个现代 SQL 关系数据库,结合了 Git 风格的版本控制。
## 检查 diff
现在,如果你想在提交之前查看工作集中发生了什么更改怎么办?你使用 `dolt_status` 和 `dolt_diff_` 系统表。
```
mysql> select * from dolt_status;
+-----------------+--------+----------+
| table_name | staged | status |
+-----------------+--------+----------+
| teams | 0 | modified |
| employees | 0 | modified |
| employees_teams | 0 | modified |
+-----------------+--------+----------+
3 rows in set (0.01 sec)
mysql> select * from dolt_diff_employees;
+--------------+---------------+-------+-----------+----------------+----------------+-----------------+---------+----------------------------------+-------------------------+-----------+
| to_last_name | to_first_name | to_id | to_commit | to_commit_date | from_last_name | from_first_name | from_id | from_commit | from_commit_date | diff_type |
+--------------+---------------+-------+-----------+----------------+----------------+-----------------+---------+----------------------------------+-------------------------+-----------+
| Sehn | Tim | 0 | WORKING | NULL | NULL | NULL | NULL | ne182jemgrlm8jnjmoubfqsstlfi1s98 | 2022-06-07 16:35:49.277 | added |
| Hendriks | Brian | 1 | WORKING | NULL | NULL | NULL | NULL | ne182jemgrlm8jnjmoubfqsstlfi1s98 | 2022-06-07 16:35:49.277 | added |
| Son | Aaron | 2 | WORKING | NULL | NULL | NULL | NULL | ne182jemgrlm8jnjmoubfqsstlfi1s98 | 2022-06-07 16:35:49.277 | added |
| Fitzgerald | Brian | 3 | WORKING | NULL | NULL | NULL | NULL | ne182jemgrlm8jnjmoubfqsstlfi1s98 | 2022-06-07 16:35:49.277 | added |
+--------------+---------------+-------+-----------+----------------+----------------+-----------------+---------+----------------------------------+-------------------------+-----------+
4 rows in set (0.00 sec)
```
从 diff 中可以看出,我已将正确的值添加到 `employees` 表中。这些值以前是 `NULL`,现在已填充。
让我们以另一次 Dolt commit 结束,这次使用 `-am` 添加所有受影响的表。
```
mysql> call dolt_commit('-am', 'Populated tables with data');
+----------------------------------+
| hash |
+----------------------------------+
| 13qfqa5rojq18j84d1n2htjkm6fletg4 |
+----------------------------------+
1 row in set (0.02 sec)
```
你可以使用 `dolt_log` 检查日志,并使用非限定的 `dolt_diff` 查看每次提交中哪些表发生了更改。非限定 `dolt_diff` 会告诉你该表中特定提交更改的是 schema、数据还是两者。
```
mysql> select * from dolt_log;
+----------------------------------+-----------+-----------------+-------------------------+----------------------------+
| commit_hash | committer | email | date | message |
+----------------------------------+-----------+-----------------+-------------------------+----------------------------+
| 13qfqa5rojq18j84d1n2htjkm6fletg4 | Tim Sehn | tim@dolthub.com | 2022-06-07 16:39:32.066 | Populated tables with data |
| ne182jemgrlm8jnjmoubfqsstlfi1s98 | Tim Sehn | tim@dolthub.com | 2022-06-07 16:35:49.277 | Created initial schema |
| vluuhvd0bn59598utedt77ed9q5okbcb | Tim Sehn | tim@dolthub.com | 2022-06-07 16:33:59.531 | Initialize data repository |
+----------------------------------+-----------+-----------------+-------------------------+----------------------------+
3 rows in set (0.00 sec)
mysql> select * from dolt_diff;
+----------------------------------+-----------------+-----------+-----------------+-------------------------+----------------------------+-------------+---------------+
| commit_hash | table_name | committer | email | date | message | data_change | schema_change |
+----------------------------------+-----------------+-----------+-----------------+-------------------------+----------------------------+-------------+---------------+
| 13qfqa5rojq18j84d1n2htjkm6fletg4 | teams | Tim Sehn | tim@dolthub.com | 2022-06-07 16:39:32.066 | Populated tables with data | 1 | 0 |
| 13qfqa5rojq18j84d1n2htjkm6fletg4 | employees | Tim Sehn | tim@dolthub.com | 2022-06-07 16:39:32.066 | Populated tables with data | 1 | 0 |
| 13qfqa5rojq18j84d1n2htjkm6fletg4 | employees_teams | Tim Sehn | tim@dolthub.com | 2022-06-07 16:39:32.066 | Populated tables with data | 1 | 0 |
| ne182jemgrlm8jnjmoubfqsstlfi1s98 | employees | Tim Sehn | tim@dolthub.com | 2022-06-07 16:35:49.277 | Created initial schema | 0 | 1 |
| ne182jemgrlm8jnjmoubfqsstlfi1s98 | employees_teams | Tim Sehn | tim@dolthub.com | 2022-06-07 16:35:49.277 | Created initial schema | 0 | 1 |
| ne182jemgrlm8jnjmoubfqsstlfi1s98 | teams | Tim Sehn | tim@dolthub.com | 2022-06-07 16:35:49.277 | Created initial schema | 0 | 1 |
+----------------------------------+-----------------+-----------+-----------------+-------------------------+----------------------------+-------------+---------------+
6 rows in set (0.00 sec)
```
## 哦不!我犯了个错误。
Dolt 支持通过 `call dolt_reset()` 撤消更改。让我们想象一下我不小心删除了一个表。
```
mysql> drop table employees_teams;
Query OK, 0 rows affected (0.01 sec)
mysql> show tables;
+---------------------------+
| Tables_in_getting_started |
+---------------------------+
| employees |
| teams |
+---------------------------+
2 rows in set (0.00 sec)
```
在传统数据库中,这可能是灾难性的。在 Dolt 中,你只需一个命令即可找回你的表。
```
mysql> call dolt_reset('--hard');
+--------+
| status |
+--------+
| 0 |
+--------+
1 row in set (0.01 sec)
mysql> show tables;
+---------------------------+
| Tables_in_getting_started |
+---------------------------+
| employees |
| employees_teams |
| teams |
+---------------------------+
3 rows in set (0.01 sec)
```
Dolt 使操作数据库不太容易出错。你总是可以撤消正在进行的更改或倒回到已知的良好状态。你还能够使用 [`dolt_revert()`](https://docs.dolthub.com/sql-reference/version-control/dolt-sql-procedures#dolt_revert) 撤消特定的提交。即使你不小心在错误的数据库上运行 `drop database`,Dolt 也允许你通过调用 [`dolt_undrop()` 存储过程](https://docs.dolthub.com/sql-reference/version-control/dolt-sql-procedures#dolt_undrop) 来撤消该操作。
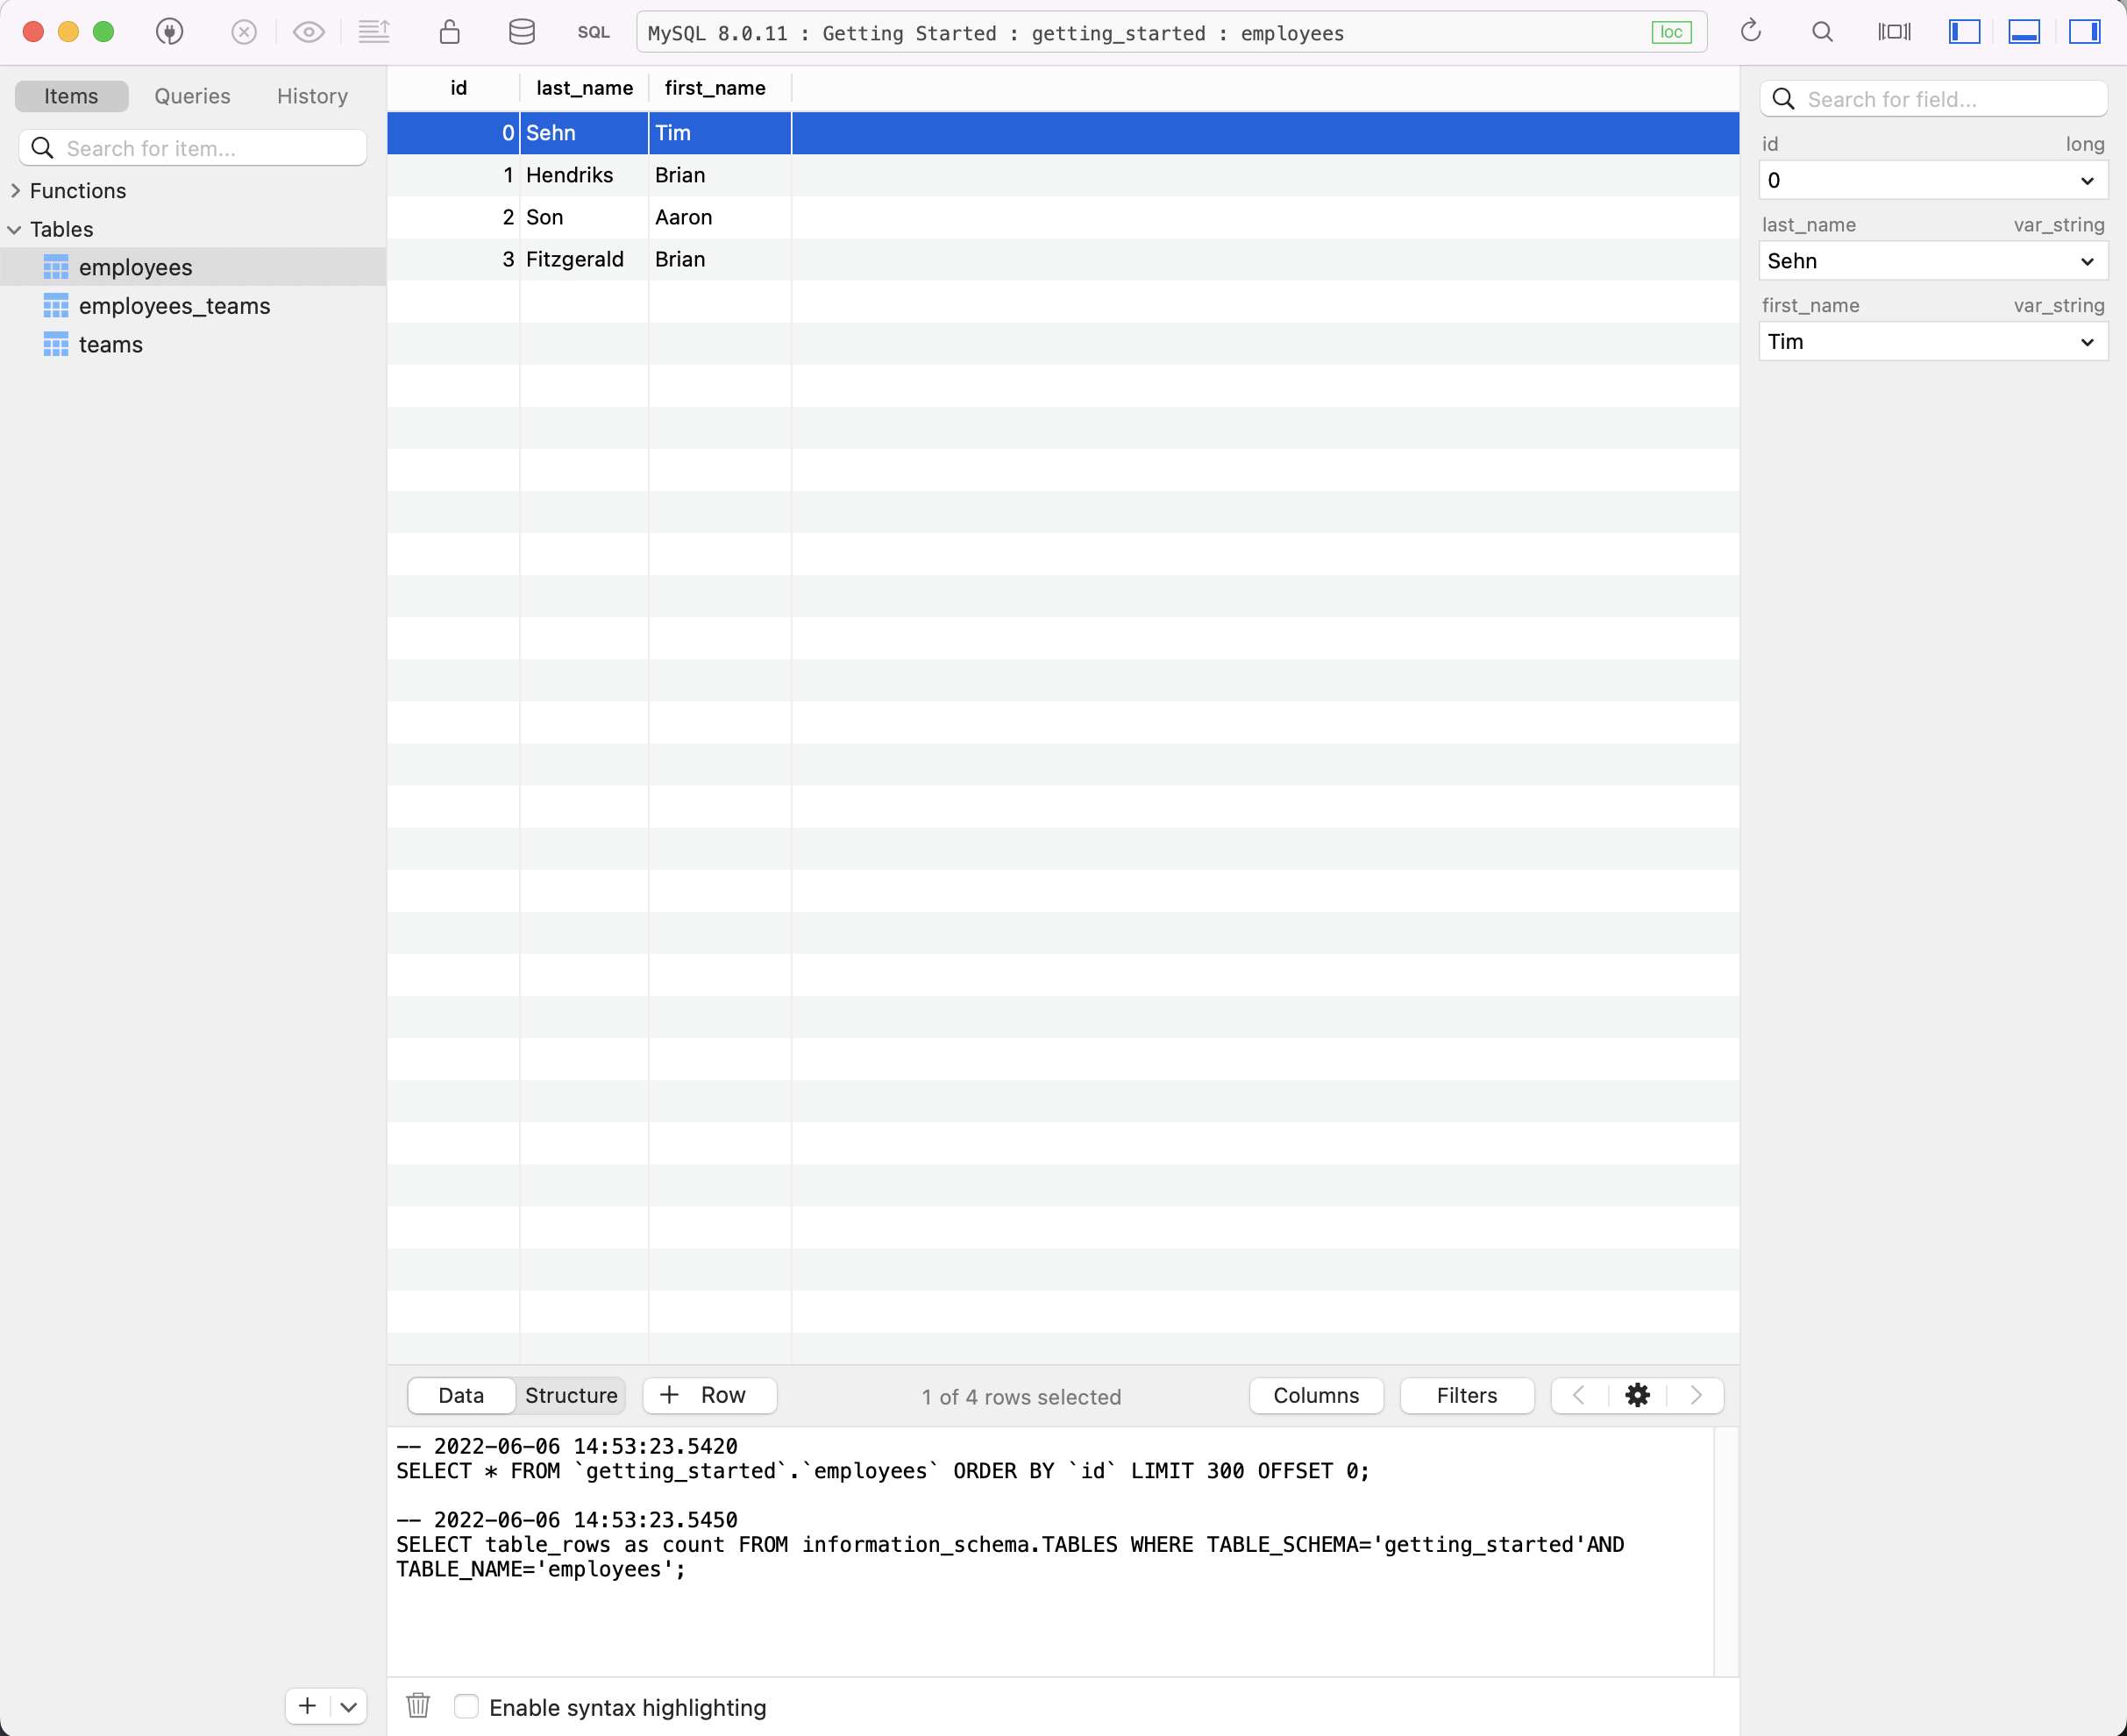
## 在 SQL Workbench 中查看数据
讨厌命令行?让我们使用 [Tableplus](https://tableplus.com/) 进行一些修改。Tableplus 是一个免费的 SQL Workbench。按照其网站上的安装说明进行操作。
现在,要连接,你必须选择 MySQL 作为连接类型。然后输入你的连接名称,`getting_started` 作为你的数据库,以及 `root` 作为你的用户。
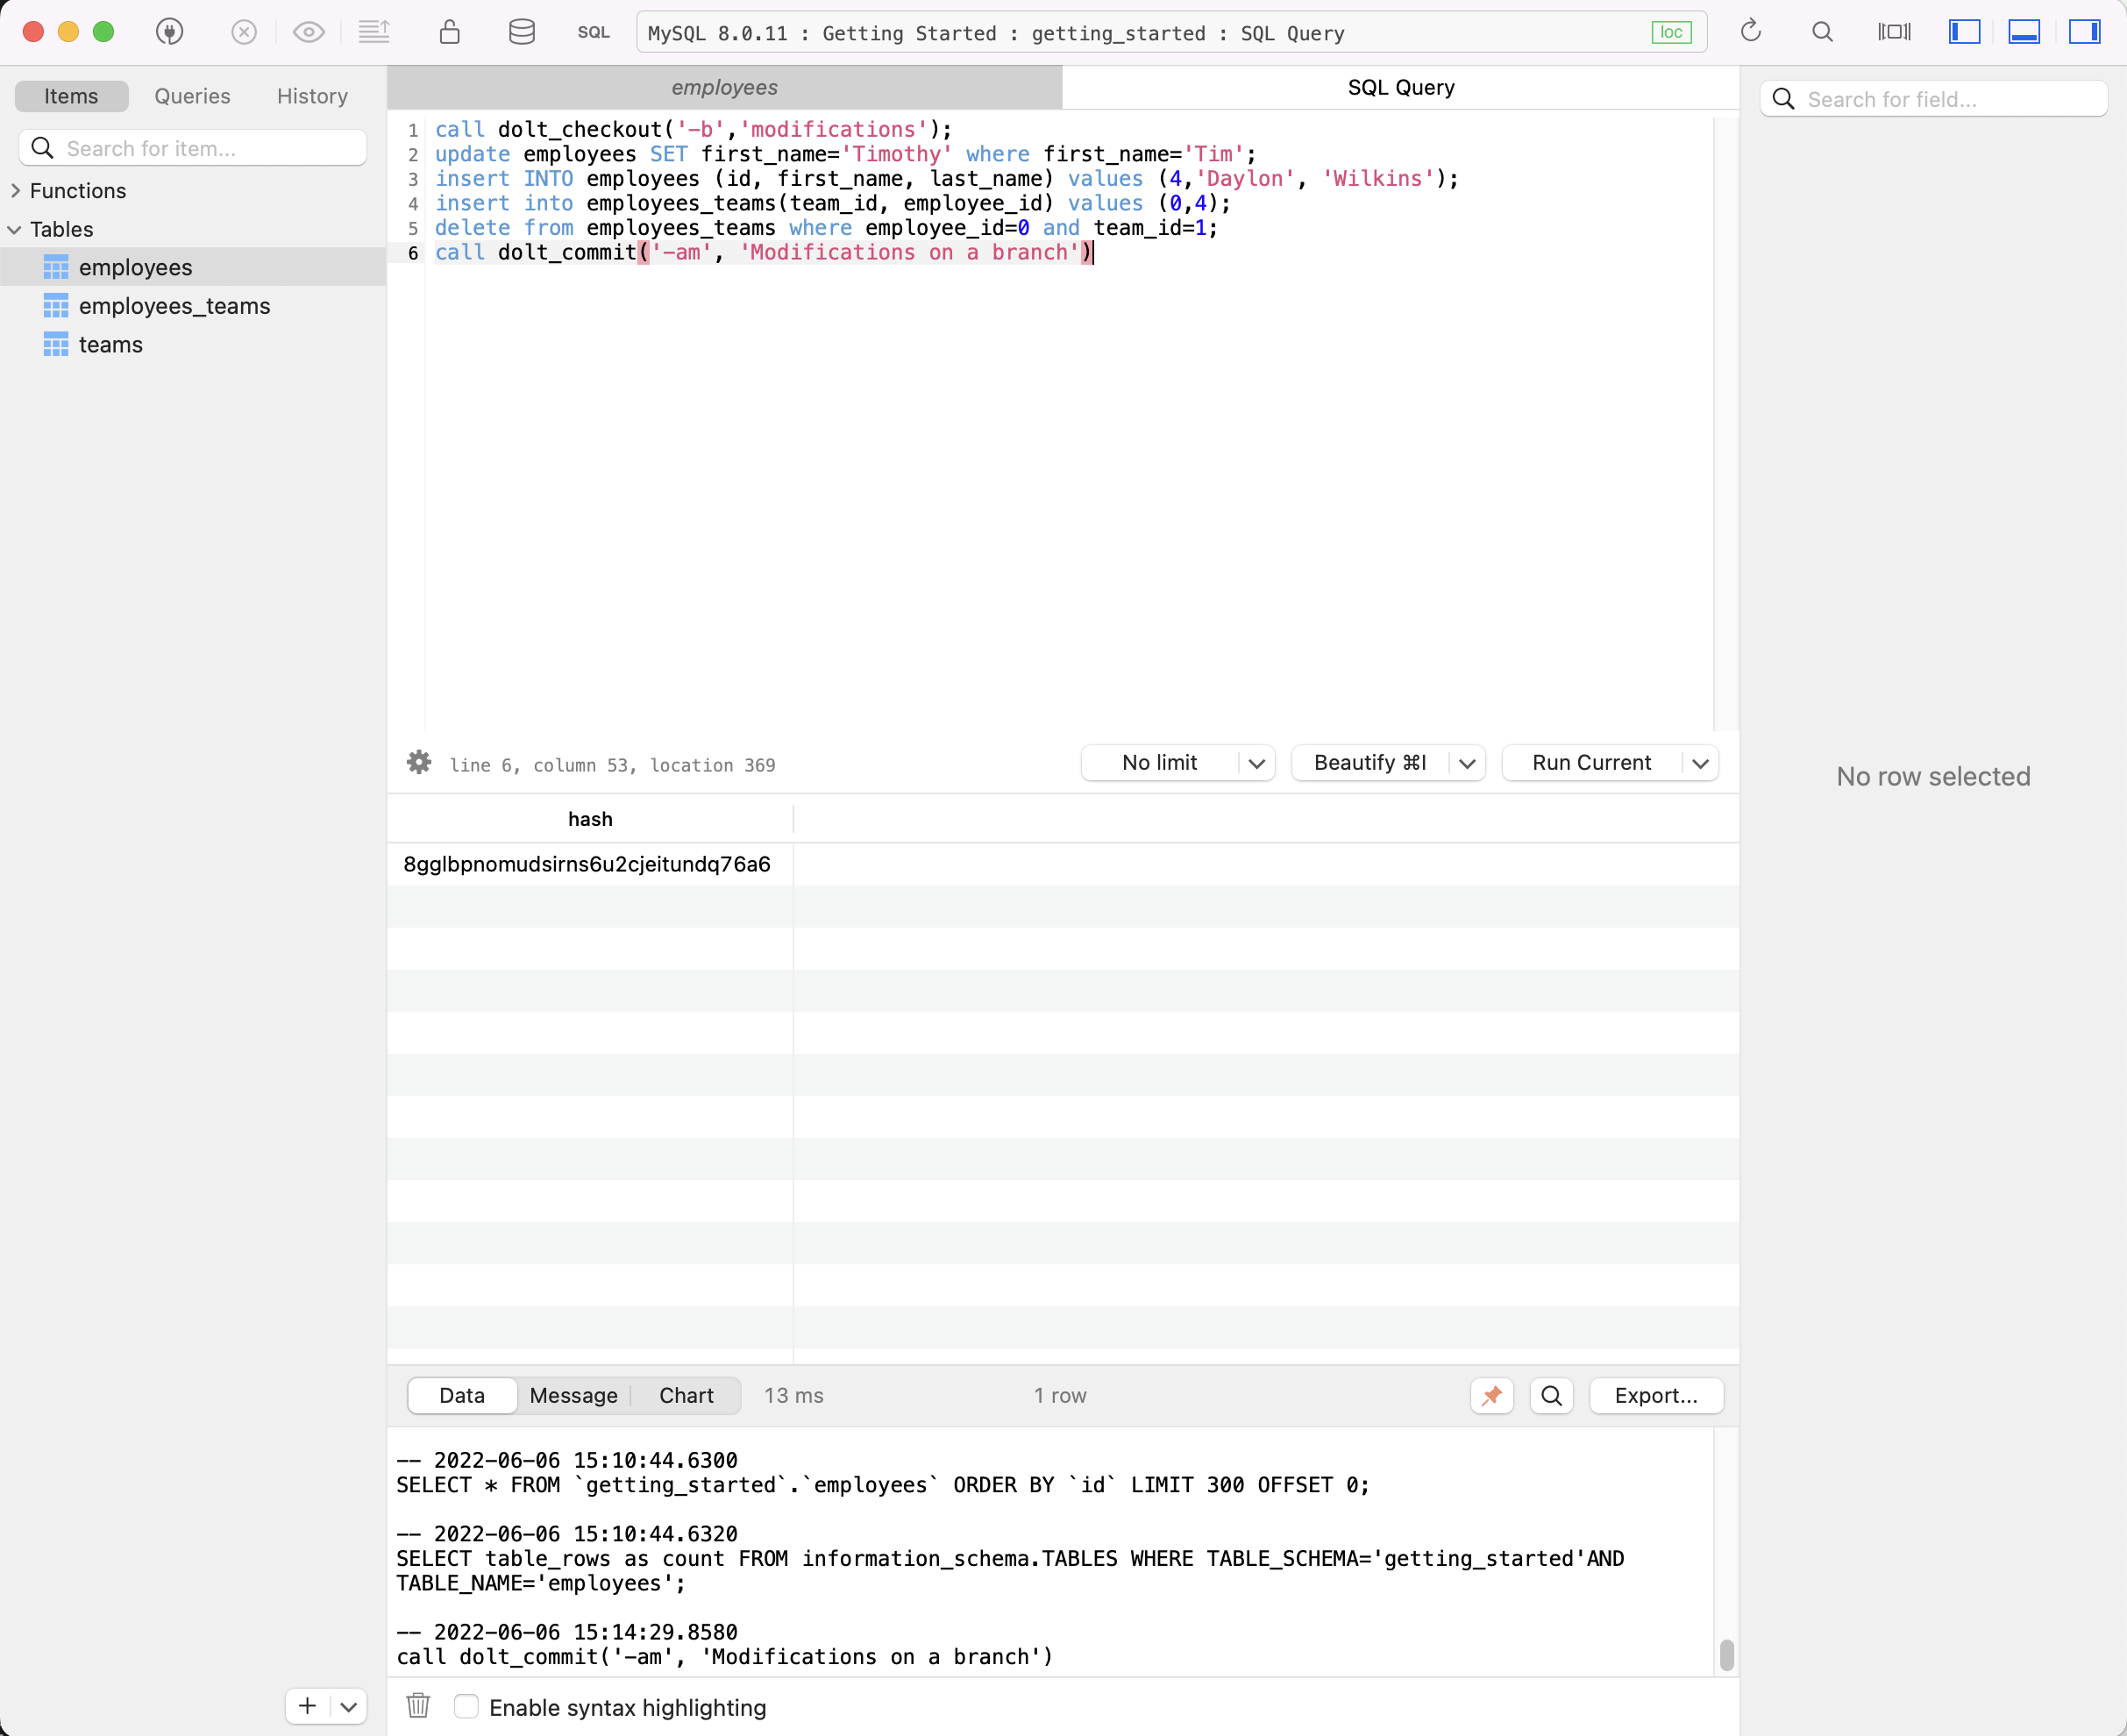
## 在分支上进行更改
要在分支上进行更改,我使用 `dolt_checkout()` 存储过程。使用 `-b` 选项创建一个分支,就像在 Git 中一样。
Tableplus 使我能够在 SQL 选项卡上输入多行 SQL 脚本。我输入了以下 SQL 以 checkout 一个分支、更新、插入、删除,最后 Dolt commit 我的更改。
```
call dolt_checkout('-b','modifications');
update employees SET first_name='Timothy' where first_name='Tim';
insert INTO employees (id, first_name, last_name) values (4,'Daylon', 'Wilkins');
insert into employees_teams(team_id, employee_id) values (0,4);
delete from employees_teams where employee_id=0 and team_id=1;
call dolt_commit('-am', 'Modifications on a branch');
```
这是 Tableplus 中的结果。
回到我的终端中,我看不到在 Tableplus 中进行的表修改,因为它们发生在我会话中 checkout 的分支以外的分支上。
```
mysql> select * from dolt_branches;
+---------------+----------------------------------+------------------+------------------------+-------------------------+----------------------------+
| name | hash | latest_committer | latest_committer_email | latest_commit_date | latest_commit_message |
+---------------+----------------------------------+------------------+------------------------+-------------------------+----------------------------+
| main | 13qfqa5rojq18j84d1n2htjkm6fletg4 | Tim Sehn | tim@dolthub.com | 2022-06-07 16:39:32.066 | Populated tables with data |
| modifications | uhkv57j4bp2v16vcnmev9lshgkqq8ppb | Tim Sehn | tim@dolthub.com | 2022-06-07 16:41:49.847 | Modifications on a branch |
+---------------+----------------------------------+------------------+------------------------+-------------------------+----------------------------+
2 rows in set (0.00 sec)
mysql> select active_branch();
+-----------------+
| active_branch() |
+-----------------+
| main |
+-----------------+
1 row in set (0.00 sec)
mysql> select * from employees;
+------+------------+------------+
| id | last_name | first_name |
+------+------------+------------+
| 0 | Sehn | Tim |
| 1 | Hendriks | Brian |
| 2 | Son | Aaron |
| 3 | Fitzgerald | Brian |
+------+------------+------------+
4 rows in set (0.00 sec)
```
无论我 checkout 了什么,我都可以使用 SQL `as of` 语法查询分支。
```
mysql> select * from employees as of 'modifications';
+------+------------+------------+
| id | last_name | first_name |
+------+------------+------------+
| 0 | Sehn | Timothy |
| 1 | Hendriks | Brian |
| 2 | Son | Aaron |
| 3 | Fitzgerald | Brian |
| 4 | Wilkins | Daylon |
+------+------------+------------+
5 rows in set (0.01 sec)
```
如果我想查看两个分支之间的 diff,我可以使用 `dolt_diff()` 表函数。它接受两个分支和表名作为参数。
```
mysql> select * from dolt_diff('main', 'modifications', 'employees');
+--------------+---------------+-------+---------------+-------------------------+----------------+-----------------+---------+-------------+-------------------------+-----------+
| to_last_name | to_first_name | to_id | to_commit | to_commit_date | from_last_name | from_first_name | from_id | from_commit | from_commit_date | diff_type |
+--------------+---------------+-------+---------------+-------------------------+----------------+-----------------+---------+-------------+-------------------------+-----------+
| Sehn | Timothy | 0 | modifications | 2022-06-07 16:41:49.847 | Sehn | Tim | 0 | main | 2022-06-07 16:39:32.066 | modified |
| Wilkins | Daylon | 4 | modifications | 2022-06-07 16:41:49.847 | NULL | NULL | NULL | main | 2022-06-07 16:39:32.066 | added |
+--------------+---------------+-------+---------------+-------------------------+----------------+-----------------+---------+-------------+-------------------------+-----------+
2 rows in set (0.00 sec)
```
如你所见,你在使用 Dolt 的 SQL 数据库中拥有了 Git 风格分支和 diff 的全部功能。
## 在另一个分支上进行 schema 更改
我还可以在分支上进行 schema 更改,以便对新 schema 进行隔离测试。我将在一个新分支上添加一个 `start_date` 列并填充它。
```
mysql> call dolt_checkout('-b', 'schema_changes');
+--------+
| status |
+--------+
| 0 |
+--------+
1 row in set (0.01 sec)
mysql> alter table employees add column start_date date;
Query OK, 0 rows affected (0.02 sec)
mysql> update employees set start_date='2018-09-08';
Query OK, 4 rows affected (0.01 sec)
Rows matched: 4 Changed: 4 Warnings: 0
mysql> update employees set start_date='2021-04-19' where last_name='Fitzgerald';
Query OK, 1 row affected (0.01 sec)
Rows matched: 1 Changed: 1 Warnings: 0
mysql> select * from employees;
+------+------------+------------+------------+
| id | last_name | first_name | start_date |
+------+------------+------------+------------+
| 0 | Sehn | Tim | 2018-09-08 |
| 1 | Hendriks | Brian | 2018-09-08 |
| 2 | Son | Aaron | 2018-09-08 |
| 3 | Fitzgerald | Brian | 2021-04-19 |
+------+------------+------------+------------+
4 rows in set (0.00 sec)
mysql> call dolt_commit('-am', 'Added start_date column to employees');
+----------------------------------+
| hash |
+----------------------------------+
| pg3nfi0j1dpc5pf1rfgckpmlteaufdrt |
+----------------------------------+
1 row in set (0.01 sec)
```
在分支上更改 schema 为你提供了一种对新 schema 更改进行隔离集成测试的新方法。
## 将所有内容合并在一起
让我们假设在 `schema_changes` 分支上对新 schema 的所有测试以及在 `modifications` 分支上的数据都已完美完成。是时候将我们所有的编辑合并到 `main` 上。这是使用 `dolt_merge` 存储过程完成的。
```
mysql> call dolt_checkout('main');
+--------+
| status |
+--------+
| 0 |
+--------+
1 row in set (0.01 sec)
mysql> select * from dolt_status;
Empty set (0.00 sec)
mysql> call dolt_merge('schema_changes');
+--------------+
| no_conflicts |
+--------------+
| 1 |
+--------------+
1 row in set (0.01 sec)
mysql> select * from employees;
+------+------------+------------+------------+
| id | last_name | first_name | start_date |
+------+------------+------------+------------+
| 0 | Sehn | Tim | 2018-09-08 |
| 1 | Hendriks | Brian | 2018-09-08 |
| 2 | Son | Aaron | 2018-09-08 |
| 3 | Fitzgerald | Brian | 2021-04-19 |
+------+------------+------------+------------+
4 rows in set (0.00 sec)
```
Schema 更改成功。我们现在有了开始日期。接下来是数据更改。
```
mysql> call dolt_merge('modifications');
+--------------+
| no_conflicts |
+--------------+
| 1 |
+--------------+
1 row in set (0.02 sec)
mysql> select * from employees;
+------+------------+------------+------------+
| id | last_name | first_name | start_date |
+------+------------+------------+------------+
| 0 | Sehn | Timothy | 2018-09-08 |
| 1 | Hendriks | Brian | 2018-09-08 |
| 2 | Son | Aaron | 2018-09-08 |
| 3 | Fitzgerald | Brian | 2021-04-19 |
| 4 | Wilkins | Daylon | NULL |
+------+------------+------------+------------+
5 rows in set (0.00 sec)
```
数据更改也成功了。如你所见,我现在是“Timothy”而不是“Tim”,Daylon 已添加,除了 Daylon(他是在另一个分支上添加的)之外,我们都有开始日期。
```
mysql> select first_name, last_name, team_name from employees
join employees_teams on (employees.id=employees_teams.employee_id)
join teams on (teams.id=employees_teams.team_id)
where team_name='Sales';
+------------+------------+-----------+
| first_name | last_name | team_name |
+------------+------------+-----------+
| Brian | Fitzgerald | Sales |
+------------+------------+-----------+
1 row in set (0.01 sec)
```
我也从 Sales Team 消失了。Engineering 才是生活。
我必须提交所有更改,因为最后一次合并不是快进合并。
```
mysql> call dolt_commit('-m', 'Merged all branches');
+----------------------------------+
| hash |
+----------------------------------+
| vn9b0qcematsj2f6ka0hfoflhr5s6p0b |
+----------------------------------+
1 row in set (0.01 sec)
mysql> select * from dolt_log;
+----------------------------------+-----------+-----------------+-------------------------+--------------------------------------+
| commit_hash | committer | email | date | message |
+----------------------------------+-----------+-----------------+-------------------------+--------------------------------------+
| vn9b0qcematsj2f6ka0hfoflhr5s6p0b | Tim Sehn | tim@dolthub.com | 2022-06-07 17:10:02.07 | Merged all branches |
| pg3nfi0j1dpc5pf1rfgckpmlteaufdrt | Tim Sehn | tim@dolthub.com | 2022-06-07 16:44:37.513 | Added start_date column to employees |
| uhkv57j4bp2v16vcnmev9lshgkqq8ppb | Tim Sehn | tim@dolthub.com | 2022-06-07 16:41:49.847 | Modifications on a branch |
| 13qfqa5rojq18j84d1n2htjkm6fletg4 | Tim Sehn | tim@dolthub.com | 2022-06-07 16:39:32.066 | Populated tables with data |
| ne182jemgrlm8jnjmoubfqsstlfi1s98 | Tim Sehn | tim@dolthub.com | 2022-06-07 16:35:49.277 | Created initial schema |
| vluuhvd0bn59598utedt77ed9q5okbcb | Tim Sehn | tim@dolthub.com | 2022-06-07 16:33:59.531 | Initialize data repository |
+----------------------------------+-----------+-----------------+-------------------------+--------------------------------------+
6 rows in set (0.00 sec)
```
现在,我们有一个数据库,其中包含所有已合并并准备好使用的 schema 和数据更改。
## 审计 Cell Lineage
哪个提交更改了我的名字?使用 Dolt,你可以获得数据库中每个 cell 的 lineage。让我们使用 `dolt_history_` 和 `dolt_diff_` 来探索 Dolt 中的 lineage 功能。
`dolt_history_` 显示每次提交时行的状态。
```
mysql> select * from dolt_history_employees where id=0 order by commit_date;
+------+-----------+------------+------------+----------------------------------+-----------+-------------------------+
| id | last_name | first_name | start_date | commit_hash | committer | commit_date |
+------+-----------+------------+------------+----------------------------------+-----------+-------------------------+
| 0 | Sehn | Tim | NULL | 13qfqa5rojq18j84d1n2htjkm6fletg4 | Tim Sehn | 2022-06-07 16:39:32.066 |
| 0 | Sehn | Timothy | NULL | uhkv57j4bp2v16vcnmev9lshgkqq8ppb | Tim Sehn | 2022-06-07 16:41:49.847 |
| 0 | Sehn | Tim | 2018-09-08 | pg3nfi0j1dpc5pf1rfgckpmlteaufdrt | Tim Sehn | 2022-06-07 16:44:37.513 |
| 0 | Sehn | Timothy | 2018-09-08 | vn9b0qcematsj2f6ka0hfoflhr5s6p0b | Tim Sehn | 2022-06-07 17:10:02.07 |
+------+-----------+------------+------------+----------------------------------+-----------+-------------------------+
4 rows in set (0.00 sec)
```
`dolt_diff_` 允许你将历史记录筛选为仅限所讨论的 cell 发生更改时的提交。在这种情况下,我对更改我的名字的提交感兴趣。注意,有两个提交更改了我的名字,因为一个是原始更改,第二个是合并提交。
```
mysql> select to_commit,from_first_name,to_first_name from dolt_diff_employees
where (from_id=0 or to_id=0) and (from_first_name <> to_first_name or from_first_name is NULL)
order by to_commit_date;
+----------------------------------+-----------------+---------------+
| to_commit | from_first_name | to_first_name |
+----------------------------------+-----------------+---------------+
| 13qfqa5rojq18j84d1n2htjkm6fletg4 | NULL | Tim |
| uhkv57j4bp2v16vcnmev9lshgkqq8ppb | Tim | Timothy |
| vn9b0qcematsj2f6ka0hfoflhr5s6p0b | Tim | Timothy |
+----------------------------------+-----------------+---------------+
3 rows in set (0.01 sec)
```
Dolt 提供了强大的数据审计功能,精确到单个 cell。你的数据库中每个 cell 随着时间的推移是在何时、如何以及为何发生更改的?
# 延伸阅读
既然你对 Dolt 有了初步了解,请前往 [我们的文档](https://docs.dolthub.com/introduction/what-is-dolt)。你也可以在 [我们的博客](https://www.dolthub.com/blog/) 中阅读我们一直在进行的工作。
# 安全政策
[Dolt 当前的安全政策](https://github.com/dolthub/dolt/blob/main/SECURITY.md) 在此仓库中维护。请遵循那里的披露说明。请勿在此仓库的公开 GitHub issues 中初步报告安全问题。
# 致谢和许可
Dolt 大量依赖
[Noms](https://github.com/attic-labs/noms) 项目的开源代码和思想。我们非常
感谢 Noms 团队免费提供此代码,
如果没有这些代码,我们将无法如此迅速地构建 Dolt。
Dolt 根据 Apache License, Version 2.0 获得许可。有关
详细信息,请参阅
[LICENSE](https://github.com/dolthub/dolt/blob/master/LICENSE)。标签:BinlogReplication, Dolt, DoltHub, EVTX分析, EVTX分析, Git, RelationalDatabase, SchemaMigration, SQL数据库, 多线程, 安全可观测性, 开源, 数据 lineage, 数据协作, 数据工程, 数据库版本控制, 数据管理, 日志审计, 版本控制, 网络安全研究, 请求拦截