patarisac/wg-config
GitHub: patarisac/wg-config
一款基于浏览器的 WireGuard 配置生成器,专为配合 Burp Suite 流量拦截场景自动生成服务端和客户端配置文件。
Stars: 0 | Forks: 1
# WireGuard 配置生成器
基于 Web 的 WireGuard 配置生成器,用于创建可用于 Burp Suite 拦截需求的服务端和客户端配置文件。
## 预览
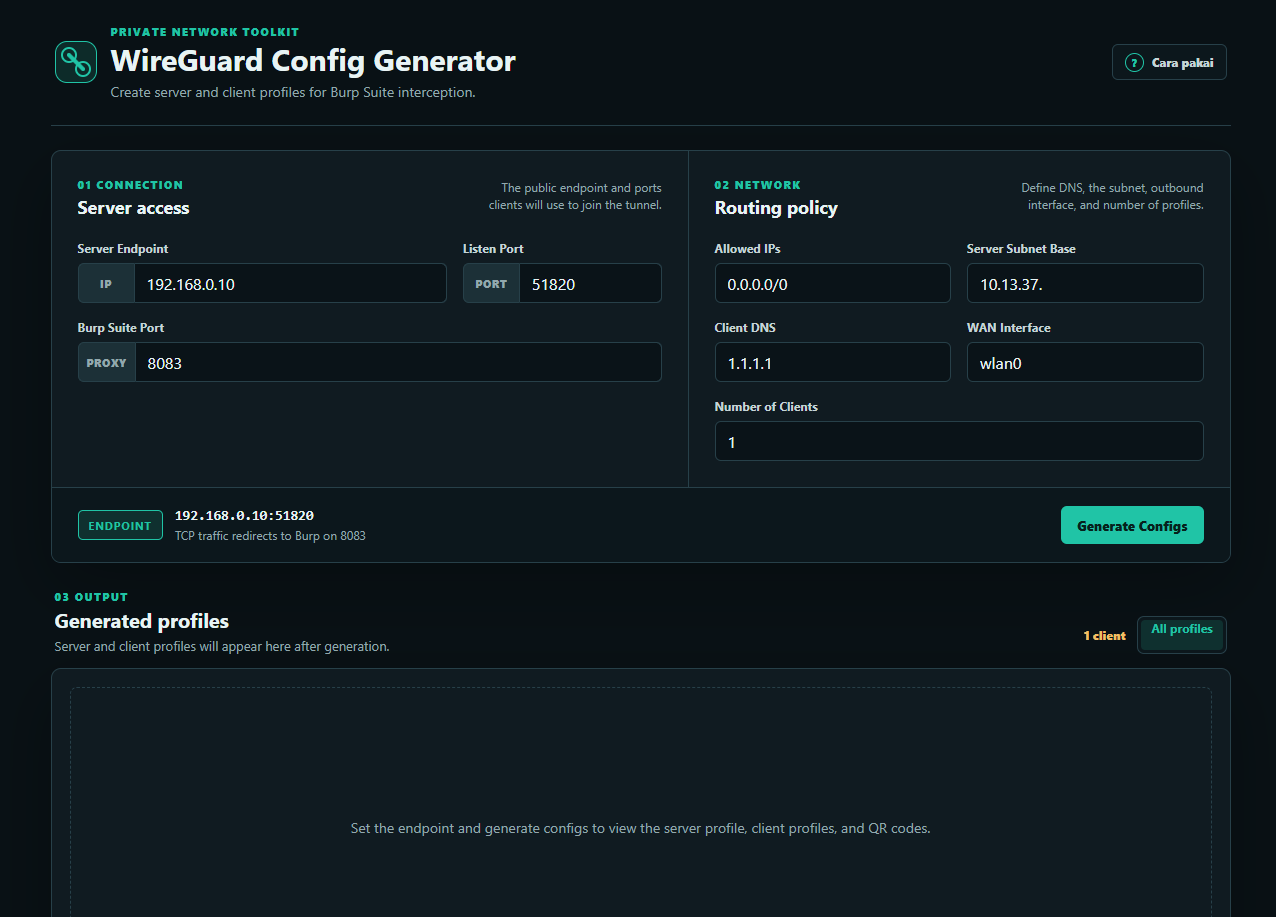
## 功能
- 直接在浏览器中生成 WireGuard 服务端和客户端密钥对。
- 生成带有 NAT 规则、转发、DNS 重定向以及 TCP 重定向到 Burp Suite 端口的服务端配置。
- 支持同时生成多个客户端配置文件。
- 为每个配置文件显示 QR code,以便轻松导入到 WireGuard 移动端应用中。
- 提供快速指南,用于设置 Linux WireGuard、导入移动端客户端以及配置 Burp Suite 代理监听器。
- 作为静态页面运行,无需后端,也无需构建过程。
## 项目结构
```
index.html
favicon.ico
js/
nacl-fast.min.js
qrcode.min.js
assets/
readme-preview.png
tutorial/
```
## 运行方式
克隆仓库:
```
git clone https://github.com/patarisac/wg-config.git
cd wg-config
```
直接在浏览器中打开 `index.html`,或者运行一个简单的本地服务器:
```
python -m http.server 8000
```
然后打开:
```
http://localhost:8000
```
## 使用方法
1. 在 `Server Endpoint` 中填入客户端可访问的服务端 IP 或域名。
2. 根据 WireGuard 服务端的端口填写 `Listen Port`,默认为 `51820`。
3. 根据 Burp 的代理监听器端口填写 `Burp Suite Port`,默认为 `8083`。
4. 配置 `Allowed IPs`、`Server Subnet Base`、`Client DNS`、`WAN Interface` 以及客户端数量。
5. 点击 `Generate Configs`。
6. 将 `Server` 配置复制到 Linux 服务端的 `/etc/wireguard/wg0.conf` 中。
7. 通过 QR code 导入 `Client` 配置,或者手动复制客户端配置。
8. 确保 Burp Suite 代理监听器使用相同的端口并绑定到所有接口。
## 服务端设置示例
安装 WireGuard:
```
sudo apt install wireguard
```
保存服务端配置:
```
sudo nano /etc/wireguard/wg0.conf
```
保护配置文件的安全并启动接口:
```
sudo chmod 600 /etc/wireguard/wg0.conf
sudo wg-quick up wg0
```
检查 WireGuard 状态:
```
sudo wg
```
## 安全提示
- 私钥在浏览器中生成,不会发送到任何服务器。
- 切勿分享包含 `PrivateKey` 的配置。
- 请使用与服务端环境相匹配的 endpoint、子网、DNS 和网络接口。
- 在生产服务器上使用之前,请先审查 `PostUp` 和 `PostDown` 规则。
标签:Burp Suite, WireGuard, 前端工具, 后端开发, 多模态安全, 安全合规, 数据可视化, 流量转发, 网络代理, 配置生成器