TanUjNimkar/devsecops-gitops-eks-platform
GitHub: TanUjNimkar/devsecops-gitops-eks-platform
该项目演示了如何利用 Jenkins、ArgoCD 和 AWS EKS 等工具,为 MERN 栈应用构建一个集成安全扫描与 GitOps 自动化部署的生产级 DevSecOps 平台。
Stars: 0 | Forks: 0
# DevOps 超级项目:从代码到 Kubernetes - 构建生产级 DevSecOps + GitOps 平台
## 在这个全面的演示中,我们将探讨如何在 AWS EKS(Elastic Kubernetes Service)集群上完成生产级三层 MERN 栈应用的部署,展示真实的 DevOps 实践。
#
### 项目部署流程:
 #
## 本项目使用的技术栈:
- GitHub(代码)
- Docker(容器化)
- Jenkins(CI)
- OWASP(依赖检查)
- SonarQube(质量)
- Trivy(文件系统扫描)
- ArgoCD(CD)
- Redis(缓存)
- AWS EKS(Kubernetes)
- Helm(使用 grafana 和 prometheus 进行监控)
## 🛠️ 使用的技术栈
### 🚀 核心 DevSecOps 栈
#
## 本项目使用的技术栈:
- GitHub(代码)
- Docker(容器化)
- Jenkins(CI)
- OWASP(依赖检查)
- SonarQube(质量)
- Trivy(文件系统扫描)
- ArgoCD(CD)
- Redis(缓存)
- AWS EKS(Kubernetes)
- Helm(使用 grafana 和 prometheus 进行监控)
## 🛠️ 使用的技术栈
### 🚀 核心 DevSecOps 栈
- 凭据: 添加 --> 类型:ssh username with private key --> ID: Worker --> 描述: Worker --> 用户名: root --> 私钥: 直接输入 --> 添加私钥
- 主机密钥验证策略: 非验证验证策略
- 可用性: 尽可能保持此节点在线
#
- 这样你的 jenkins worker 节点就添加完成了
#
- 安装 docker(Jenkins Worker)
```
sudo apt install docker.io -y
sudo usermod -aG docker ubuntu && newgrp docker
```
#
- 安装并配置 SonarQube(Master 机器)
```
docker run -itd --name SonarQube-Server -p 9000:9000 sonarqube:lts-community
docker run -itd --name SonarQube-Server -p 9000:9000 sonarqube:community #Recommended to use
```
#
- 安装 Trivy(Jenkins Worker)
```
sudo apt-get install wget apt-transport-https gnupg lsb-release -y
wget -qO - https://aquasecurity.github.io/trivy-repo/deb/public.key | sudo apt-key add -
echo deb https://aquasecurity.github.io/trivy-repo/deb $(lsb_release -sc) main | sudo tee -a /etc/apt/sources.list.d/trivy.list
sudo apt-get update -y
sudo apt-get install trivy -y
```
#
- 安装并配置 ArgoCD(Master 机器)
- 创建 argocd namespace
kubectl create namespace argocd
- 应用 argocd manifest
kubectl apply -n argocd -f https://raw.githubusercontent.com/argoproj/argo-cd/stable/manifests/install.yaml
- 确保所有 pod 都在 argocd namespace 中运行
watch kubectl get pods -n argocd
- 安装 argocd CLI
sudo curl --silent --location -o /usr/local/bin/argocd https://github.com/argoproj/argo-cd/releases/download/v2.4.7/argocd-linux-amd64
- 提供可执行权限
sudo chmod +x /usr/local/bin/argocd
- 检查 argocd 服务
kubectl get svc -n argocd
- 将 argocd server 的服务从 ClusterIP 更改为 NodePort
kubectl patch svc argocd-server -n argocd -p '{"spec": {"type": "NodePort"}}'
- 确认服务是否已修补
kubectl get svc -n argocd
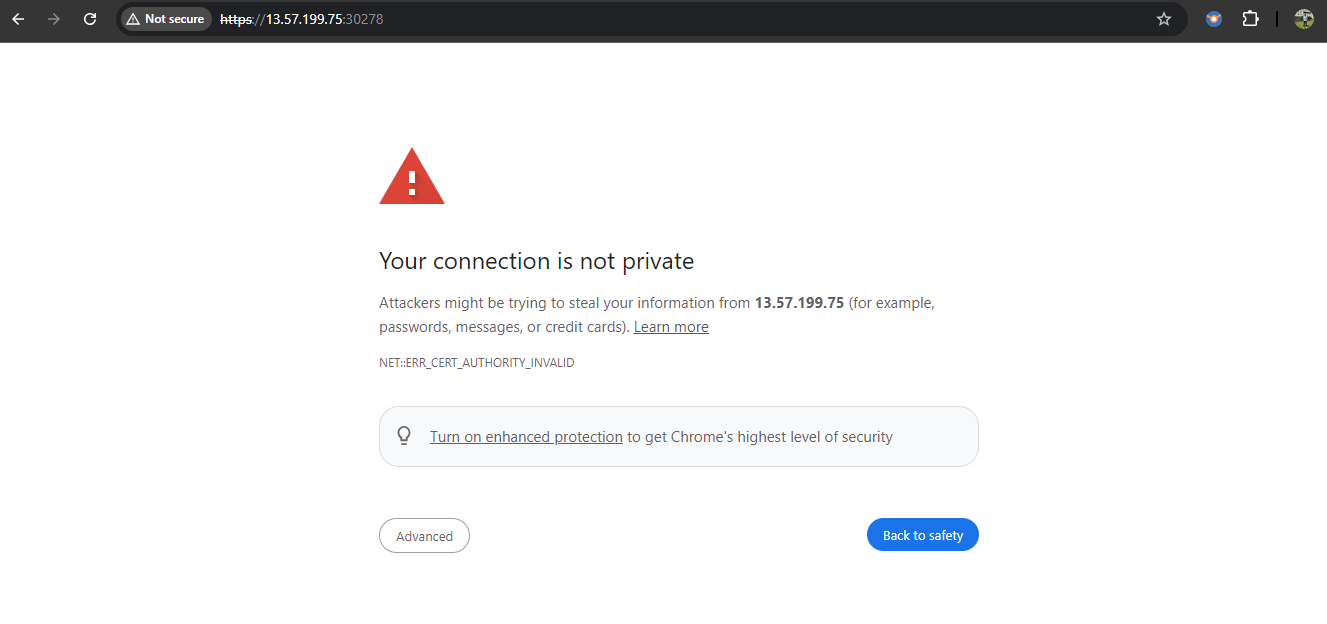
- 检查 ArgoCD server 运行的端口,并在 worker 节点的安全组中将其暴露出来

- 在浏览器中访问它,点击高级并继续
:


- 获取 argocd server 的初始密码
kubectl -n argocd get secret argocd-initial-admin-secret -o jsonpath="{.data.password}" | base64 -d; echo
- 用户名:admin
- 现在,转到 用户信息 并更新你的 argocd 密码
#
## 添加邮件通知的步骤
- 进入你的 Jenkins Master EC2 实例,并为 SMTPS 开放 465 端口
#
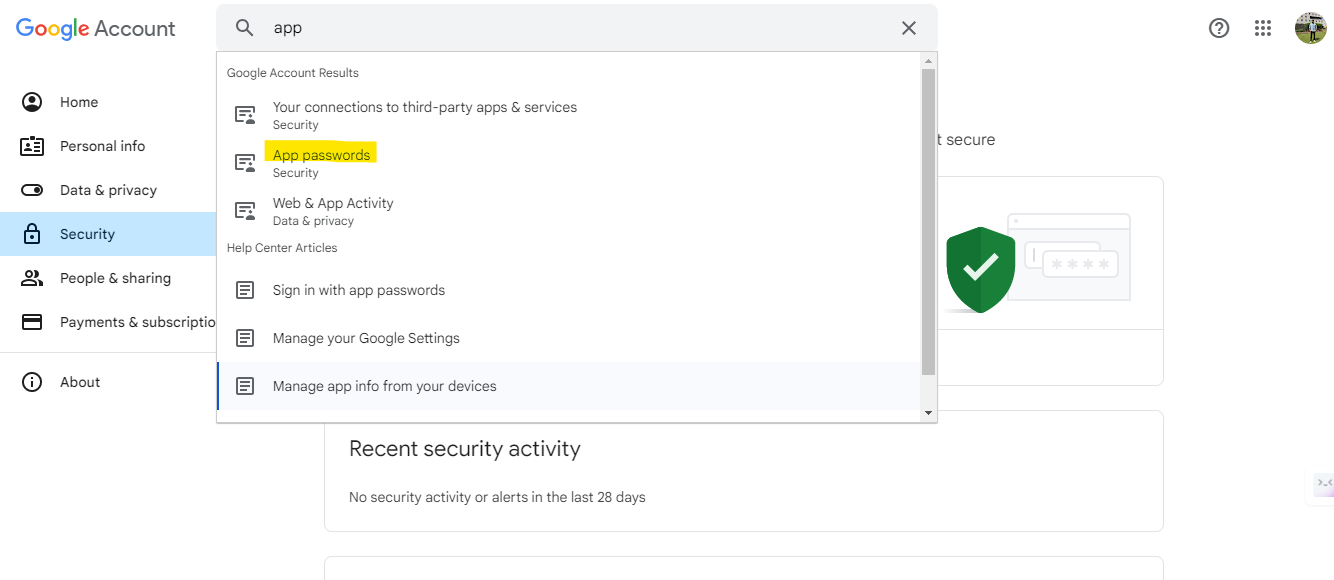
- 现在,我们需要从 gmail 帐户生成应用密码,以便与 jenkins 进行身份验证
- 打开 gmail 并转到 管理你的 Google 帐户 --> 安全

- 搜索 应用密码 并为 jenkins 创建一个应用密码
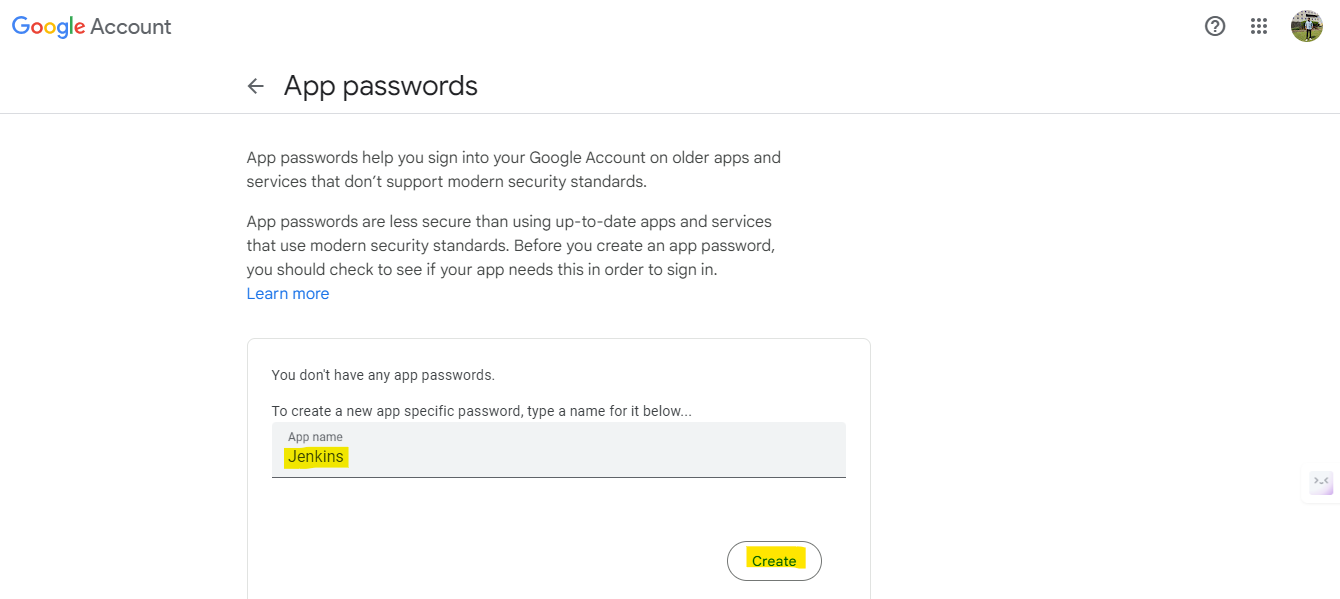
#
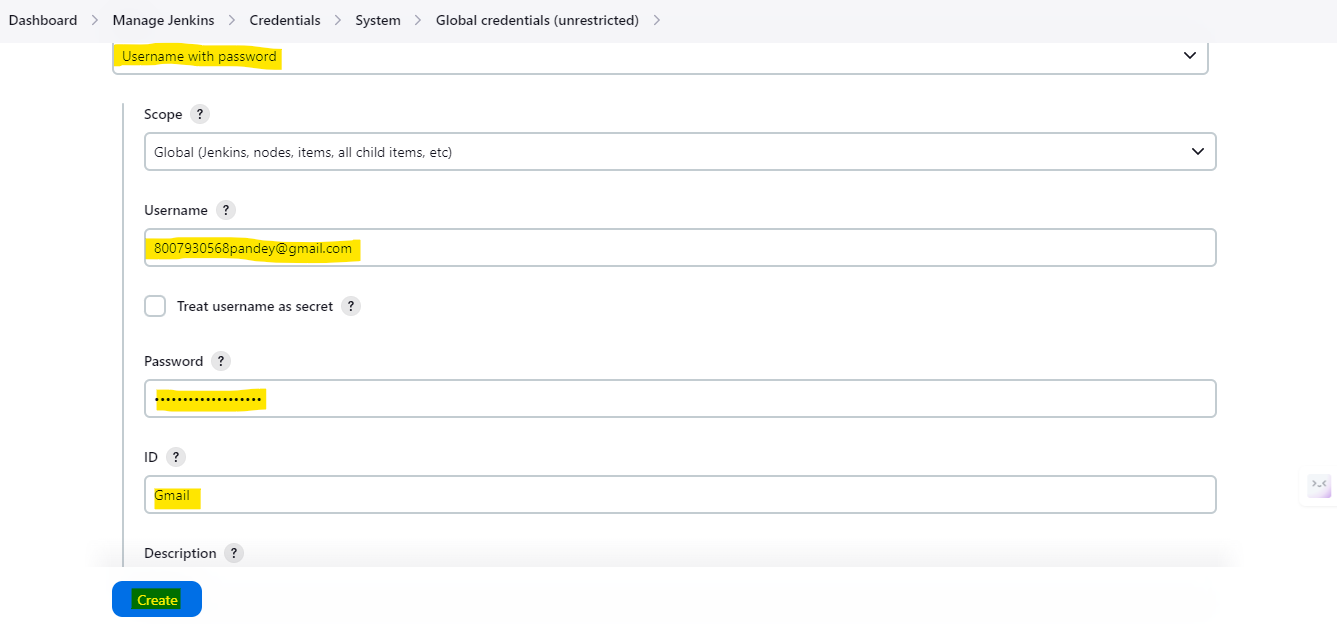
- 创建应用密码后,返回 jenkins 的 管理 Jenkins --> 凭据,添加用于邮件通知的用户名和密码
#
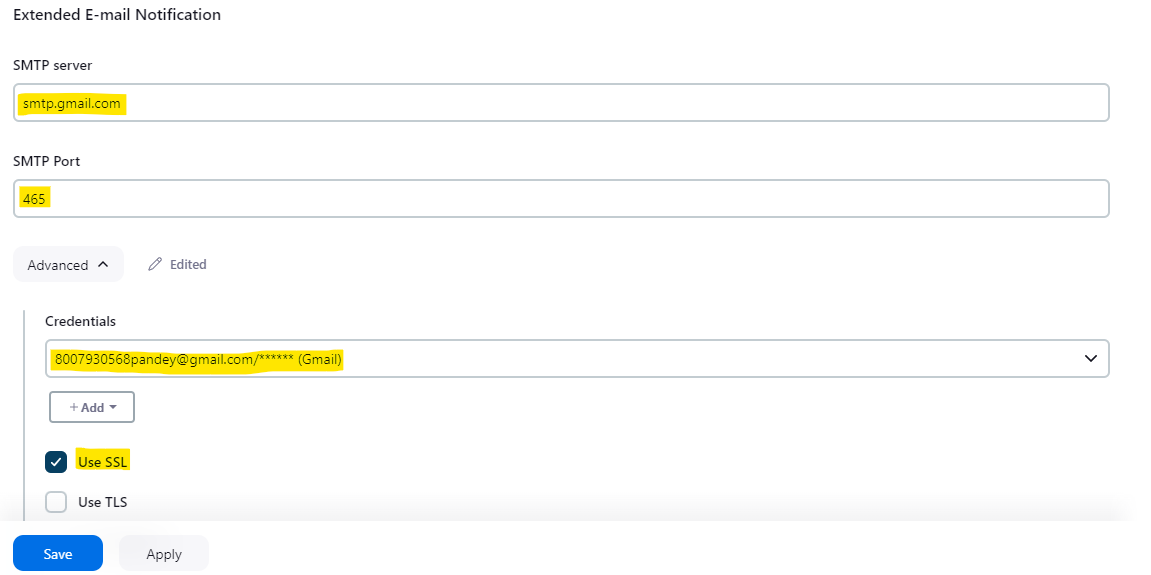
- 返回 管理 Jenkins --> 系统 并搜索 Extended E-mail Notification
#
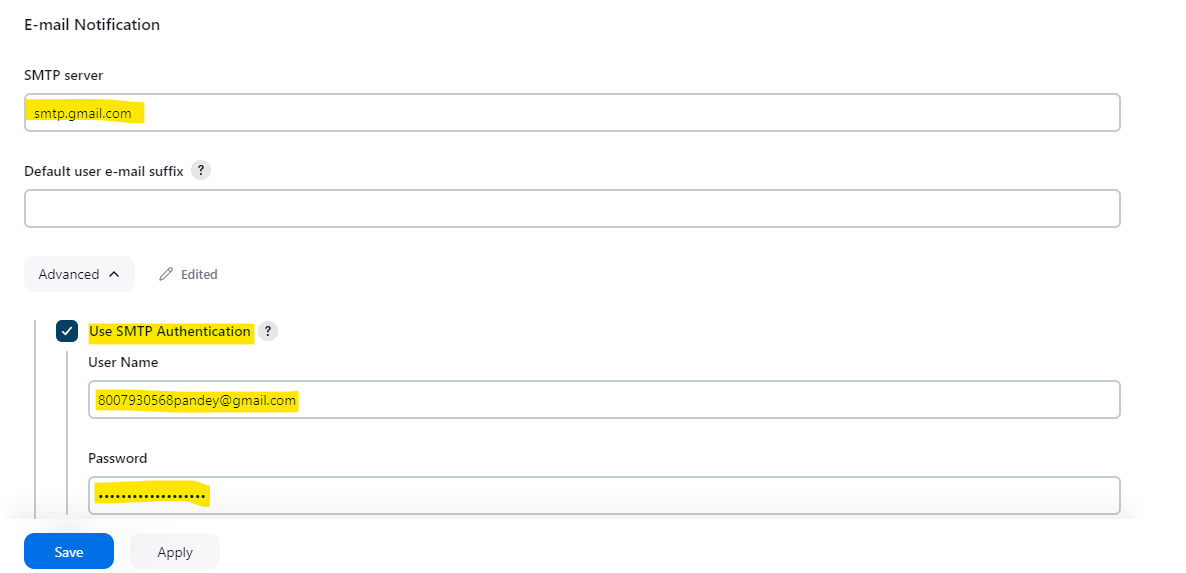
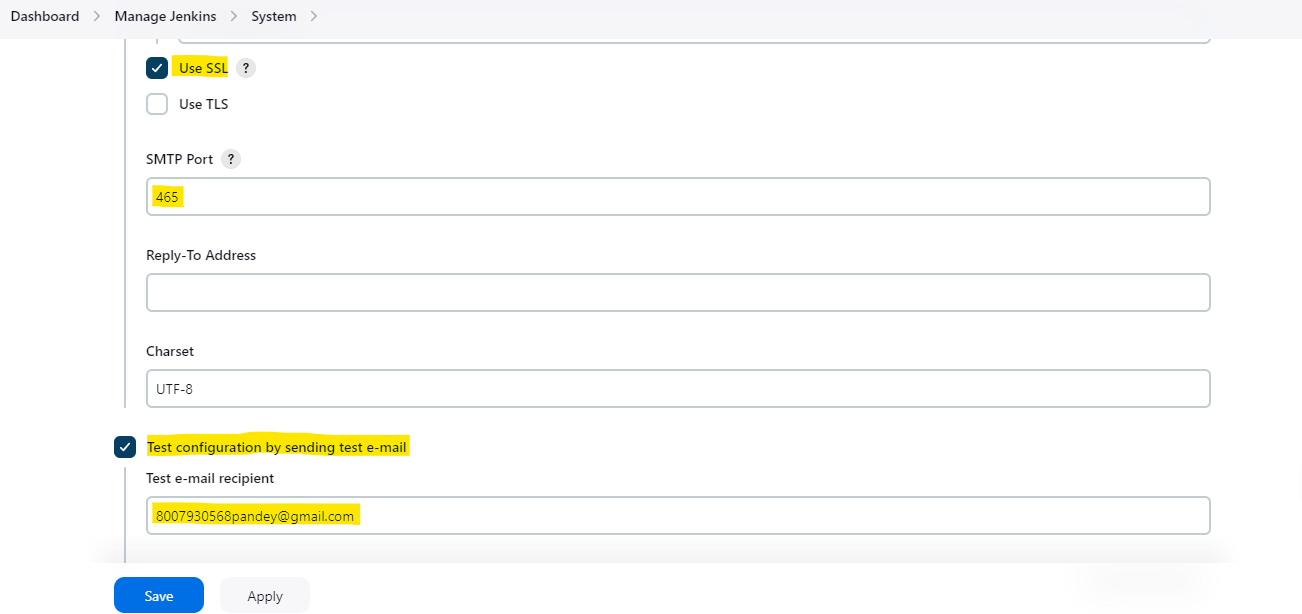
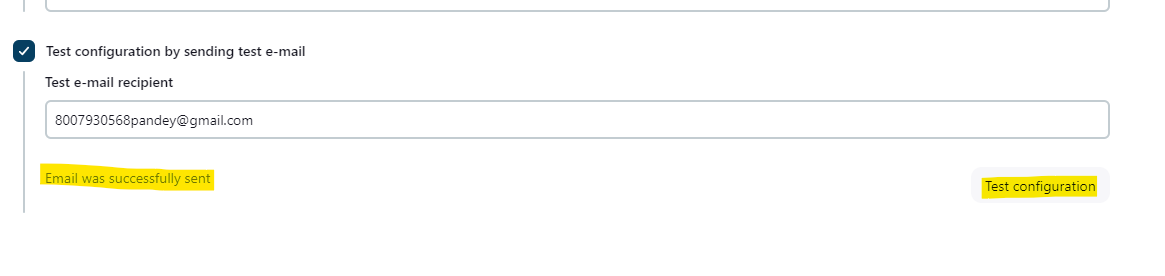
- 向下滚动并搜索 E-mail Notification 并设置邮件通知
#
## 实施项目的步骤:
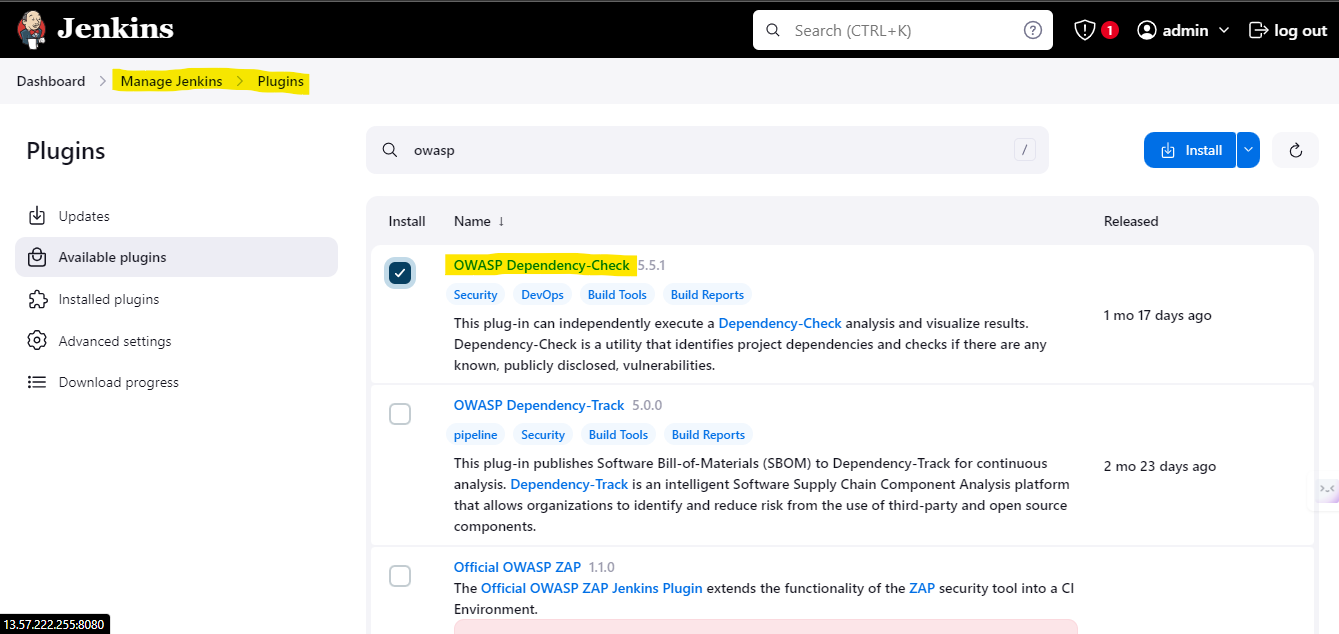
- 转到 Jenkins Master,点击 管理 Jenkins --> 插件 --> 可用插件 安装以下插件:
- OWASP
- SonarQube Scanner
- Docker
- Pipeline: Stage View
#
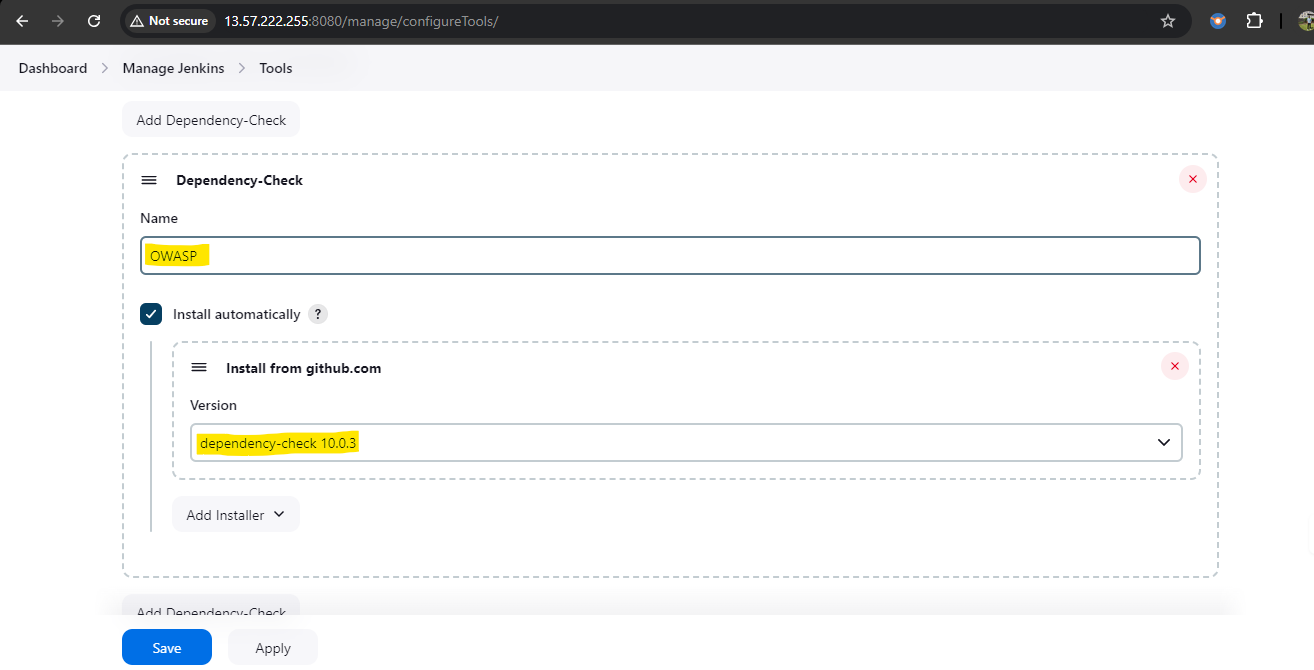
- 配置 OWASP,转到 管理 Jenkins --> 插件 --> 可用插件(Jenkins Worker)
- 安装 OWASP 插件后,现在转到 管理 Jenkins --> 工具(Jenkins Worker)
#
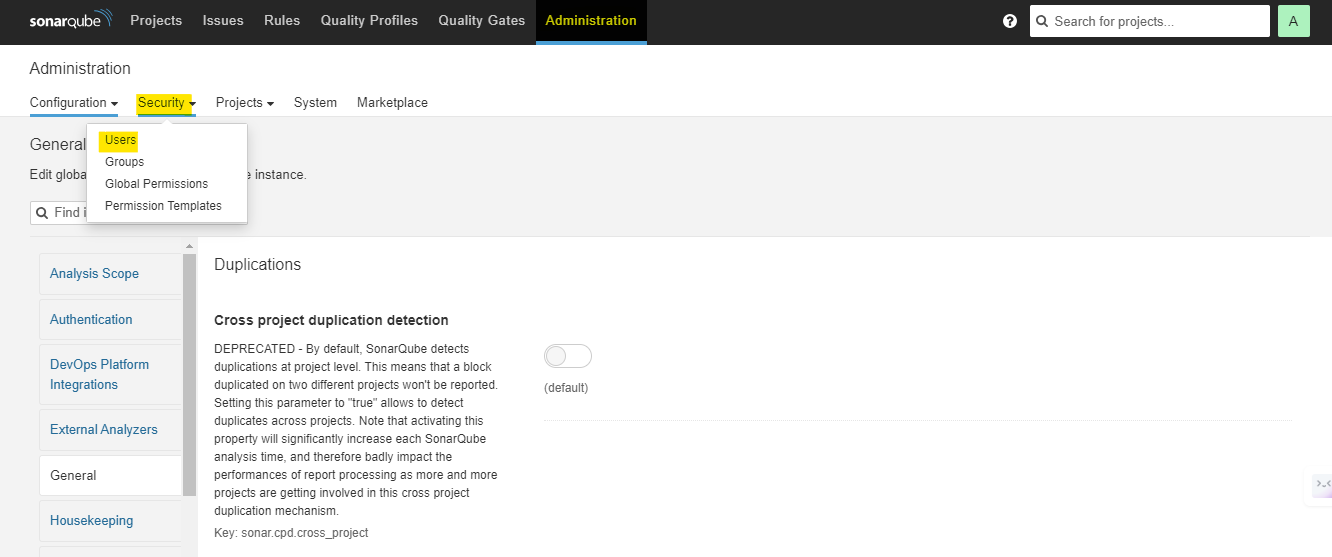
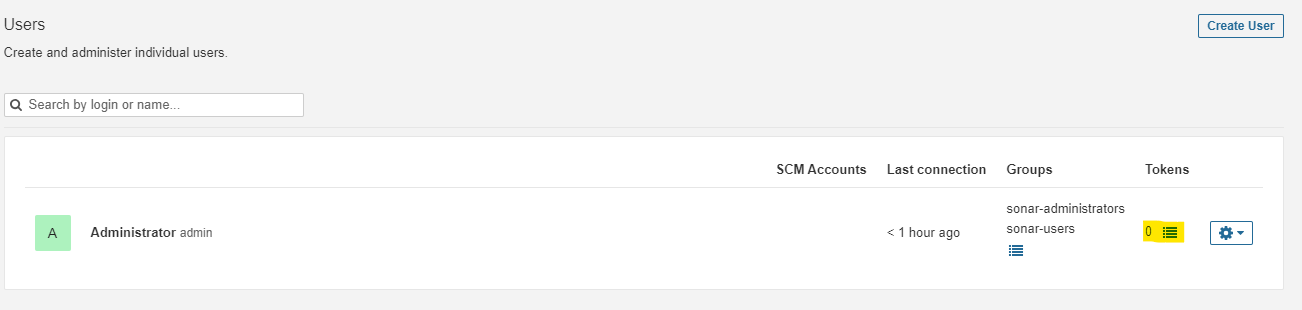
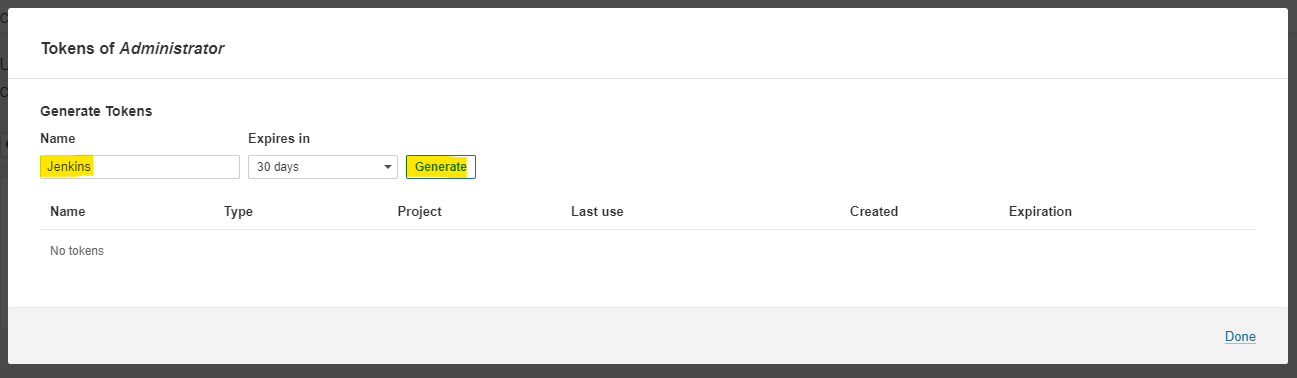
- 登录 SonarQube server 并为 jenkins 创建凭据,以便与 SonarQube 集成
- 导航到 管理 --> 安全 --> 用户 --> Token
#
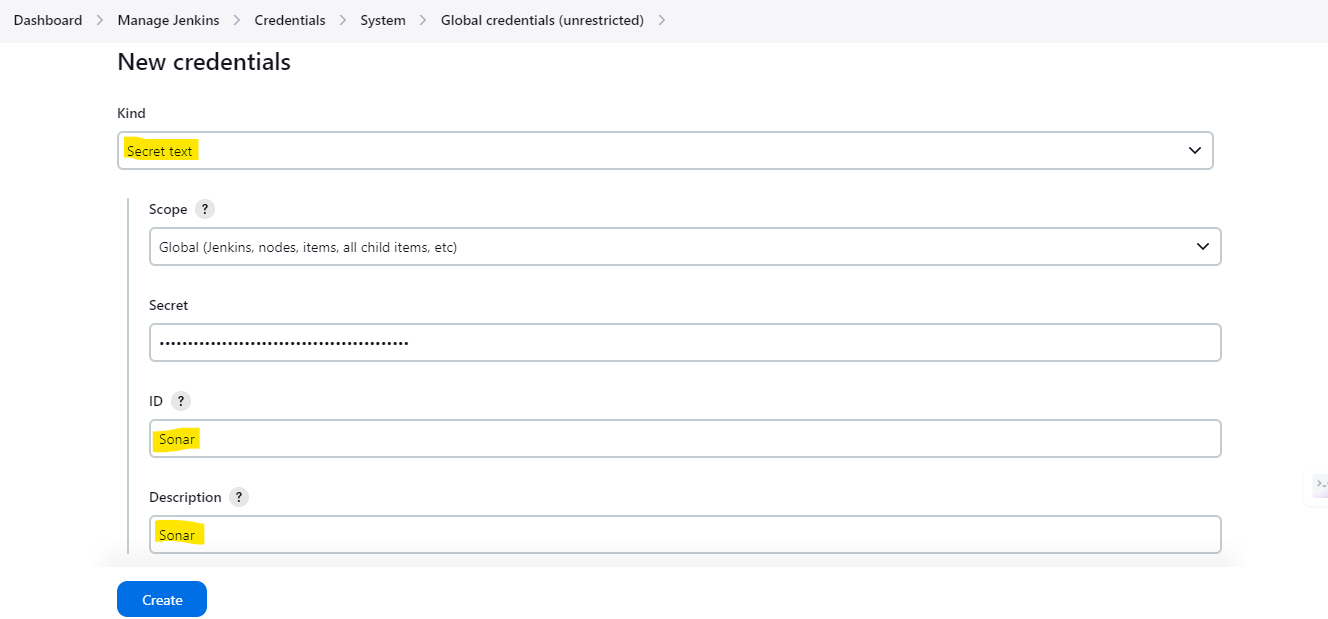
- 现在,转到 管理 Jenkins --> 凭据 并添加 Sonarqube 凭据:
#
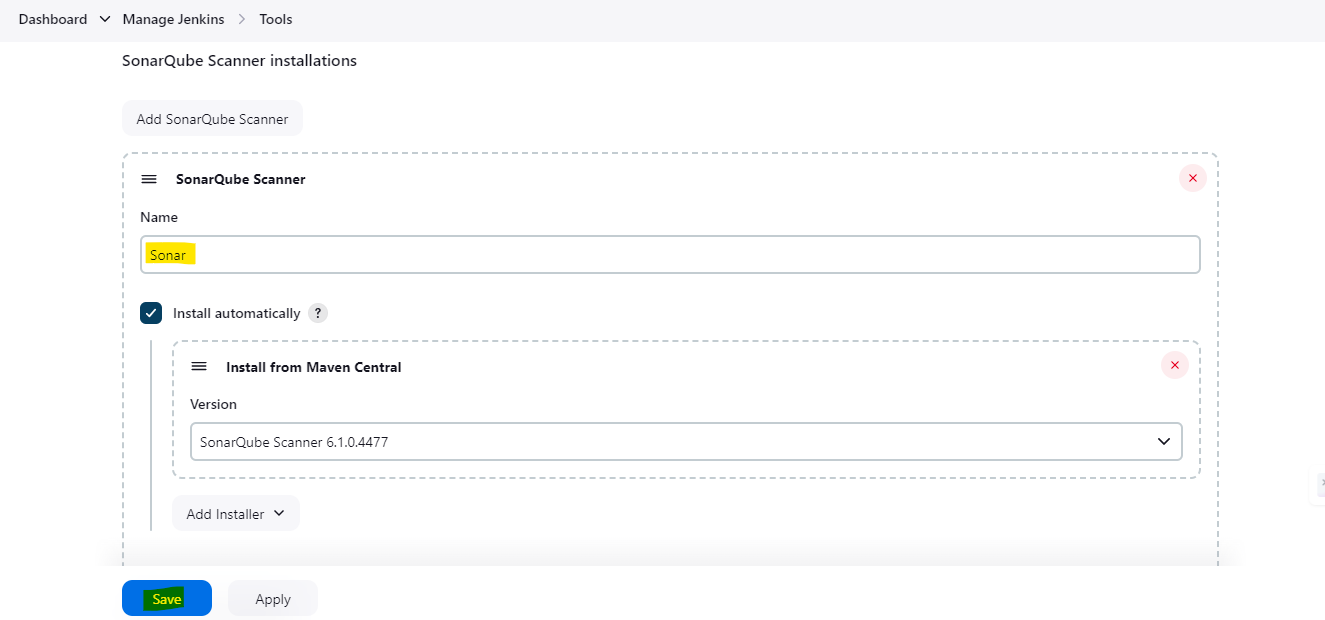
- 转到 管理 Jenkins --> 工具 并搜索 SonarQube Scanner installations:
#
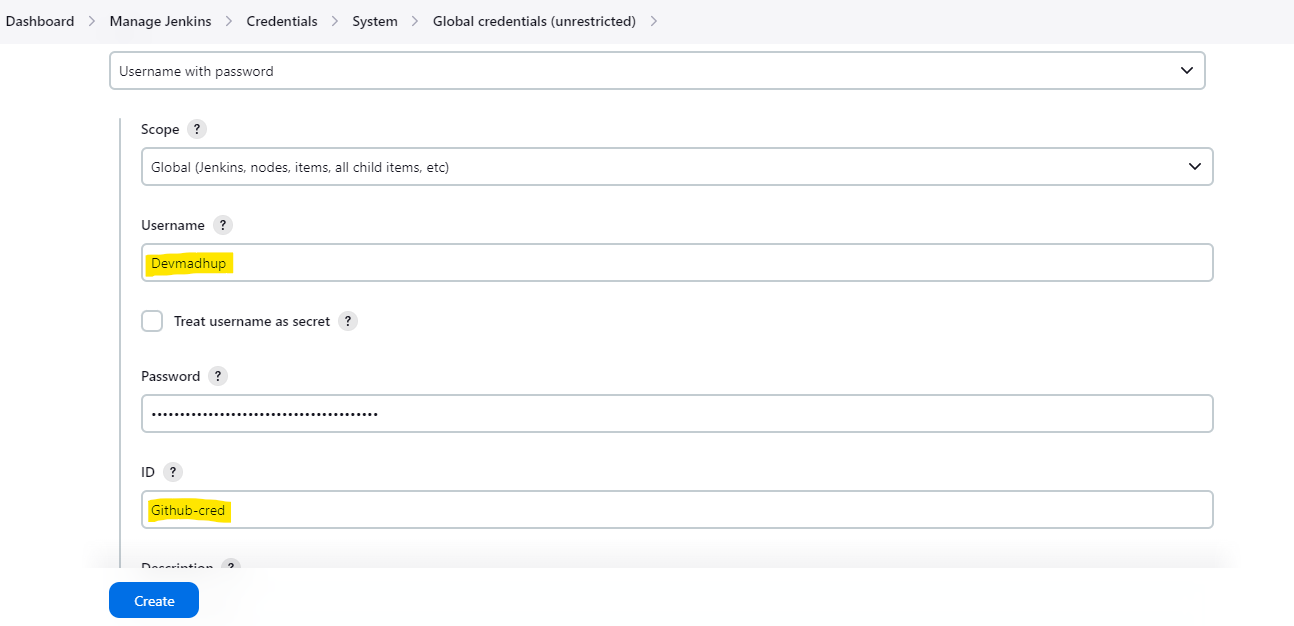
- 转到 管理 Jenkins --> 凭据 并添加 Github 凭据,以便从流水线推送更新的代码:
#
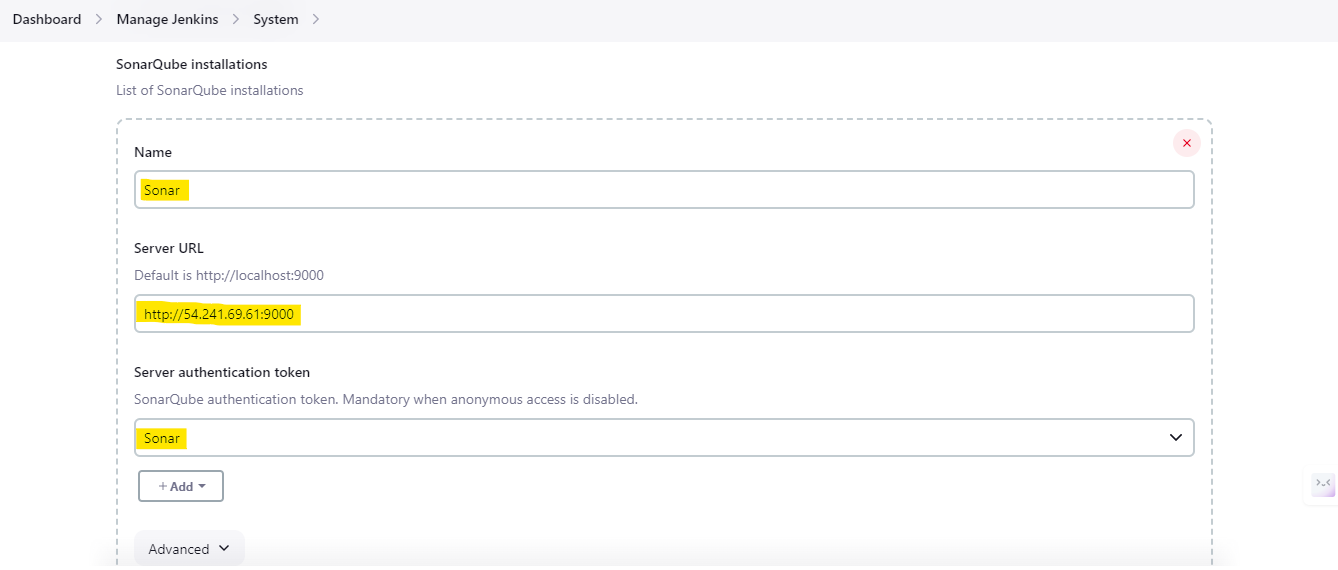
- 转到 管理 Jenkins --> 系统 并搜索 SonarQube installations:
#
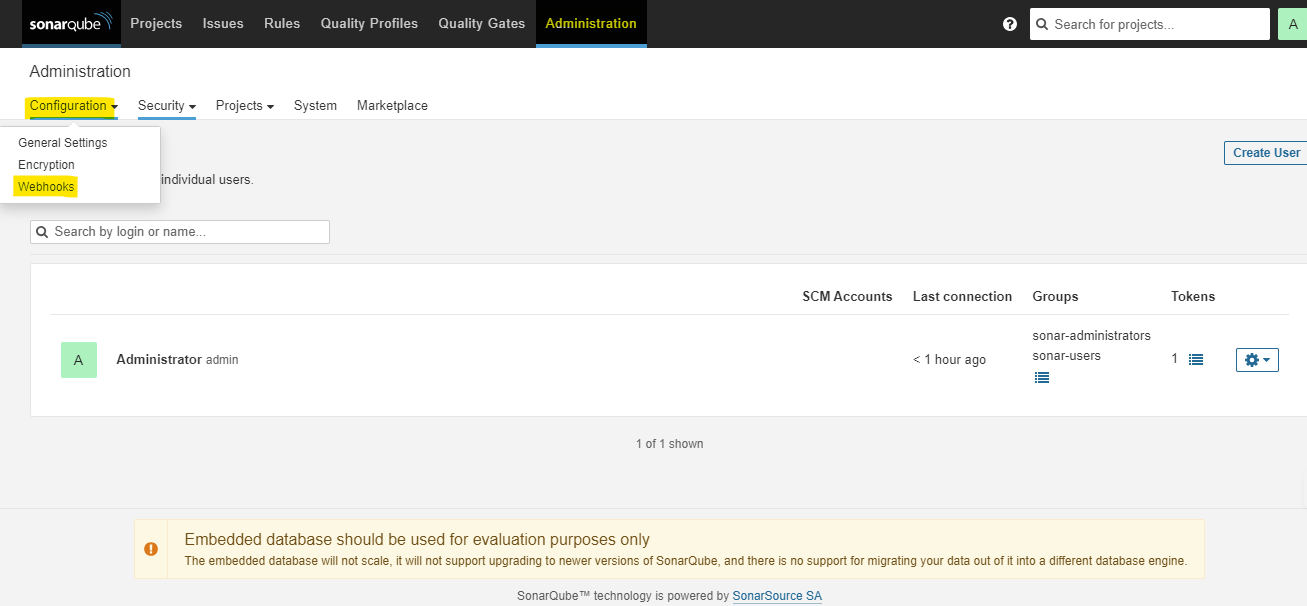
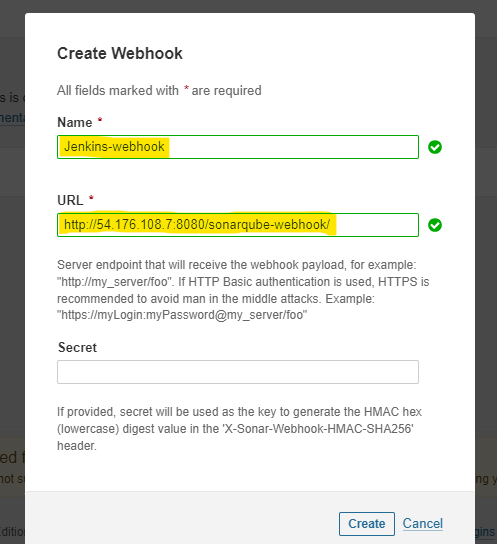
- 现在再次转到 管理 Jenkins --> 系统 并搜索 Global Trusted Pipeline Libraries:登录 SonarQube server,转到 管理 --> Webhook 并点击创建
#
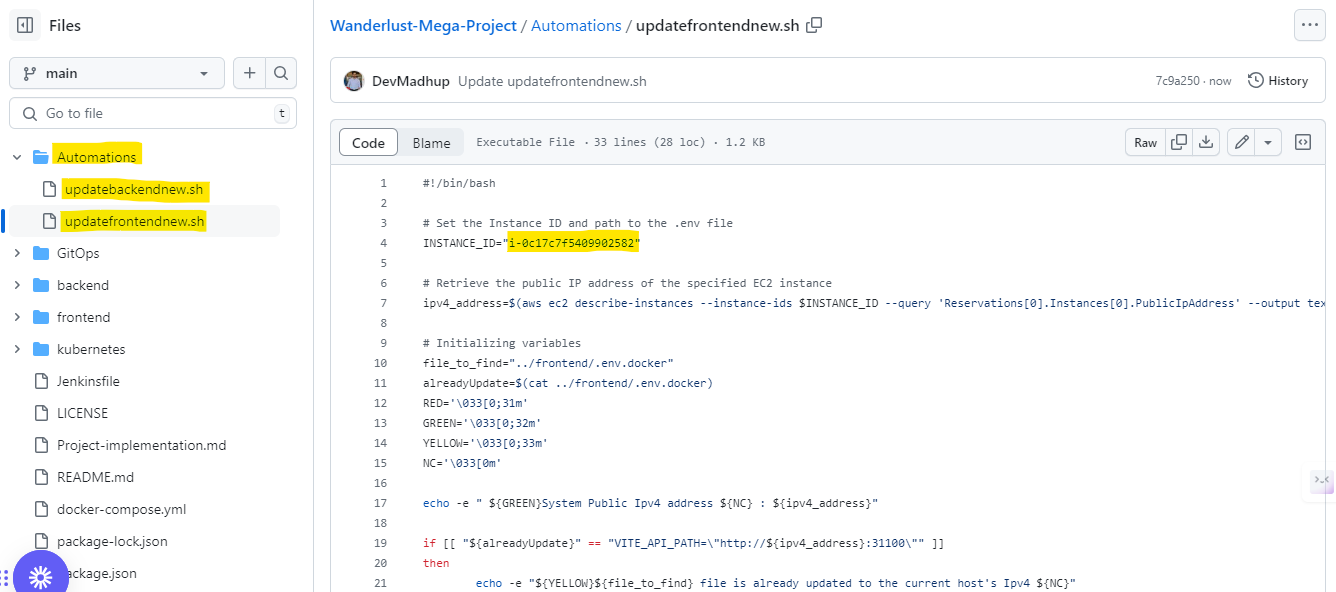
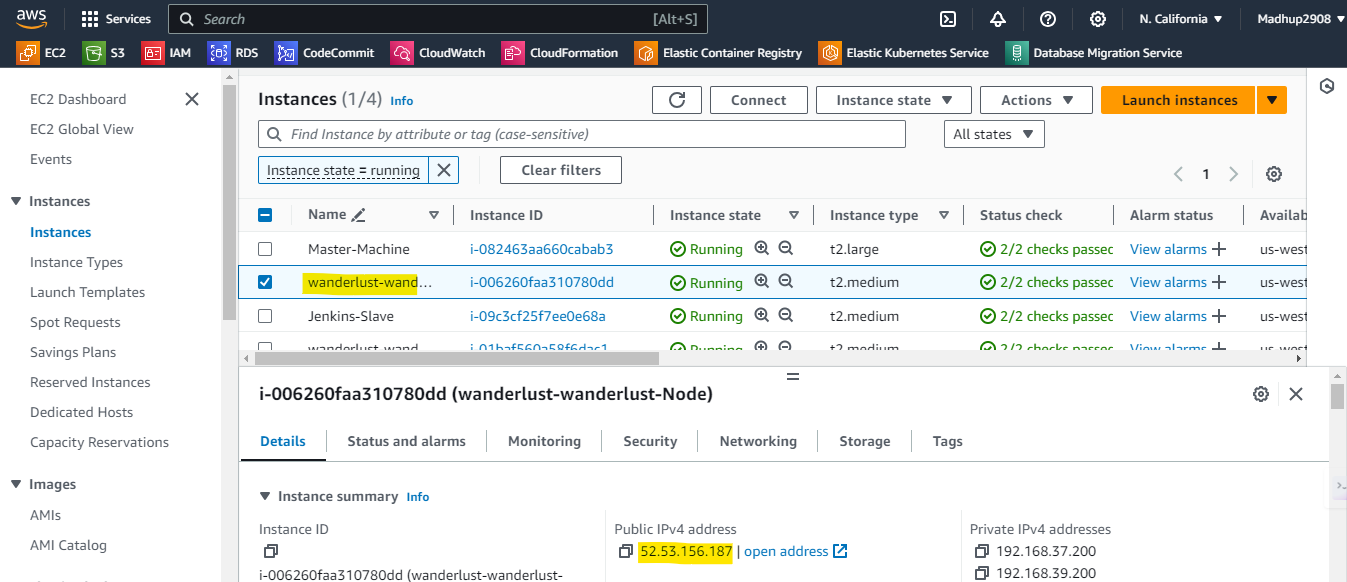
- 现在,转到 github 仓库,在 Automations 目录下,使用 k8s worker 的实例 ID 更新 updatefrontendnew.sh updatebackendnew.sh 两个脚本中的 instance-id 字段
#
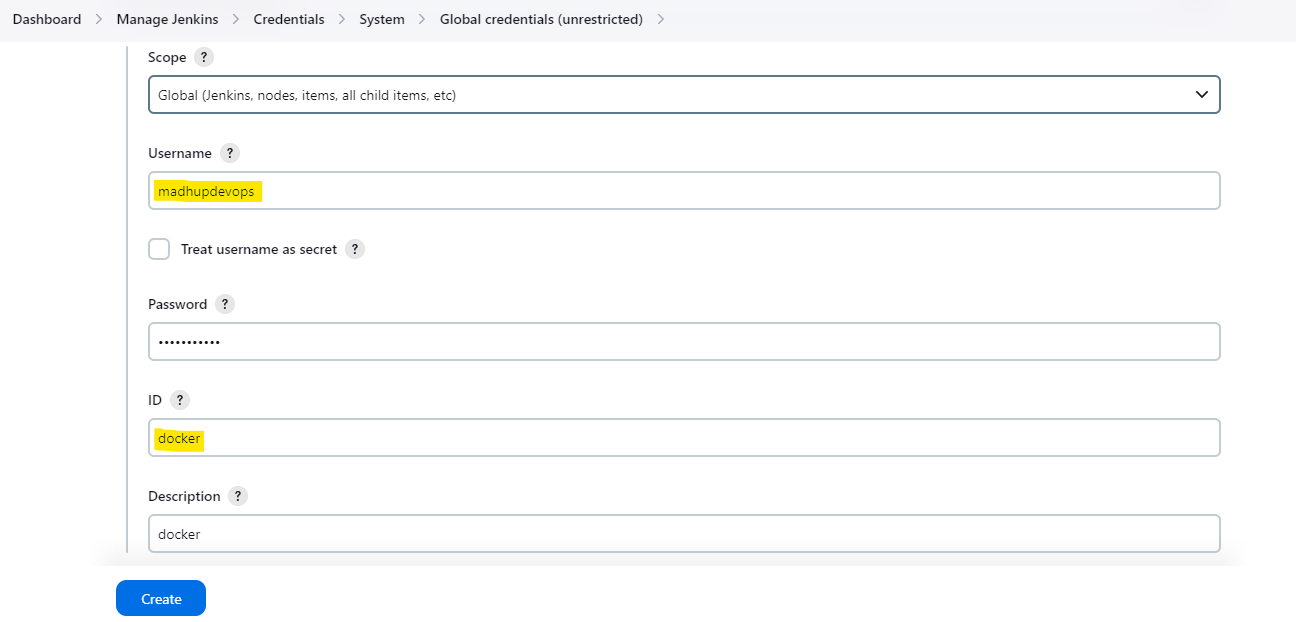
- 导航到 管理 Jenkins --> 凭据 并添加用于 docker 登录的凭据以推送 docker 镜像:
#
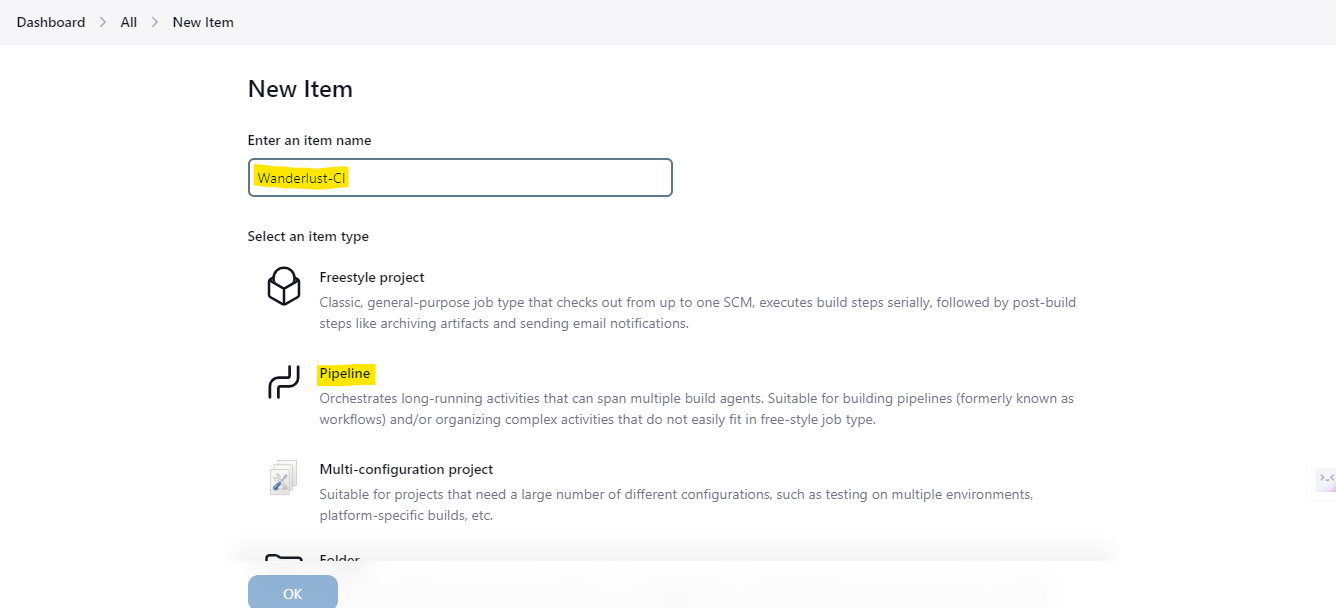
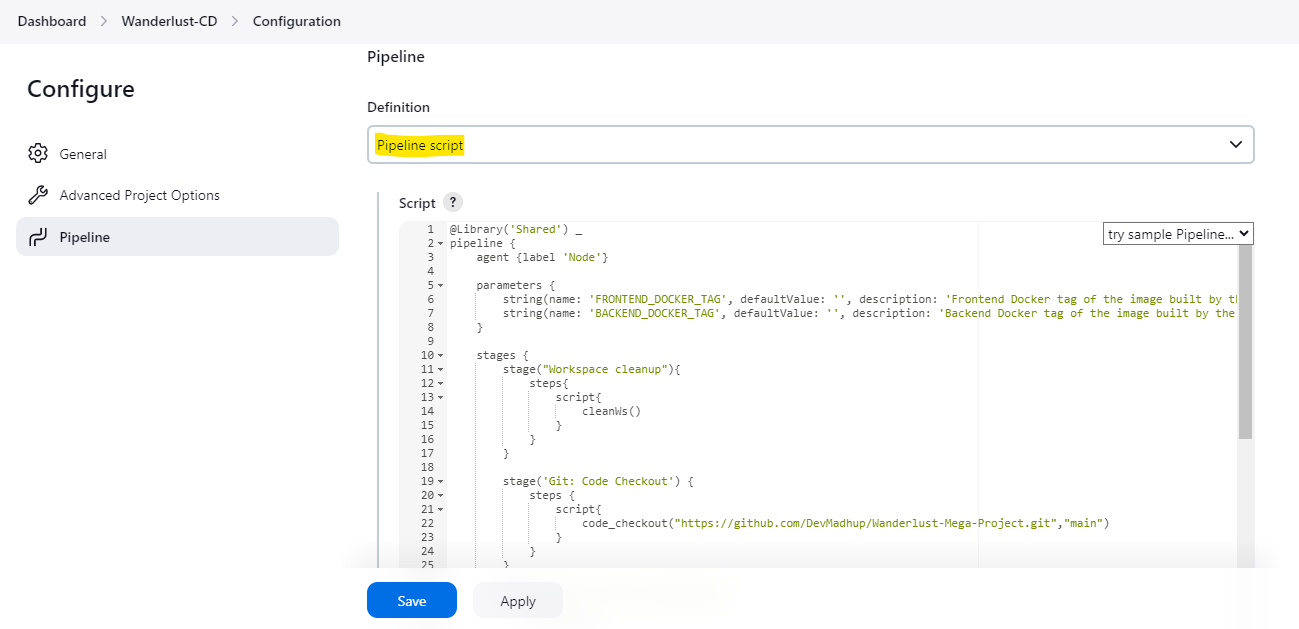
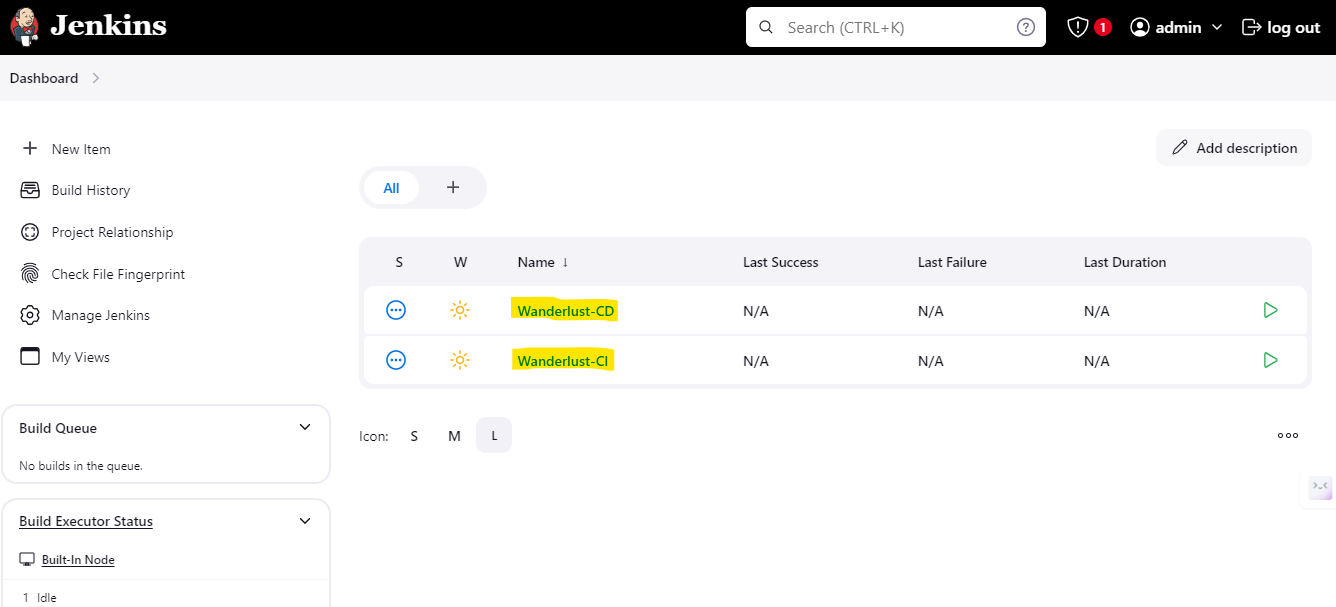
- 创建一个 Wanderlust-CI 流水线
#
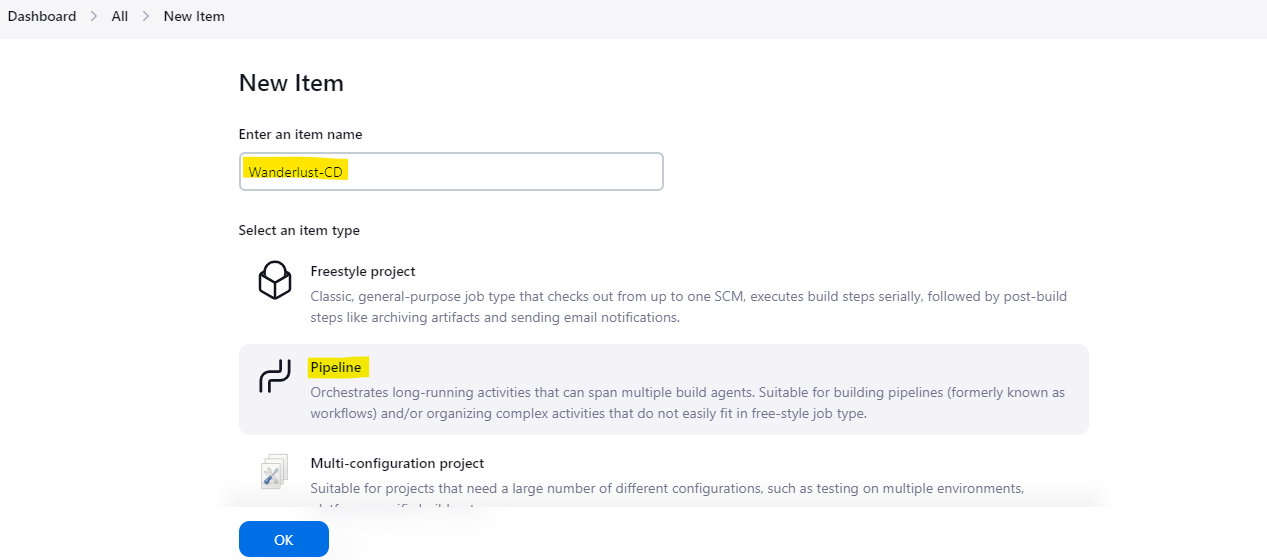
- 再创建一个流水线 Wanderlust-CD
#
- 授予 docker socket 权限,以便 docker 构建和推送命令不会失败(Jenkins Worker)
```
chmod 777 /var/run/docker.sock
```

#
- 转到 Master 机器,使用 cli 将我们自己的 eks 集群添加到 argocd 以进行应用部署
- 通过 CLI 登录到 argoCD
argocd login 52.53.156.187:32738 --username admin

- 检查 argocd 中有多少可用的集群
```
argocd cluster list
```

- 获取你的集群名称
```
kubectl config get-contexts
```

- 将你的集群添加到 argocd
```
argocd cluster add Wanderlust@wanderlust.us-west-1.eksctl.io --name wanderlust-eks-cluster
```

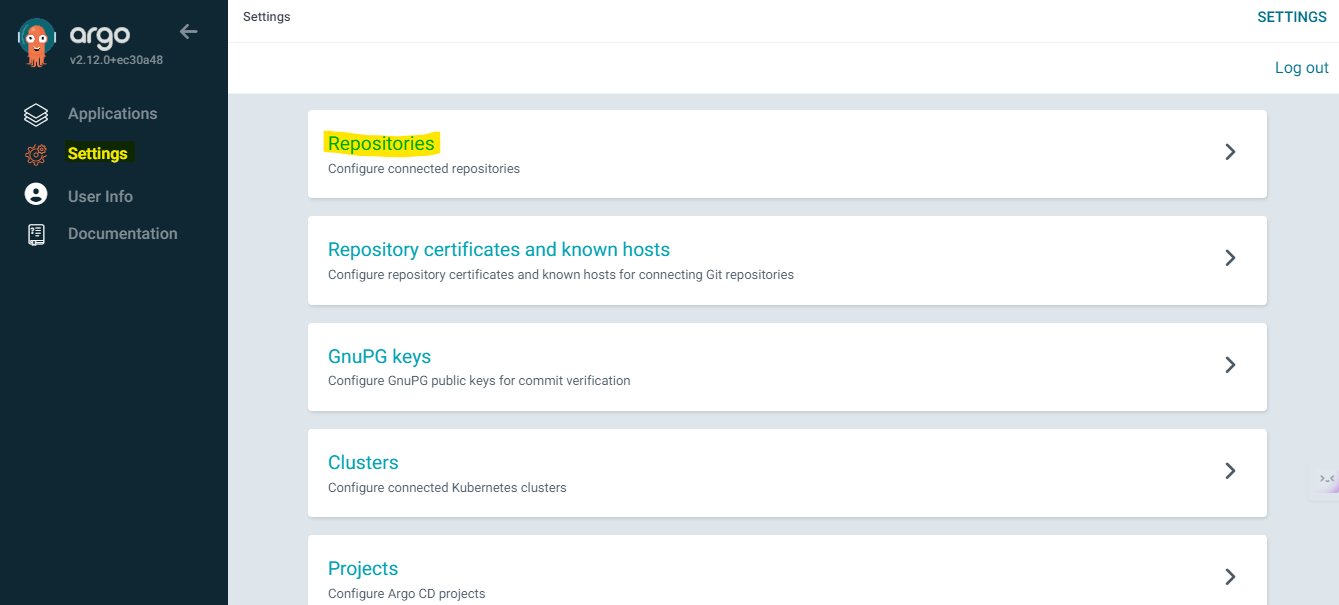
- 将集群添加到 argocd 后,转到 argocd 控制台的 设置 --> 集群 进行验证

#
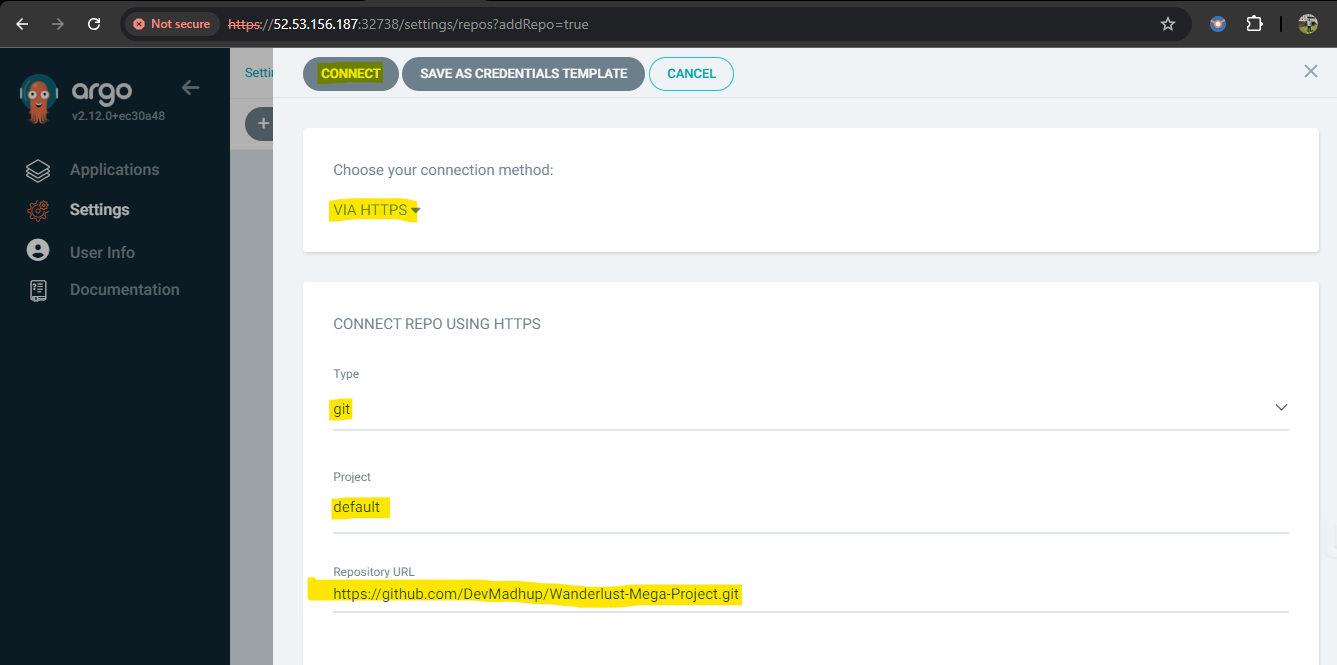
- 转到 设置 --> 仓库 并点击 连接仓库

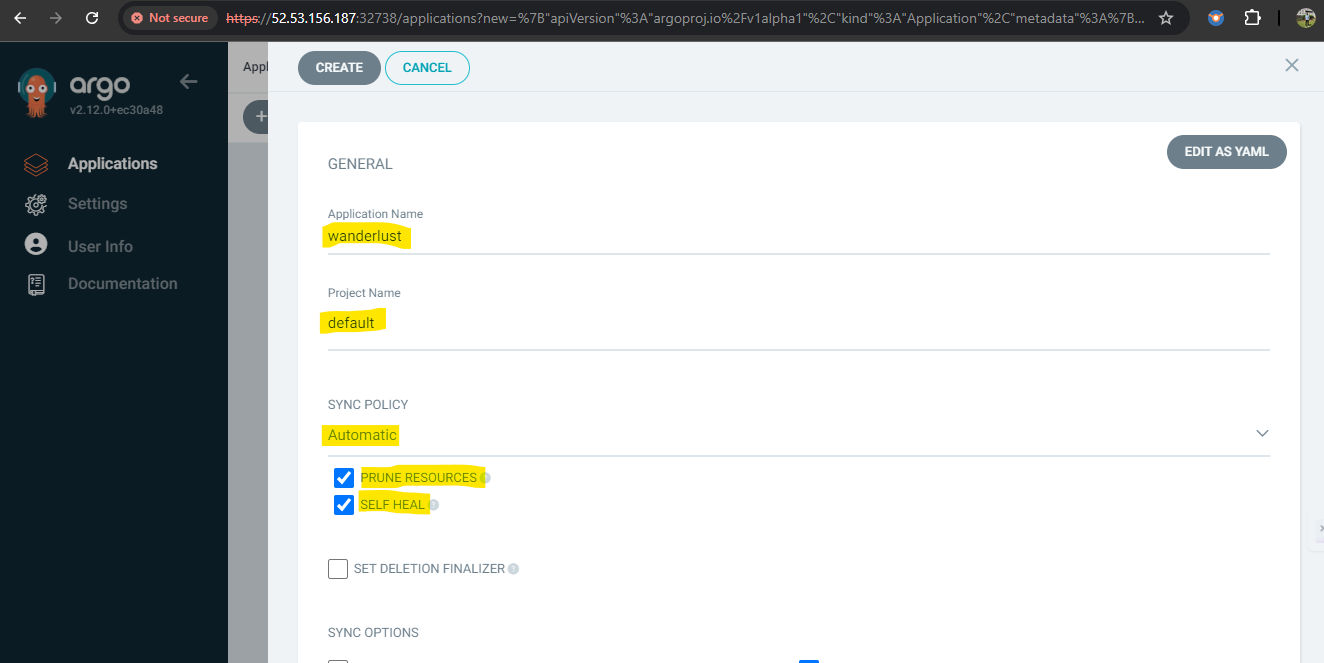
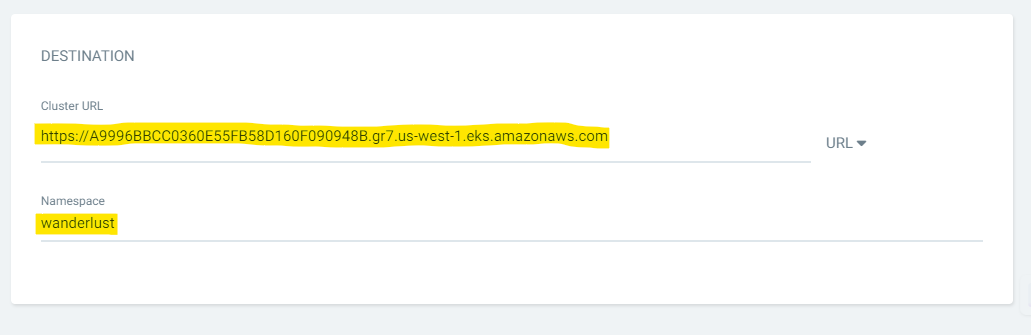
- 现在,转到 应用 并点击 新建应用

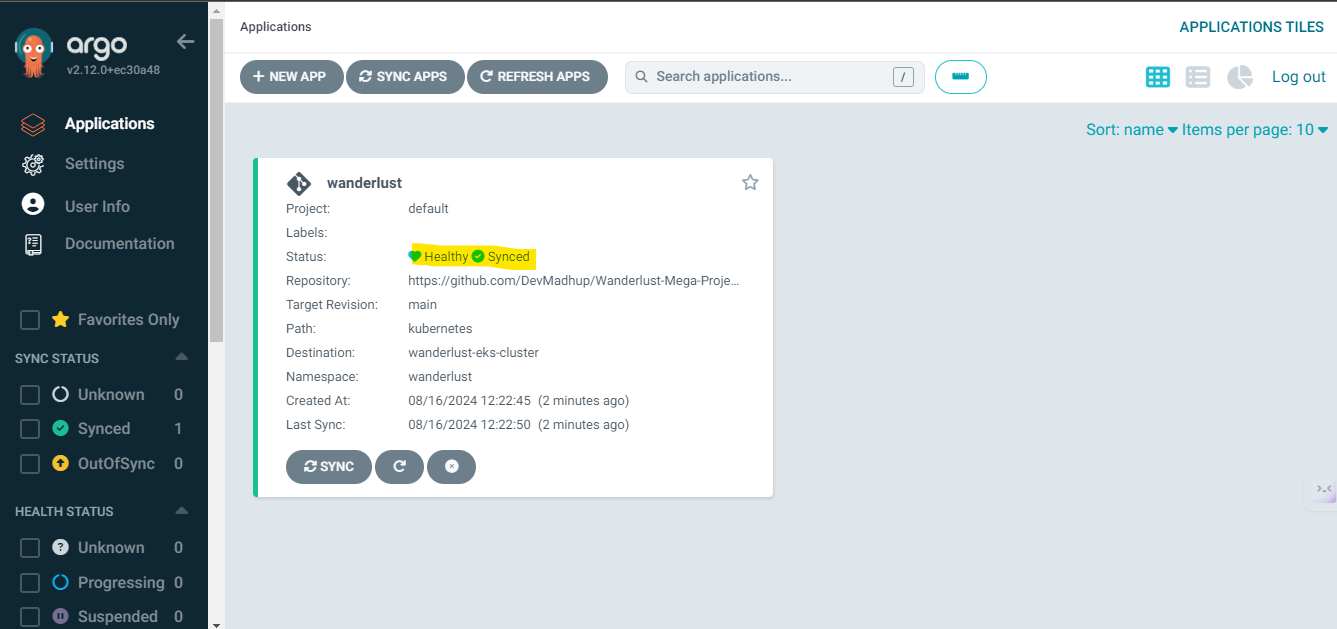
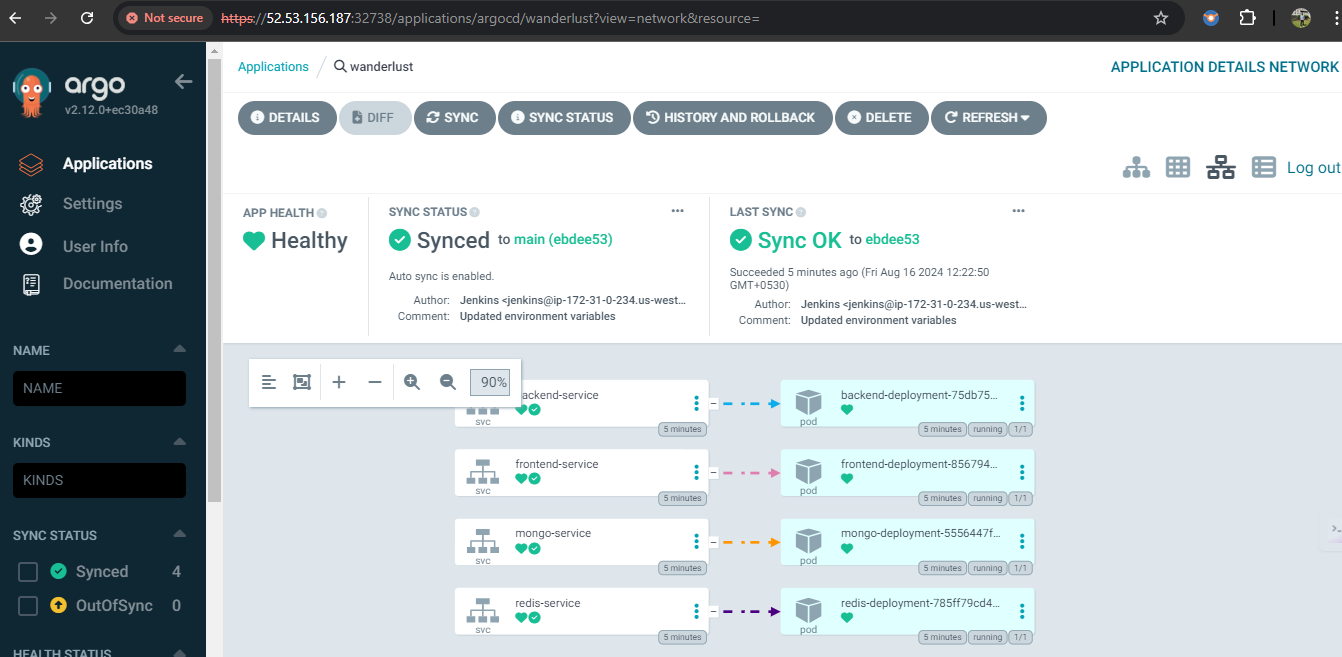
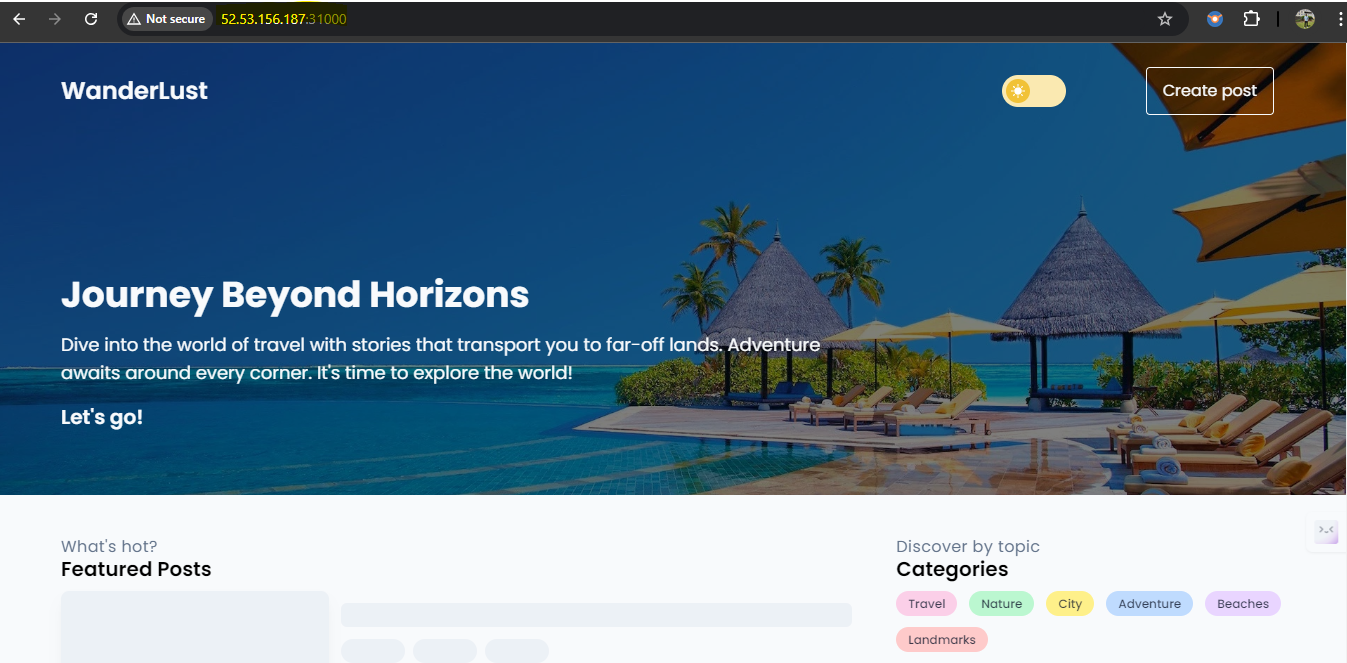
- 恭喜,你的应用已成功部署在 AWS EKS 集群上
- 在 worker 节点上开放端口 31000 和 31100,并在浏览器中访问它
```
:31000
```

- 邮件通知

#
## 如何通过 HELM(在 Master 机器上)使用 prometheus 和 grafana 监控 EKS 集群、kubernetes 和工作负载
-
#
## 本项目使用的技术栈:
- GitHub(代码)
- Docker(容器化)
- Jenkins(CI)
- OWASP(依赖检查)
- SonarQube(质量)
- Trivy(文件系统扫描)
- ArgoCD(CD)
- Redis(缓存)
- AWS EKS(Kubernetes)
- Helm(使用 grafana 和 prometheus 进行监控)
## 🛠️ 使用的技术栈
### 🚀 核心 DevSecOps 栈
![]()
![]()
![]()
![]()
GitHub • Jenkins • Docker • ArgoCD
### 🔐 安全与代码质量
![]()
![]()
![]()
OWASP Dependency Check • SonarQube • Trivy
### ☸️ Kubernetes 与云
![]()
![]()
![]()
![]()
AWS EKS • Helm • Redis
### 📊 监控与可观测性
![]()
![]()
Prometheus • Grafana
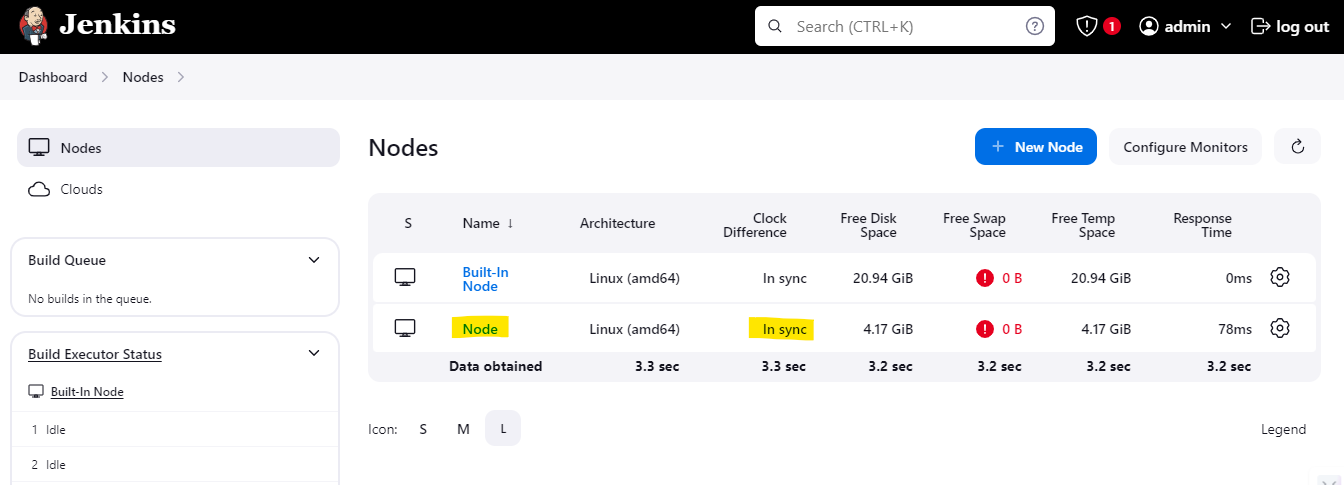
### DevSecOps 架构  ### 🔄 CI/CD 流程  🔄 CI Pipeline (Jenkins) ✔ 代码 Checkout ✔ Trivy 文件系统扫描 ✔ OWASP 依赖检查 ✔ SonarQube 代码分析 ✔ Docker 镜像构建 ✔ 推送 Docker 镜像到 DockerHub 🚀 CD Pipeline (GitOps with ArgoCD) ✔ 更新 Kubernetes Manifests ✔ 推送更改到 GitHub ✔ ArgoCD 自动同步 ✔ 滚动部署到 AWS EKS ✔ 零停机部署 🧠 核心特性 ✅ 集成 DevSecOps 的 CI ✅ 自动化漏洞扫描 ✅ GitOps 部署策略 ✅ Kubernetes 滚动更新 ✅ 启用监控 ✅ 邮件通知 ✅ 安全凭证处理 ✅ 全自动端到端流程 ### 部署后的流水线效果: - 用于构建和推送的 CI pipeline 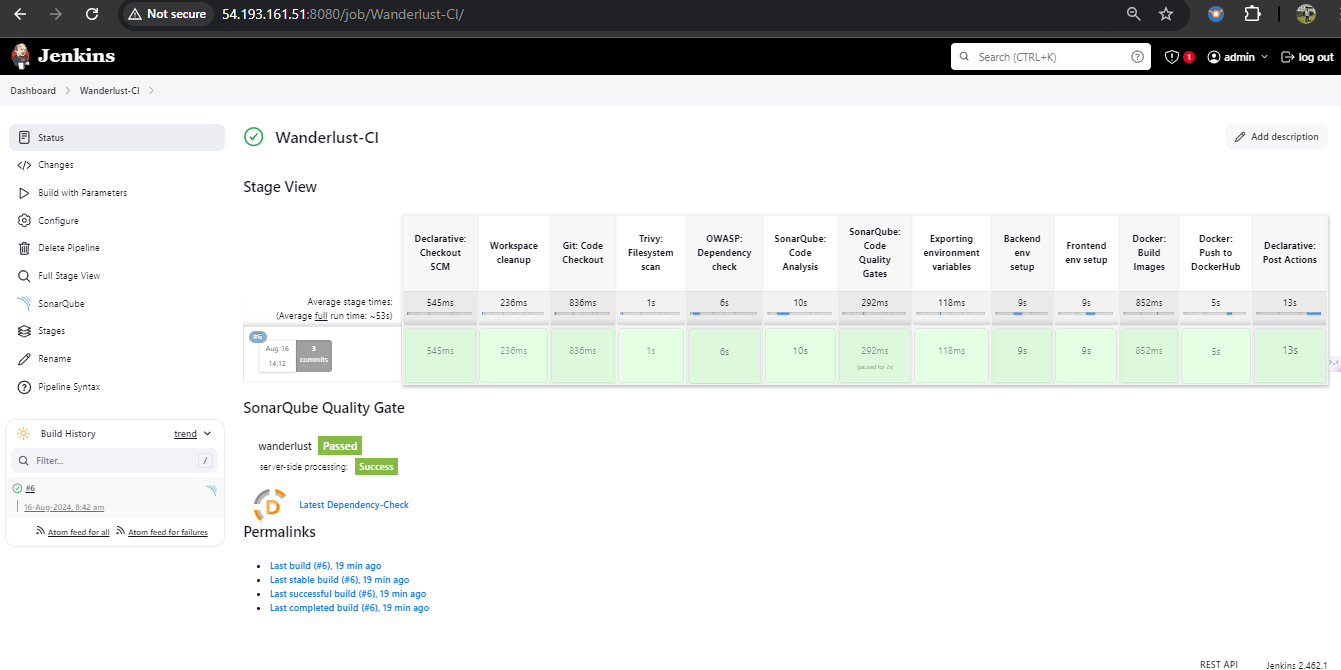 - 用于更新应用版本的 CD pipeline 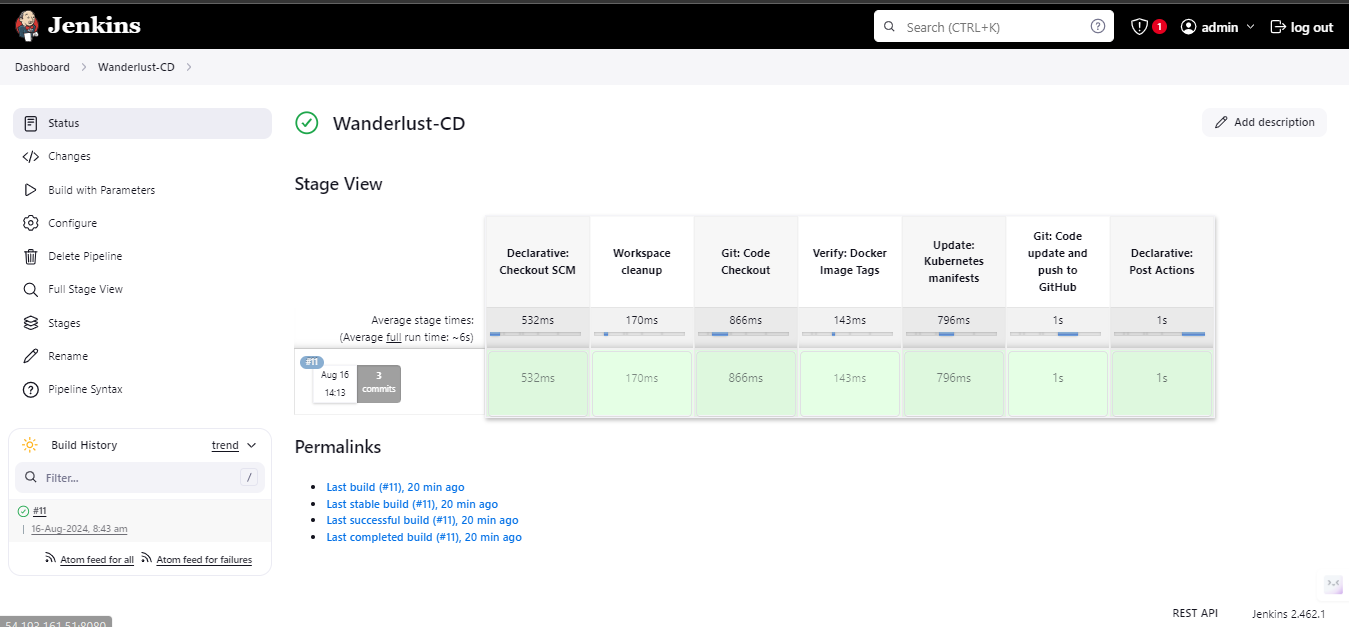 - 用于部署到 EKS 的 ArgoCD 应用  # | 技术栈 | 安装 | | -------- | ------- | | Jenkins Master | 安装并配置 Jenkins | | eksctl | 安装 eksctl | | Argocd | 安装并配置 ArgoCD | | Jenkins-Worker 设置 | 安装并配置 Jenkins Worker 节点 | | OWASP 设置 | 安装并配置 OWASP | | SonarQube | 安装并配置 SonarQube | | 邮件通知设置 | 邮件通知设置 | | 监控 | 使用 helm charts 设置 Prometheus 和 grafana | 清理 | 清理资源 | # ### 实施该项目的前置条件: # - 在 AWS 上创建 1 台 Master 机器,配置为 2CPU、8GB 内存(t2.large)和 30 GB 存储,并安装 Docker。 # - 在 Master 机器的安全组中开放以下端口,并将相同的安全组附加到 Jenkins worker 节点(我们稍后将创建 worker 节点) 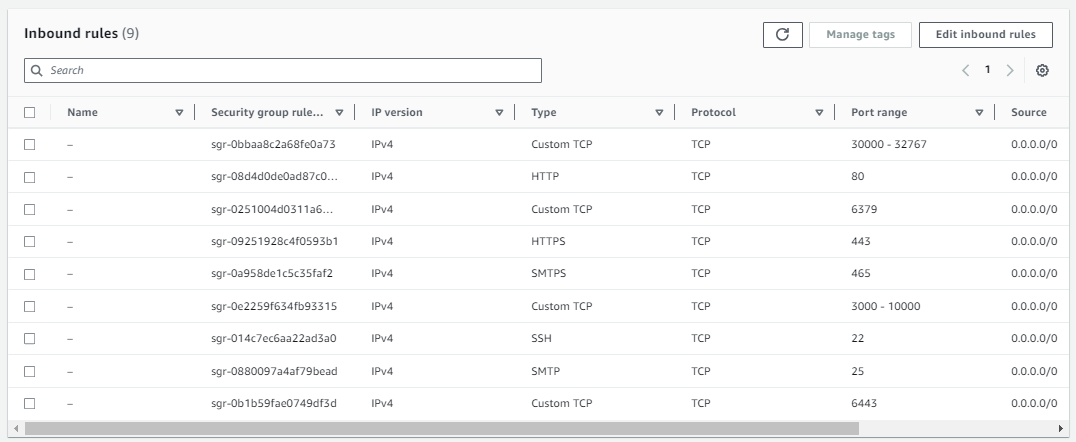 使用以下命令安装和配置 Docker,"NewGrp docker" 将刷新组配置,因此无需重启 EC2 机器。 ``` sudo apt-get update ``` ``` sudo apt-get install docker.io -y sudo usermod -aG docker ubuntu && newgrp docker ``` # - 安装并配置 Jenkins(Master 机器) ``` sudo apt update -y sudo apt install fontconfig openjdk-21-jre -y sudo wget -O /etc/apt/keyrings/jenkins-keyring.asc \ https://pkg.jenkins.io/debian-stable/jenkins.io-2026.key echo "deb [signed-by=/etc/apt/keyrings/jenkins-keyring.asc]" \ https://pkg.jenkins.io/debian-stable binary/ | sudo tee \ /etc/apt/sources.list.d/jenkins.list > /dev/null sudo apt update -y sudo apt install jenkins -y ``` - 现在,在浏览器中通过 8080 端口访问 Jenkins Master 并进行配置。 # - 在 AWS 上创建 EKS 集群(Master 机器) - 拥有 **access keys 和 secret access keys** 的 IAM 用户 - 应配置 AWSCLI(设置 AWSCLI) curl "https://awscli.amazonaws.com/awscli-exe-linux-x86_64.zip" -o "awscliv2.zip" sudo apt install unzip unzip awscliv2.zip sudo ./aws/install aws configure - 安装 **kubectl**(Master 机器)(设置 kubectl ) curl -LO "https://dl.k8s.io/release/$(curl -L -s https://dl.k8s.io/release/stable.txt)/bin/linux/amd64/kubectl" && \ chmod +x kubectl && \ sudo mv kubectl /usr/local/bin/ && \ kubectl version --client which kubectl - 安装 **eksctl**(Master 机器)(设置 eksctl) curl --silent --location "https://github.com/weaveworks/eksctl/releases/latest/download/eksctl_$(uname -s)_amd64.tar.gz" | tar xz -C /tmp sudo mv /tmp/eksctl /usr/local/bin eksctl version - ✅ 首先检查支持的 EKS 版本。EKS 通常支持特定的稳定版本。截至 15022026,最新的上游版本(如 1.35)可能尚未被 EKS 支持 aws eks describe-addon-versions --query 'addons[].addonVersions[].compatibilities[].clusterVersion' --output text - 创建 EKS 集群(Master 机器) eksctl create cluster --name=wanderlust \ --region=us-east-2 \ --version=1.34 \ --without-nodegroup - 关联 IAM OIDC Provider(Master 机器) eksctl utils associate-iam-oidc-provider \ --region us-east-2 \ --cluster wanderlust \ --approve - 创建 Nodegroup(Master 机器) eksctl create nodegroup --cluster=wanderlust \ --region=us-east-2 \ --name=wanderlust \ --node-type=t3.medium \ --nodes=2 \ --nodes-min=2 \ --nodes-max=3 \ --node-volume-size=30 \ --ssh-access \ --ssh-public-key=eks-nodegroup-key # - 设置 jenkins worker 节点 - 创建一个新的 EC2 实例(Jenkins Worker),配置为 2CPU、8GB 内存(t2.large)和 29 GB 存储,并安装 java sudo apt update -y sudo apt install fontconfig openjdk-17-jre -y - 创建一个具有管理员访问权限的 IAM 角色,并将其附加到 jenkins worker 节点 选择 Jenkins worker 节点的 EC2 实例 --> 操作(Actions) --> 安全(Security) --> 修改 IAM 角色(Modify IAM role) 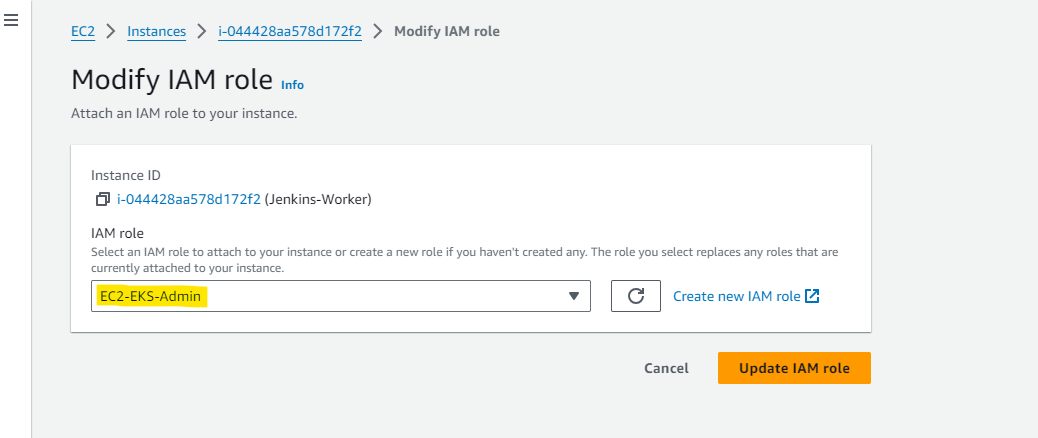 - 配置 AWSCLI(设置 AWSCLI) sudo su curl "https://awscli.amazonaws.com/awscli-exe-linux-x86_64.zip" -o "awscliv2.zip" sudo apt install unzip unzip awscliv2.zip sudo ./aws/install aws configure # - 生成 ssh 密钥(Master 机器)以设置 jenkins master-slave ``` ssh-keygen ``` 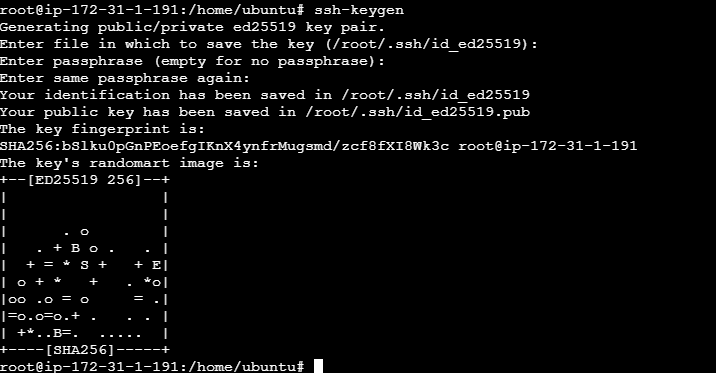 # - 现在,转到生成 ssh 密钥的目录,复制公钥内容,并将其粘贴到 Jenkins worker 节点的 authorized_keys 文件中。 # - 现在,回到 jenkins master,导航到 管理 Jenkins (Manage jenkins) --> 节点,然后点击添加节点 - 名称: Node - 类型: 永久代理 - 执行器数量: 2 - 远程根目录 - 标签: Node - 用法: 只构建具有与此节点匹配的标签表达式的作业 - 启动方法: 通过 ssh - 主机: \安装 Helm Chart
``` curl -fsSL -o get_helm.sh https://raw.githubusercontent.com/helm/helm/main/scripts/get-helm-3 ``` ``` chmod 700 get_helm.sh ``` ``` ./get_helm.sh ``` # - 为你的本地客户端添加 Helm Stable Charts ``` helm repo add stable https://charts.helm.sh/stable ``` # - 添加 Prometheus Helm 仓库 ``` helm repo add prometheus-community https://prometheus-community.github.io/helm-charts ``` # - 创建 Prometheus Namespace ``` kubectl create namespace prometheus ``` ``` kubectl get ns ``` # - 使用 Helm 安装 Prometheus ``` helm install stable prometheus-community/kube-prometheus-stack -n prometheus ``` # - 验证 prometheus 安装 ``` kubectl get pods -n prometheus ``` # - 检查 Prometheus 的服务文件 ``` kubectl get svc -n prometheus ``` # - 通过 Node Port 将 Prometheus 和 Grafana 暴露给外部世界 ``` kubectl edit svc stable-kube-prometheus-sta-prometheus -n prometheus ``` 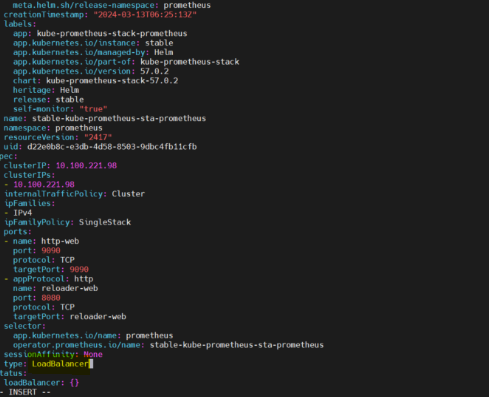  # - 验证服务 ``` kubectl get svc -n prometheus ``` # - 现在,让我们更改 Grafana 的 SVC 文件并将其暴露给外部世界 ``` kubectl edit svc stable-grafana -n prometheus ``` 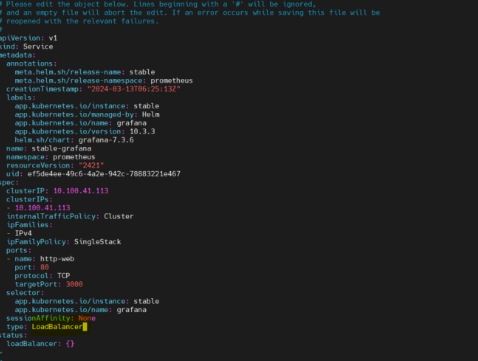 # - 检查 grafana 服务 ``` kubectl get svc -n prometheus ``` # - 获取 grafana 的密码 ``` kubectl get secret --namespace prometheus stable-grafana -o jsonpath="{.data.admin-password}" | base64 --decode ; echo ``` # - 现在,在 Grafana 中查看仪表板  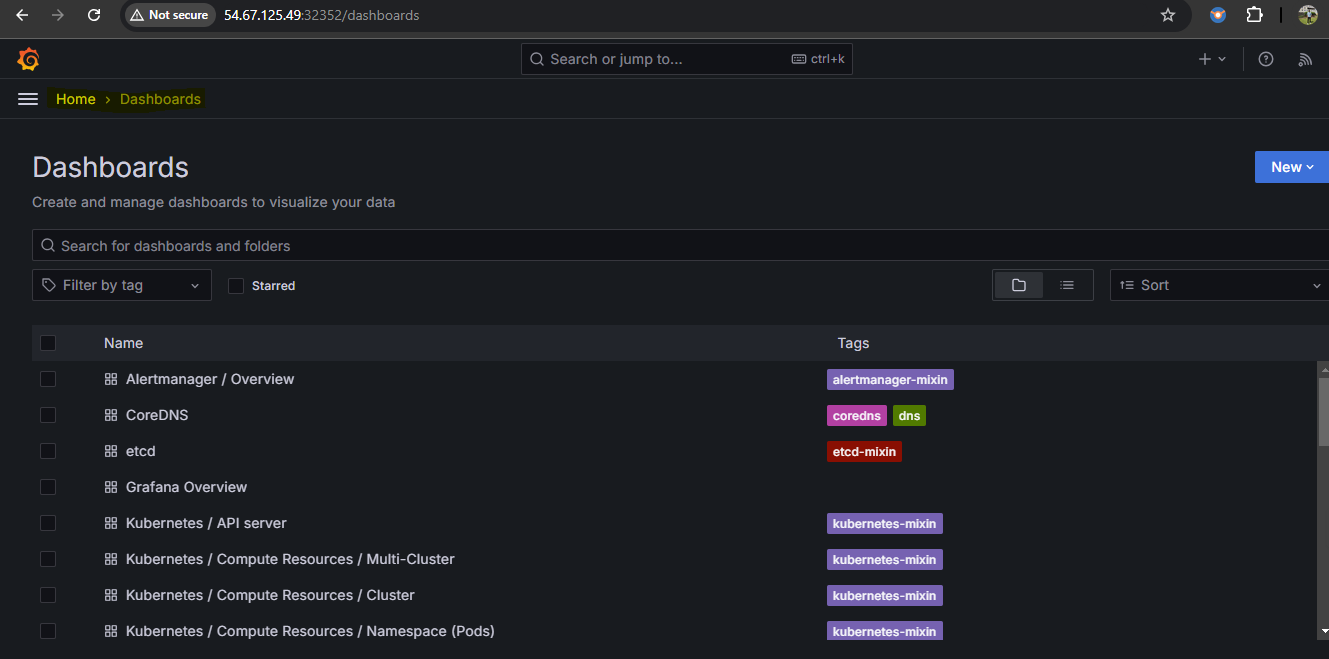 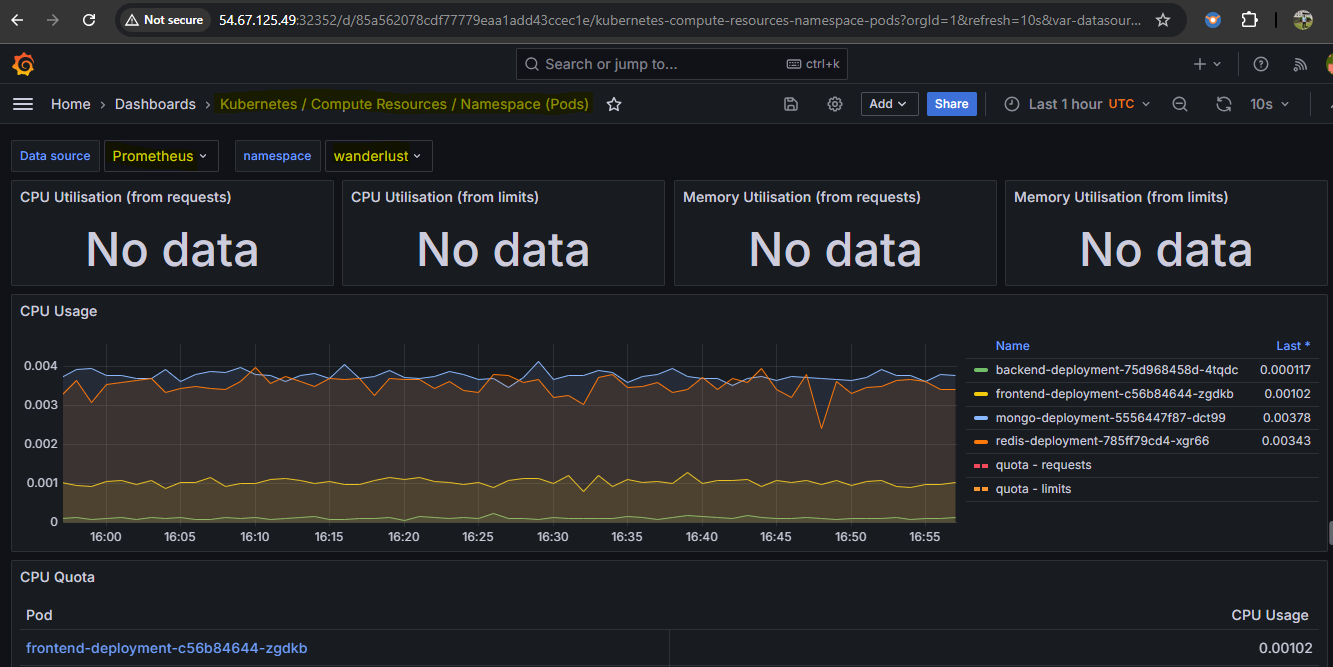 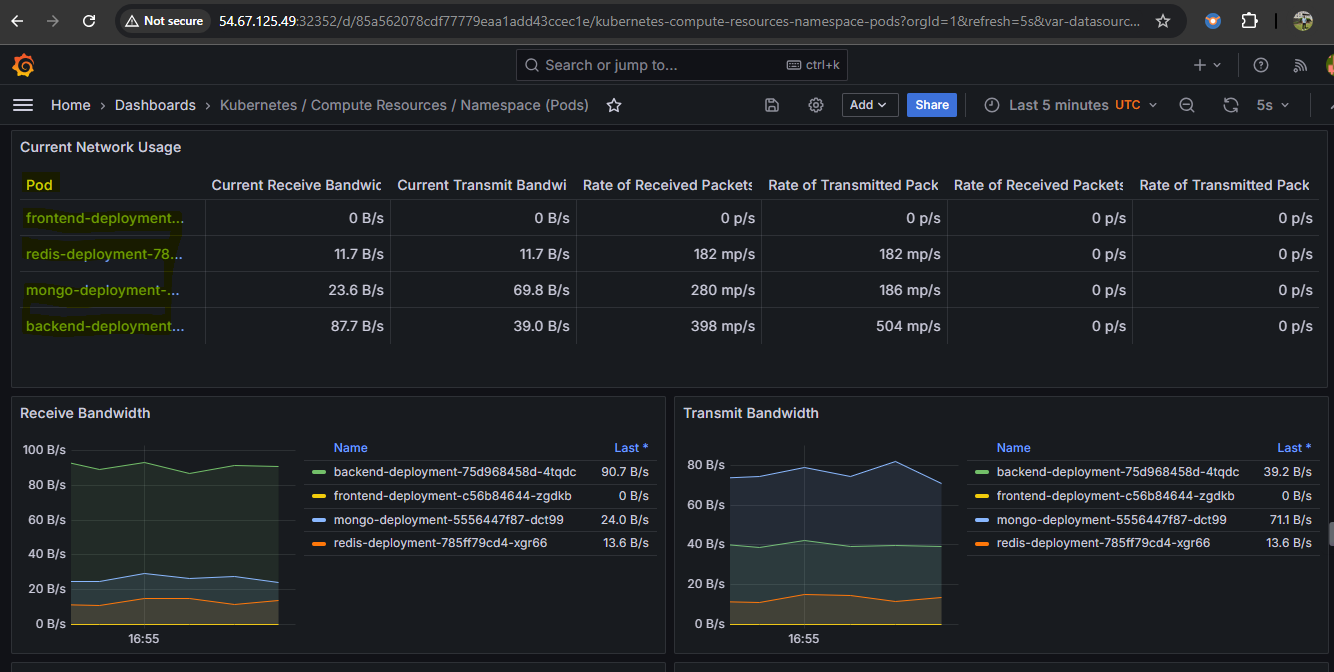 # ## 清理 - 删除 eks 集群 ``` eksctl delete cluster --name=wanderlust --region=us-west-1 ``` # # devsecops-gitops-eks-platform标签:DevSecOps, GitOps, 上游代理, 子域名突变, 搜索引擎查询, 自动化攻击, 自动化运维, 自定义请求头, 请求拦截