cxleb0/Building-an-AI-Driven-Threat-Hunting-Workflow-with-Security-Onion
GitHub: cxleb0/Building-an-AI-Driven-Threat-Hunting-Workflow-with-Security-Onion
该项目演示了如何通过 Docker 部署 Elasticsearch MCP Server 并连接 AI 编码 Agent,在 Security Onion 平台上构建 AI 辅助的威胁狩猎工作流。
Stars: 0 | Forks: 0
# 目录
1. [灵感](#orgec7f558)
2. [组件](#org68d66c8)
3. [配置](#org0d29280)
1. [Security Onion](#org0b8c995)
2. [Elasticsearch MCP](#org9979551)
3. [AI Agent](#org0f8f1fa)
4. [测试工作流](#org6e0273c)
5. [结果](#org713e19c)
6. [总结思考](#orgdd4fadc)
# 灵感
- 我工作场所的一位高级分析师发给我一篇文章,文章讲解了使用 Security Onion 和 Elasticsearch MCP server 的类似工作流:
- 我立刻产生了兴趣,因为我已经是 Security Onion 的超级粉丝。我的实现与原文略有不同,
但它确实作为一个参考点,帮助我完成了设置。
# 组件
- Security Onion 虚拟机。
- 在这个项目中我使用了一个 Security Onion 导入节点。
- Docker Engine 和 Docker Compose。
- 用于容器化并部署 Elasticsearch MCP server。
- 您选择的编码 agent。
- 对于这个工作流,我选择了 opencode。
- 您选择的 LLM。
# 配置
- 在设置此工作流之前,我建议阅读每个组件的官方文档。安装过程非常简单。
- 以下步骤将作为我如何设置环境的高层概述。有关技术实现细节,
请参阅文档。
## Security Onion
- Security Onion 默认没有 “elasticsearchrest” 防火墙主机组。我手动添加了该组,并添加了我希望允许访问 Elasticsearch 的 IP。在 portgroup 中允许 UDP 端口 9200 也很重要。
- 防火墙配置完成后,我导航到 Kibana -> Security -> API keys。
- 我创建了 API key,稍后将供 Elasticsearch MCP server 用于身份验证。
## Elasticsearch MCP
- 我创建了一个工作目录,其中包含:
- 一个 ’.env’ 文件
- 一个 ’docker-compose.yml’ 文件
- .env 文件存储了:
- Elasticsearch URL
- Elasticsearch API key
- Elasticsearch 凭据
- 然后我使用 Docker Compose 部署了 MCP server。
- 此项目使用的 compose 文件可以在这里找到:
## AI Agent
- 我使用 opencode 作为我用于此项目的 AI 编码 agent,并在安装和配置过程中大量参考了官方文档。
- 安装完成后,我配置了:
- Elasticsearch MCP server 连接
- 我首选的 LLM
# 测试工作流
- 为了验证我的工作流,我执行了以下步骤:
1. 启动我的 Security Onion 虚拟机。
2. 导入包含已知恶意活动的 pcap。
3. 启动 opencode,它会自动启动 Docker 容器并连接到 MCP server。
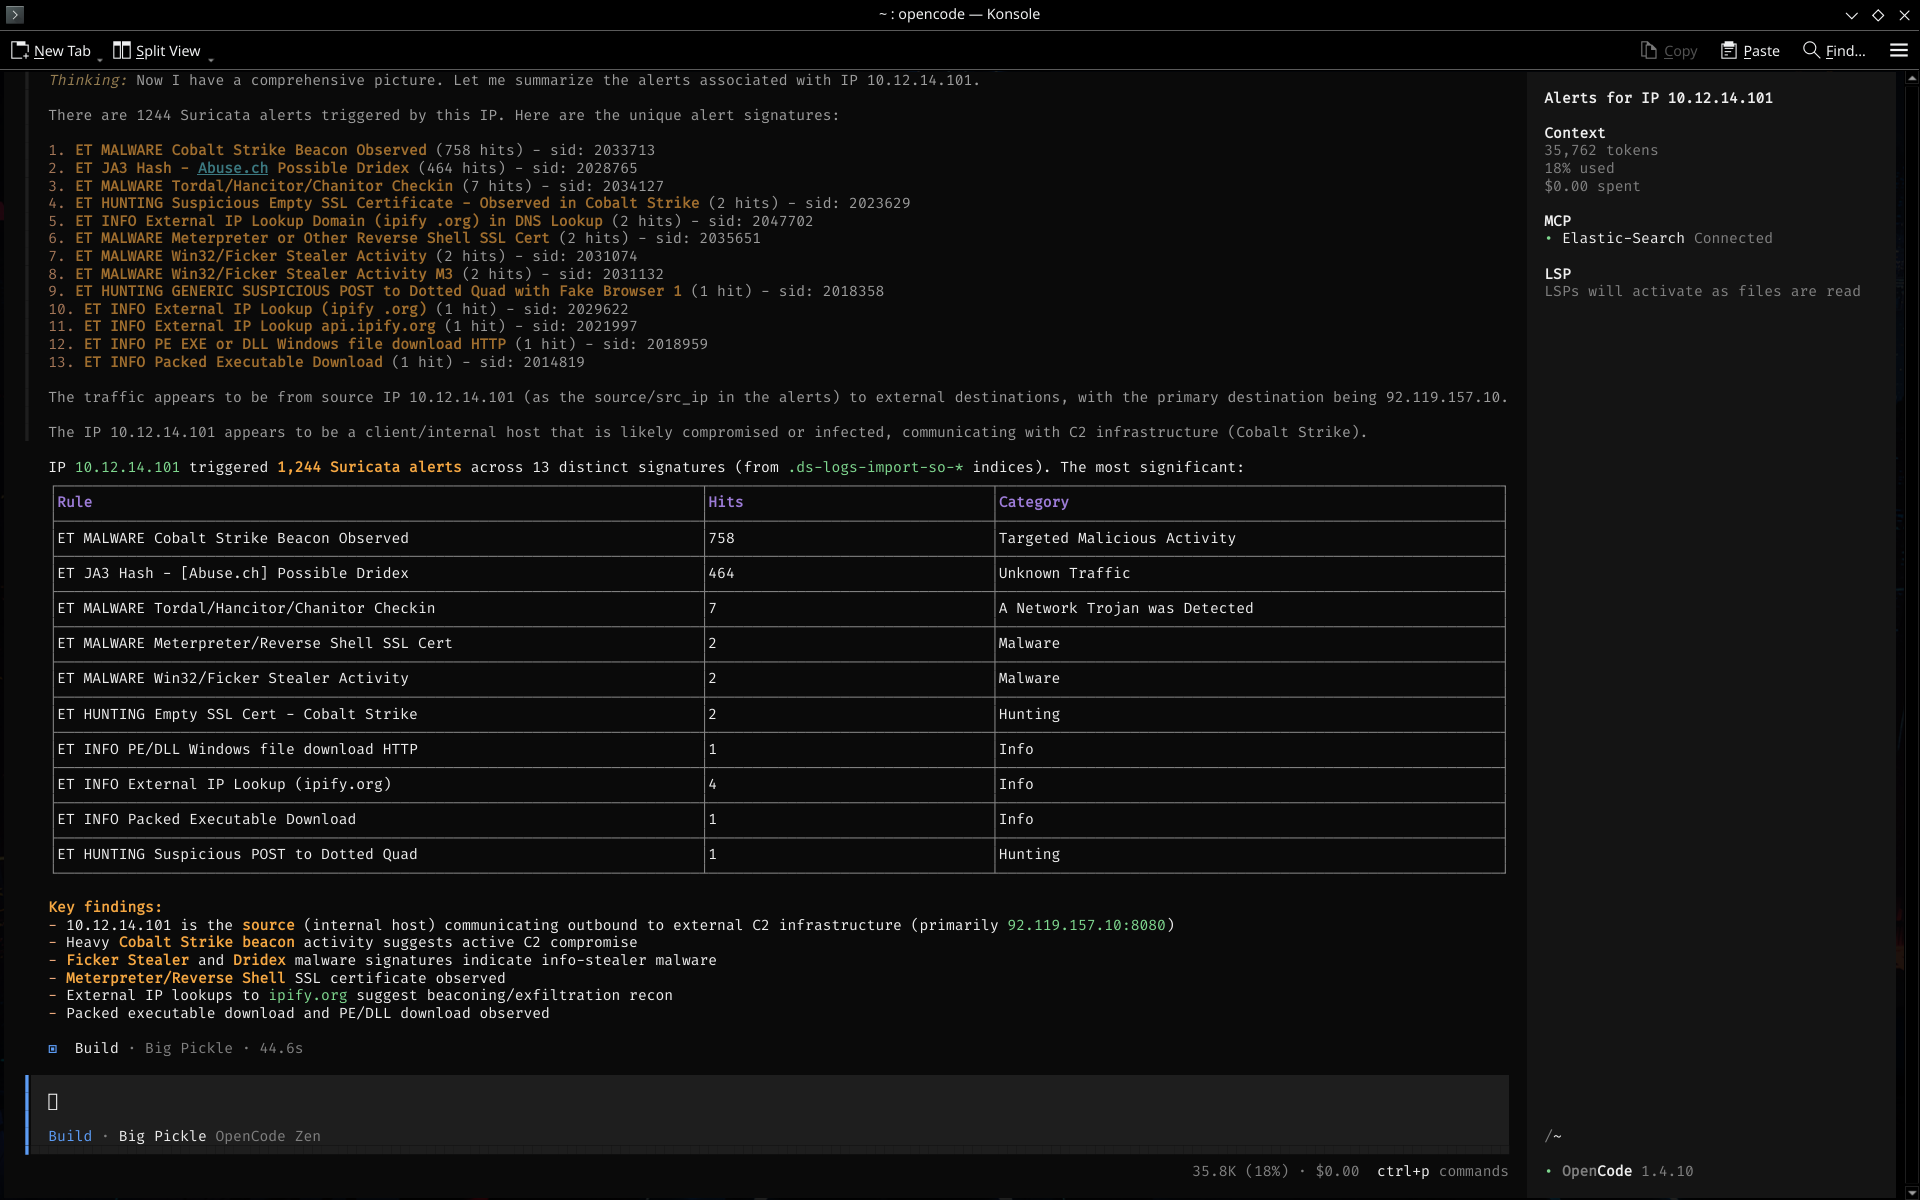
4. 根据 PCAP 数据中观察到的发现查询 LLM。
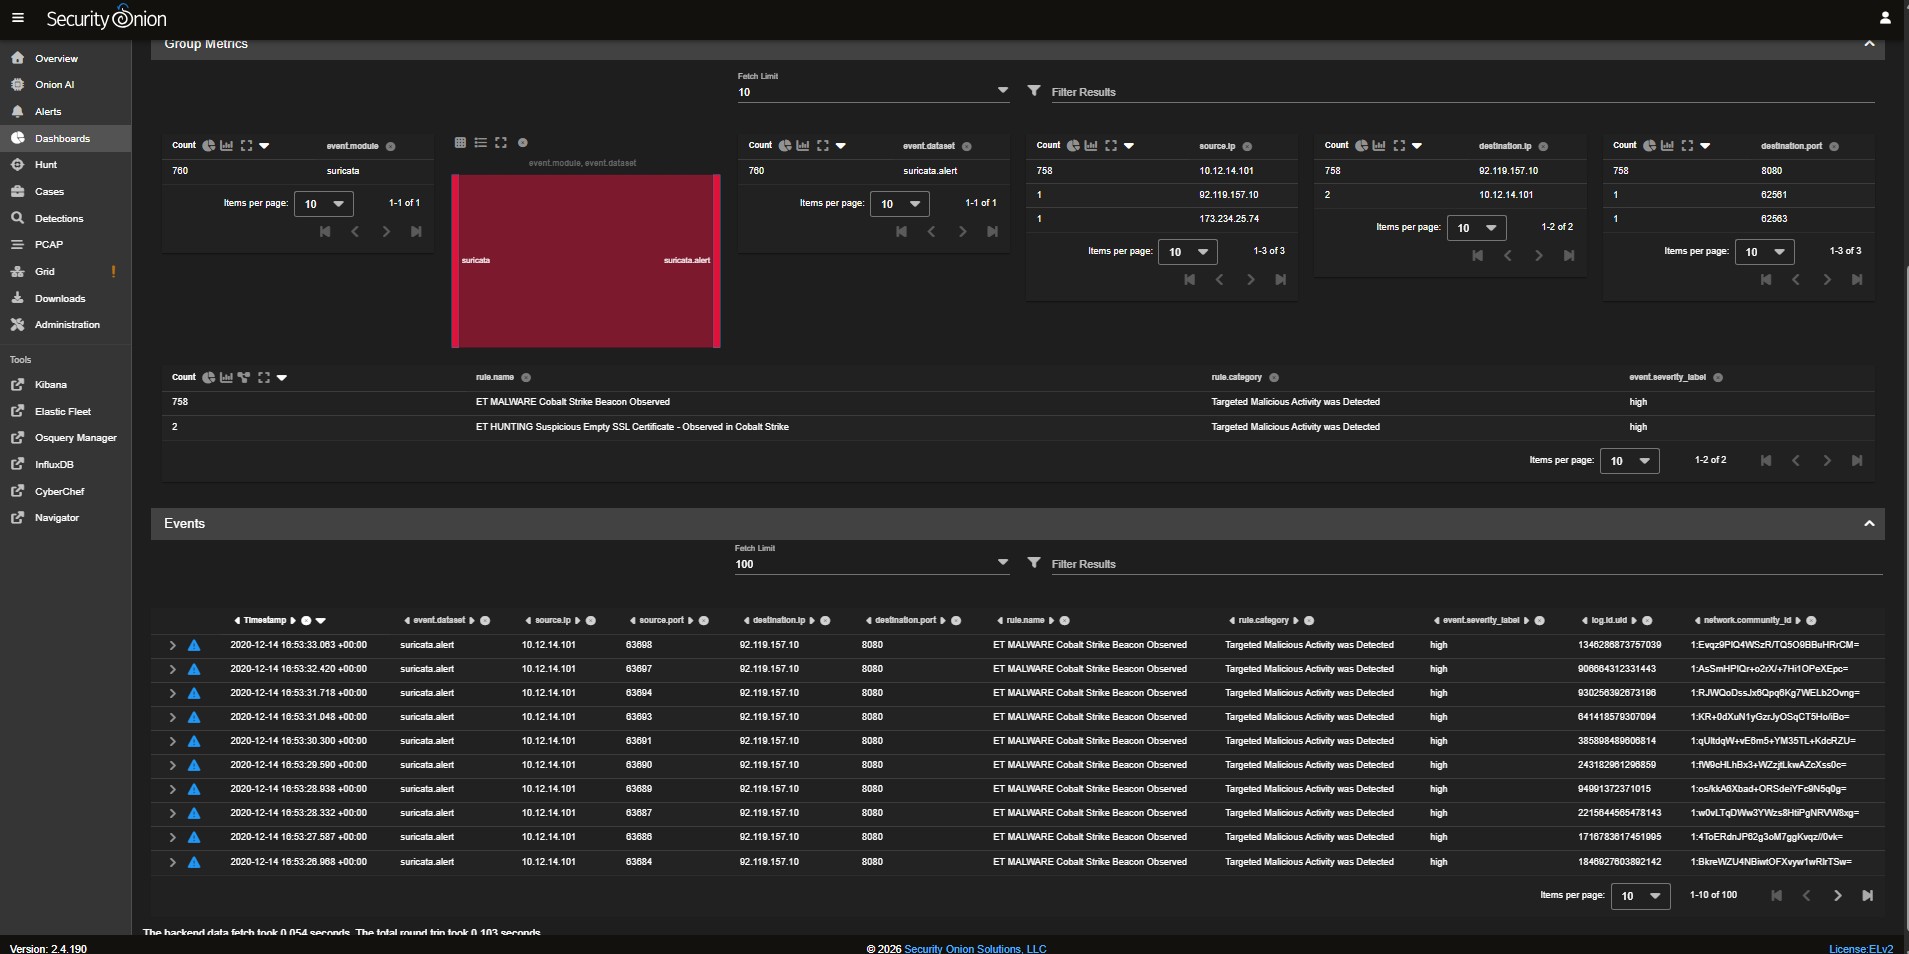
5. 将 AI 生成的分析与 Security Onion 内的遥测数据进行交叉比对,以验证准确性。
# 结果
 # 总结思考
- 这个项目非常有趣,也是在 MCP server、工作流自动化和 AI 辅助分析方面的一次重要学习经历。我期待尝试更多
工具和平台,以扩展这一概念并构建类似的工作流。试试这个设置吧,感谢您的阅读!
# 总结思考
- 这个项目非常有趣,也是在 MCP server、工作流自动化和 AI 辅助分析方面的一次重要学习经历。我期待尝试更多
工具和平台,以扩展这一概念并构建类似的工作流。试试这个设置吧,感谢您的阅读!
# 总结思考
- 这个项目非常有趣,也是在 MCP server、工作流自动化和 AI 辅助分析方面的一次重要学习经历。我期待尝试更多
工具和平台,以扩展这一概念并构建类似的工作流。试试这个设置吧,感谢您的阅读!标签:C2, DLL 劫持, Elasticsearch, MCP, Security Onion, 大语言模型, 安全运营, 扫描框架, 版权保护, 自动化分析, 请求拦截, 越狱测试, 跨站脚本