nagol0618/sysmon-splunk-lab
GitHub: nagol0618/sysmon-splunk-lab
一套完整的家庭实验室方案,演示如何用 Sysmon 和 Splunk 从零构建 Windows 端点威胁检测流水线,并模拟攻击完成端到端验证。
Stars: 1 | Forks: 0
# 🔵 Windows 威胁检测实验室 — Sysmon + Splunk


## 📋 概述
本实验室演示了如何使用免费工具从头开始构建一个功能性的威胁检测流水线。目标是模拟 Windows 端点上的攻击者行为,使用 Sysmon 捕获该行为,并在 Splunk 中进行检测——这与真实 SOC 环境中使用的工作流程相同。
**模拟攻击:** `powershell.exe` 生成 `cmd.exe` 并运行 `whoami` —— 这是一种经典的侦察技术和常见的入侵指标。
## 🏗️ 实验室架构
| 组件 | 详情 |
|---|---|
| **攻击者/SIEM 主机** | Kali Linux — Splunk Enterprise 10.2.3 |
| **目标/端点** | Windows 11 Enterprise (90天评估版) |
| **日志收集器** | Sysmon v15.20 + SwiftOnSecurity 配置 |
| **日志转发器** | Splunk Universal Forwarder 10.2.3 |
| **网络** | VirtualBox Host-Only (隔离,无互联网) |
| **Kali IP** | 192.168.56.102 |
| **Windows IP** | 192.168.56.101 |
## 🛠️ 环境搭建
### 步骤 1 — Windows 11 虚拟机
- 从 Microsoft Evaluation Center 下载了 Windows 11 Enterprise 90天评估版 ISO
- 创建了 VirtualBox 虚拟机:4GB 内存,50GB 硬盘
- 网络适配器设置为 **Host-Only** (与互联网隔离)
- 安装了 VirtualBox Guest Additions 用于显示缩放和剪贴板共享
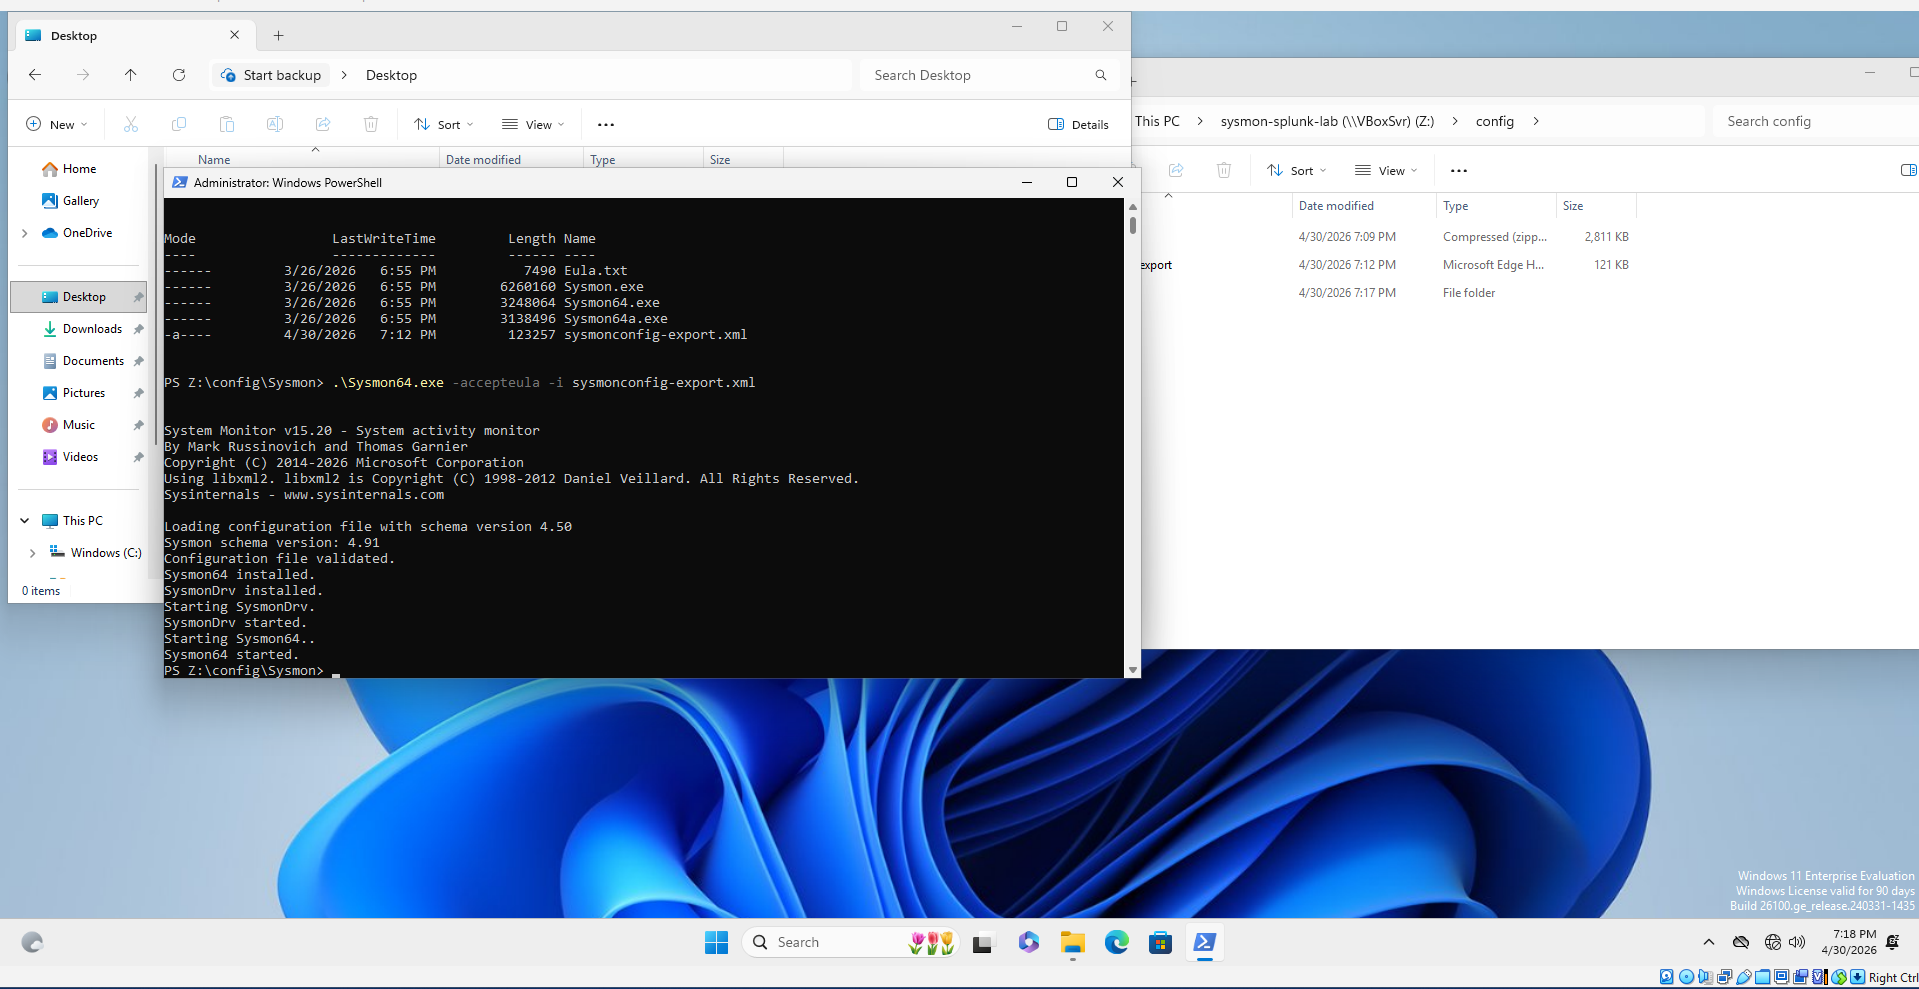
### 步骤 2 — Sysmon 安装
- 从 Microsoft Sysinternals 下载了 Sysmon v15.20
- 从 GitHub 下载了 SwiftOnSecurity 配置 (`sysmonconfig-export.xml`)
- 通过 VirtualBox 共享文件夹将文件传输到虚拟机
- 通过管理员 PowerShell 安装:
```
.\Sysmon64.exe -accepteula -i sysmonconfig-export.xml
```
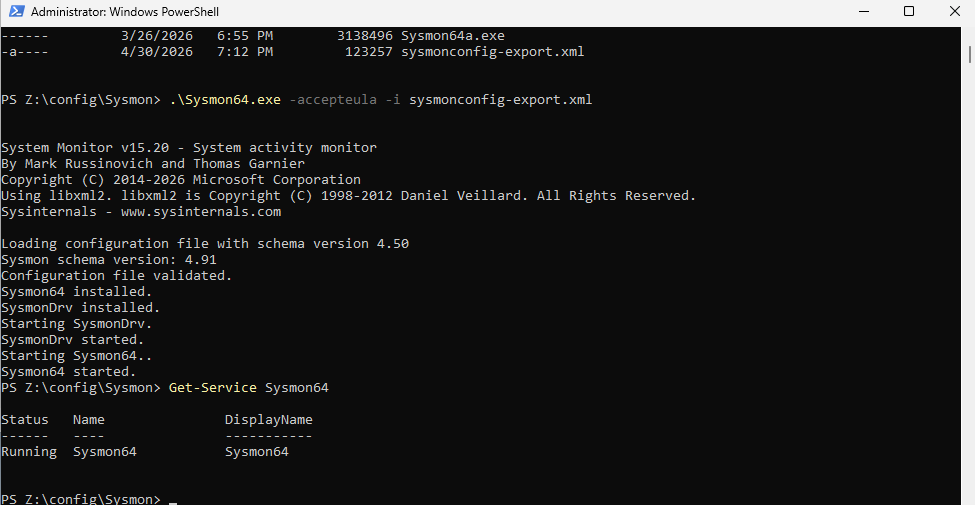
- 验证服务正在运行:
```
Get-Service Sysmon64
```
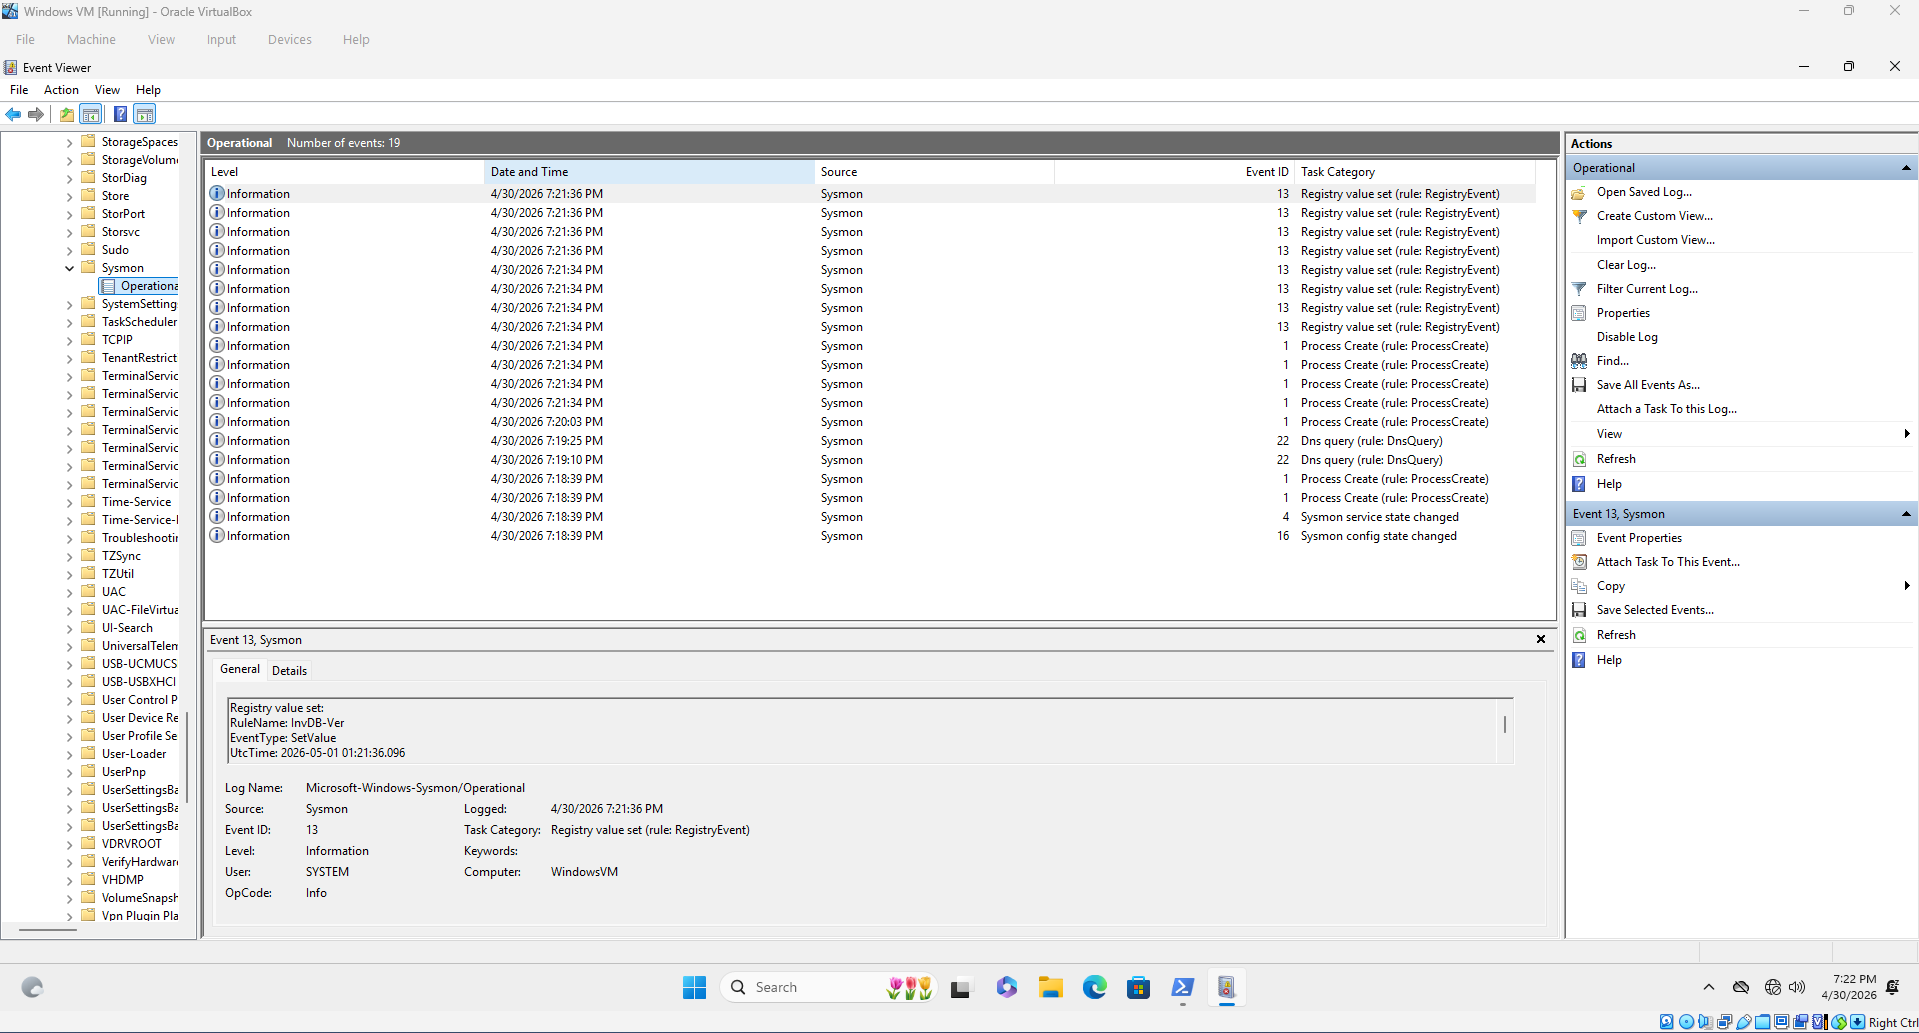
### 步骤 3 — 验证 Sysmon 日志记录
确认安装后立即在事件查看器中出现事件 ID 1 (进程创建)、事件 ID 13 (注册表) 和事件 ID 22 (DNS 查询)。
`应用程序和服务日志 → Microsoft → Windows → Sysmon → Operational`
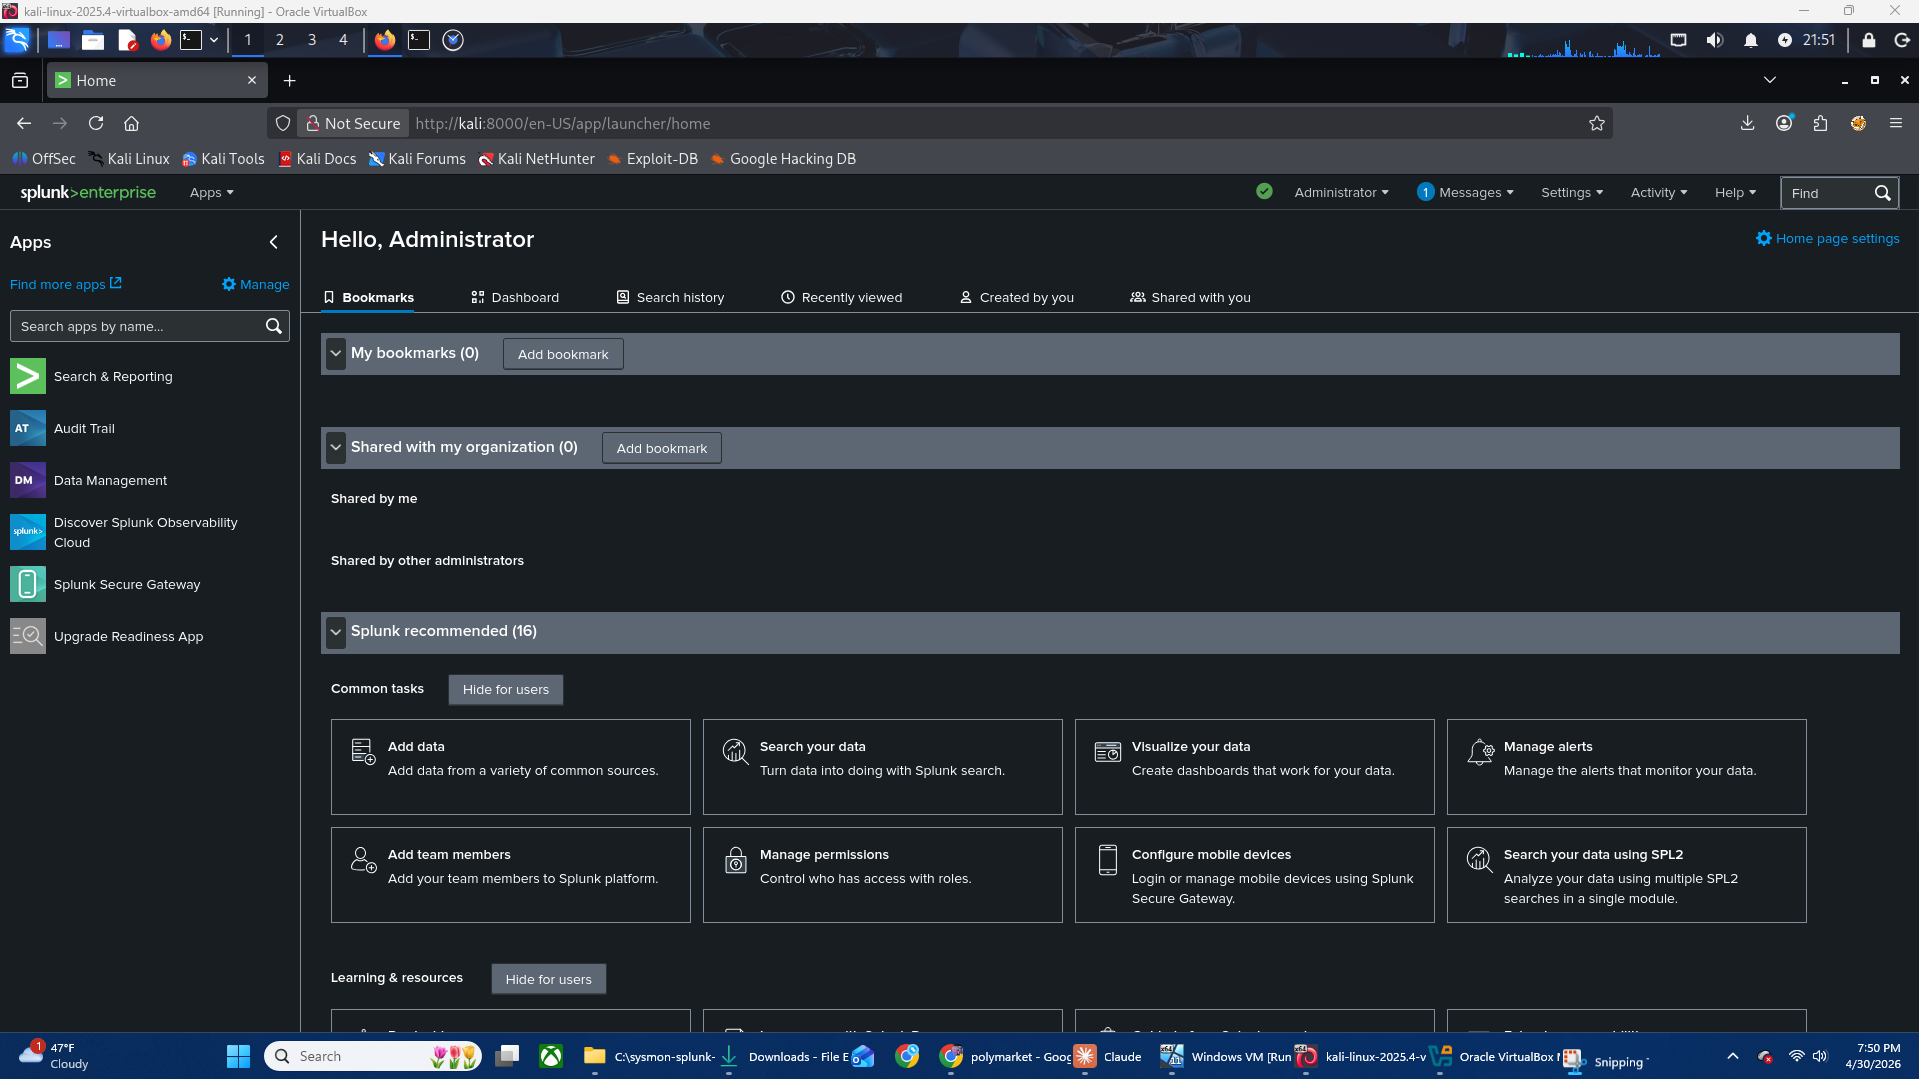
### 步骤 4 — 在 Kali 上配置 Splunk
- 从 splunk.com 下载了 Splunk Enterprise 10.2.3 (.deb)
- 安装并启动:
```
sudo dpkg -i splunk-10.2.3-4d61cf8a5c0c-linux-amd64.deb
sudo /opt/splunk/bin/splunk start --accept-license --run-as-root
```
- 通过 Settings → Forwarding and Receiving 配置了接收端口 **9997**
### 步骤 5 — 在 Windows 上配置 Splunk Universal Forwarder
- 下载了 Splunk Universal Forwarder 10.2.3 (Windows MSI)
- 通过 GUI 安装,指向 `192.168.56.102:9997`
- 创建了 `inputs.conf` 以监控 Sysmon 事件日志通道:
```
[WinEventLog://Microsoft-Windows-Sysmon/Operational]
index = main
sourcetype = XmlWinEventLog
renderXml = true
disabled = false
```
- 将转发器服务账户更改为 `LocalSystem`,以解决 Sysmon 通道的访问被拒绝错误
- 验证了日志正在流入 Splunk
## ⚔️ 攻击模拟
### 技术
模拟了可疑的父子进程关系——这是一种常见的攻击者模式,即 PowerShell 生成 cmd.exe 来运行侦察命令。
**MITRE ATT&CK 映射:**
| 战术 | 技术 | ID |
|---|---|---|
| Execution | Command and Scripting Interpreter: PowerShell | T1059.001 |
| Discovery | System Owner/User Discovery | T1033 |
### 执行的命令
```
powershell.exe -NoProfile -ExecutionPolicy Bypass -Command "cmd.exe /c whoami"
```
### 为什么这很可疑
- `powershell.exe` 生成 `cmd.exe` 是一种常见的就地取材 (living-off-the-land) 技术
- `-ExecutionPolicy Bypass` 是一个危险信号——用于绕过脚本限制
- `whoami` 是标准的初始阶段侦察命令
- 父子进程链 `powershell → cmd → whoami` 是一个已知的 IOC 模式
## 🔍 在 Splunk 中进行检测
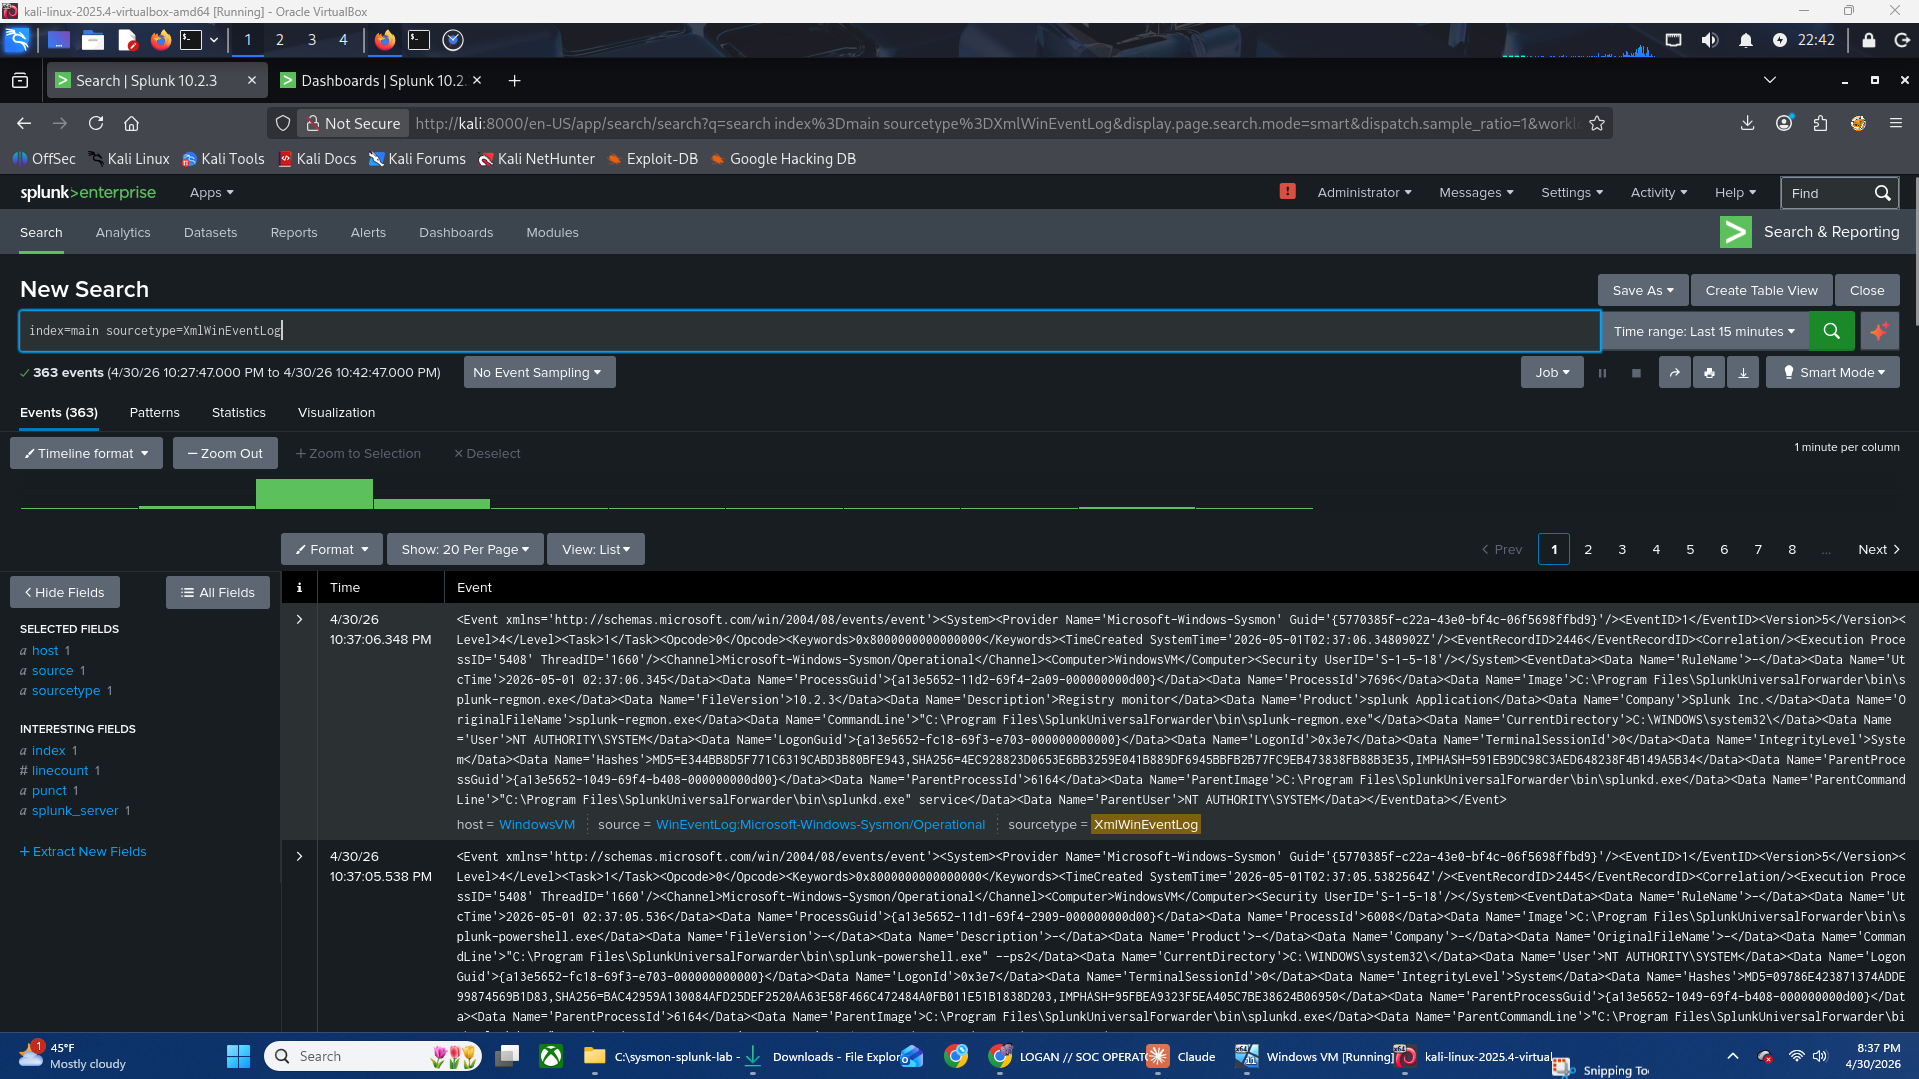
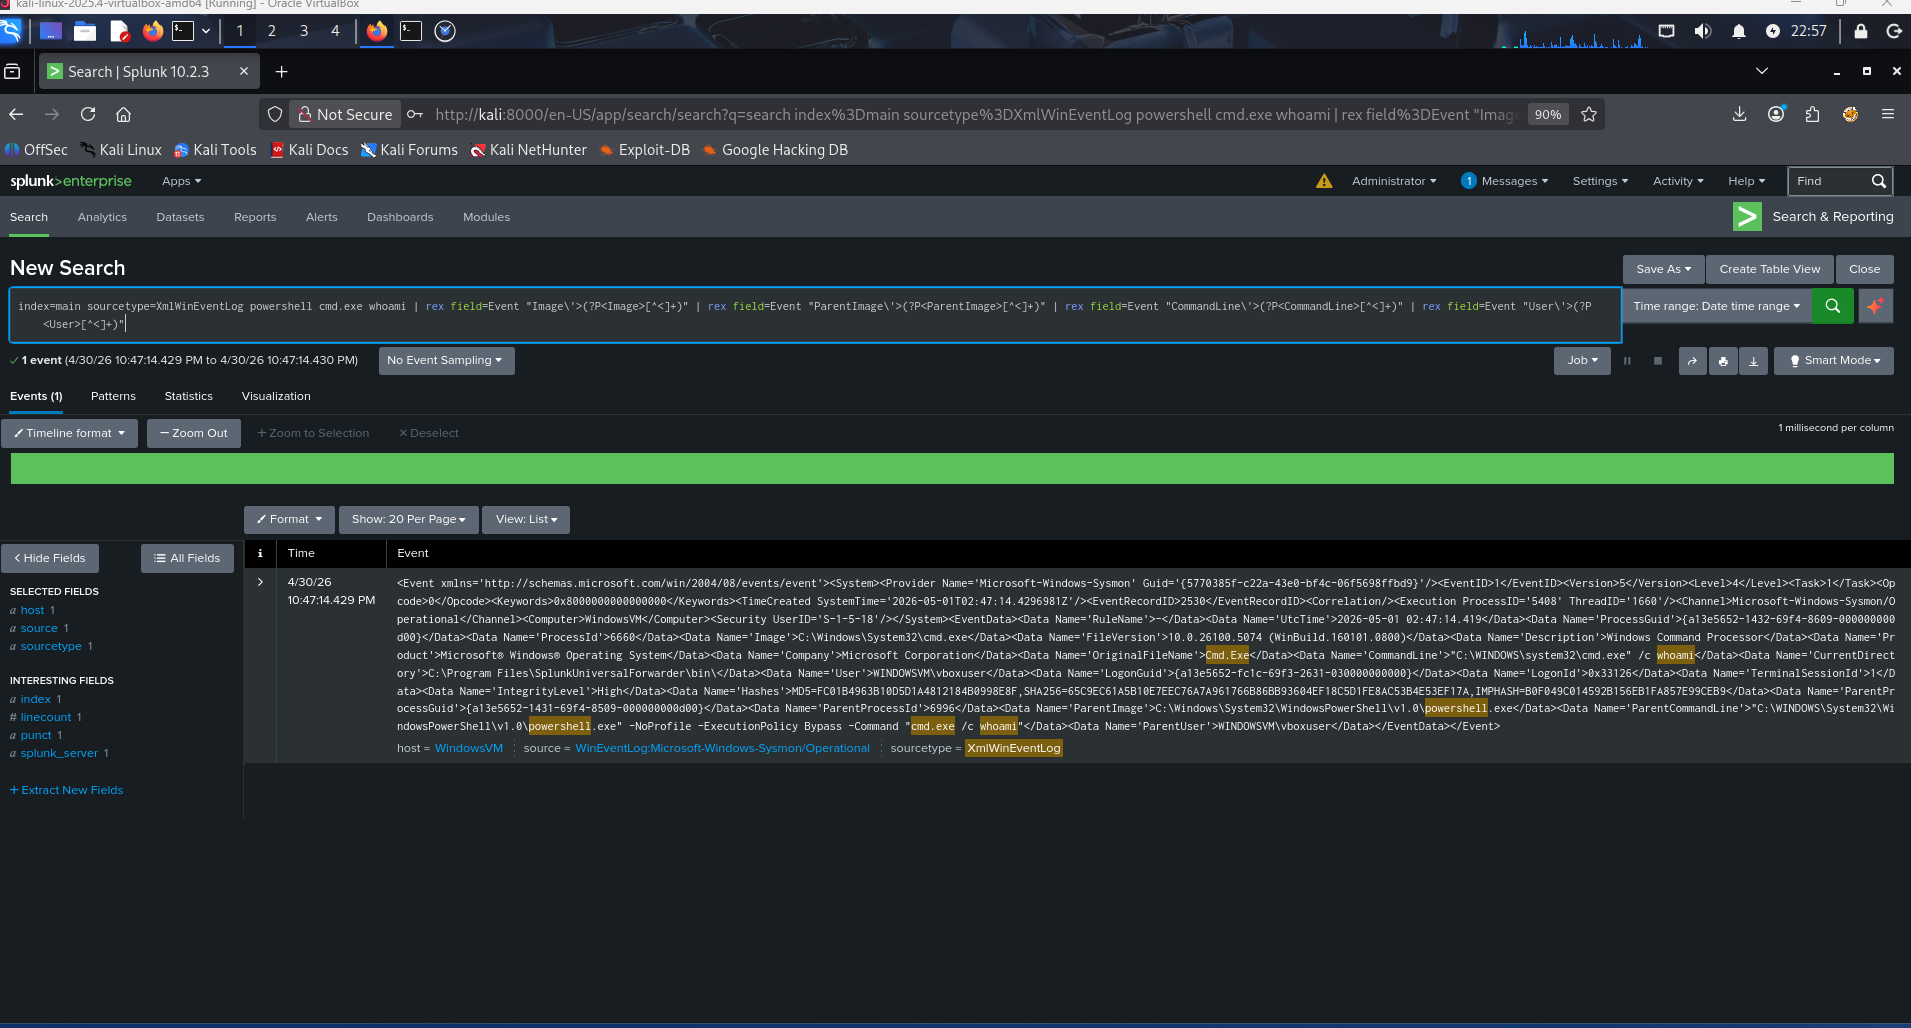
### 搜索查询
index=main sourcetype=XmlWinEventLog powershell cmd.exe whoami
### 结果
- 返回了 **14 个匹配事件**
- 完整的攻击链在原始 Sysmon XML 中可见:
- `Image: C:\Windows\System32\cmd.exe`
- `CommandLine: cmd.exe /c whoami`
- `ParentImage: C:\Windows\System32\WindowsPowerShell\v1.0\powershell.exe`
- `ParentCommandLine: powershell.exe -NoProfile -ExecutionPolicy Bypass -Command "cmd.exe /c whoami"`
- `User: WINDOWSVM\vboxuser`
## 🔧 故障排除
在本实验过程中遇到了几个真实环境的问题并已解决——此处记录这些问题,因为它们反映了真实的运营挑战。
| 问题 | 原因 | 修复方法 |
|---|---|---|
| Splunk MSI 无法从共享文件夹安装 | Windows Installer 阻止从网络路径执行 .msi | 先将 MSI 复制到本地驱动器 |
| Kali 和 Windows 虚拟机无法通信 | Kali 只有 NAT 适配器 | 为 Kali 添加了第二个 Host-Only 适配器 |
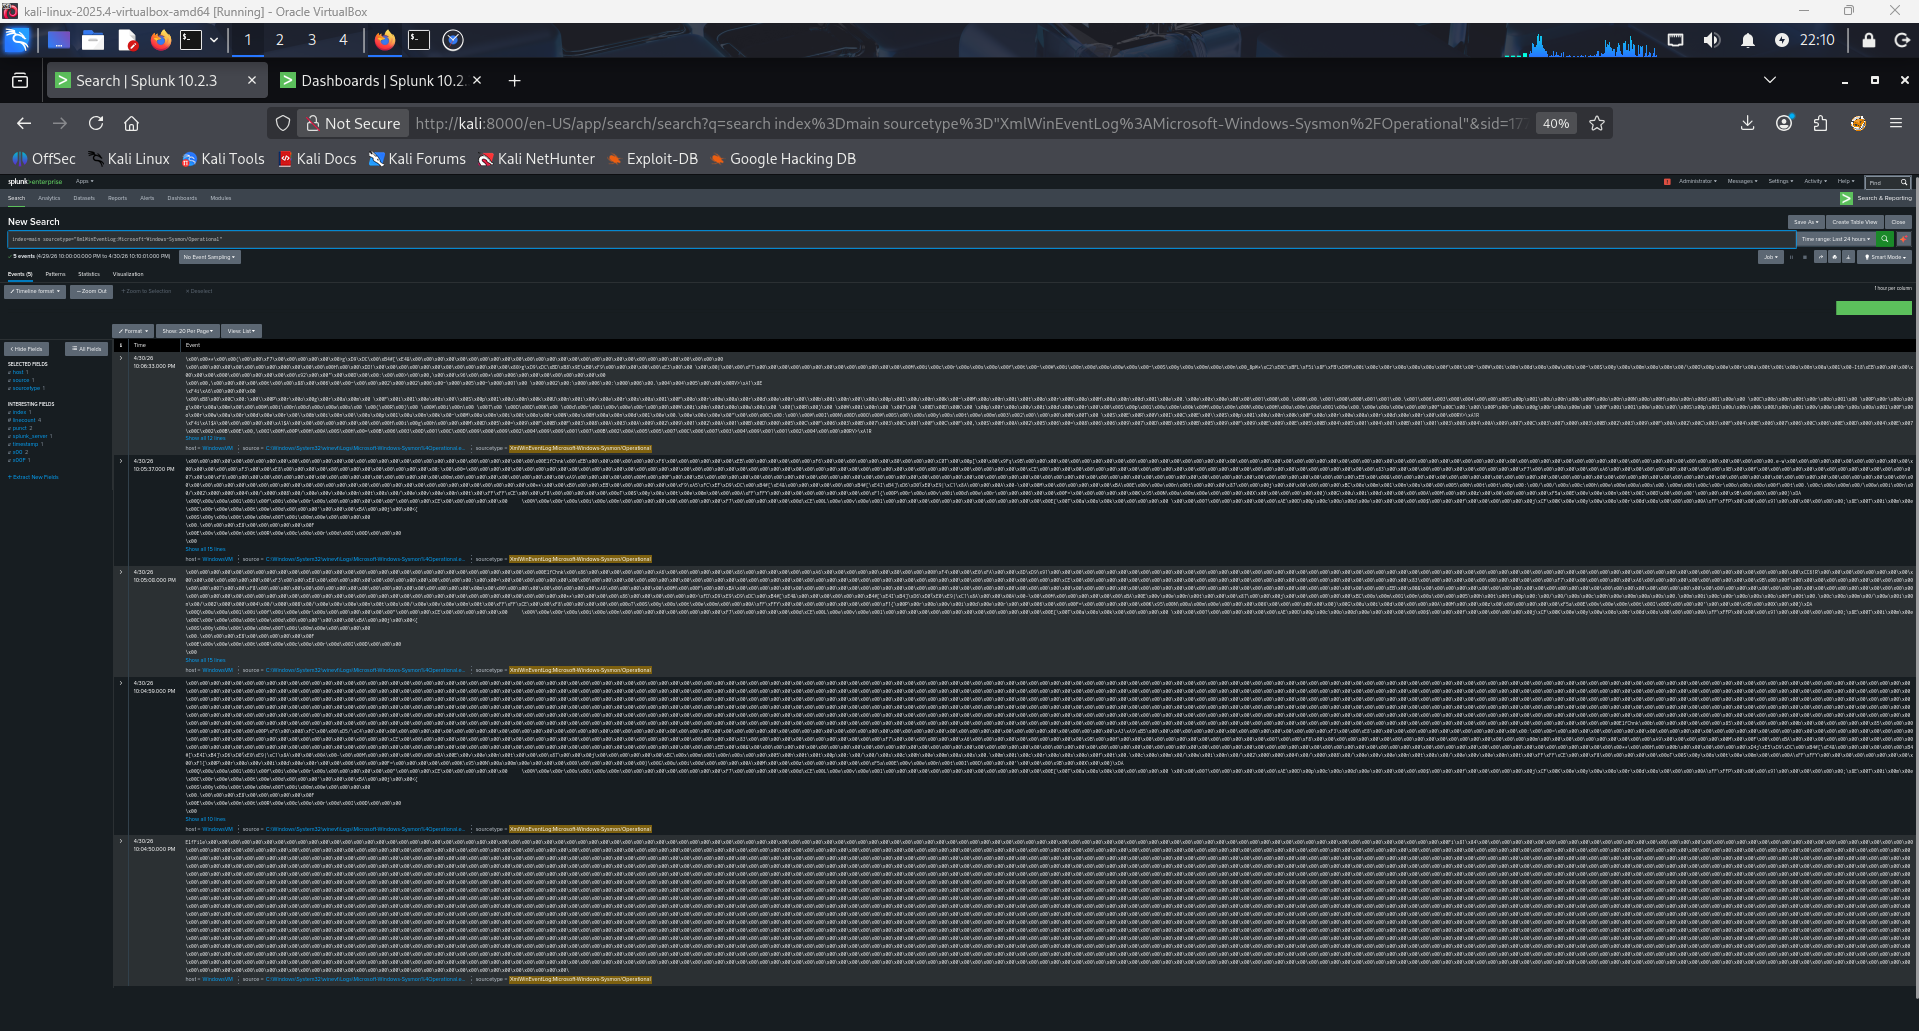
| Sysmon 日志以二进制十六进制乱码形式到达 | 转发器正在监控原始 .evtx 文件 | 通过 inputs.conf 切换到 WinEventLog 通道输入 |
| `errorCode=5` — Sysmon 通道访问被拒绝 | 转发器在没有读取权限的情况下作为 `NT SERVICE\SplunkForwarder` 运行 | 通过 `sc.exe config` 将服务账户更改为 `LocalSystem` |
| 基于字段的 SPL 搜索未返回结果 | Sysmon Add-on 未完全解析 XML 字段 | 使用原始文本搜索;将字段提取列为未来的改进项 |
## 💡 经验教训
- **Sysmon 默认产生大量噪声**——SwiftOnSecurity 配置对于从噪声中过滤出有效信号至关重要
- **日志摄取 ≠ 已解析字段**——原始 XML 事件需要正确的 sourcetype 配置或插件才能进行干净的字段提取
- **服务账户权限很重要**——这是一种常见的真实环境中的配置错误,会默默阻止日志收集
- **Host-Only 网络需要双网卡**——一个用于互联网 (NAT),一个用于实验室隔离 (Host-Only)
- **事件查看器与 Splunk 对比**——事件查看器原生渲染 Sysmon XML;而 Splunk 需要配置才能实现相同的结构化视图
## 🚀 未来改进
- [ ] 配置 Splunk Add-on for Sysmon (TA-microsoft-sysmon) 以实现正确的字段提取
- [ ] 构建用于实时进程监控的 Splunk 仪表板
- [ ] 模拟额外的攻击技术 (横向移动、通过注册表 Run 键实现持久化)
- [ ] 添加第二台 Windows 虚拟机以模拟主机间的横向移动
- [ ] 集成蜜罐 (OpenCanary 或 T-Pot) 作为单独的检测层
## 🧰 使用的工具
| 工具 | 版本 | 用途 |
|---|---|---|
| VirtualBox | 7.x | 虚拟机 Hypervisor |
| Windows 11 Enterprise | 21H2 eval | 目标端点 |
| Sysmon | v15.20 | 端点遥测 |
| SwiftOnSecurity 配置 | 最新版 | Sysmon 噪声过滤 |
| Splunk Enterprise | 10.2.3 | SIEM / 日志分析 |
| Splunk Universal Forwarder | 10.2.3 | 日志发送代理 |
| Kali Linux | 2025.4 | 攻击者主机 / SIEM 主机 |
## 👤 作者
**Logan Garner**
- 🔗 [LinkedIn](https://linkedin.com/in/logan-garner-368798277)
- 🐱 [GitHub](https://github.com/nagol0618)
- 🎯 [TryHackMe](https://tryhackme.com/p/nagol0618)
标签:AI合规, AMSI绕过, ATT&CK框架, Conpot, EDR, OpenCanary, PowerShell攻击, Splunk Universal Forwarder, SwiftOnSecurity, Sysinternals, Sysmon, Windows安全, 企业安全, 威胁检测, 安全信息与事件管理, 安全架构, 安全运营中心, 家庭实验室, 搜索引擎爬取, 攻击模拟, 日志转发, 端点安全, 网络安全, 网络安全实验, 网络映射, 网络资产管理, 脆弱性评估, 补丁管理, 隐私保护, 驱动签名利用