Kaoz625/ghidramcp
GitHub: Kaoz625/ghidramcp
一个通过 MCP 协议桥接 Ghidra 与 AI 代理的服务器,让大语言模型能够自主进行二进制逆向工程分析。
Stars: 0 | Forks: 0
[](https://www.apache.org/licenses/LICENSE-2.0)
[](https://github.com/LaurieWired/GhidraMCP/releases)
[](https://github.com/LaurieWired/GhidraMCP/stargazers)
[](https://github.com/LaurieWired/GhidraMCP/network/members)
[](https://github.com/LaurieWired/GhidraMCP/graphs/contributors)
[](https://twitter.com/lauriewired)

# ghidraMCP
ghidraMCP 是一个 Model Context Protocol 服务器,旨在允许 LLM 自主进行应用程序的逆向工程。它将 Ghidra 核心功能的众多工具暴露给 MCP 客户端。
https://github.com/user-attachments/assets/36080514-f227-44bd-af84-78e29ee1d7f9
# 功能
MCP 服务器 + Ghidra 插件
- 在 Ghidra 中反编译和分析二进制文件
- 自动重命名方法和数据
- 列出方法、类、导入和导出
# 安装说明
## 前置条件
- 安装 [Ghidra](https://ghidra-sre.org)
- Python3
- MCP [SDK](https://github.com/modelcontextprotocol/python-sdk)
## Ghidra
首先,从本仓库下载最新的[发布版](https://github.com/LaurieWired/GhidraMCP/releases)。其中包含 Ghidra 插件和 Python MCP 客户端。然后,你可以直接将插件导入到 Ghidra 中。
1. 运行 Ghidra
2. 选择 `File` -> `Install Extensions`
3. 点击 `+` 按钮
4. 从下载的发布版中选择 `GhidraMCP-1-2.zip`(或您选择的版本)
5. 重启 Ghidra
6. 确保在 `File` -> `Configure` -> `Developer` 中启用了 GhidraMCPPlugin
7. *可选*:在 Ghidra 中通过 `Edit` -> `Tool Options` -> `GhidraMCP HTTP Server` 配置端口
视频安装指南:
https://github.com/user-attachments/assets/75f0c176-6da1-48dc-ad96-c182eb4648c3
## MCP 客户端
理论上,任何 MCP 客户端都应该能与 ghidraMCP 配合使用。下面给出了三个示例。
## 示例 1: Claude Desktop
要将 Claude Desktop 设置为 Ghidra MCP 客户端,请转到 `Claude` -> `Settings` -> `Developer` -> `Edit Config` -> `claude_desktop_config.json` 并添加以下内容:
```
{
"mcpServers": {
"ghidra": {
"command": "python",
"args": [
"/ABSOLUTE_PATH_TO/bridge_mcp_ghidra.py",
"--ghidra-server",
"http://127.0.0.1:8080/"
]
}
}
}
```
或者,直接编辑此文件:
```
/Users/YOUR_USER/Library/Application Support/Claude/claude_desktop_config.json
```
服务器 IP 和端口是可配置的,应将其设置为指向目标 Ghidra 实例。如果未设置,两者默认将指向 localhost:8080。
## 示例 2: Cline
要将 GhidraMCP 与 [Cline](https://cline.bot) 结合使用,还需要手动运行 MCP 服务器。首先运行以下命令:
```
python bridge_mcp_ghidra.py --transport sse --mcp-host 127.0.0.1 --mcp-port 8081 --ghidra-server http://127.0.0.1:8080/
```
唯一*必需*的参数是 transport。如果未指定其他所有参数,它们将采用上述默认值。MCP 服务器运行后,打开 Cline 并在顶部选择 `MCP Servers`。
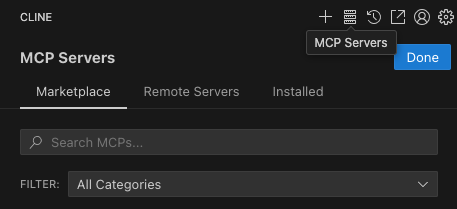
然后选择 `Remote Servers` 并添加以下内容,确保 URL 与 MCP 主机和端口匹配:
1. Server Name: GhidraMCP
2. Server URL: `http://127.0.0.1:8081/sse`
## 示例 3: 5ire
另一个支持后端多模型的 MCP 客户端是 [5ire](https://github.com/nanbingxyz/5ire)。要设置 GhidraMCP,请打开 5ire 并转到 `Tools` -> `New`,然后设置以下配置:
1. Tool Key: ghidra
2. Name: GhidraMCP
3. Command: `python /ABSOLUTE_PATH_TO/bridge_mcp_ghidra.py`
# 从源码构建
1. 将以下文件从你的 Ghidra 目录复制到此项目的 `lib/` 目录中:
- `Ghidra/Features/Base/lib/Base.jar`
- `Ghidra/Features/Decompiler/lib/Decompiler.jar`
- `Ghidra/Framework/Docking/lib/Docking.jar`
- `Ghidra/Framework/Generic/lib/Generic.jar`
- `Ghidra/Framework/Project/lib/Project.jar`
- `Ghidra/Framework/SoftwareModeling/lib/SoftwareModeling.jar`
- `Ghidra/Framework/Utility/lib/Utility.jar`
- `Ghidra/Framework/Gui/lib/Gui.jar`
2. 通过运行以下命令使用 Maven 构建:
`mvn clean package assembly:single`
生成的 zip 文件包含已构建的 Ghidra 插件及其资源。Ghidra 需要这些文件才能识别新扩展。
- lib/GhidraMCP.jar
- extensions.properties
- Module.manifest
标签:Claude, CVE检测, DAST, DLL 劫持, DNS解析, Ghidra, JS文件枚举, LLM, MCP, Model Context Protocol, Python, Unmanaged PE, URL提取, 二进制分析, 云安全运维, 云资产清单, 人工智能, 反编译, 域名枚举, 大语言模型, 开源项目, 恶意软件分析, 插件, 无后门, 用户模式Hook绕过, 网络安全, 网络调试, 自动化, 逆向工具, 逆向工程, 隐私保护