rachit9876/fysearch
GitHub: rachit9876/fysearch
基于 CLIP 和 FAISS 的离线多模态取证搜索引擎,无需 GPU 和网络即可对文本、图像及扫描 PDF 进行跨模态语义检索。
Stars: 0 | Forks: 0
# FYSearch
问答/帮助请访问:https://gemini.google.com/share/19600477641
 [报告.pdf](https://github.com/rachit9876/fysearch/blob/main/Documentation/report.pdf)
## 它能做什么?
| 搜索类型 | 工作原理 | 示例 |
|-------------|-------------|---------|
| **文本 → 文本** | 输入查询,查找具有匹配*含义*(而不仅仅是关键字)的文档。 | 搜索 `"发票欺诈"` → 查找有关账单诈骗的文档,即使它们不包含这些确切的字词 |
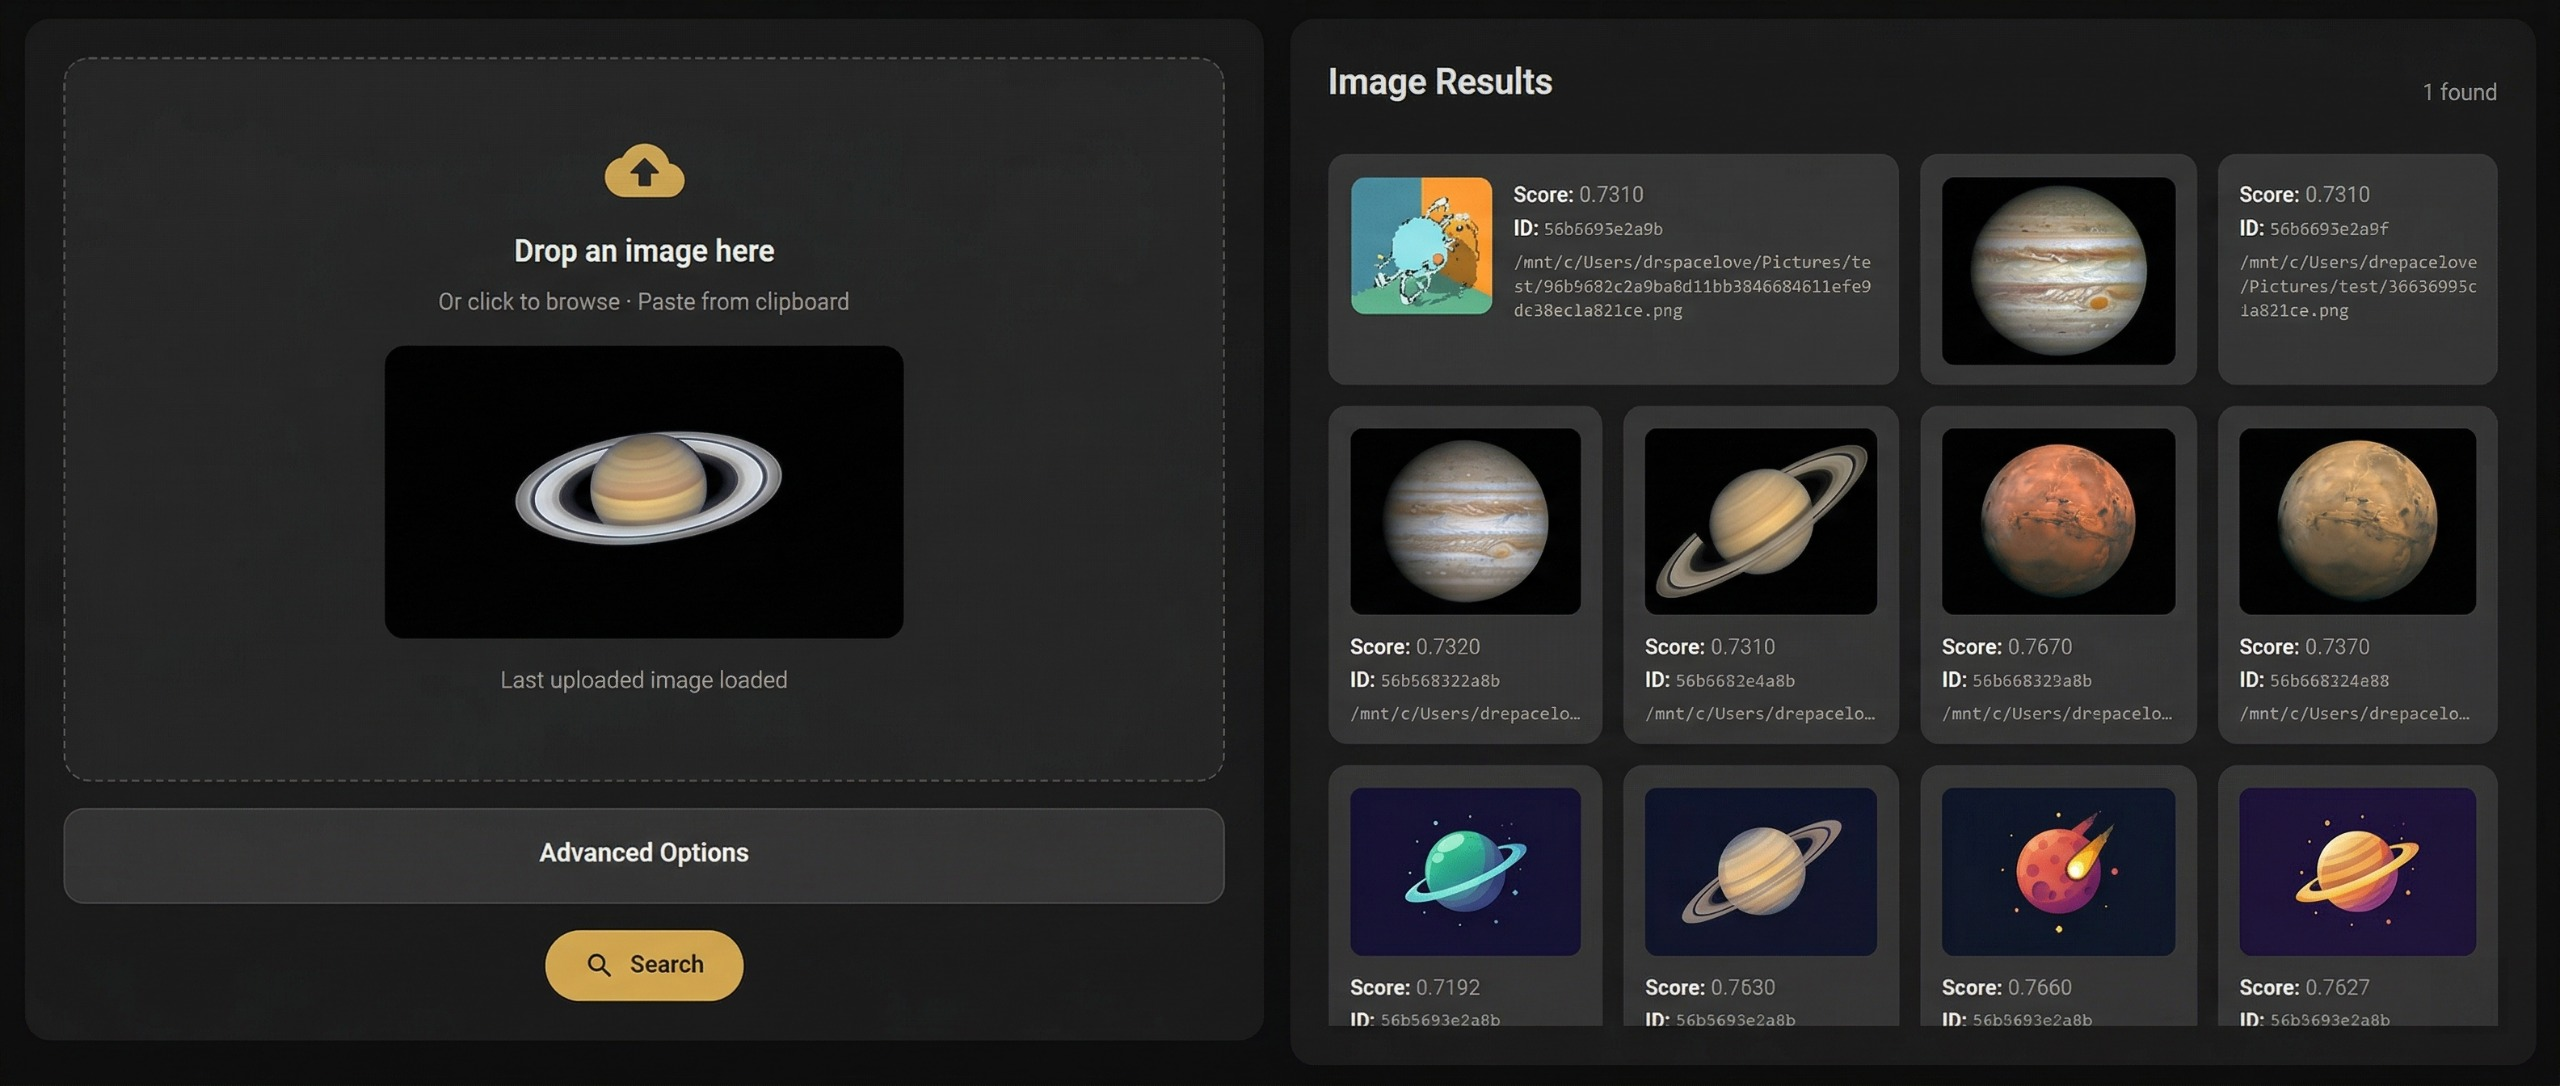
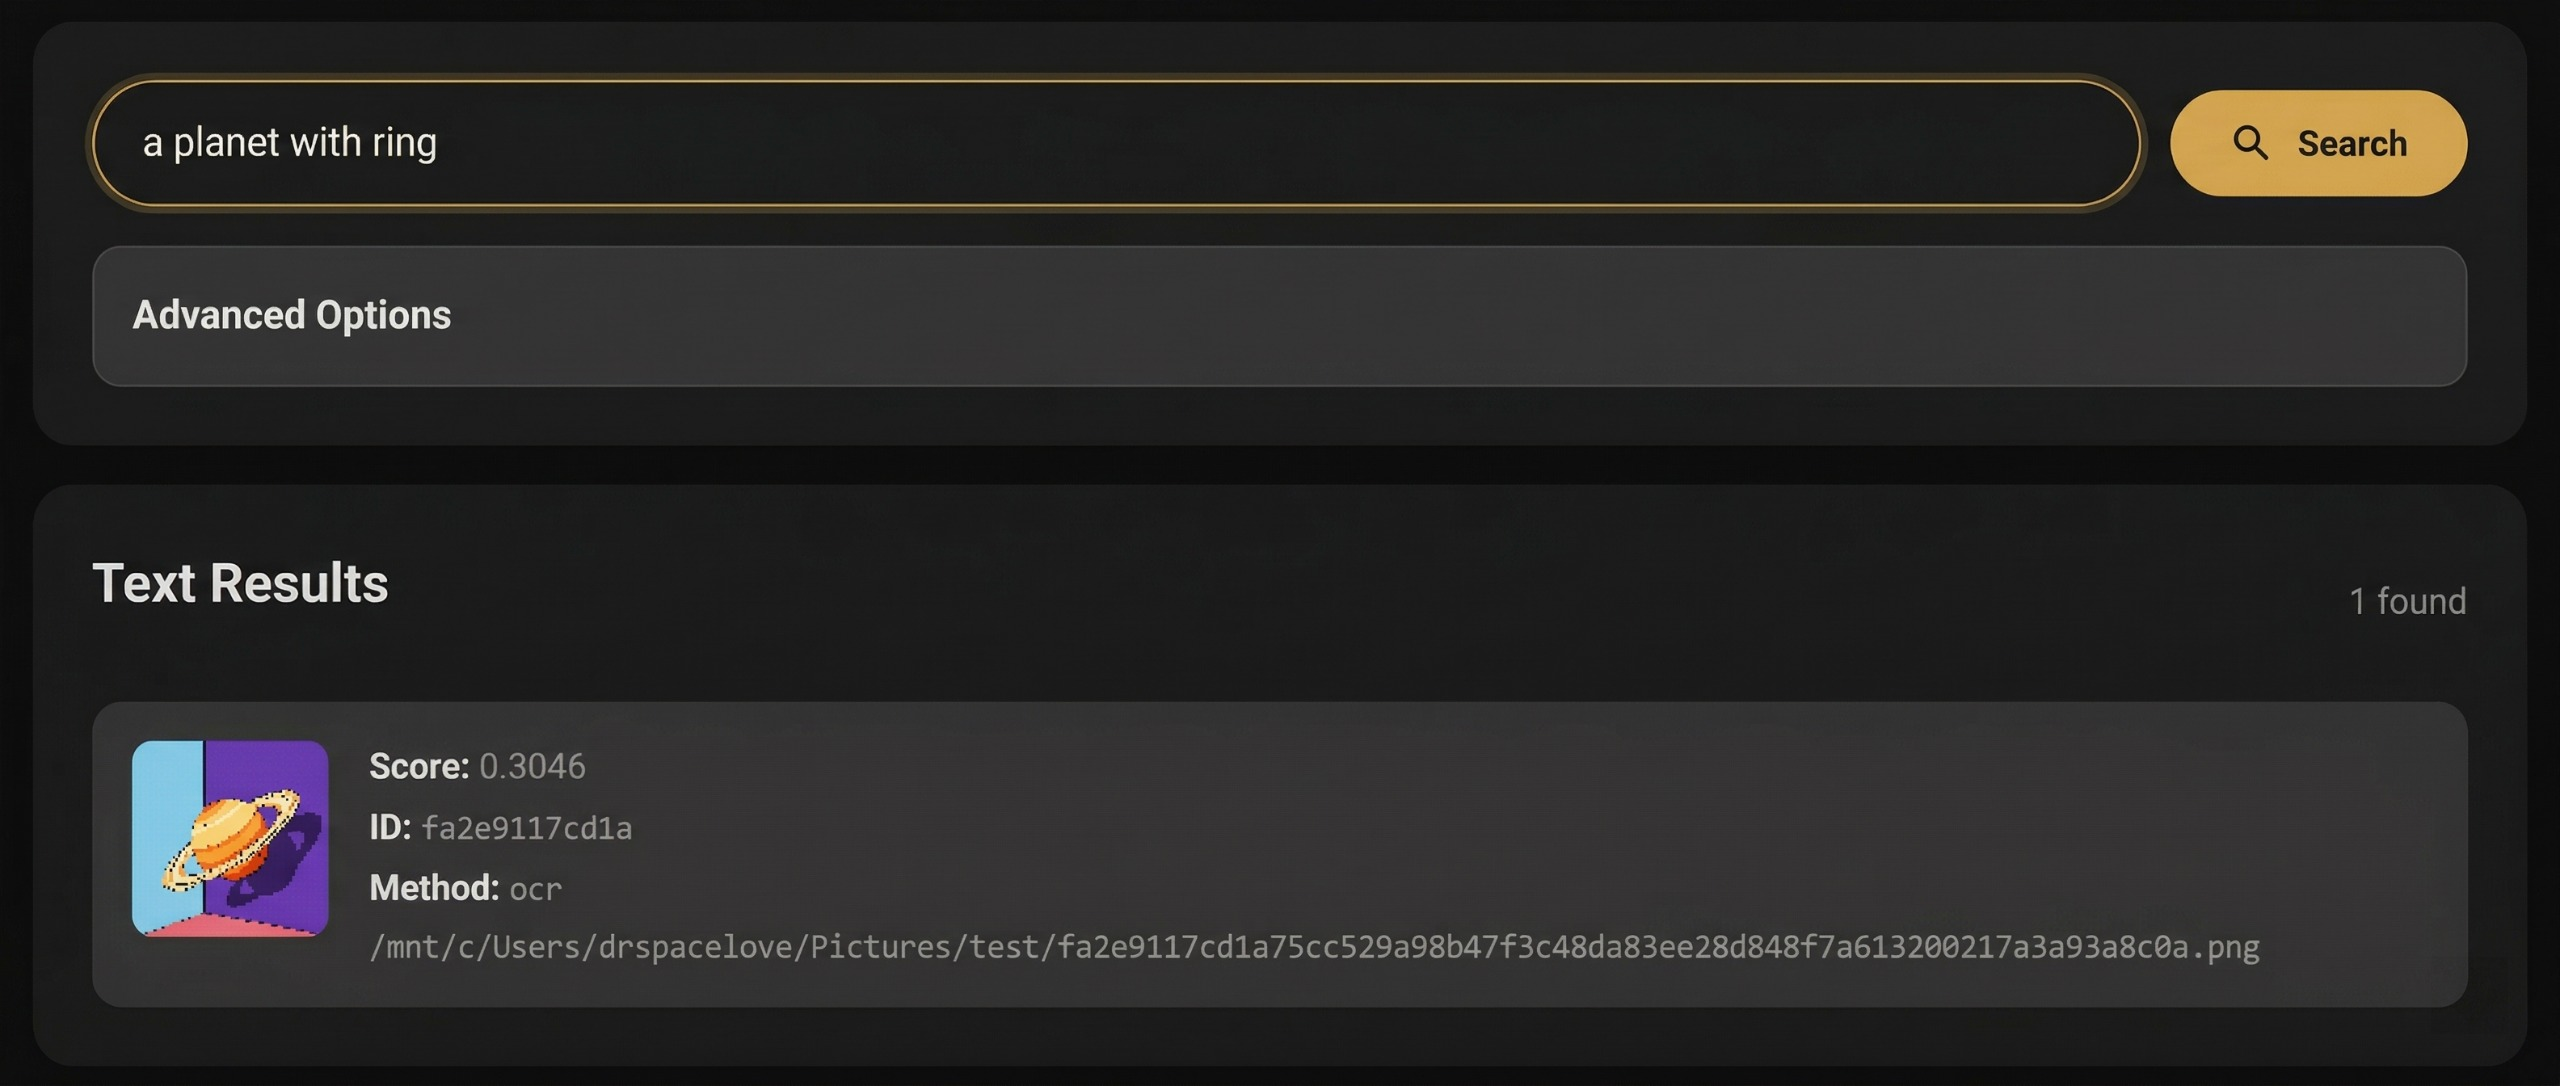
| **文本 → 图像** | 输入描述,查找*视觉上匹配*的图像。 | 搜索 `"山上的日落"` → 查找风景照片 |
| **图像 → 图像** | 上传图像,查找*视觉上相似*的图像。 | 上传一张照片 → 查找重复或高度相似的图片 |
| **PDF 搜索** | 自动提取扫描或数字 PDF(OCR + 文本)。 | 在扫描的政府文件内进行搜索 |
### 工作原理(内部机制)
```
Your Files → Ingest → Extract Text (OCR/PDF) → Generate Embeddings → Build Vector Index
↓
Search Query → Embed Query → Find Nearest Vectors → Results
```
- **Embeddings** = 将文本/图像转换为捕获*含义*的数值向量
- **Vector search** = 使用 FAISS 或暴力搜索查找最接近的向量(最相似的内容)
- **OCR** = 使用 Tesseract 从图像/扫描 PDF 中提取文本
## 快速开始(5 分钟)
### 步骤 1:安装系统依赖项
您需要在系统上安装 **Tesseract OCR** 和 **Poppler**(用于 PDF 渲染)。
### 步骤 2:克隆并设置 Python 环境
```
git clone https://github.com/rachit9876/finalYear.git
cd finalYear
```
### 步骤 3:安装 Python 依赖项
```
pip install -e ".[web,embeddings,faiss,ocr,pdf_images]"
```
### 步骤 4:初始化并启动
```
fysearch init
fysearch web
```
在浏览器中打开 **http://127.0.0.1:5000**。大功告成! 🎉
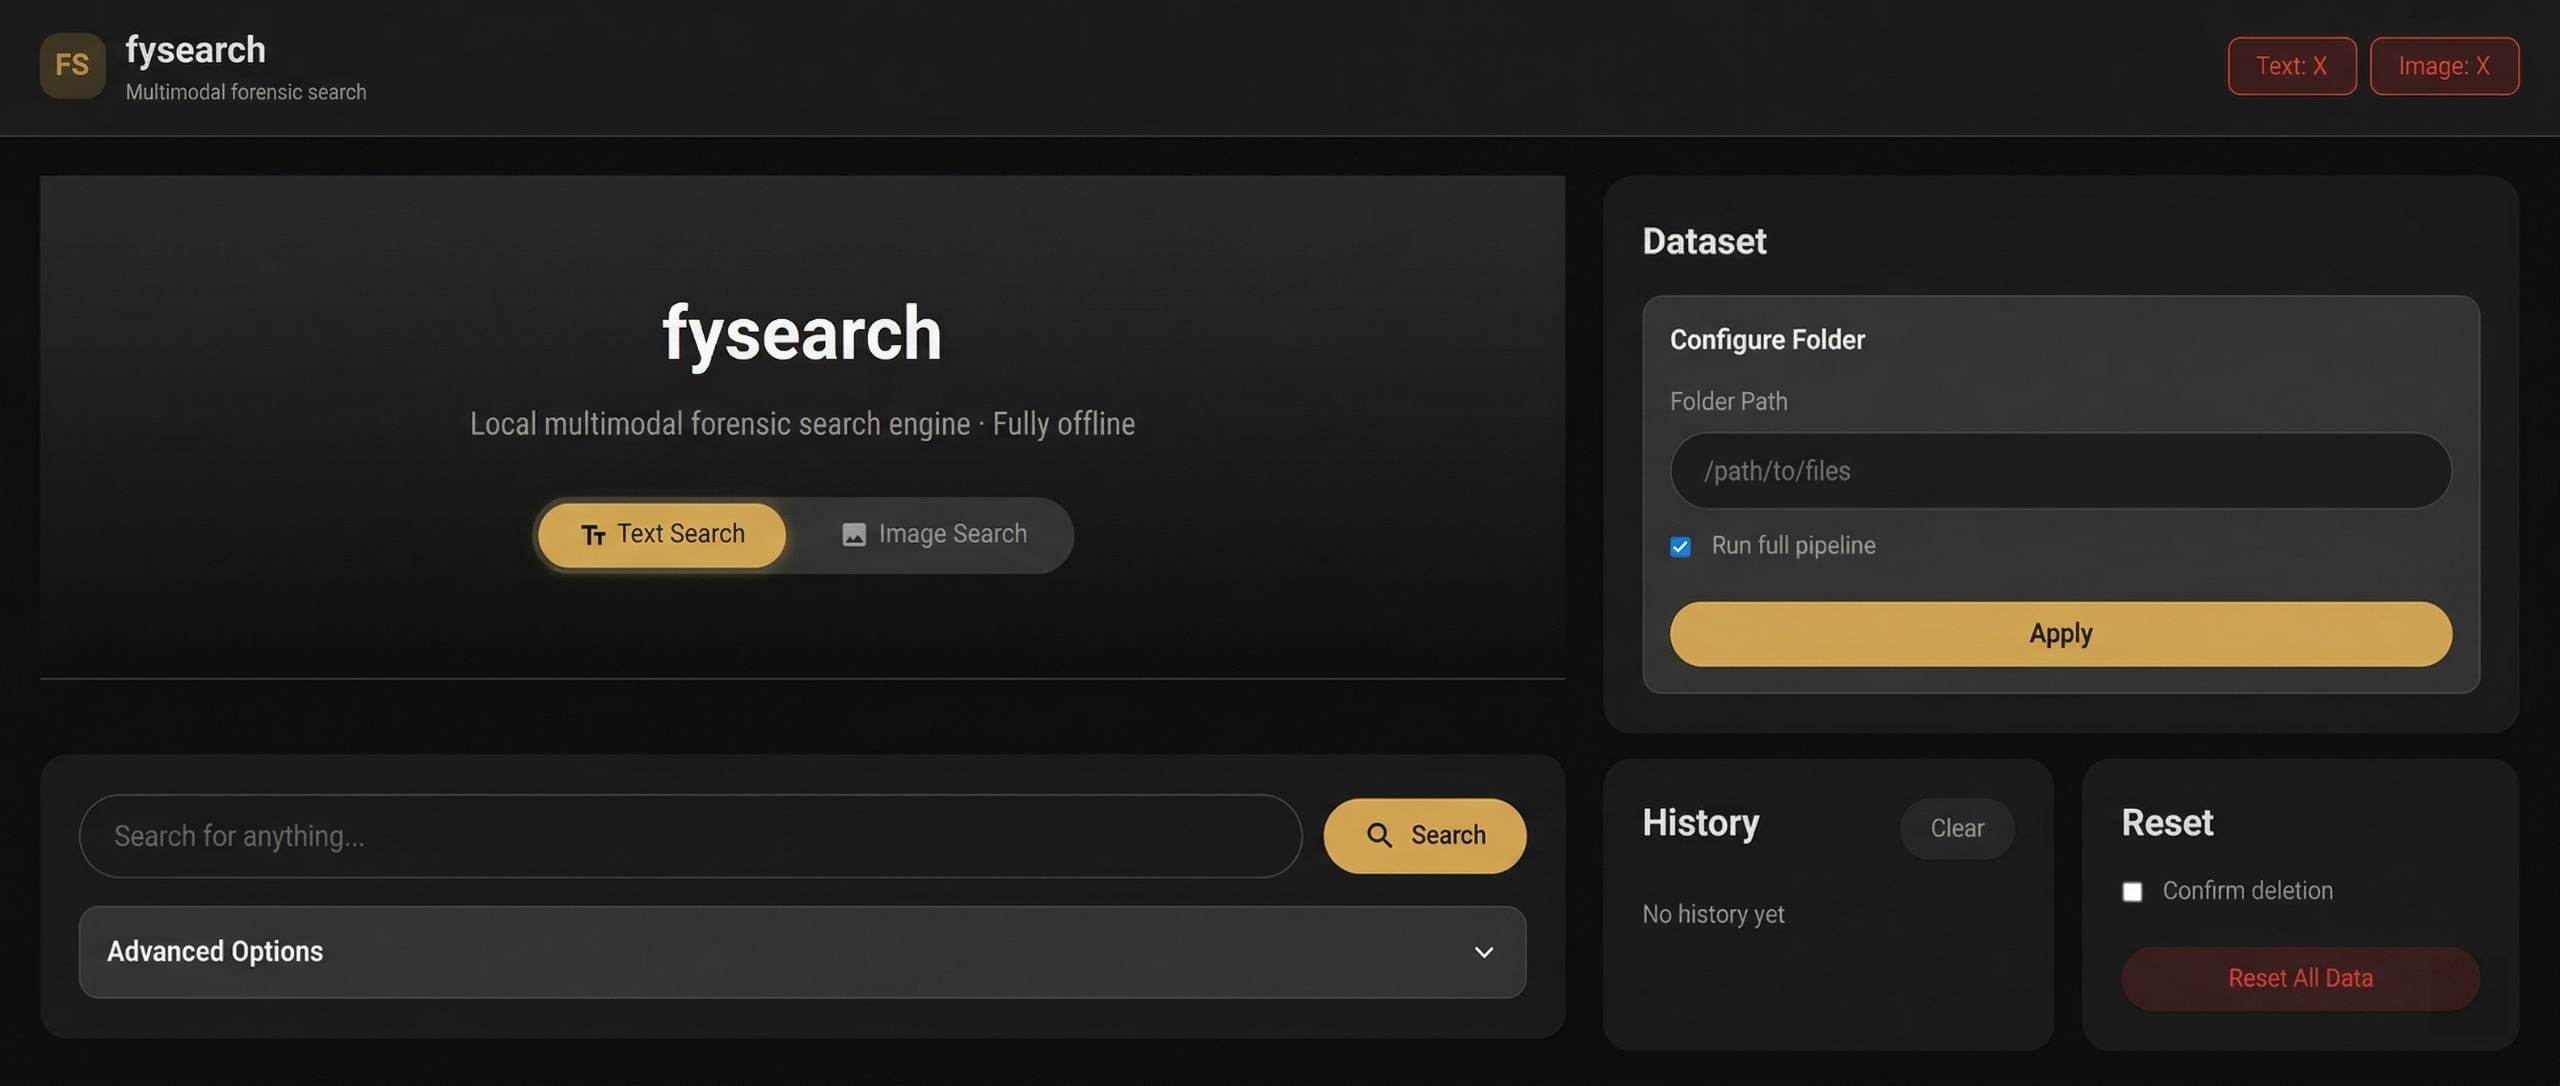
## 使用 Web UI
### 1. 设置您的数据集文件夹
在侧边栏中,将包含您文件的文件夹的**完整路径**粘贴进去:
| 平台 | 示例路径 |
|----------|-------------|
| Linux / WSL | `/mnt/c/Users/YourName/Pictures/test` |
| Windows | `C:\Users\YourName\Pictures\test` |
| macOS | `/Users/YourName/Pictures/test` |
勾选 **"Run full pipeline"** 并点击 **Apply**。这将执行以下操作:
1. **摄取** — 将文件复制到本地存储
2. **提取** — 对图像运行 OCR,从 PDF 中提取文本
3. **构建索引** — 创建可搜索的向量索引
### 2. 搜索
| 标签页 | 操作 |
|-----|-----------|
| **Text Search** | 输入任意查询 → 点击 Search。默认使用 `Auto (Smart)` 模式 — 同时搜索文本和图像。 |
| **Image Search** | 拖放图像、从剪贴板粘贴或点击浏览 → 点击 Search。 |
### 3. 高级选项
- **Search Mode**(搜索模式):`Auto`(两者)、`Text → Text` 或 `Text → Image`
- **Results**(结果):要返回的结果数量(1–50)
### 4. 单独构建索引
如果您稍后添加了新文件,可以从侧边栏重新构建索引,而无需重新摄取:
- **Build Image Index** — 重新嵌入所有图像
- **Build Text Index** — 重新嵌入所有提取的文本
## CLI 参考
所有功能也可通过命令行使用:
```
# 初始化项目
fysearch init
# 显示/编辑 config
fysearch config
fysearch config --text-model "sentence-transformers/clip-ViT-B-32"
fysearch config --ocr-languages "eng+hin"
# 导入文件
fysearch ingest /path/to/your/files
# 提取文本 (OCR + PDF parsing)
fysearch extract
# 构建搜索 indexes
fysearch build-index --modality text
fysearch build-index --modality image
# 搜索
fysearch search-text "your query" --top-k 10
fysearch search-text "your query" --modality image # text → image search
fysearch search-image /path/to/query.jpg --top-k 5 # image → image search
# 启动 web UI
fysearch web # http://127.0.0.1:5000
fysearch web --port 8000 # custom port
fysearch web --host 127.0.0.1 # localhost only
```
## 配置
设置存储在项目根目录的 `fysearch.config.json` 中:
| 键 | 默认值 | 描述 |
|-----|---------|-------------|
| `text_model` | `sentence-transformers/clip-ViT-B-32` | 用于文本 Embeddings 的模型 |
| `image_model` | `sentence-transformers/clip-ViT-B-32` | 用于图像 Embeddings 的模型 |
| `dataset_path` | `""` | 数据集文件夹的路径 |
| `ocr_languages` | `eng` | Tesseract 语言(例如 `eng`、`hin`、`eng+hin`) |
| `embedding_dim` | `512` | 向量维度(必须与模型输出匹配) |
| `max_workers` | `0` | 并行 Worker 数量(`0` = 根据 CPU 核心数自动检测) |
## 适用于 WSL 用户 (Windows Subsystem for Linux)
WSL 是在 Windows 上运行 FYSearch 的**推荐**方式。以下是完整的设置过程:
```
# 1. 在 WSL 内安装 system deps
sudo apt update && sudo apt install tesseract-ocr poppler-utils python3-venv
# 2. 导航到项目 (你的 Windows 文件位于 /mnt/c/ 下)
cd /mnt/c/Users/YourName/Documents/GitHub/finalYear
# 3. 创建 venv 并安装
python3 -m venv .venv
source .venv/bin/activate
pip install -e ".[web,embeddings,faiss,ocr,pdf_images]"
# 4. 初始化并运行
fysearch init
fysearch web
```
然后在您的 **Windows** 浏览器(Edge、Chrome 等)中打开 **http://127.0.0.1:5000**。
## 项目结构
```
finalYear/
├── src/fysearch/ # Source code
│ ├── cli.py # Command-line interface (Typer)
│ ├── config.py # Configuration management
│ ├── db.py # SQLite database layer
│ ├── embeddings.py # CLIP text/image embedders
│ ├── extract.py # OCR + PDF text extraction
│ ├── ingest.py # File ingestion pipeline
│ ├── paths.py # Path resolution + WSL support
│ ├── vector_index.py # FAISS / brute-force vector search
│ ├── webapp.py # Flask web application
│ └── templates/
│ └── index.html # Web UI template
├── data/ # Runtime data (auto-created)
│ ├── input/ # Original input files
│ ├── store/ # Content-addressed file store
│ ├── db/ # SQLite database
│ └── index/ # Vector indexes (.npz)
├── fysearch.config.json # Configuration file
└── pyproject.toml # Python package definition
```
## 支持的文件类型
| 类型 | 扩展名 | 处理方式 |
|------|-----------|------------|
| **图像** | `.jpg`, `.jpeg`, `.png`, `.webp`, `.bmp`, `.tif`, `.tiff` | OCR(可选)+ 图像 Embedding |
| **PDF** | `.pdf` | 文本提取 + 逐页图像渲染 + 扫描页面的 OCR |
| **文本** | `.txt` | 直接读取文本 |
## 故障排除
| 问题 | 解决方案 |
|-------|----------|
| `tesseract not found` | 安装 Tesseract 并确保它位于您的 PATH 中 |
| `poppler not found` | 安装 Poppler 并确保它位于您的 PATH 中 |
| `No module named 'sentence_transformers'` | 运行 `pip install -e ".[embeddings]"` |
| `No module named 'flask'` | 运行 `pip install -e ".[web]"` |
| 虚拟环境无法激活 | 运行 `Set-ExecutionPolicy RemoteSigned -Scope CurrentUser` |
| 端口已被占用 | 使用 `fysearch web --port 8080` |
| WSL:找不到文件夹 | 对于 Windows 路径使用 `/mnt/c/Users/...` 格式 |
| 首次运行缓慢 | 属于正常现象 — CLIP 模型(约 350 MB)会在首次使用时下载 |
| 内存不足 | 减少图像数量或关闭其他应用程序(Embedding 过程需要约 4-8 GB RAM) |
## 技术栈
| 组件 | 技术 |
|-----------|-----------|
| Embeddings | 通过 sentence-transformers 使用 [CLIP ViT-B/32](https://huggingface.co/sentence-transformers/clip-ViT-B-32) |
| Vector Search | [FAISS](https://github.com/facebookresearch/faiss)(CPU)带有暴力搜索回退 |
| OCR | 通过 pytesseract 使用 [Tesseract](https://github.com/tesseract-ocr/tesseract) |
| PDF 渲染 | 通过 pdf2image 使用 [Poppler](https://poppler.freedesktop.org/) |
| Web UI | [Flask](https://flask.palletsprojects.com/) |
| CLI | [Typer](https://typer.tiangolo.com/) + [Rich](https://rich.readthedocs.io/) |
| 数据库 | SQLite(用于并发的 WAL 模式) |
## 许可证
MIT — 详见 [LICENSE](LICENSE)。
[报告.pdf](https://github.com/rachit9876/fysearch/blob/main/Documentation/report.pdf)
## 它能做什么?
| 搜索类型 | 工作原理 | 示例 |
|-------------|-------------|---------|
| **文本 → 文本** | 输入查询,查找具有匹配*含义*(而不仅仅是关键字)的文档。 | 搜索 `"发票欺诈"` → 查找有关账单诈骗的文档,即使它们不包含这些确切的字词 |
| **文本 → 图像** | 输入描述,查找*视觉上匹配*的图像。 | 搜索 `"山上的日落"` → 查找风景照片 |
| **图像 → 图像** | 上传图像,查找*视觉上相似*的图像。 | 上传一张照片 → 查找重复或高度相似的图片 |
| **PDF 搜索** | 自动提取扫描或数字 PDF(OCR + 文本)。 | 在扫描的政府文件内进行搜索 |
### 工作原理(内部机制)
```
Your Files → Ingest → Extract Text (OCR/PDF) → Generate Embeddings → Build Vector Index
↓
Search Query → Embed Query → Find Nearest Vectors → Results
```
- **Embeddings** = 将文本/图像转换为捕获*含义*的数值向量
- **Vector search** = 使用 FAISS 或暴力搜索查找最接近的向量(最相似的内容)
- **OCR** = 使用 Tesseract 从图像/扫描 PDF 中提取文本
## 快速开始(5 分钟)
### 步骤 1:安装系统依赖项
您需要在系统上安装 **Tesseract OCR** 和 **Poppler**(用于 PDF 渲染)。
### 步骤 2:克隆并设置 Python 环境
```
git clone https://github.com/rachit9876/finalYear.git
cd finalYear
```
### 步骤 3:安装 Python 依赖项
```
pip install -e ".[web,embeddings,faiss,ocr,pdf_images]"
```
### 步骤 4:初始化并启动
```
fysearch init
fysearch web
```
在浏览器中打开 **http://127.0.0.1:5000**。大功告成! 🎉
## 使用 Web UI
### 1. 设置您的数据集文件夹
在侧边栏中,将包含您文件的文件夹的**完整路径**粘贴进去:
| 平台 | 示例路径 |
|----------|-------------|
| Linux / WSL | `/mnt/c/Users/YourName/Pictures/test` |
| Windows | `C:\Users\YourName\Pictures\test` |
| macOS | `/Users/YourName/Pictures/test` |
勾选 **"Run full pipeline"** 并点击 **Apply**。这将执行以下操作:
1. **摄取** — 将文件复制到本地存储
2. **提取** — 对图像运行 OCR,从 PDF 中提取文本
3. **构建索引** — 创建可搜索的向量索引
### 2. 搜索
| 标签页 | 操作 |
|-----|-----------|
| **Text Search** | 输入任意查询 → 点击 Search。默认使用 `Auto (Smart)` 模式 — 同时搜索文本和图像。 |
| **Image Search** | 拖放图像、从剪贴板粘贴或点击浏览 → 点击 Search。 |
### 3. 高级选项
- **Search Mode**(搜索模式):`Auto`(两者)、`Text → Text` 或 `Text → Image`
- **Results**(结果):要返回的结果数量(1–50)
### 4. 单独构建索引
如果您稍后添加了新文件,可以从侧边栏重新构建索引,而无需重新摄取:
- **Build Image Index** — 重新嵌入所有图像
- **Build Text Index** — 重新嵌入所有提取的文本
## CLI 参考
所有功能也可通过命令行使用:
```
# 初始化项目
fysearch init
# 显示/编辑 config
fysearch config
fysearch config --text-model "sentence-transformers/clip-ViT-B-32"
fysearch config --ocr-languages "eng+hin"
# 导入文件
fysearch ingest /path/to/your/files
# 提取文本 (OCR + PDF parsing)
fysearch extract
# 构建搜索 indexes
fysearch build-index --modality text
fysearch build-index --modality image
# 搜索
fysearch search-text "your query" --top-k 10
fysearch search-text "your query" --modality image # text → image search
fysearch search-image /path/to/query.jpg --top-k 5 # image → image search
# 启动 web UI
fysearch web # http://127.0.0.1:5000
fysearch web --port 8000 # custom port
fysearch web --host 127.0.0.1 # localhost only
```
## 配置
设置存储在项目根目录的 `fysearch.config.json` 中:
| 键 | 默认值 | 描述 |
|-----|---------|-------------|
| `text_model` | `sentence-transformers/clip-ViT-B-32` | 用于文本 Embeddings 的模型 |
| `image_model` | `sentence-transformers/clip-ViT-B-32` | 用于图像 Embeddings 的模型 |
| `dataset_path` | `""` | 数据集文件夹的路径 |
| `ocr_languages` | `eng` | Tesseract 语言(例如 `eng`、`hin`、`eng+hin`) |
| `embedding_dim` | `512` | 向量维度(必须与模型输出匹配) |
| `max_workers` | `0` | 并行 Worker 数量(`0` = 根据 CPU 核心数自动检测) |
## 适用于 WSL 用户 (Windows Subsystem for Linux)
WSL 是在 Windows 上运行 FYSearch 的**推荐**方式。以下是完整的设置过程:
```
# 1. 在 WSL 内安装 system deps
sudo apt update && sudo apt install tesseract-ocr poppler-utils python3-venv
# 2. 导航到项目 (你的 Windows 文件位于 /mnt/c/ 下)
cd /mnt/c/Users/YourName/Documents/GitHub/finalYear
# 3. 创建 venv 并安装
python3 -m venv .venv
source .venv/bin/activate
pip install -e ".[web,embeddings,faiss,ocr,pdf_images]"
# 4. 初始化并运行
fysearch init
fysearch web
```
然后在您的 **Windows** 浏览器(Edge、Chrome 等)中打开 **http://127.0.0.1:5000**。
## 项目结构
```
finalYear/
├── src/fysearch/ # Source code
│ ├── cli.py # Command-line interface (Typer)
│ ├── config.py # Configuration management
│ ├── db.py # SQLite database layer
│ ├── embeddings.py # CLIP text/image embedders
│ ├── extract.py # OCR + PDF text extraction
│ ├── ingest.py # File ingestion pipeline
│ ├── paths.py # Path resolution + WSL support
│ ├── vector_index.py # FAISS / brute-force vector search
│ ├── webapp.py # Flask web application
│ └── templates/
│ └── index.html # Web UI template
├── data/ # Runtime data (auto-created)
│ ├── input/ # Original input files
│ ├── store/ # Content-addressed file store
│ ├── db/ # SQLite database
│ └── index/ # Vector indexes (.npz)
├── fysearch.config.json # Configuration file
└── pyproject.toml # Python package definition
```
## 支持的文件类型
| 类型 | 扩展名 | 处理方式 |
|------|-----------|------------|
| **图像** | `.jpg`, `.jpeg`, `.png`, `.webp`, `.bmp`, `.tif`, `.tiff` | OCR(可选)+ 图像 Embedding |
| **PDF** | `.pdf` | 文本提取 + 逐页图像渲染 + 扫描页面的 OCR |
| **文本** | `.txt` | 直接读取文本 |
## 故障排除
| 问题 | 解决方案 |
|-------|----------|
| `tesseract not found` | 安装 Tesseract 并确保它位于您的 PATH 中 |
| `poppler not found` | 安装 Poppler 并确保它位于您的 PATH 中 |
| `No module named 'sentence_transformers'` | 运行 `pip install -e ".[embeddings]"` |
| `No module named 'flask'` | 运行 `pip install -e ".[web]"` |
| 虚拟环境无法激活 | 运行 `Set-ExecutionPolicy RemoteSigned -Scope CurrentUser` |
| 端口已被占用 | 使用 `fysearch web --port 8080` |
| WSL:找不到文件夹 | 对于 Windows 路径使用 `/mnt/c/Users/...` 格式 |
| 首次运行缓慢 | 属于正常现象 — CLIP 模型(约 350 MB)会在首次使用时下载 |
| 内存不足 | 减少图像数量或关闭其他应用程序(Embedding 过程需要约 4-8 GB RAM) |
## 技术栈
| 组件 | 技术 |
|-----------|-----------|
| Embeddings | 通过 sentence-transformers 使用 [CLIP ViT-B/32](https://huggingface.co/sentence-transformers/clip-ViT-B-32) |
| Vector Search | [FAISS](https://github.com/facebookresearch/faiss)(CPU)带有暴力搜索回退 |
| OCR | 通过 pytesseract 使用 [Tesseract](https://github.com/tesseract-ocr/tesseract) |
| PDF 渲染 | 通过 pdf2image 使用 [Poppler](https://poppler.freedesktop.org/) |
| Web UI | [Flask](https://flask.palletsprojects.com/) |
| CLI | [Typer](https://typer.tiangolo.com/) + [Rich](https://rich.readthedocs.io/) |
| 数据库 | SQLite(用于并发的 WAL 模式) |
## 许可证
MIT — 详见 [LICENSE](LICENSE)。
[报告.pdf](https://github.com/rachit9876/fysearch/blob/main/Documentation/report.pdf)
## 它能做什么?
| 搜索类型 | 工作原理 | 示例 |
|-------------|-------------|---------|
| **文本 → 文本** | 输入查询,查找具有匹配*含义*(而不仅仅是关键字)的文档。 | 搜索 `"发票欺诈"` → 查找有关账单诈骗的文档,即使它们不包含这些确切的字词 |
| **文本 → 图像** | 输入描述,查找*视觉上匹配*的图像。 | 搜索 `"山上的日落"` → 查找风景照片 |
| **图像 → 图像** | 上传图像,查找*视觉上相似*的图像。 | 上传一张照片 → 查找重复或高度相似的图片 |
| **PDF 搜索** | 自动提取扫描或数字 PDF(OCR + 文本)。 | 在扫描的政府文件内进行搜索 |
### 工作原理(内部机制)
```
Your Files → Ingest → Extract Text (OCR/PDF) → Generate Embeddings → Build Vector Index
↓
Search Query → Embed Query → Find Nearest Vectors → Results
```
- **Embeddings** = 将文本/图像转换为捕获*含义*的数值向量
- **Vector search** = 使用 FAISS 或暴力搜索查找最接近的向量(最相似的内容)
- **OCR** = 使用 Tesseract 从图像/扫描 PDF 中提取文本
## 快速开始(5 分钟)
### 步骤 1:安装系统依赖项
您需要在系统上安装 **Tesseract OCR** 和 **Poppler**(用于 PDF 渲染)。
🐧 Linux / WSL (Ubuntu/Debian)
``` sudo apt update sudo apt install tesseract-ocr poppler-utils ```🪟 Windows (原生)
**使用 Chocolatey(推荐):** ``` choco install tesseract poppler ``` **手动安装:** - Tesseract:从 [UB-Mannheim/tesseract](https://github.com/UB-Mannheim/tesseract/wiki) 下载 - Poppler:从 [poppler-windows](https://github.com/oschwartz10612/poppler-windows/releases) 下载🍎 macOS
``` brew install tesseract poppler ```🐧 Linux / WSL / 🍎 macOS
``` python3 -m venv .venv source .venv/bin/activate ```🪟 Windows (PowerShell)
``` python -m venv .venv .venv\Scripts\Activate.ps1 ```标签:CLIP模型, CPU优化, FAISS向量检索, OCR文字识别, PDF解析, Poppler, Tesseract OCR, 人工智能, 向量数据库, 图像搜索, 域渗透, 多模态取证, 敏感数据检索, 数字取证, 数据泄露, 文档管理系统, 本地部署, 深度学习, 用户模式Hook绕过, 电子数据取证, 离线搜索引擎, 自动化脚本, 语义搜索, 逆向工具, 隐私优先, 隐私计算, 零信任网络