jtenniswood/espcontrol
GitHub: jtenniswood/espcontrol
EspControl 是一款将低成本 ESP32 触摸屏变为 Home Assistant 智能家居控制面板的免代码固件,通过浏览器即可完成安装和配置。
Stars: 810 | Forks: 107

# EspControl
**将经济实惠的触摸屏变成简单的智能家居控制面板。**
EspControl 让你可以将日常使用的 Home Assistant 控件放在专用屏幕上:门边的灯光、走廊的暖气、杂物间的车库控制、桌上的室温,或者是用于场景和警报的整洁床头面板。
你无需编写代码、编辑 YAML 或构建自己的 ESPHome 设置。只需从 Web 浏览器安装固件,将屏幕连接到 WiFi,将其添加到 Home Assistant,然后从屏幕内置的设置页面中选择要在显示屏上显示的内容。
**文档和安装指南:** [jtenniswood.github.io/espcontrol](https://jtenniswood.github.io/espcontrol/)
## 它能实现什么
- **真正的家庭控制面板** - 为家人和客人提供简单的按钮,而不是要求他们使用 Home Assistant 应用。
- **逐个房间控制** - 在有用的地方放置一个小屏幕:厨房、走廊、办公室、车库、卧室或门旁边。
- **一键例程** - 运行场景、脚本和自动化,例如观影模式、就寝模式、离家模式或花园灯光。
- **实时家庭信息** - 一目了然地显示温度、传感器、天气、日期、时钟和其他 Home Assistant 读数。
- **灵活的控制页面** - 保持主屏幕简洁,然后打开额外页面以显示房间、设备或不常用的操作。
- **本地智能家居控制** - 面板在你自己的网络上与 Home Assistant 通信。它不是云仪表板。
- **后续修改简单** - 重新排列按钮、更改图标、调整活动颜色、备份你的设置以及安装固件更新,而无需重新开始。
## 你可以控制什么
EspControl 可与 Home Assistant 中已有的设备和 helper 配合使用,包括:
- 灯光、开关、风扇和智能插座
- 场景、脚本、按钮和自动化
- 百叶窗、卷帘、遮阳篷和车库门
- 媒体播放器,用于控制播放、音量、进度和正在播放的显示
- 恒温器和 HVAC 设备的温控器
- 传感器,如温度、湿度、功率、电池或自定义文本状态
- 天气、时钟、日期和时区
- 支持面板上的内置继电器
只要 Home Assistant 能检测到它,EspControl 就能让你更轻松地将该控件或信息放到触摸屏上。
## 工作原理
1. **购买受支持的 ESP32 触摸屏。**
2. **使用 Web 安装程序,从浏览器安装** EspControl。
3. **使用其创建的设置屏幕将屏幕连接到 WiFi**。
4. **当 Home Assistant 发现它时,将其添加到** Home Assistant。
5. **允许 Home Assistant 操作**,以便面板有权控制你的设备。
6. **打开面板的网页**,选择你想要的按钮、传感器、页面、活动颜色和显示设置。
之后,面板将独立运行。你仍然可以随时通过手机、平板电脑或电脑浏览器更改布局。
从这里开始:[安装 EspControl](https://jtenniswood.github.io/espcontrol/getting-started/install)
## 支持的屏幕
EspControl 支持多种低成本的 ESP32 触摸屏。较大的屏幕为你提供了更多的控件空间;较小的屏幕适用于门边、桌面上或单独的房间内。
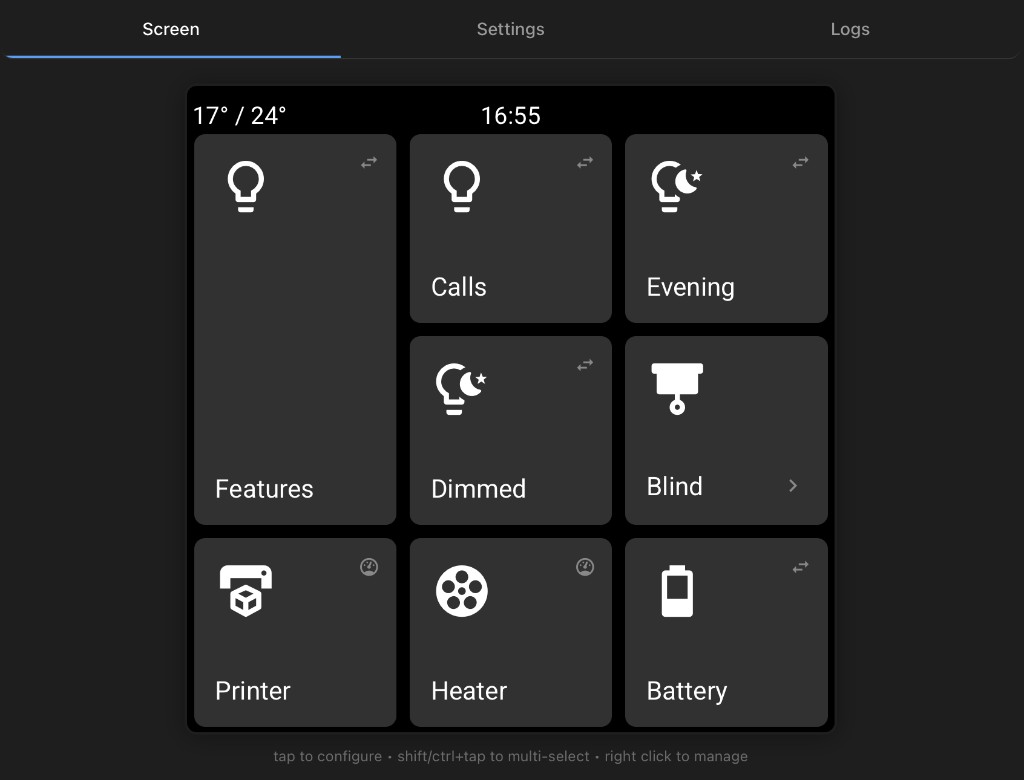
| | 10.1" JC8012P4A1 | 7" JC1060P470 | 4.3" JC4880P443 | 4" ESP32-P4 86 Panel | 4" 4848S040 |
|---|:-:|:-:|:-:|:-:|:-:|
| 图片 | 图片待定 | 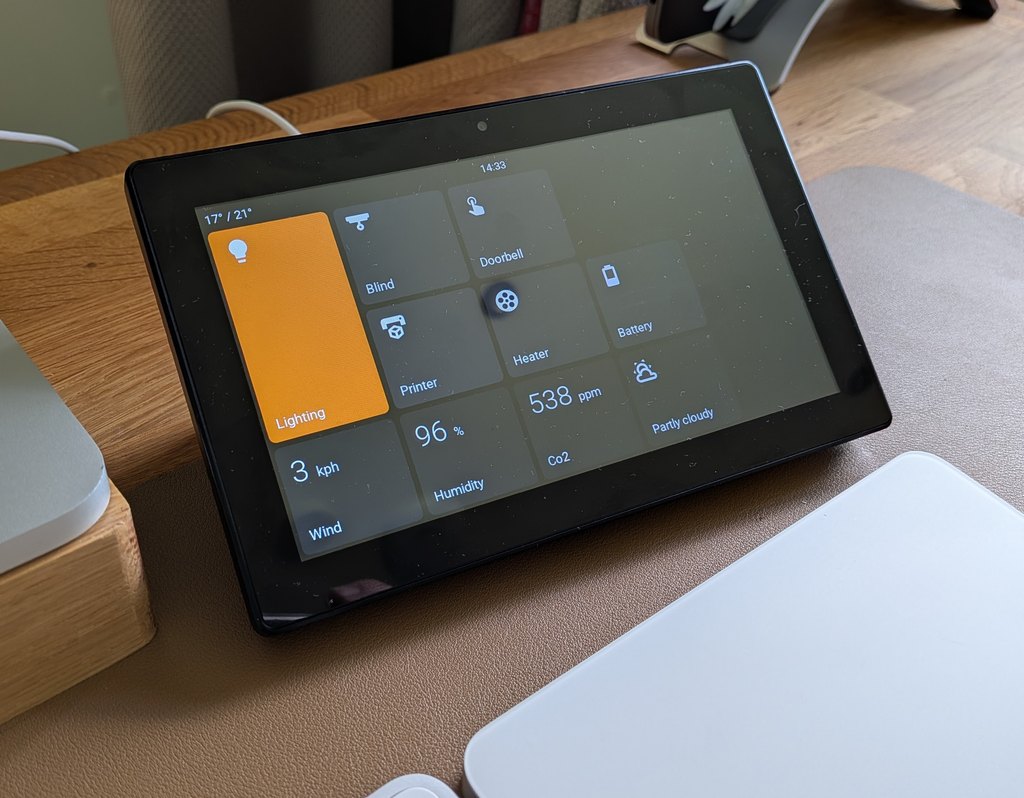 | 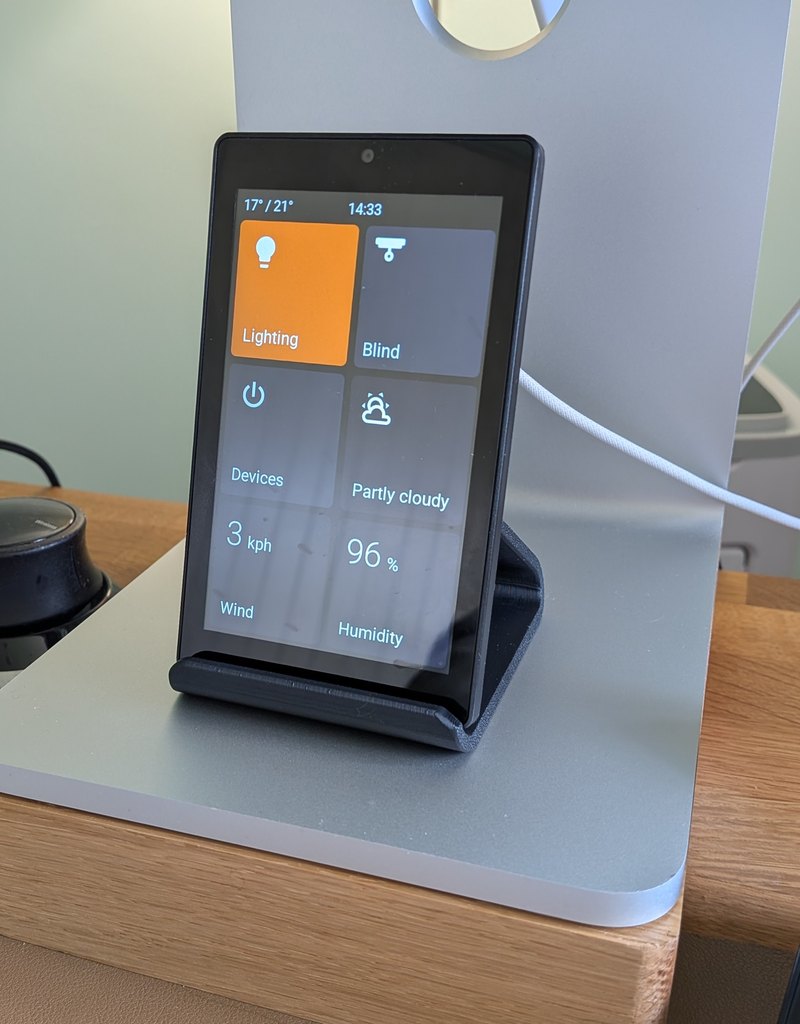 | 图片待定 | 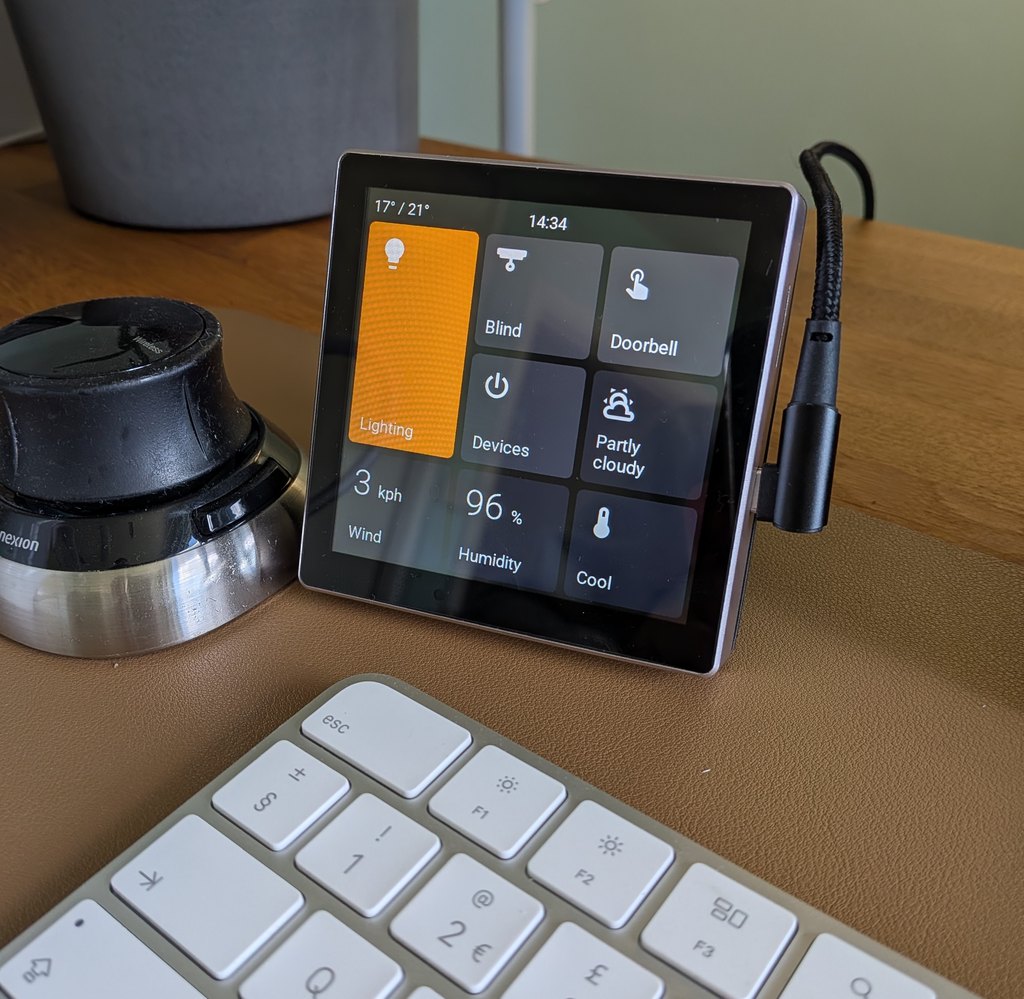 |
| 布局 | 1280x800 横屏 · 20 个卡片位 | 1024x600 横屏 · 15 个卡片位 | 480x800 竖屏 · 6 个卡片位 | 720x720 正方形 · 9 个卡片位 | 480x480 正方形 · 9 个卡片位 |
| 处理器 | ESP32-P4 | ESP32-P4 | ESP32-P4 | ESP32-P4 | ESP32-S3 |
| 面板 | [AliExpress 约£40](https://s.click.aliexpress.com/e/_c4W6TYvp) | [AliExpress 约£40](https://s.click.aliexpress.com/e/_c335W0r5) | [AliExpress 约£24](https://s.click.aliexpress.com/e/_c32jr3eN) | [AliExpress 约£45](https://s.click.aliexpress.com/e/_c3O6ndAX) | [AliExpress 约£16](https://s.click.aliexpress.com/e/_c3sIhvBv) |
| 3D 支架 | [MakerWorld](https://makerworld.com/en/models/2490049-guition-p4-10inch-screen-stand#profileId-2736046) | [MakerWorld](https://makerworld.com/en/models/2387421-guition-esp32p4-jc1060p470-7inch-screen-desk-mount#profileId-2614995) | [MakerWorld](https://makerworld.com/en/models/2982320-desk-stand-for-4-3-inch-jc4880p443-esp32-screen#profileId-3346161) | [MakerWorld](https://makerworld.com/en/models/2720366-waveshare-esp32-p4-smart-86-box-screen-desk-stand#profileId-3013481) | [MakerWorld](https://makerworld.com/en/models/2581572-guition-esp32s3-4848s040-case-stand#profileId-2847301) |
有关每个型号的完整详细信息,请参阅[屏幕指南](https://jtenniswood.github.io/espcontrol/getting-started/install)。
## 专为日常使用而构建
- **简单的设置页面** - 从普通浏览器配置屏幕。
- **拖放式布局** - 无需编辑文件即可移动控件。
- **子页面** - 为房间或控件组创建类似文件夹的页面。
- **不同的卡片尺寸** - 使重要的控件更大,并保持较小的项目紧凑。
- **专用卡片类型** - 开关、灯光、操作、本地操作、选项选择、Webhook、触发器、传感器、本地传感器、门与窗、存在状态、滑块、风扇、扫地机器人、割草机、遮阳篷、车库门、锁、警报、日期与时间、世界时钟、天气、摄像头、媒体、气候、内部开关、屏幕锁定和子页面。
- **Home Assistant 操作支持** - 直接从面板运行场景、脚本、自动化、按钮、Webhook 和 helper 更改。
- **摄像头和媒体显示** - 显示摄像头图像、媒体播放器状态、封面图、播放控件、音量和进度。
- **显示计划** - 使用闲置计时器、夜间计划、亮度控制和可选的存在传感器,使屏幕在真实房间中表现良好。
- **外观控件** - 从设置页面中选择图标、标签、状态文本、活动颜色、时钟显示、旋转和温度单位。
- **屏幕保护和亮度控件** - 在不使用时使显示屏变暗或休眠。
- **自动更新** - 首次安装后保持标准固件最新。
- **备份和恢复** - 保存你的布局并将其复制到另一个面板。
- **语言支持** - 选择面板语言,并为贡献者提供翻译文件。
## 你需要什么
- 受支持的 ESP32 触摸屏
- 用于首次安装的 USB-C 数据线
- 运行 Chrome 或 Edge 的计算机,用于刷入固件
- 在家庭网络上运行的 Home Assistant
- 用于面板的 2.4 GHz WiFi
## 项目链接
- [文档](https://jtenniswood.github.io/espcontrol/)
- [安装指南](https://jtenniswood.github.io/espcontrol/getting-started/install)
- [常见问题](https://jtenniswood.github.io/espcontrol/reference/faq)
- [报告错误或请求功能](https://github.com/jtenniswood/espcontrol/issues)
## 许可证
EspControl 采用 [PolyForm Noncommercial License 1.0.0](LICENSE) 授权。
通俗地说,你可以出于非商业目的查看、更改和共享该软件。商业用途需要项目所有者的单独许可。
这是源码可见的非商业许可证,而不是 OSI 批准的开源许可证,因为标准的开源定义不允许限制商业用途。
必要声明:参见 [NOTICE](NOTICE)。
## 支持这个项目
如果 EspControl 在你的家中很有用,你可以通过请我喝杯咖啡来支持持续的开发。

标签:ESPHome, Home Assistant, IPv6支持, 嵌入式固件, 控制面板, 智能家居, 物联网