0xBugatti/PentestOPS
GitHub: 0xBugatti/PentestOPS
一款基于 Next.js、Express 和 MongoDB 构建的综合渗透测试运营管理仪表板,用于集中管理项目、任务、客户、资产及安全发现。
Stars: 310 | Forks: 52
# PentesterOPS 仪表板
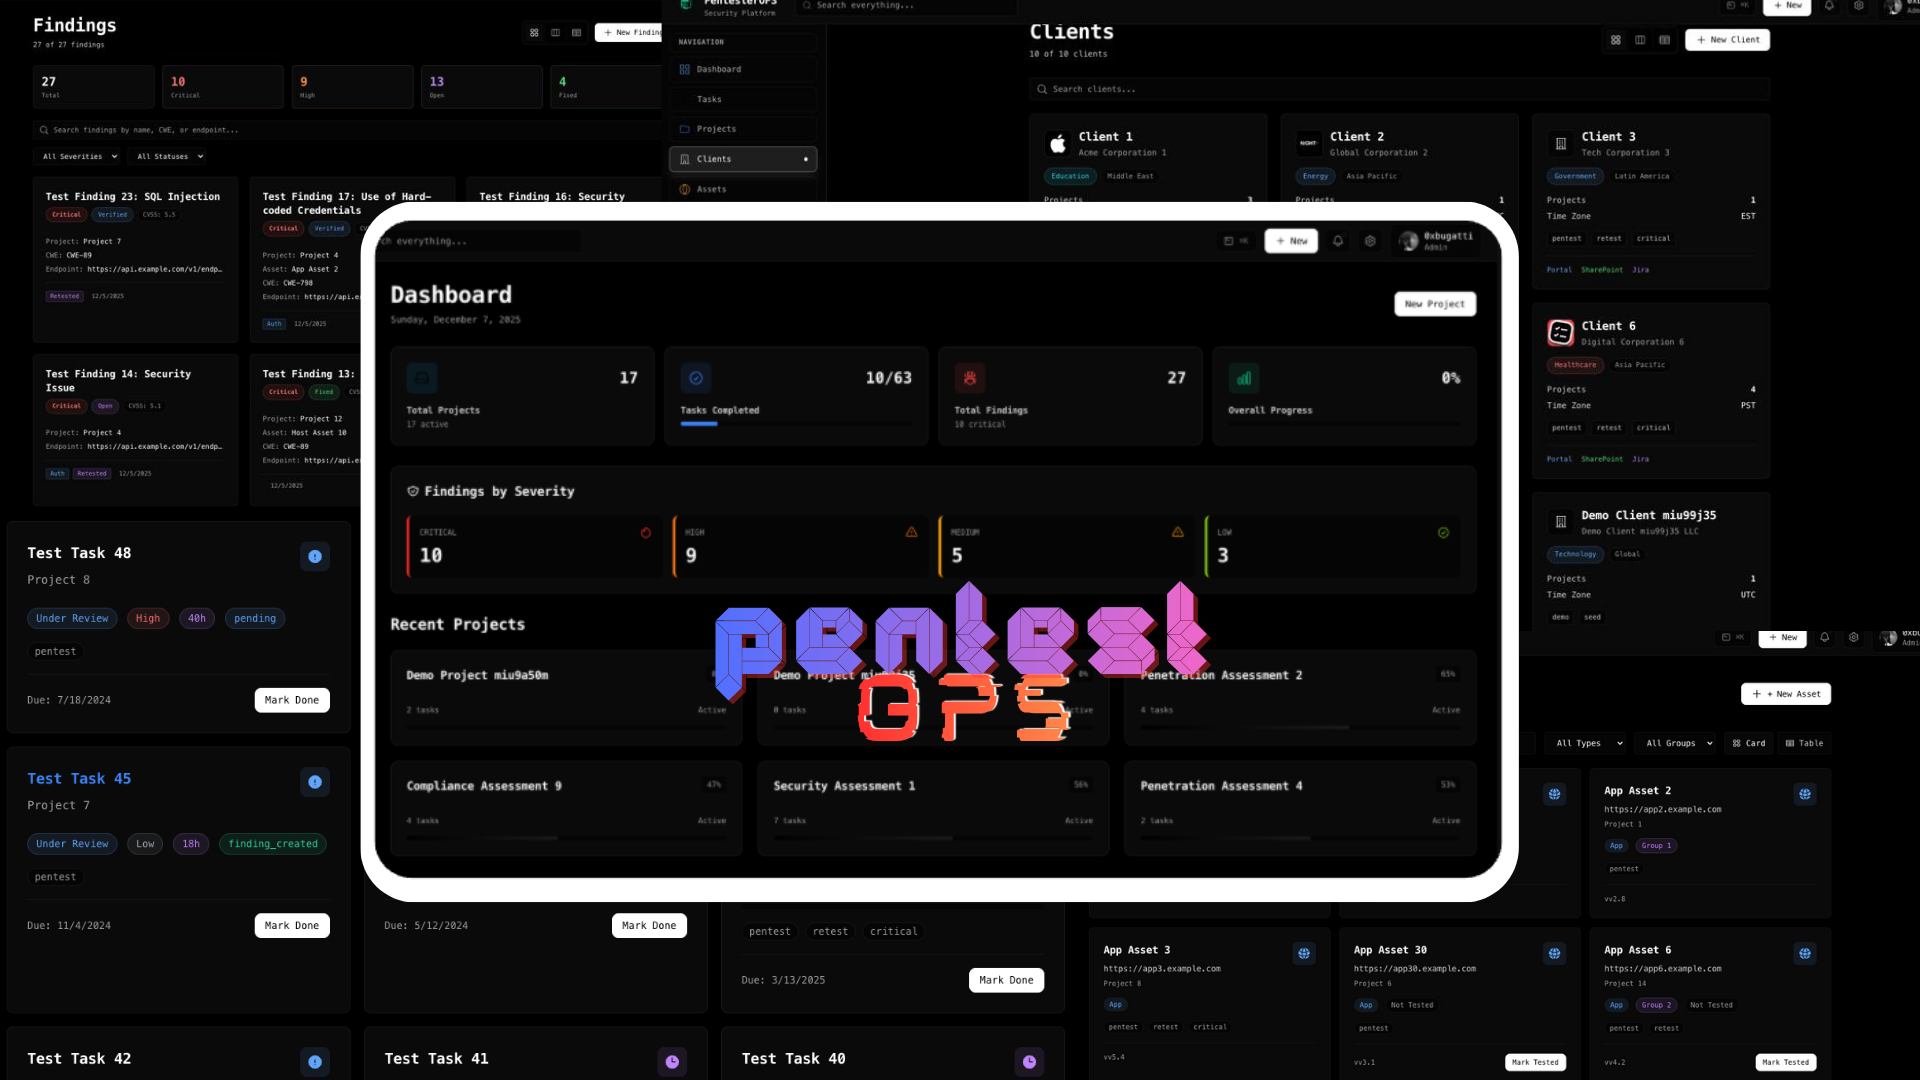
一个综合性的渗透测试操作仪表板,用于管理项目、任务、安全发现、客户和资产。使用 Next.js、Express 和 MongoDB 构建。


## 🚀 功能
- **项目管理**:通过任务、页面和团队协作组织渗透测试项目
- **任务管理**:提供看板、表格和卡片视图,支持过滤、搜索和子任务
- **发现管理**:通过集成 CWE 数据库跟踪安全发现
- **客户管理**:管理包含照片、链接和元数据的客户信息
- **资产管理**:跟踪和管理与项目及任务关联的资产
- **富文本编辑器**:基于 Editor.js 的类 Notion 页面(包含标题、段落、代码、表格、提示框和折叠列表)
- **检查清单**:创建可复用的检查清单并将其链接到任务
- **评论**:支持在任务和发现上进行线索式评论
- **文件附件**:支持上传 PDF、DOCX、XLSX、CSV、ZIP 和图片
- **版本历史**:通过差异查看和恢复功能跟踪更改
- **全局搜索**:支持跨所有实体的全文搜索
- **深色模式**:专为技术工作流优化的深色主题
- **单容器部署**:通过 Docker 轻松部署
## 📋 目录
- [技术栈](#tech-stack)
- [前置条件](#prerequisites)
- [快速开始](#quick-start)
- [开发](#development)
- [Docker 部署](#docker-deployment)
- [VPS 部署](#vps-deployment)
- [配置](#configuration)
- [API 文档](#api-documentation)
- [项目结构](#project-structure)
- [故障排除](#troubleshooting)
## 🛠 技术栈
- **前端**:Next.js 14 (App Router), React, TypeScript, TailwindCSS
- **后端**:Node.js, Express, TypeScript
- **数据库**:使用 Mongoose 的 MongoDB
- **身份验证**:带有 refresh token 的 JWT
- **富文本编辑器**:带有多插件的 Editor.js
- **文件存储**:使用 multer 的本地文件系统
- **容器化**:Docker(单容器)
## 📦 前置条件
- **Node.js**:18+
- **Docker**:最新版本(用于容器化部署)
- **MongoDB**:5.0+(或使用 MongoDB Atlas)
- **Git**:用于克隆代码库
## 🚀 快速开始
### 本地开发
1. **克隆代码库**
git clone https://github.com/yourusername/MyPentest-Dashboard.git
cd MyPentest-Dashboard
2. **安装依赖**
# 安装根目录依赖
npm install
# 安装前端依赖
cd frontend && npm install && cd ..
# 安装后端依赖
cd backend && npm install && cd ..
3. **配置环境变量**
在根目录下创建 `.env` 文件:
# Backend
NODE_ENV=development
BACKEND_PORT=4000
MONGODB_URI=mongodb://localhost:27017/pentest-dashboard
JWT_SECRET=your-jwt-secret-key
JWT_REFRESH_SECRET=your-refresh-secret-key
CORS_ORIGIN=http://localhost:3000
ALLOW_REGISTRATION=true
MAX_FILE_SIZE=10485760
UPLOAD_DIR=./backend/uploads
# Frontend
NEXT_PUBLIC_API_URL=http://localhost:4000
生成安全密钥:
openssl rand -base64 32 # 用于 JWT_SECRET
openssl rand -base64 32 # 用于 JWT_REFRESH_SECRET
4. **启动 MongoDB**
# 使用 Docker
docker run -d --name mongodb -p 27017:27017 mongo:latest
# 或使用 MongoDB Atlas(在 .env 中更新 MONGODB_URI)
5. **运行开发服务器**
# 从根目录执行
npm run dev
6. **访问应用**
- 前端:http://localhost:3000
- 后端 API:http://localhost:4000
7. **创建管理员用户**
# 通过 /login 的 UI 注册,或使用种子脚本:
node scripts/seed-admin.js
## 🐳 Docker 部署
### 单容器(推荐)
应用使用包含 MongoDB、后端和前端的单个 Docker 容器。
#### 构建并运行
```
# 构建镜像
docker build -t pentestops-dashboard:latest .
# 运行容器
docker run -d \
--name pentestops \
--restart unless-stopped \
-p 3000:3000 \
-p 4000:4000 \
-p 27017:27017 \
-v pentestops-data:/data/db \
-v pentestops-uploads:/app/uploads \
-e JWT_SECRET=$(openssl rand -base64 32) \
-e JWT_REFRESH_SECRET=$(openssl rand -base64 32) \
-e NODE_ENV=production \
-e CORS_ORIGIN=https://yourdomain.com \
-e ALLOW_REGISTRATION=false \
pentestops-dashboard:latest
```
#### 使用环境变量文件
创建 `.env` 文件:
```
NODE_ENV=production
BACKEND_PORT=4000
FRONTEND_PORT=3000
MONGODB_URI=mongodb://localhost:27017/pentest-dashboard
JWT_SECRET=your-super-secret-jwt-key
JWT_REFRESH_SECRET=your-super-secret-refresh-key
CORS_ORIGIN=https://yourdomain.com
ALLOW_REGISTRATION=false
MAX_FILE_SIZE=10485760
UPLOAD_DIR=/app/uploads
NEXT_PUBLIC_API_URL=https://yourdomain.com
```
使用环境变量文件运行:
```
docker run -d \
--name pentestops \
--restart unless-stopped \
-p 3000:3000 \
-p 4000:4000 \
-v pentestops-data:/data/db \
-v pentestops-uploads:/app/uploads \
--env-file .env \
pentestops-dashboard:latest
```
#### 容器管理
```
# 查看日志
docker logs -f pentestops
# 停止容器
docker stop pentestops
# 启动容器
docker start pentestops
# 重启容器
docker restart pentestops
# 移除容器
docker stop pentestops && docker rm pentestops
```
## 🌐 部署
1. **安装 Docker**
curl -fsSL https://get.docker.com -o get-docker.sh
sudo sh get-docker.sh
sudo systemctl start docker
sudo systemctl enable docker
2. **克隆并部署**
cd /opt
sudo git clone https://github.com/yourusername/MyPentest-Dashboard.git pentestops
cd pentestops
sudo chmod +x deploy.sh
sudo ./deploy.sh
`deploy.sh` 脚本将:
- 创建应用目录
- 生成安全的 JWT 密钥
- 构建 Docker 镜像
- 启动包含所有服务的容器
3. **访问应用**
- 前端:`http://your-vps-ip:3000`
- 后端 API:`http://your-vps-ip:4000`
### 域名和 SSL 设置
1. **安装 Nginx 和 Certbot**
sudo apt update
sudo apt install -y nginx certbot python3-certbot-nginx
2. **配置 Nginx**
创建 `/etc/nginx/sites-available/pentestops`:
server {
listen 80;
server_name yourdomain.com www.yourdomain.com;
location / {
proxy_pass http://localhost:3000;
proxy_set_header Host $host;
proxy_set_header X-Real-IP $remote_addr;
proxy_set_header X-Forwarded-For $proxy_add_x_forwarded_for;
proxy_set_header X-Forwarded-Proto $scheme;
}
}
server {
listen 80;
server_name api.yourdomain.com;
location / {
proxy_pass http://localhost:4000;
proxy_set_header Host $host;
proxy_set_header X-Real-IP $remote_addr;
proxy_set_header X-Forwarded-For $proxy_add_x_forwarded_for;
proxy_set_header X-Forwarded-Proto $scheme;
client_max_body_size 10M;
}
}
启用站点:
sudo ln -s /etc/nginx/sites-available/pentestops /etc/nginx/sites-enabled/
sudo rm /etc/nginx/sites-enabled/default
sudo nginx -t
sudo systemctl reload nginx
3. **获取 SSL 证书**
sudo certbot --nginx -d yourdomain.com -d www.yourdomain.com -d api.yourdomain.com
4. **更新环境变量**
编辑 `/opt/pentestops/.env`:
CORS_ORIGIN=https://yourdomain.com
NEXT_PUBLIC_API_URL=https://api.yourdomain.com
重启容器:
sudo docker restart pentestops
### 安全加固
1. **配置防火墙**
sudo apt install -y ufw
sudo ufw allow 22/tcp
sudo ufw allow 80/tcp
sudo ufw allow 443/tcp
sudo ufw enable
2. **禁用 root SSH 登录**
sudo nano /etc/ssh/sshd_config
# 设置:PermitRootLogin no
sudo systemctl restart sshd
3. **设置自动备份**
# 创建备份脚本
sudo nano /opt/pentestops/backup.sh
#!/bin/bash
BACKUP_DIR="/opt/backups/pentestops"
DATE=$(date +%Y%m%d_%H%M%S)
mkdir -p $BACKUP_DIR
docker exec pentestops mongodump --archive=/tmp/backup.archive --db=pentest-dashboard
docker cp pentestops:/tmp/backup.archive $BACKUP_DIR/mongodb_$DATE.archive
tar -czf $BACKUP_DIR/uploads_$DATE.tar.gz /opt/pentestops/uploads
find $BACKUP_DIR -type f -mtime +7 -delete
赋予可执行权限并设置定时任务:
chmod +x /opt/pentestops/backup.sh
crontab -e
# 添加:0 2 * * * /opt/pentestops/backup.sh
## ⚙️ 配置
### 环境变量
#### 后端
| 变量 | 描述 | 默认值 | 必填 |
|----------|-------------|---------|----------|
| `NODE_ENV` | 环境模式 | `development` | 否 |
| `BACKEND_PORT` | 后端 API 端口 | `4000` | 否 |
| `MONGODB_URI` | MongoDB 连接字符串 | `mongodb://localhost:27017/pentest-dashboard` | 是 |
| `JWT_SECRET` | JWT token 密钥 | - | 是 |
| `JWT_REFRESH_SECRET` | Refresh token 密钥 | - | 是 |
| `CORS_ORIGIN` | 允许的 CORS 源 | `*` | 否 |
| `ALLOW_REGISTRATION` | 允许公开注册 | `true` | 否 |
| `MAX_FILE_SIZE` | 最大文件上传大小(字节) | `10485760` (10MB) | 否 |
| `UPLOAD_DIR` | 上传目录路径 | `./uploads` | 否 |
#### 前端
| 变量 | 描述 | 默认值 | 必填 |
|----------|-------------|---------|----------|
| `NEXT_PUBLIC_API_URL` | 后端 API URL | `http://localhost:4000` | 是 |
| `NODE_ENV` | 环境模式 | `development` | 否 |
### 文件上传类型
应用支持以下文件类型:
- **图片**:JPG, JPEG, PNG, GIF, WebP
- **文档**:PDF, DOC, DOCX
- **表格**:XLS, XLSX, CSV
- **文本**:TXT
- **归档**:ZIP
最大文件大小:10MB(可通过 `MAX_FILE_SIZE` 配置)
## 📚 API 文档
### 身份验证
- `POST /api/auth/register` - 注册新用户
- `POST /api/auth/login` - 登录
- `POST /api/auth/refresh` - 刷新 access token
- `GET /api/auth/profile` - 获取用户资料
- `PUT /api/auth/profile` - 更新用户资料
### 项目
- `GET /api/projects` - 列出所有项目
- `POST /api/projects` - 创建项目
- `GET /api/projects/:id` - 获取项目详情
- `PUT /api/projects/:id` - 更新项目
- `DELETE /api/projects/:id` - 删除项目
### 任务
- `GET /api/tasks` - 列出所有任务
- `POST /api/tasks` - 创建任务
- `GET /api/tasks/:id` - 获取任务详情
- `PUT /api/tasks/:id` - 更新任务
- `DELETE /api/tasks/:id` - 删除任务
### 发现
- `GET /api/findings` - 列出所有发现
- `POST /api/findings` - 创建发现
- `GET /api/findings/:id` - 获取发现详情
- `PUT /api/findings/:id` - 更新发现
- `DELETE /api/findings/:id` - 删除发现
### 客户
- `GET /api/clients` - 列出所有客户
- `POST /api/clients` - 创建客户
- `GET /api/clients/:id` - 获取客户详情
- `PUT /api/clients/:id` - 更新客户
- `DELETE /api/clients/:id` - 删除客户
### 页面(检查清单)
- `GET /api/pages` - 列出所有页面
- `POST /api/pages` - 创建页面
- `GET /api/pages/:slug` - 获取页面详情
- `PUT /api/pages/:slug` - 更新页面
- `DELETE /api/pages/:slug` - 删除页面
### CWE 数据库
- `GET /api/cwes` - 列出所有 CWE
- `GET /api/cwes/:id` - 获取 CWE 详情
- `POST /api/cwes/import` - 从 CSV 导入 CWE 数据库
### 附件
- `POST /api/attachments` - 上传文件
- `GET /api/attachments/:id/download` - 下载文件
- `GET /api/attachments/:id/view` - 查看文件(图片)
### 搜索
- `GET /api/search?q=query` - 全局搜索
除以下情况外,所有 API endpoint 均需身份验证:
- `/api/auth/register`(如果 `ALLOW_REGISTRATION=true`)
- `/api/auth/login`
- `/api/attachments/:id/view`(公开图片)
## 📁 项目结构
```
MyPentest-Dashboard/
├── frontend/ # Next.js frontend application
│ ├── app/ # Next.js app router pages
│ ├── components/ # React components
│ ├── lib/ # Utilities and API client
│ ├── public/ # Static assets
│ └── types/ # TypeScript types
├── backend/ # Express backend API
│ ├── src/
│ │ ├── routes/ # API routes
│ │ ├── models/ # Mongoose models
│ │ ├── middleware/ # Express middleware
│ │ ├── config/ # Configuration files
│ │ └── utils/ # Utility functions
│ └── uploads/ # File uploads directory
├── scripts/ # Utility scripts
│ ├── seed-admin.js # Create admin user
│ └── test-crud.js # Test CRUD operations
├── Dockerfile # Single container Dockerfile
├── docker-entrypoint.sh # Container entrypoint script
├── deploy.sh # VPS deployment script
└── README.md # This file
```
## 📝 许可证
MIT 许可证 - 有关详情,请参阅 LICENSE 文件
📧 支持
如有问题、疑问或贡献:
- 在 GitHub 上开启一个 issue
- 查看故障排除部分
- 查看日志:`docker logs pentestops`
**专为渗透测试团队倾力打造 ❤️**
标签:Express, Linux 内核安全, MongoDB, PPID欺骗, 网络空间测绘, 自动化攻击, 请求拦截, 项目管理