sudarshan200417/SOC_Automation
GitHub: sudarshan200417/SOC_Automation
集成Wazuh、TheHive和Shuffle的开源SOC自动化框架,实现从威胁检测、告警富化到案件创建的全流程自动化。
Stars: 0 | Forks: 0
# 🛡️ SOC 自动化
## 📋 目录
- [第 6 章 — Wazuh 安装 (阶段 1)](#chapter-6--screenshot-of-development-phase-1)
- [第 7 章 — TheHive 安装 (阶段 2)](#chapter-7--screenshot-of-development-phase-2)
- [第 8 章 — 配置 (阶段 3)](#chapter-8--screenshot-of-development-phase-3)
- [第 9 章 — Shuffle + TheHive (阶段 4)](#chapter-9--screenshot-of-development-phase-4)
## 6 使用 Vultr Ubuntu 服务器安装 Wazuh
我们使用 **Vultr** 作为云平台来配置 Wazuh 服务器,而无需使用本地虚拟机。

**通过 SSH 连接到服务器:**
```
ssh root@65.20.92.112
# 从 Vultr 控制台复制密码以备后用
```
**安装 Wazuh (All-in-One):**
```
curl -sO https://packages.wazuh.com/4.7/wazuh-install.sh && sudo bash ./wazuh-install.sh -a
# 如果 dependency check 失败,请使用:
curl -sO https://packages.wazuh.com/4.7/wazuh-install.sh && sudo bash ./wazuh-install.sh -a --ignore-check
```
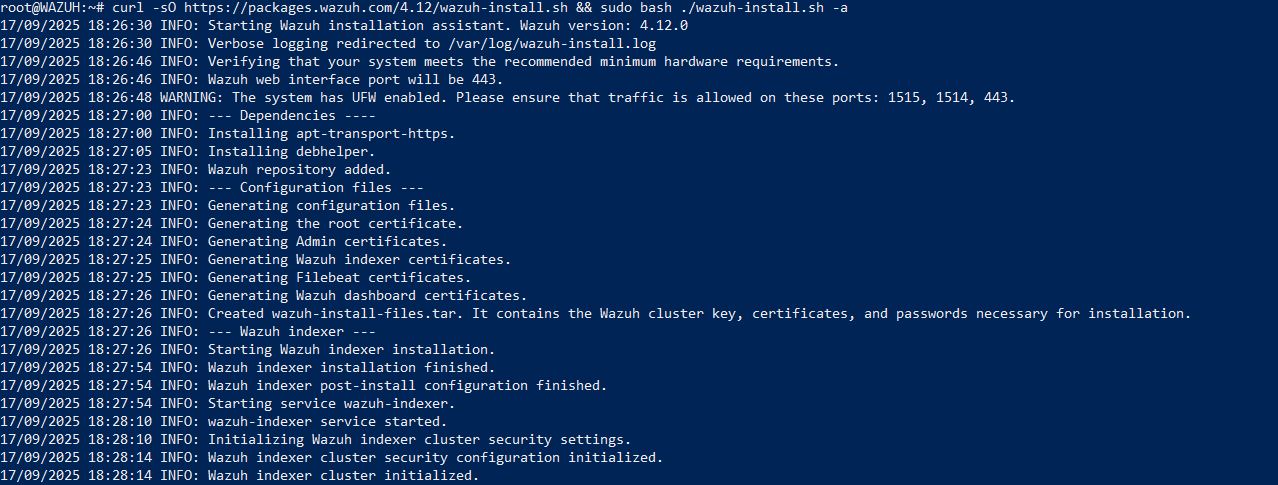
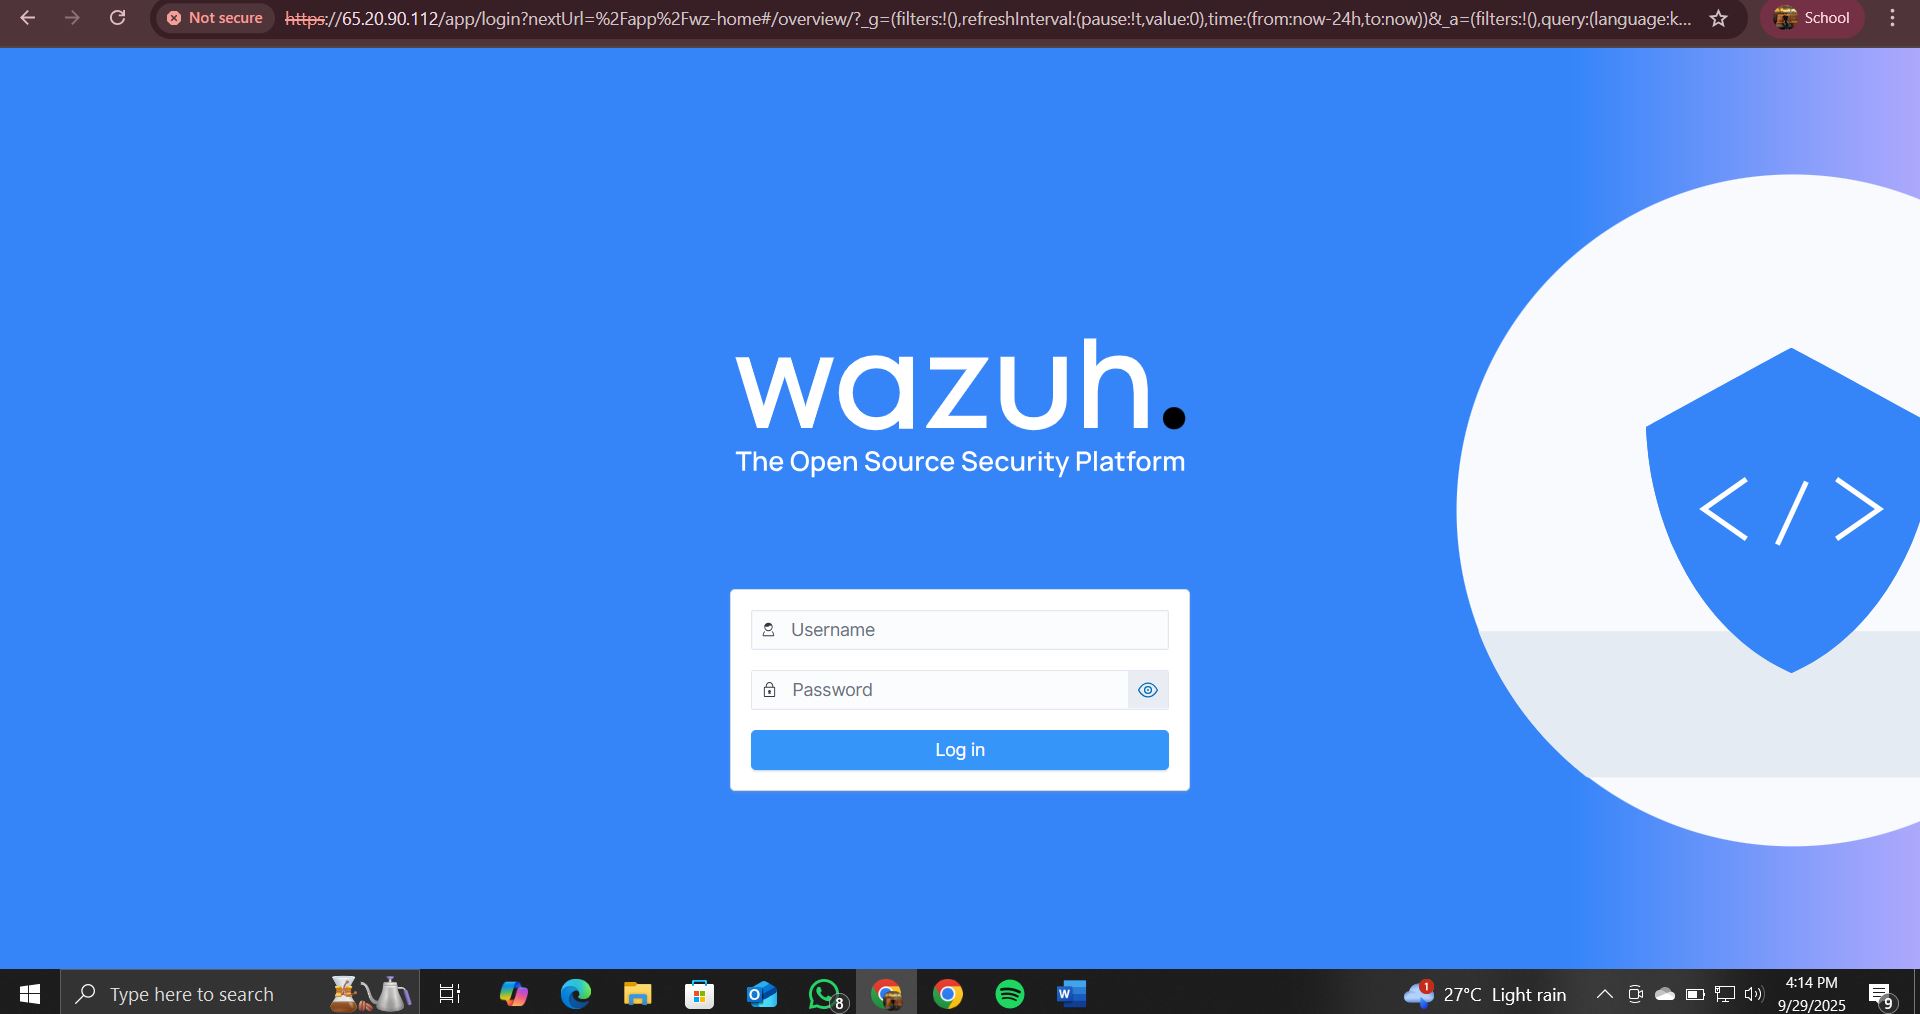
**安装完成后,访问仪表盘:**
```
URL: https://65.20.92.112:443
Username: admin
Password:
```
# 7 使用 Vultr Ubuntu 服务器安装 TheHive
使用一个单独的 Vultr 实例部署 TheHive,公网 IP 为 **65.20.68.44**。
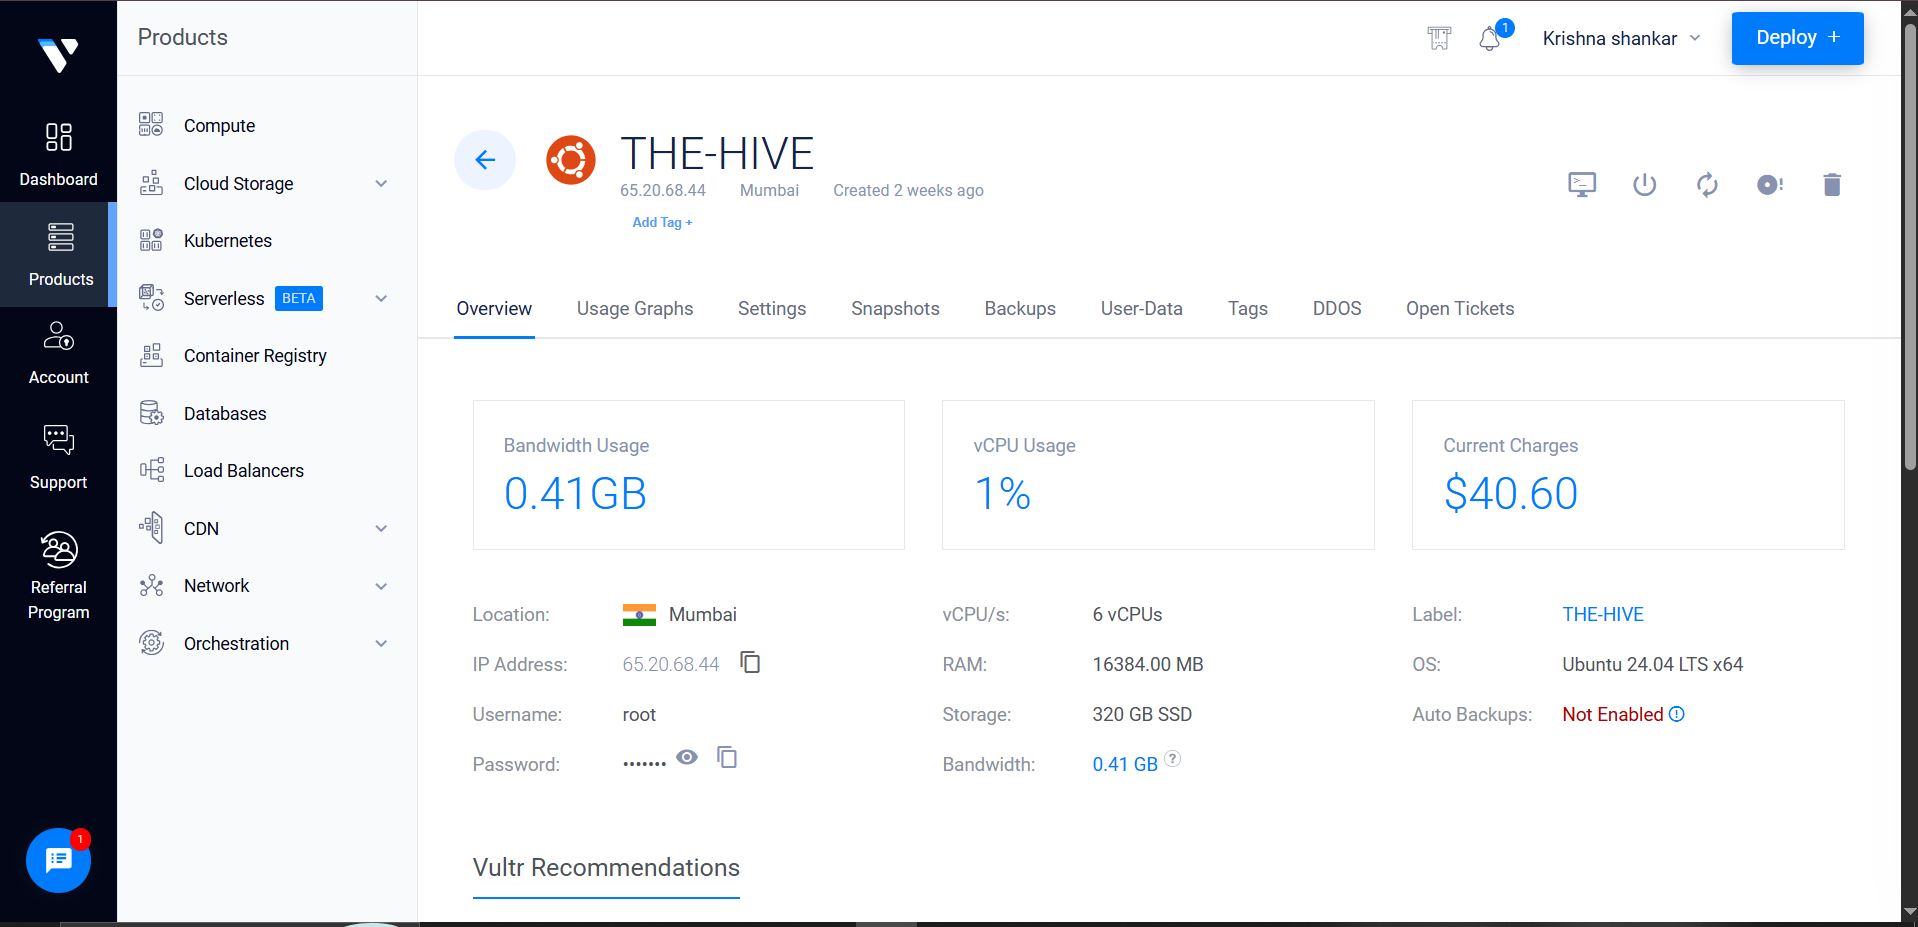
**连接到 TheHive 服务器:**
```
ssh root@65.20.68.44
```
**安装 Docker 和 Docker Compose:**
```
sudo apt update
sudo apt install docker.io -y
sudo systemctl enable docker
sudo systemctl start docker
sudo apt install docker-compose -y
```
**创建 TheHive 设置目录:**
```
mkdir thehive-docker
cd thehive-docker
nano docker-compose.yml # Paste your docker-compose config here
```
**启动所有容器:**
```
sudo docker-compose up -d
# 验证正在运行的 containers (应该看到 cassandra, elasticsearch, thehive)
sudo docker ps
```
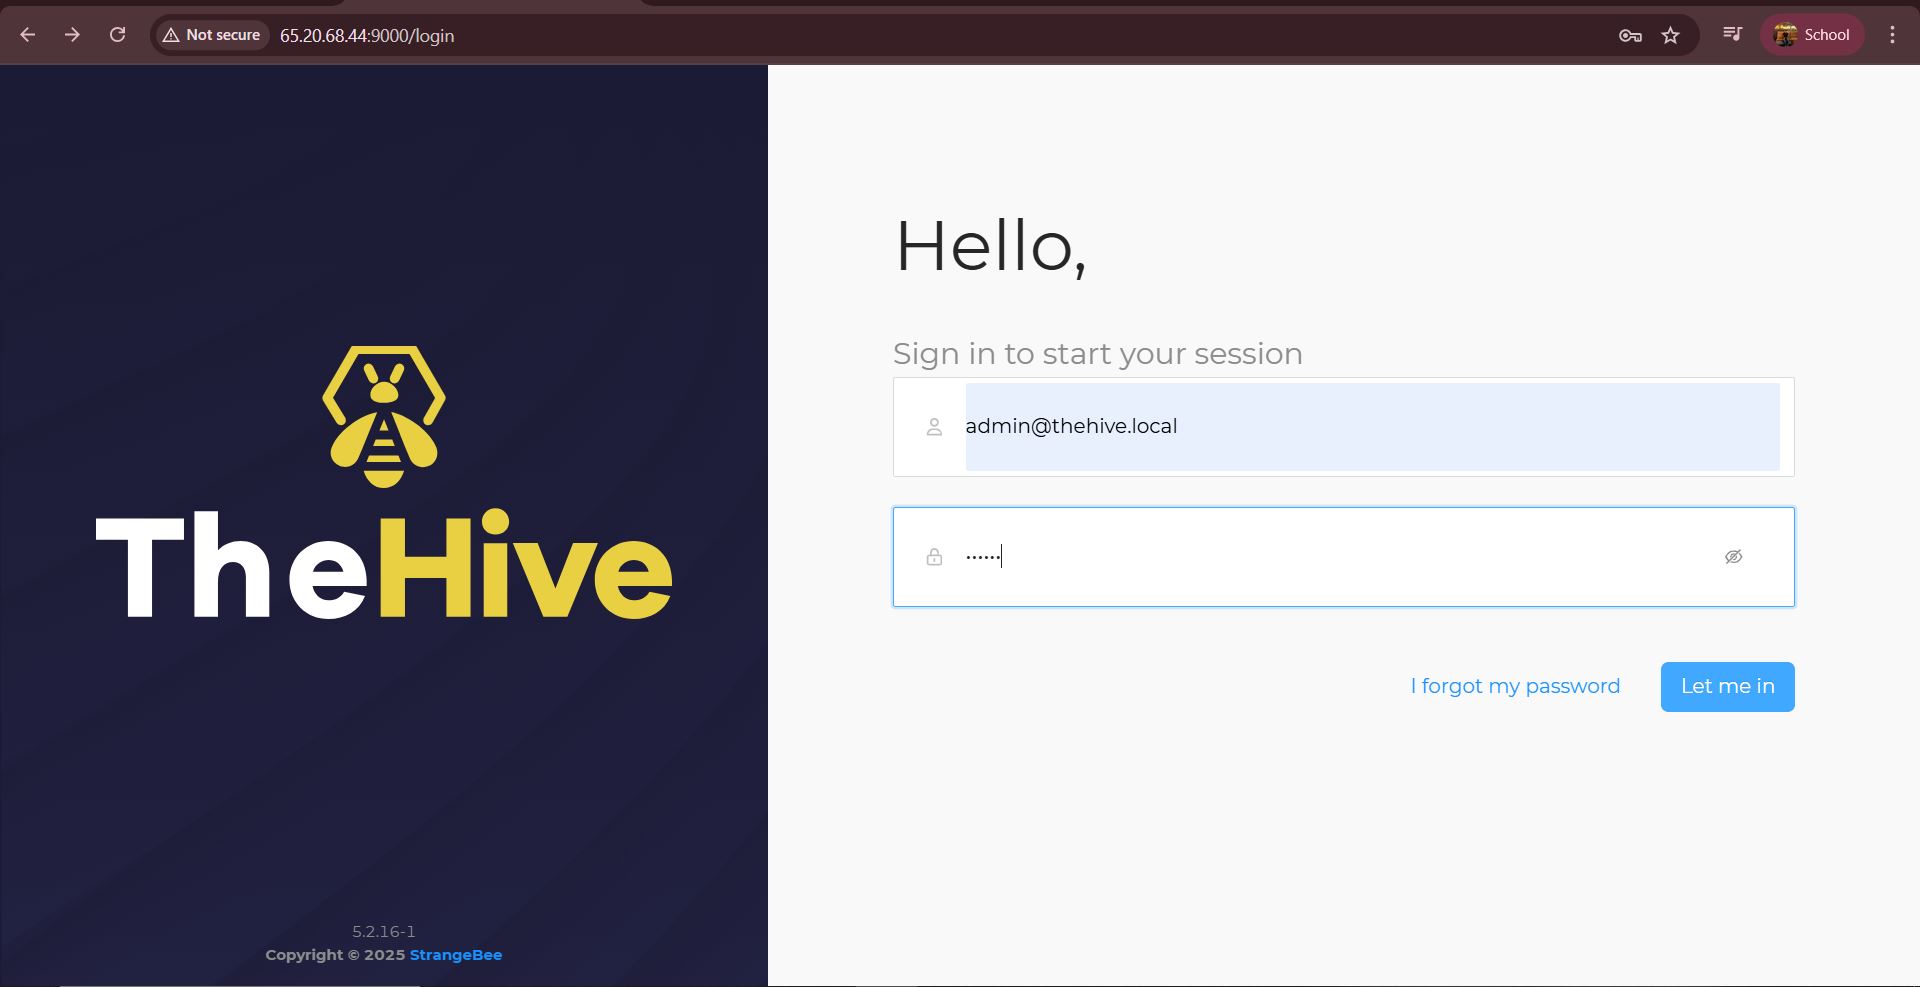
**在浏览器中访问 TheHive:**
```
URL: http://65.20.68.44:9000
Username: admin@thehive.local
Password: secret
```
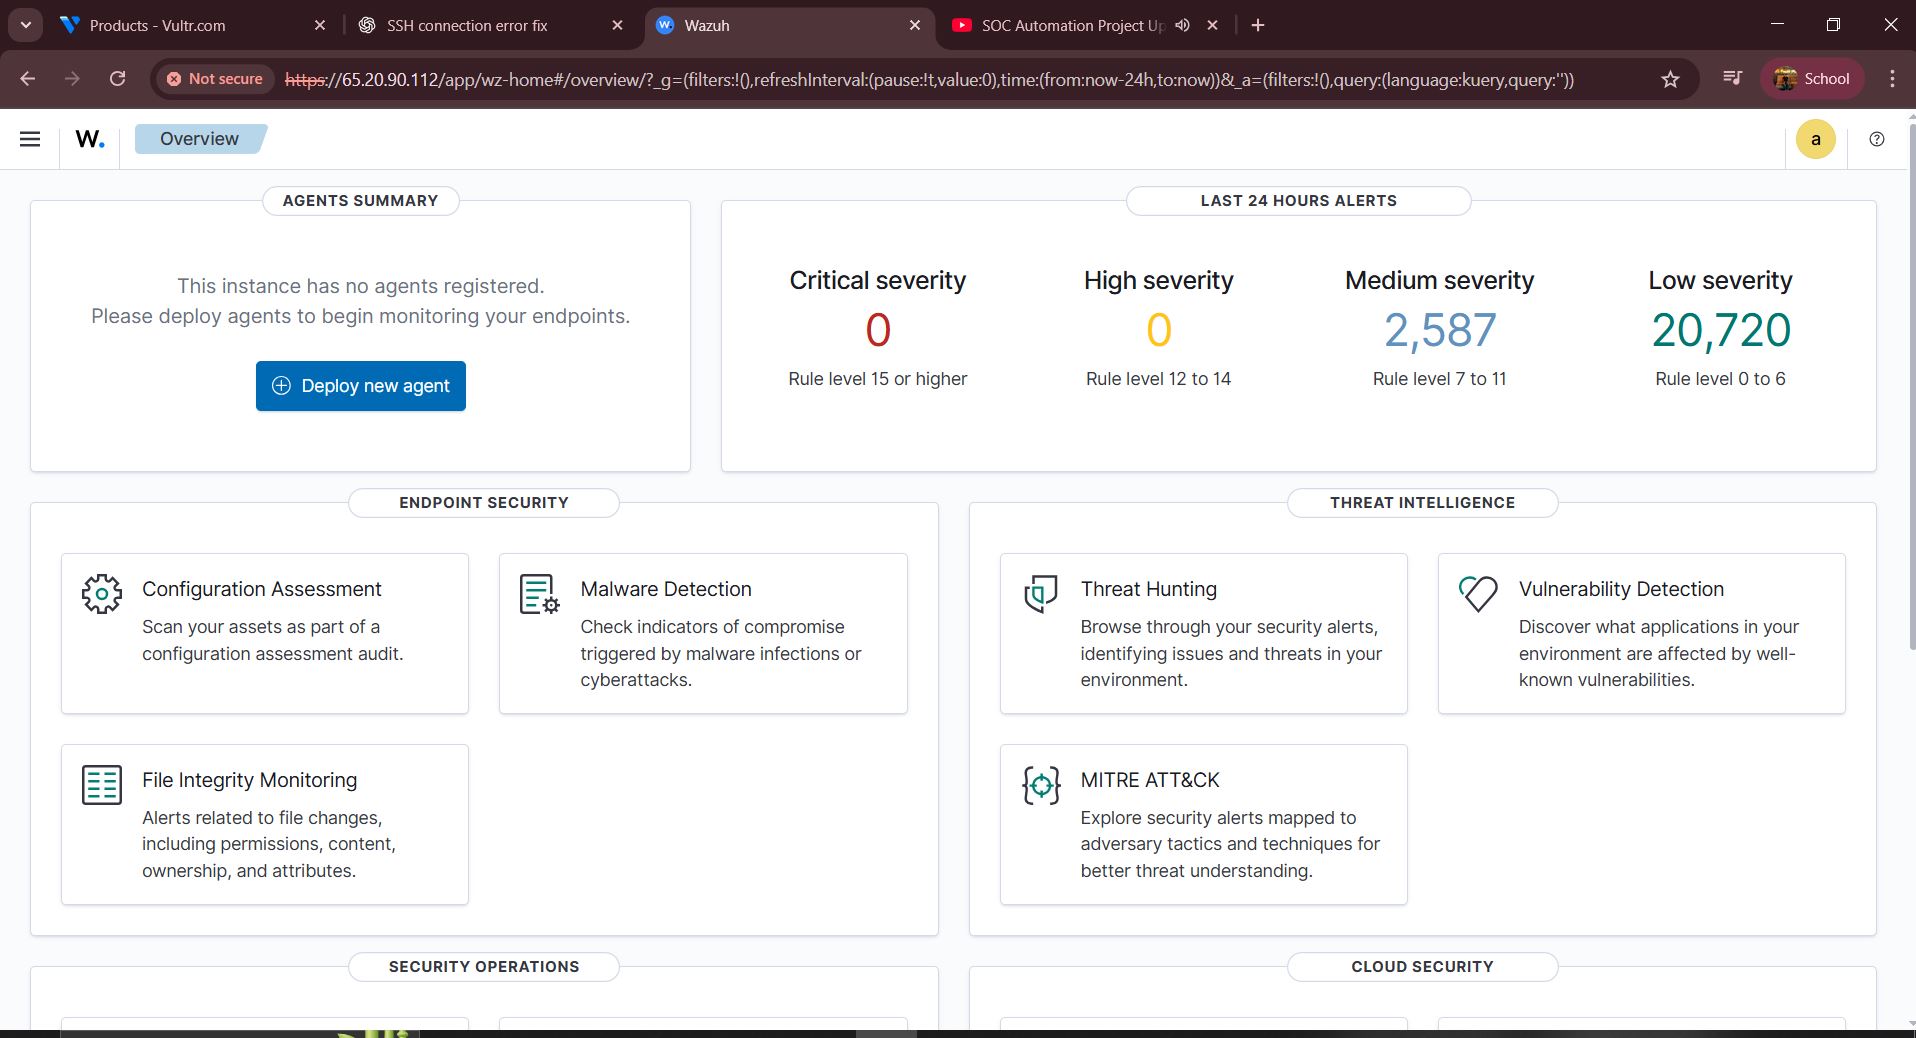
## 8 Wazuh 配置
部署一个新的 agent,以便从 Windows 10 端点收集并集中管理日志。
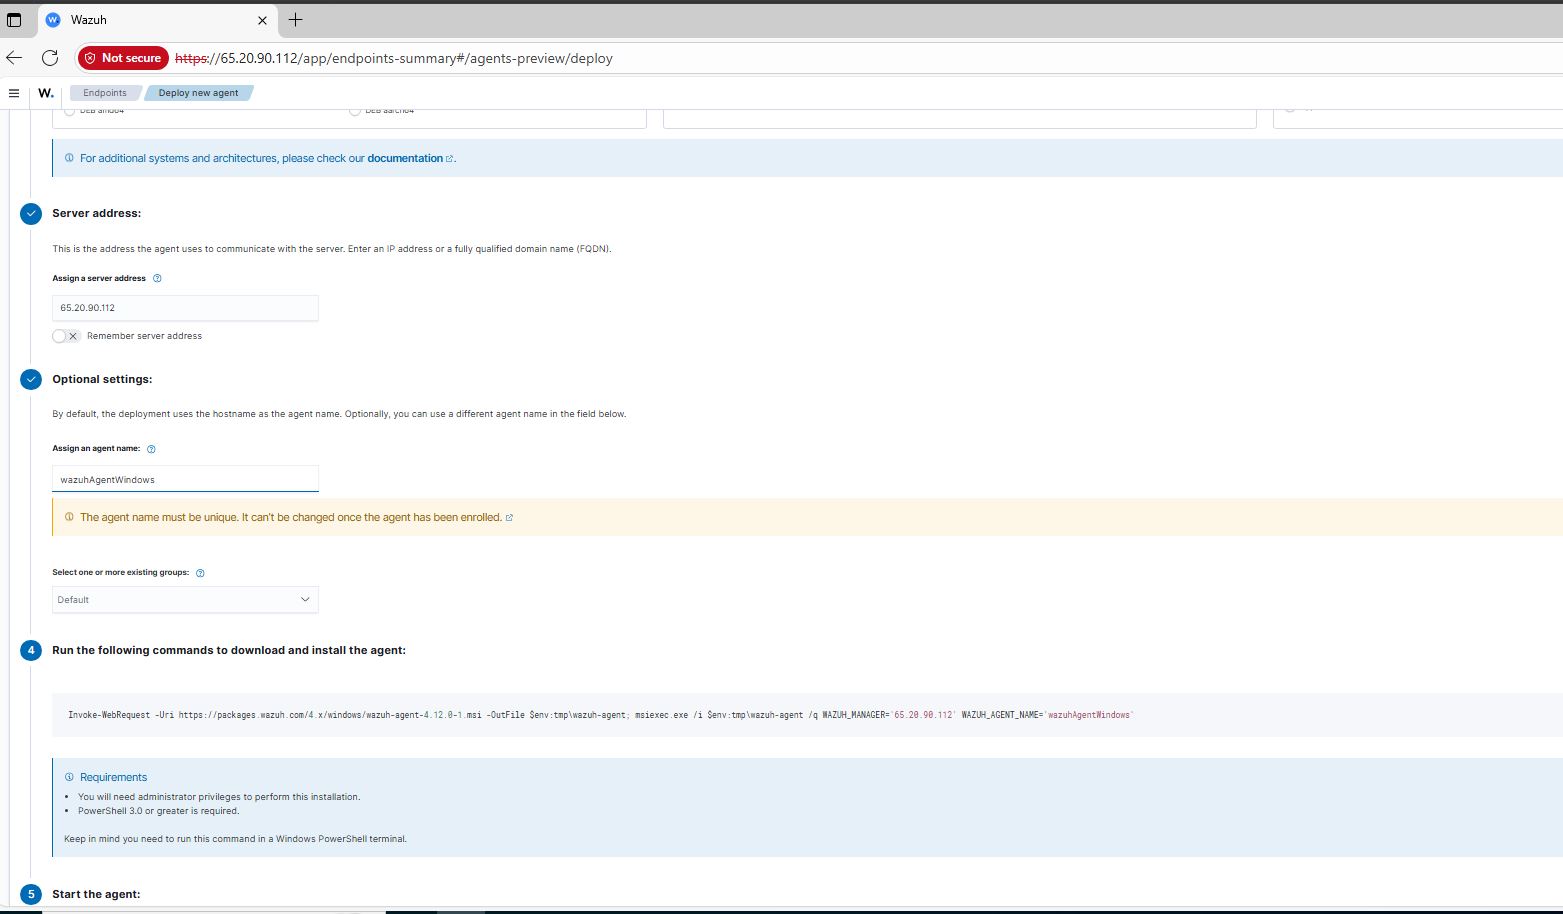
**步骤:**
1. 转到 Wazuh 仪表盘 → **Endpoints Summary** → **Deploy new agent**
2. 添加你的 Wazuh 公网 IP:`65.20.92.112`
3. 指定 agent 名称
4. 复制生成的命令并在 Windows 10 的 PowerShell 中运行
```
# 在 Windows 10 VM 上运行 — PowerShell (以管理员身份)
net start wazuhsvc
```
```
# 在 Wazuh server 上 — 打开所需端口
ufw allow 1515
ufw allow 1514
```
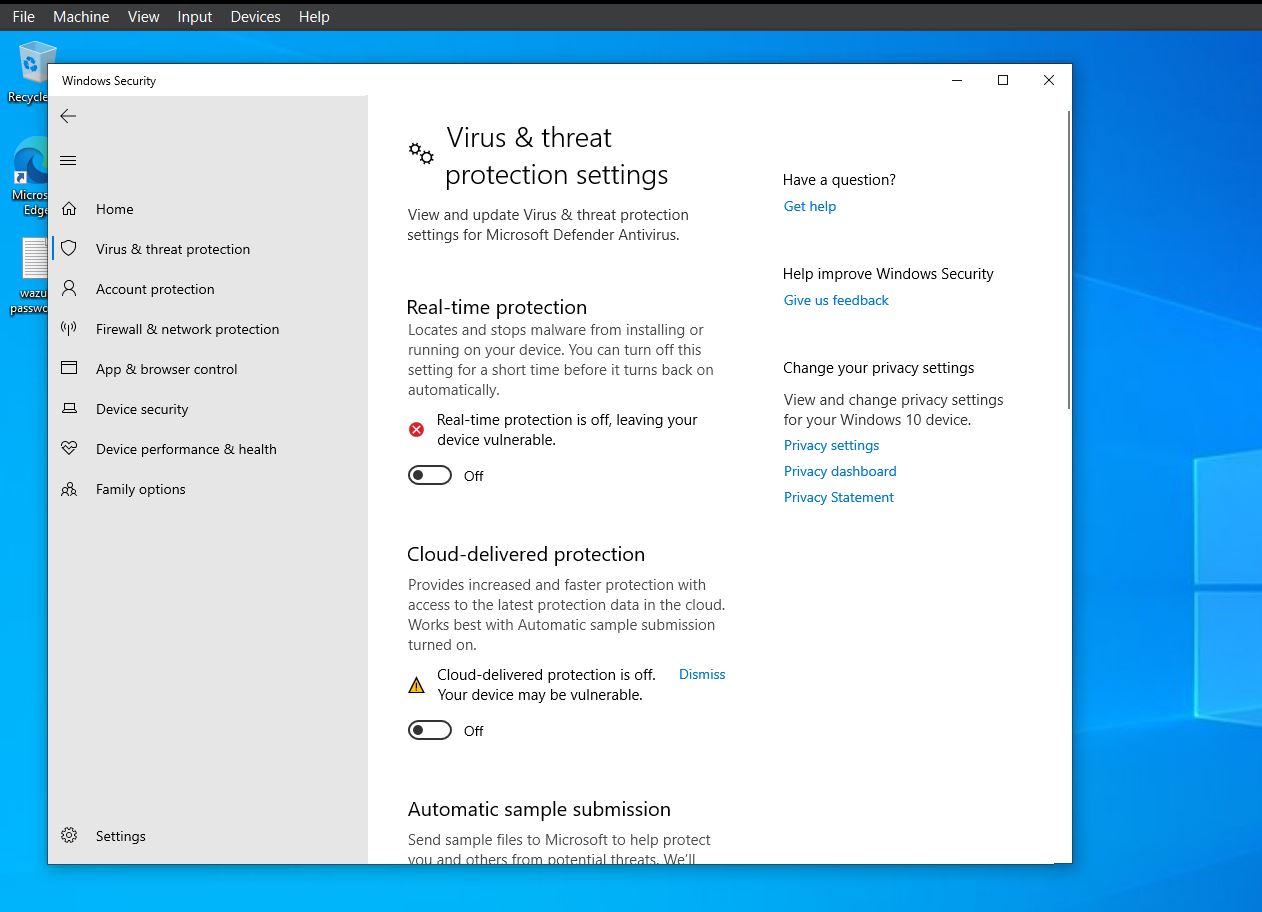
## 8 Windows 10 配置
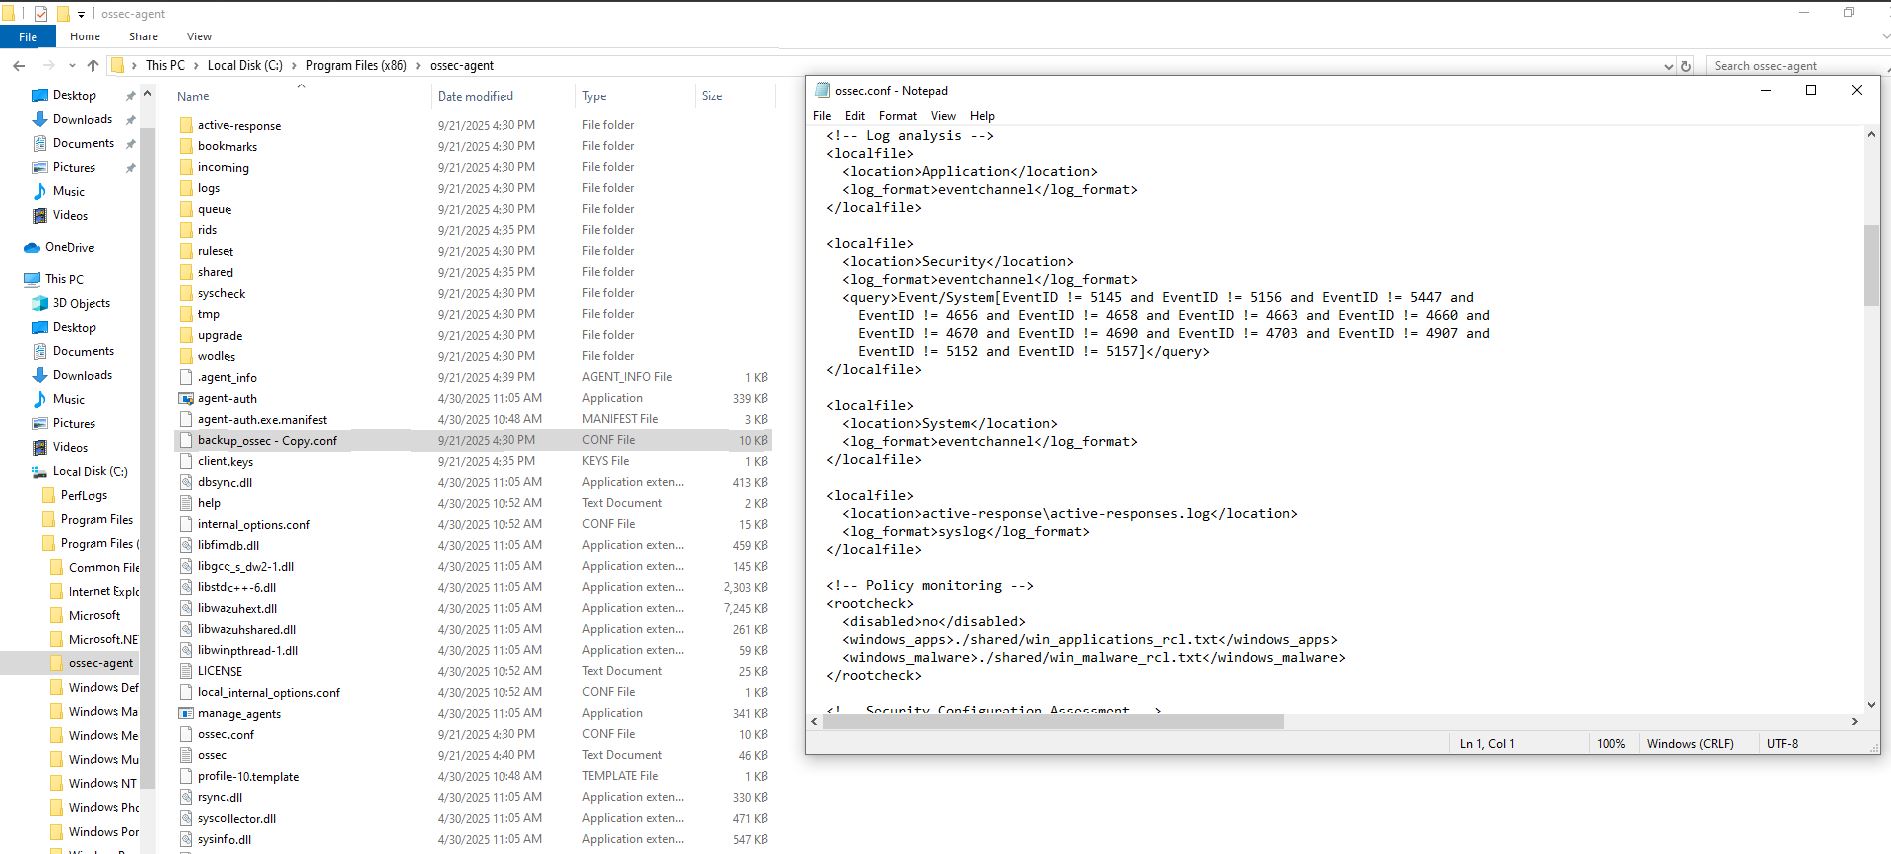
编辑位于以下路径的 `ossec.conf` 文件:
```
C:\Program Files (x86)\ossec-agent\ossec.conf
```
以 **管理员身份** 打开记事本并编辑该文件:
```
Application
eventchannel
Microsoft-Windows-Sysmon/Operational
eventchannel
```
保存后,转到 **Services** → 找到 **Wazuh** → **Restart**。
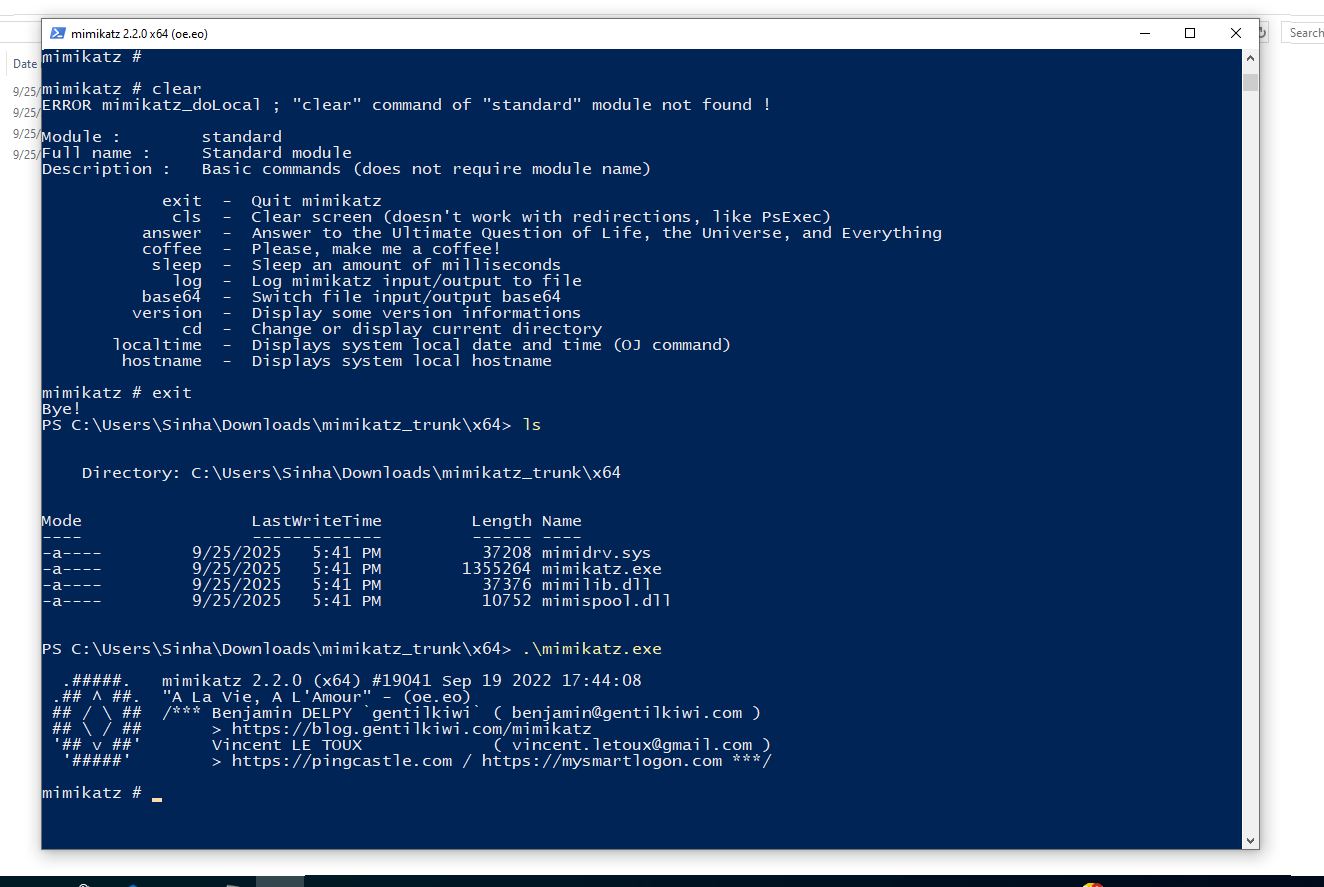
### 8.3 Mimikatz 遥测数据生成
**Mimikatz** 是一种后渗透工具,用于提取 Windows 凭据。我们运行它是为了生成真实的遥测数据供 Wazuh 检测。
**下载并运行 Mimikatz:**
```
https://github.com/gentilkiwi/mimikatz/releases
```
1. 下载 `mimikatz_trunk.zip`
2. 解压 → 进入 `x64` 文件夹
3. 打开 PowerShell (Shift + 右键单击 → 在此处打开 PowerShell)
```
.\mimikatz.exe
```
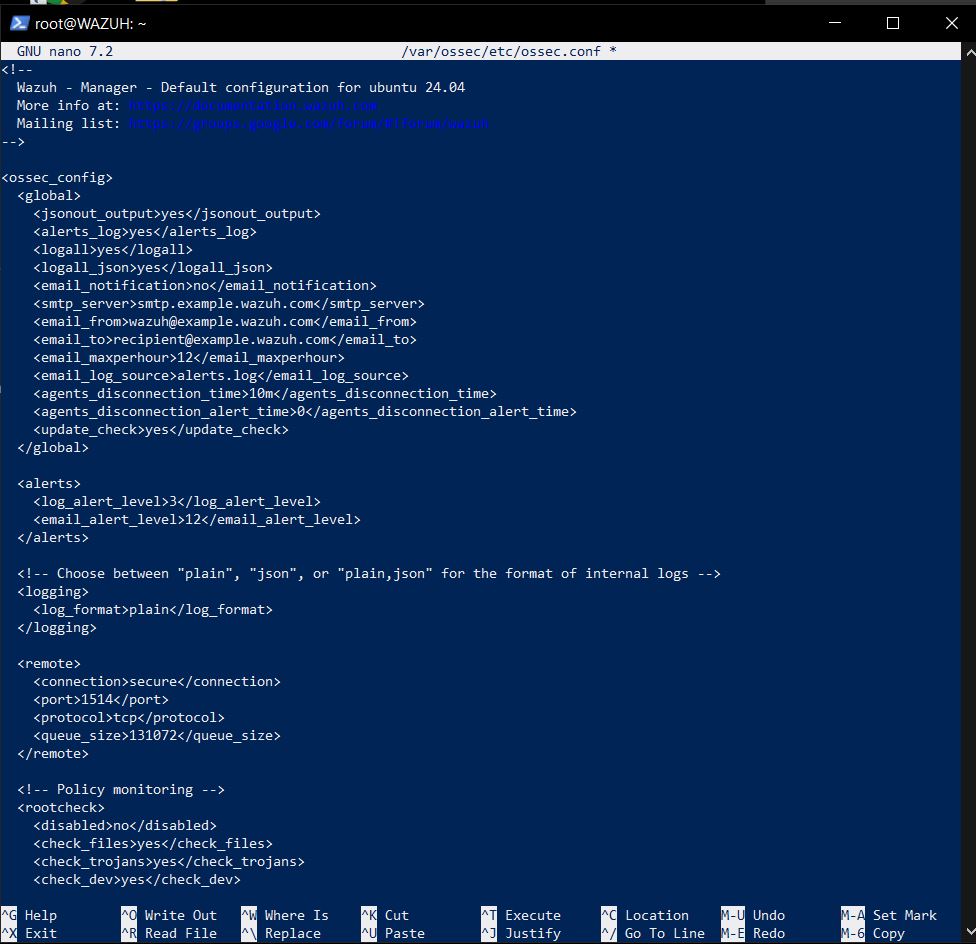
**在 Wazuh 服务器上启用日志归档:**
```
# 首先备份
cp /var/ossec/etc/ossec.conf ~/ossec_backup.conf
# 编辑 config
nano /var/ossec/etc/ossec.conf
# 更改: no → yes
# 更改: no → yes
# 重启 services
systemctl restart wazuh-manager.service
# 在 Filebeat 中启用 archives
nano /etc/filebeat/filebeat.yml
# 设置 archives.enabled: true
systemctl restart filebeat.service
```
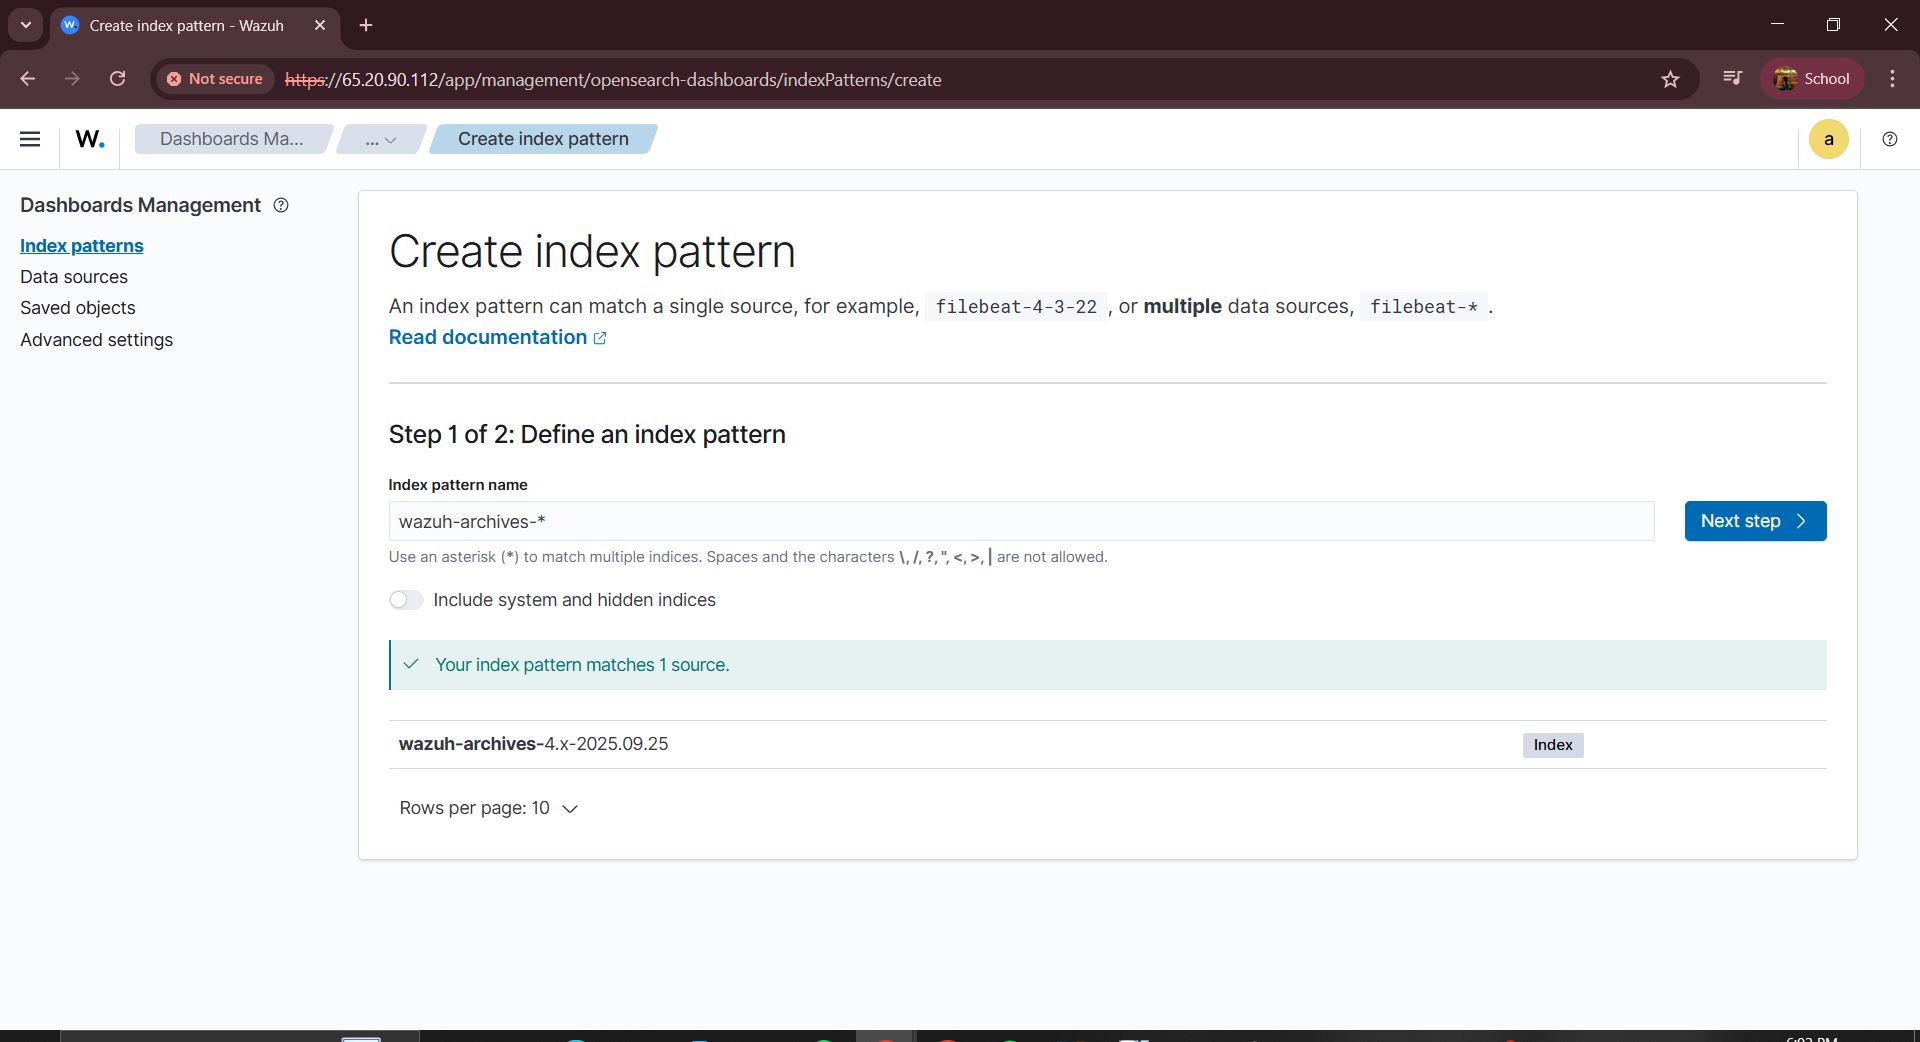
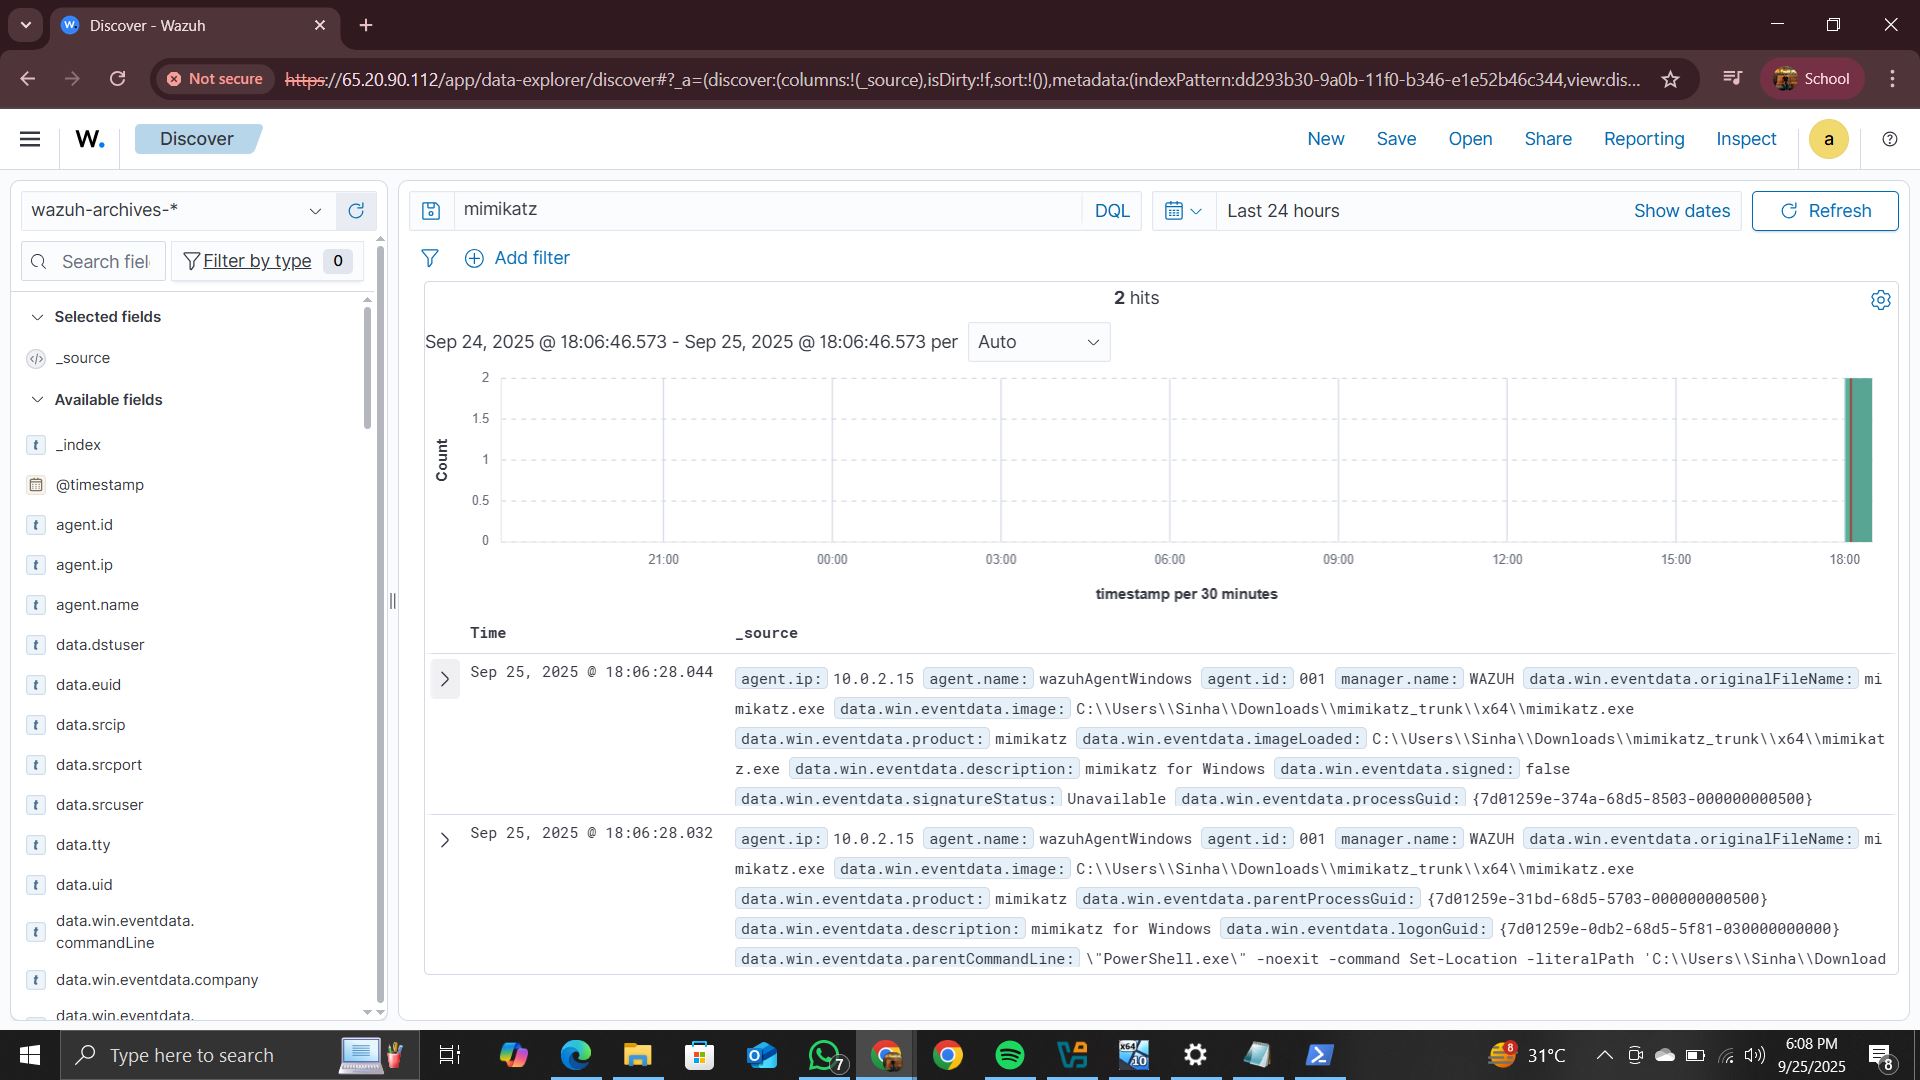
### 8.4 在 Wazuh 中创建索引
```
Wazuh Dashboard → Management → Index Patterns → Create index pattern
→ Type: wazuh-archives-*
→ Next Step → Select: @timestamp
→ Create Index Pattern
→ Go to Discover → Select wazuh-archives-*
→ Search: mimikatz
```
### 8.5 在 Wazuh 中创建自定义规则
```
Wazuh Dashboard → Server Management → Rules → Custom rules → Edit
```
添加以下规则:
```
sysmon_event1
(?i)mimikatz\.exe
mimikatz usage detected
T1003
```
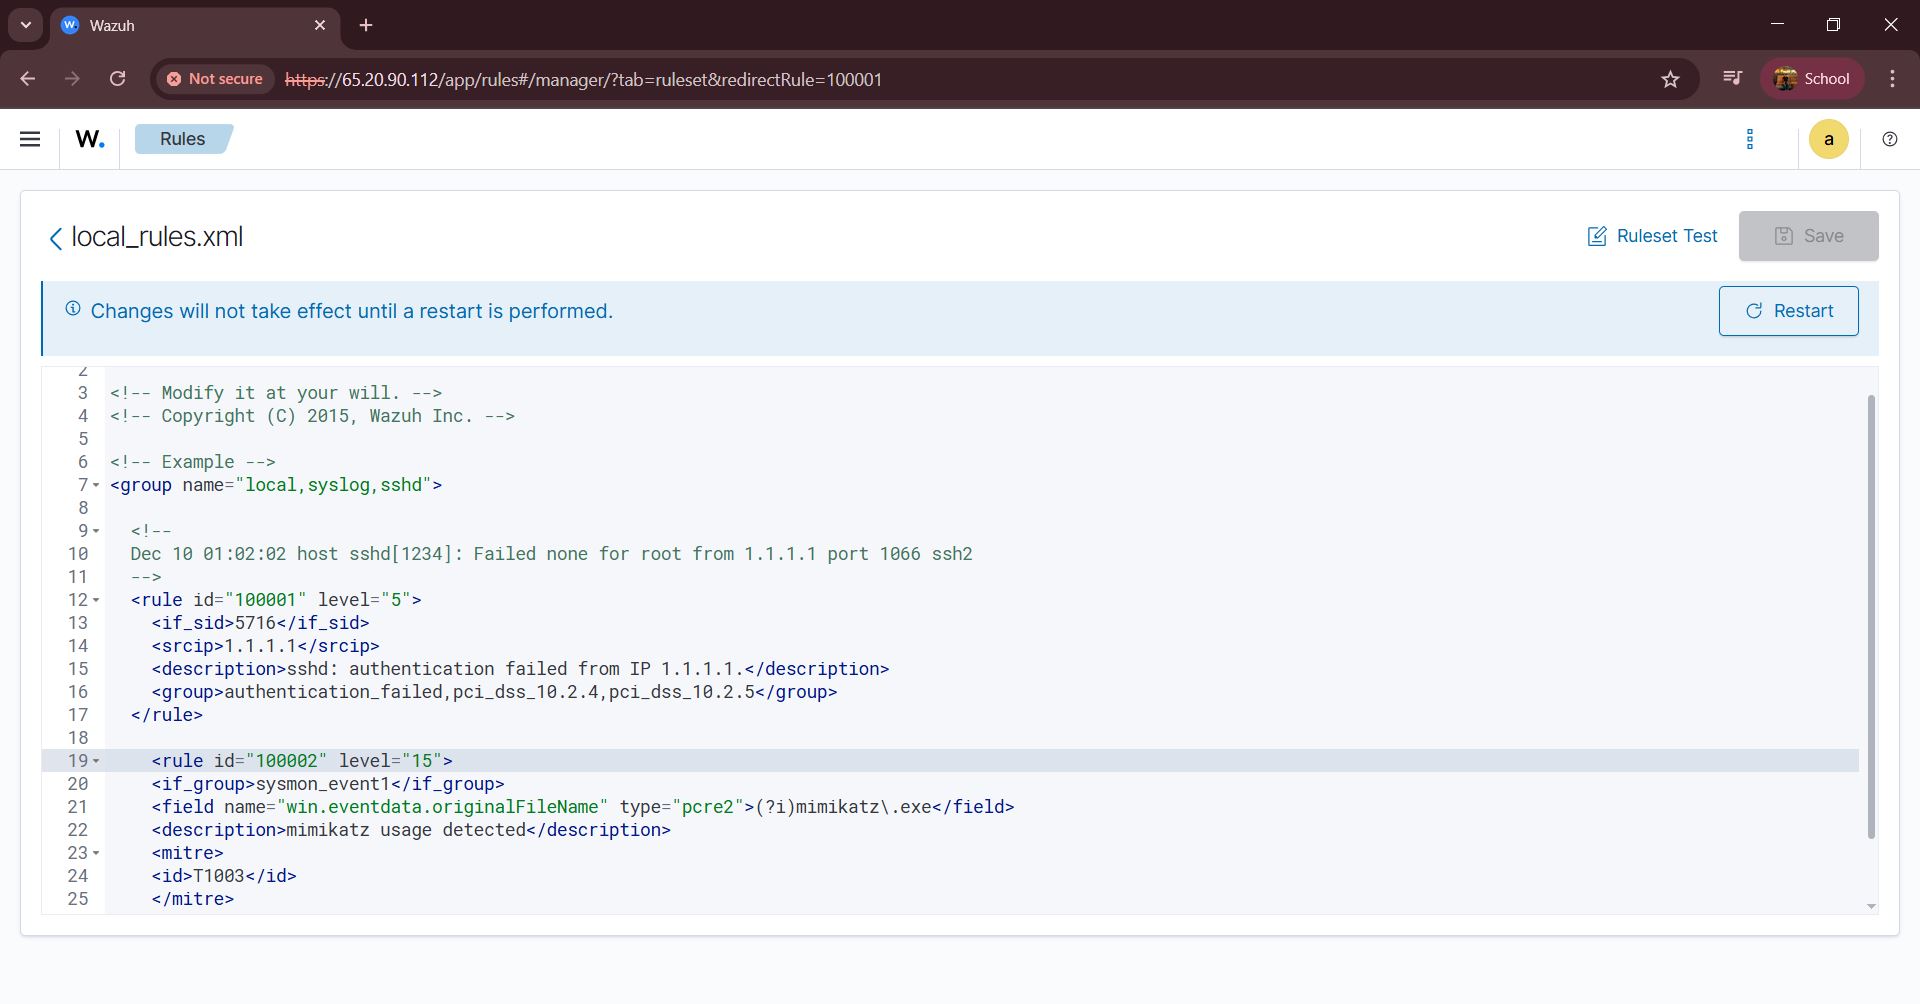
保存后,点击 **Restart** 以应用规则。
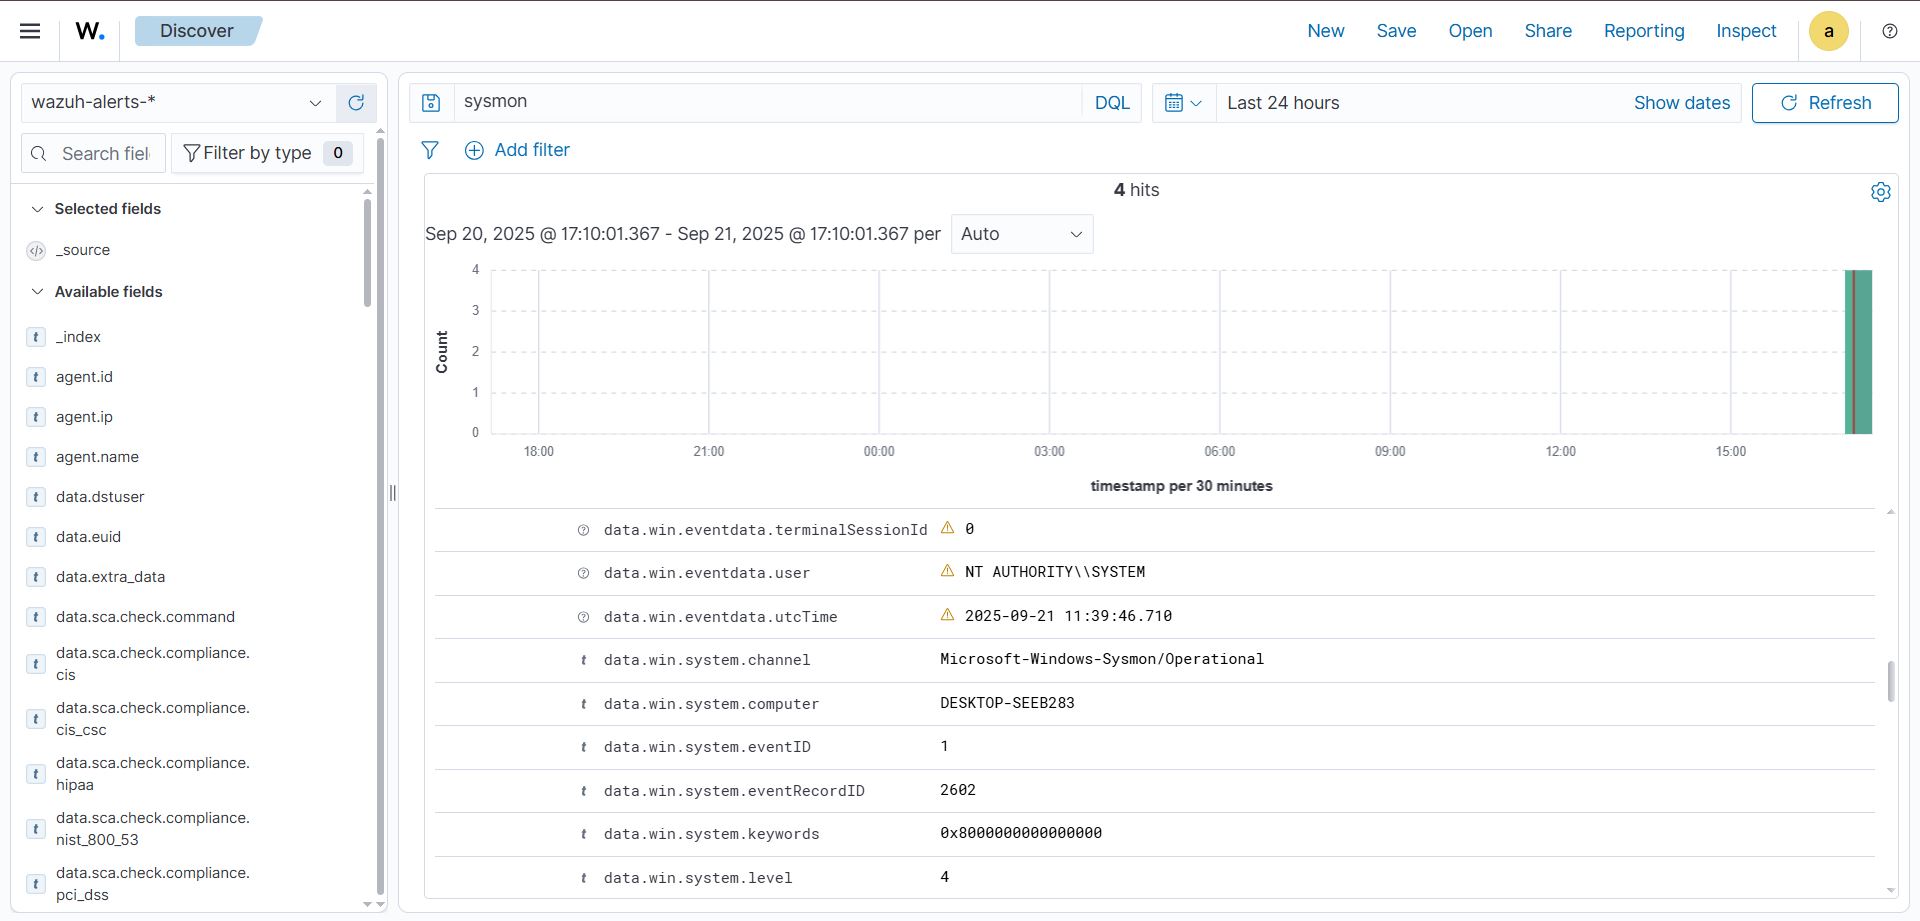
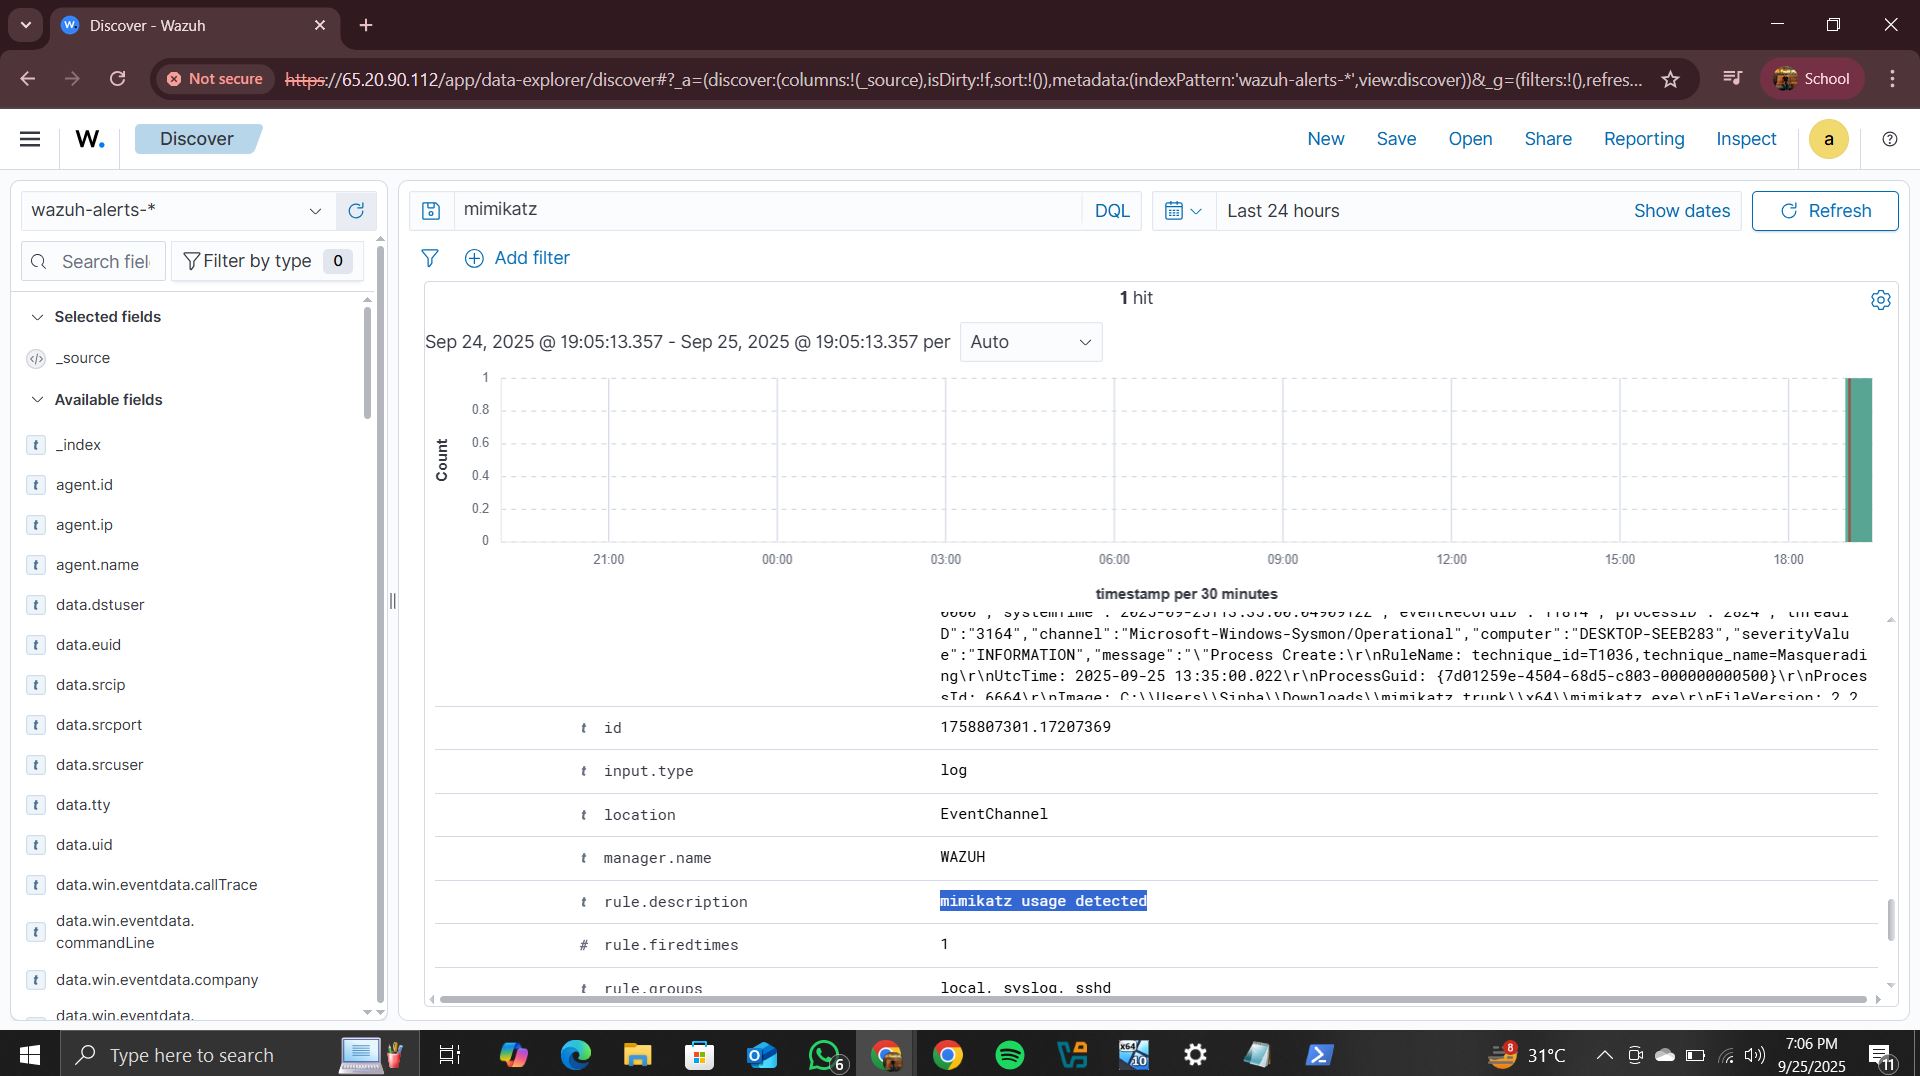
在 Windows 10 上重新运行 `.\mimikatz.exe` — 警报现在应该出现在 **wazuh-alerts** 中:
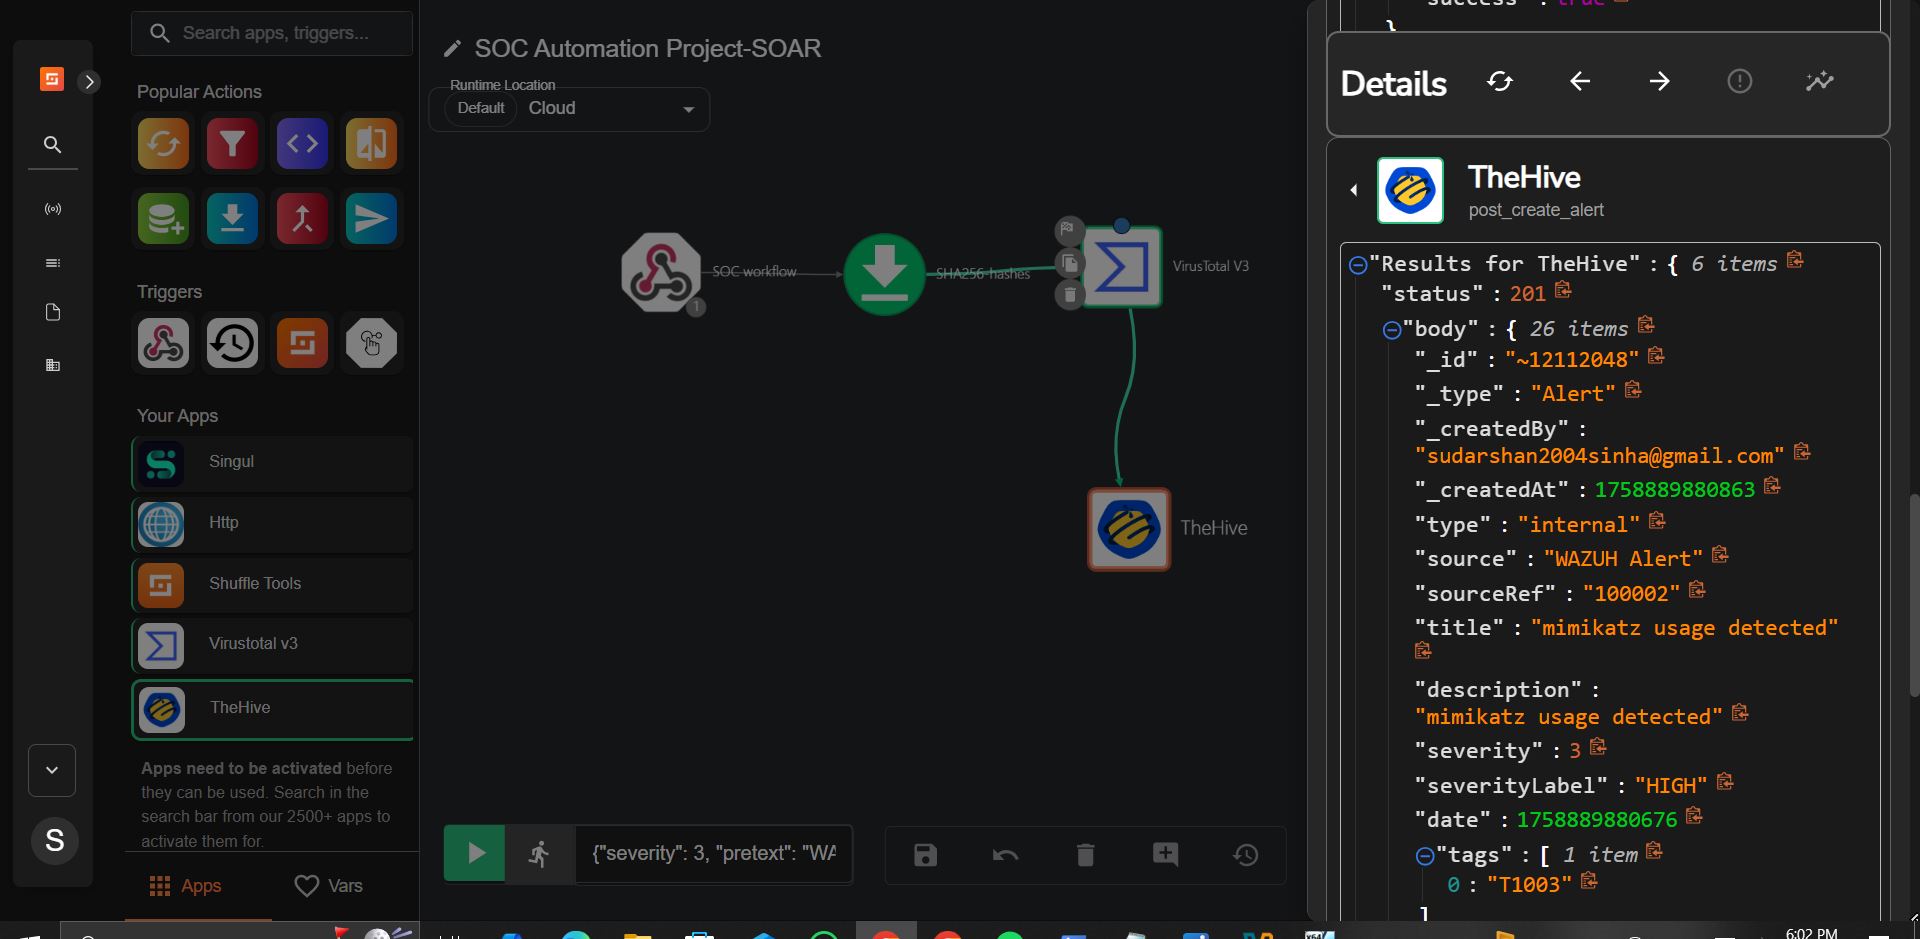
## 9 设置 Shuffler.io
**Shuffle** (shuffler.io) 是一个开源的 SOAR 平台,允许安全团队以最少的代码构建可视化的自动化工作流。

**步骤:**
1. 在 [shuffler.io](https://shuffler.io) 创建账户
2. 创建一个 **New Workflow** → 拖放一个 **Webhook** 触发器
3. 复制 Webhook URL 并将其粘贴到 Wazuh 服务器上的 `ossec.conf` 中:
```
nano /var/ossec/etc/ossec.conf
```
```
shuffle
https://shuffler.io/api/v1/hooks/
100002
json
```
```
systemctl restart wazuh-manager.service
```
4. 在 Shuffle 中点击 **Start** 以激活 webhook。
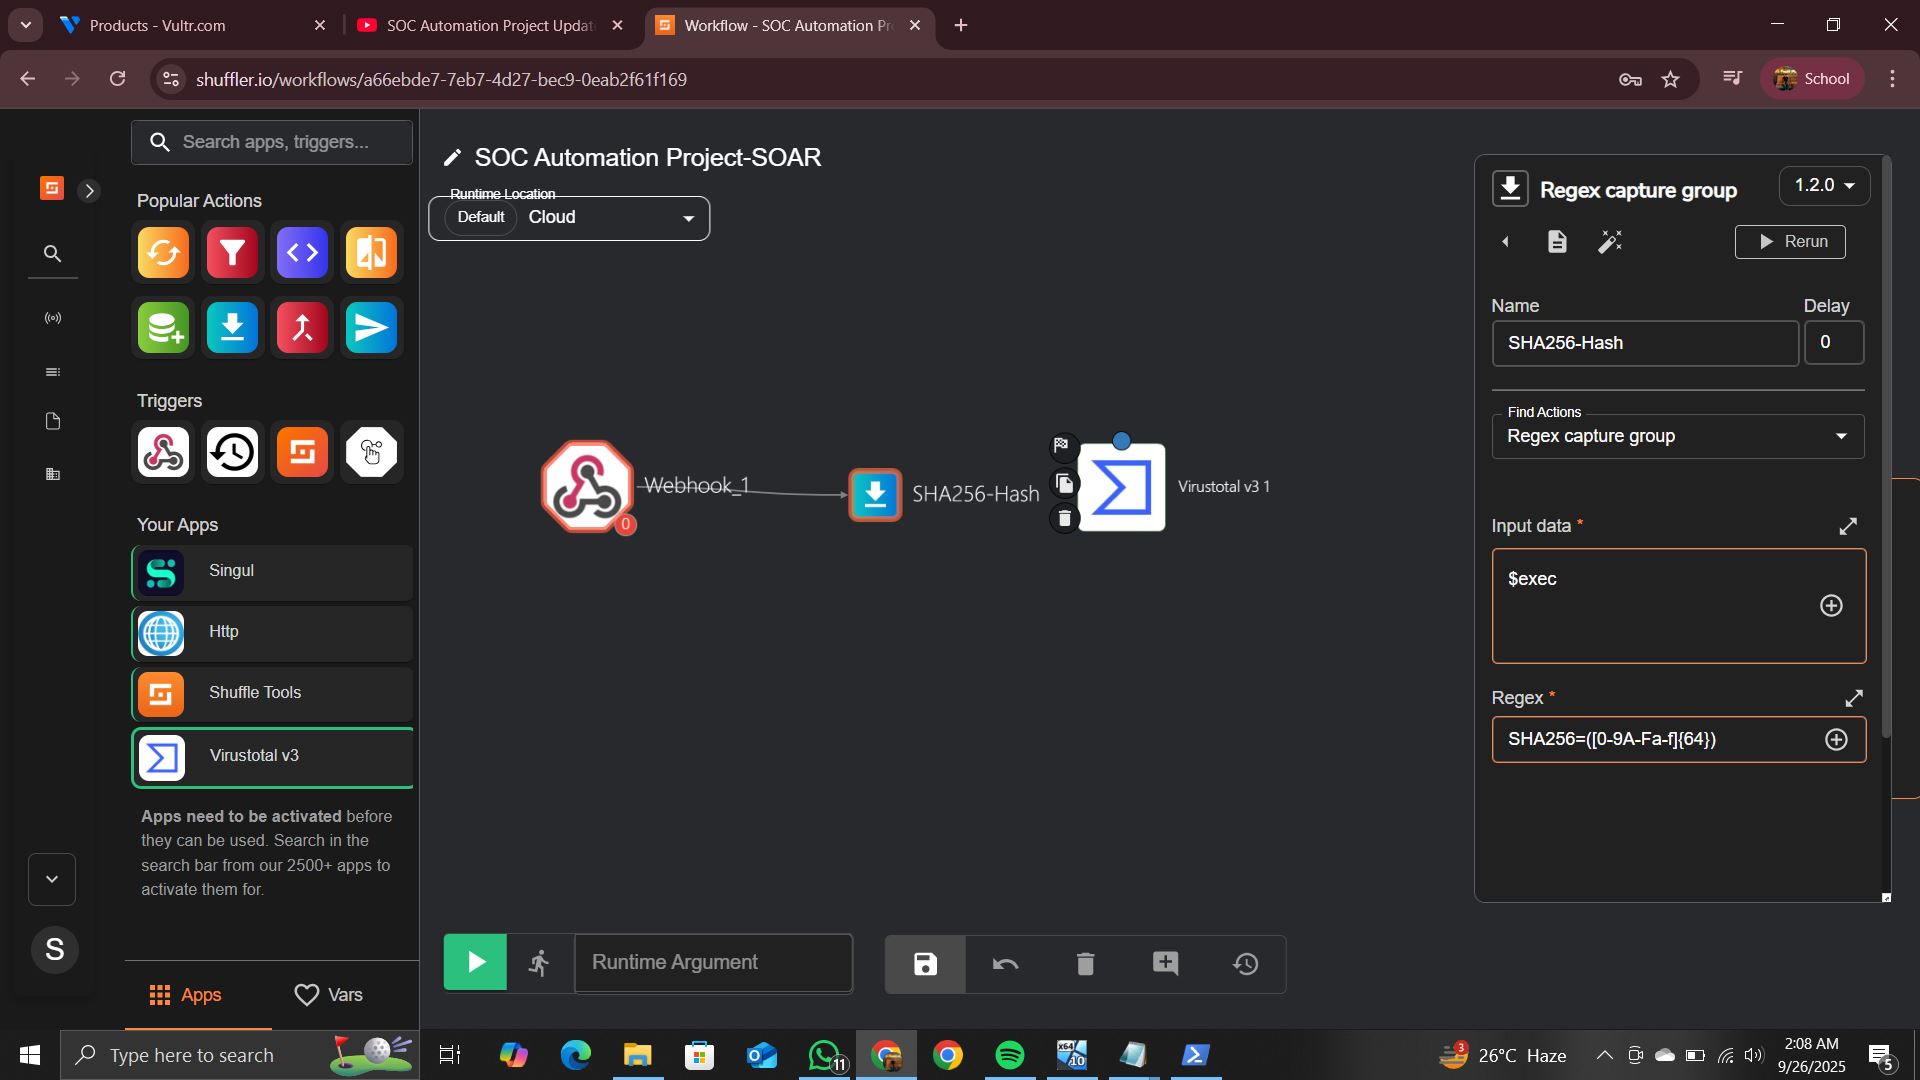
**添加 SHA256 哈希捕获:**
- 添加 **Shuffle Tools → Regex Capture Group**
- 输入数据:`$exec`
- 正则表达式:`SHA256=([0-9A-Fa-f]{64})`
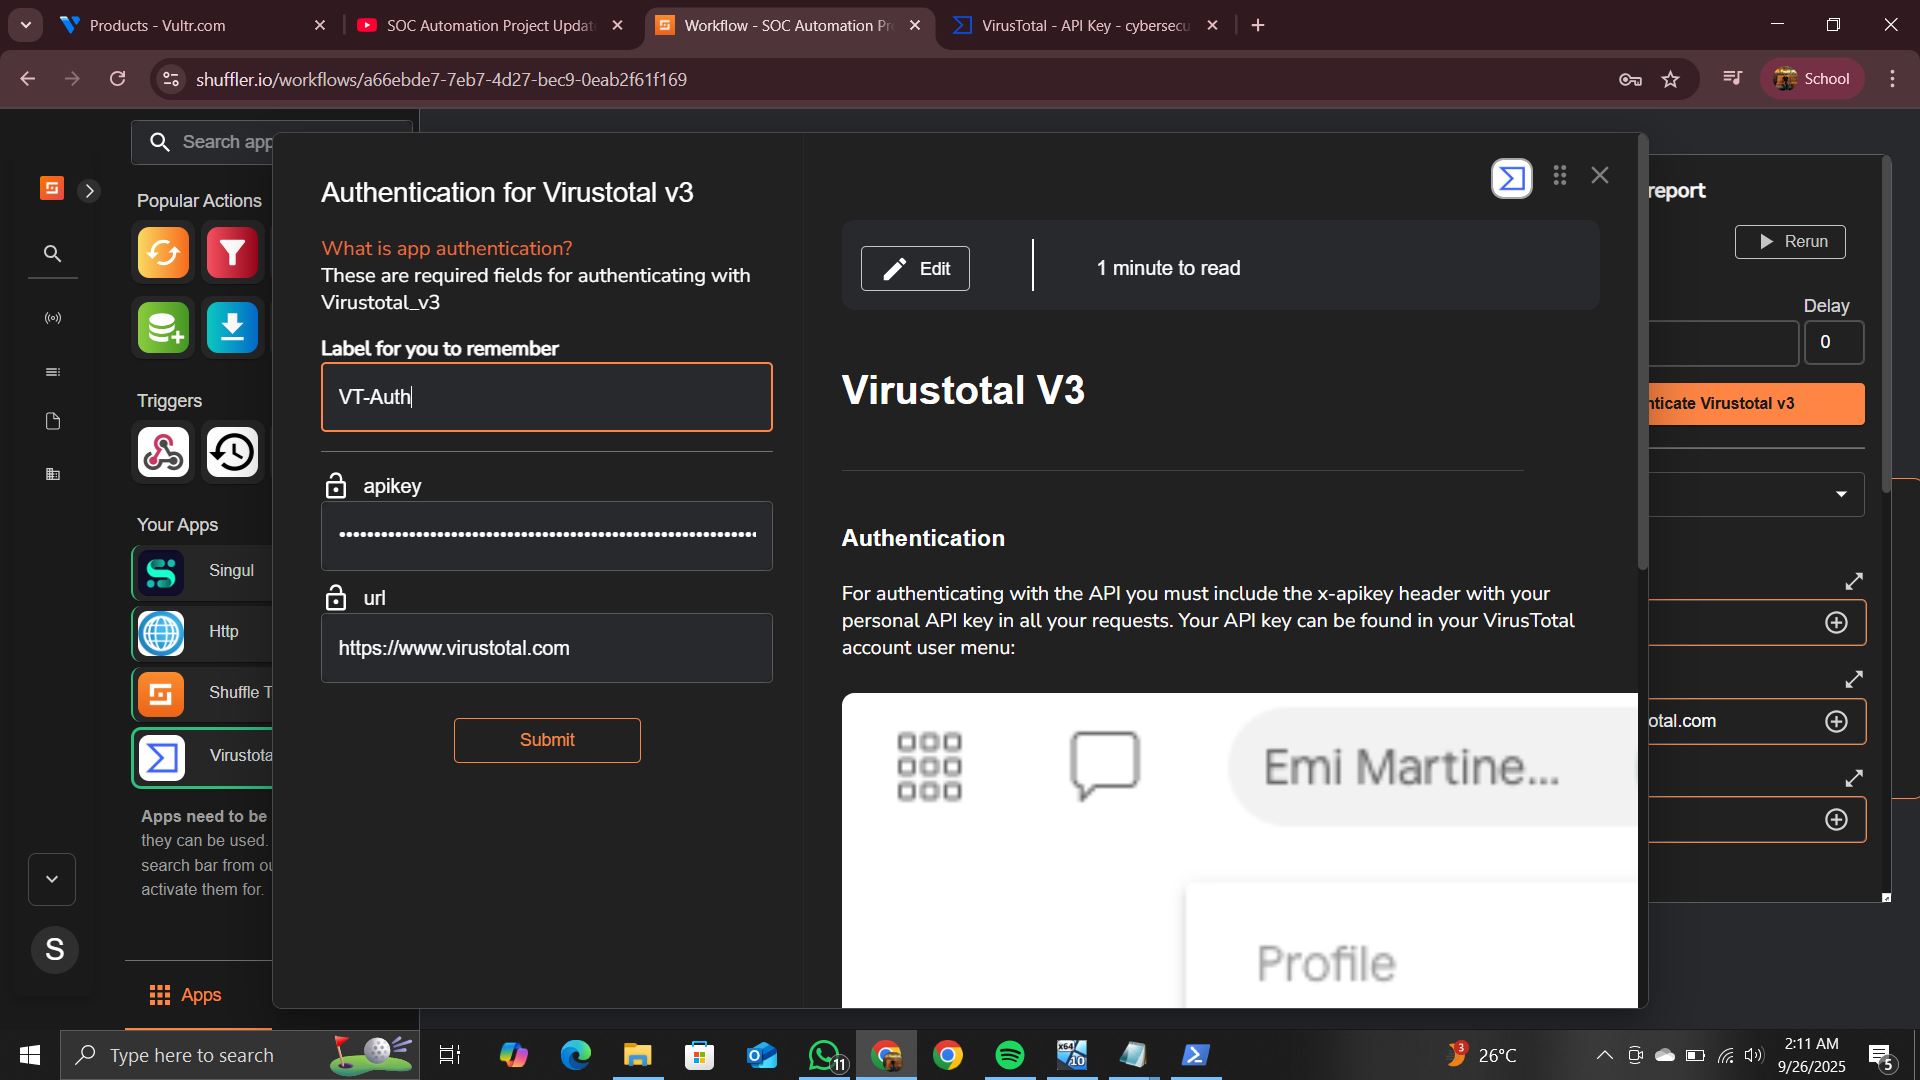
**连接 VirusTotal:**
- 添加 **Virustotal v3** 应用 → 使用你的 API 密钥进行认证
- 操作:**Get a hash report**
- 哈希值:来自 SHA256 正则表达式步骤的输出
- 将 header 设置为 `application/json`
重新运行 `.\mimikatz.exe` → Shuffle 将接收 Wazuh 警报并通过 VirusTotal 进行富化。
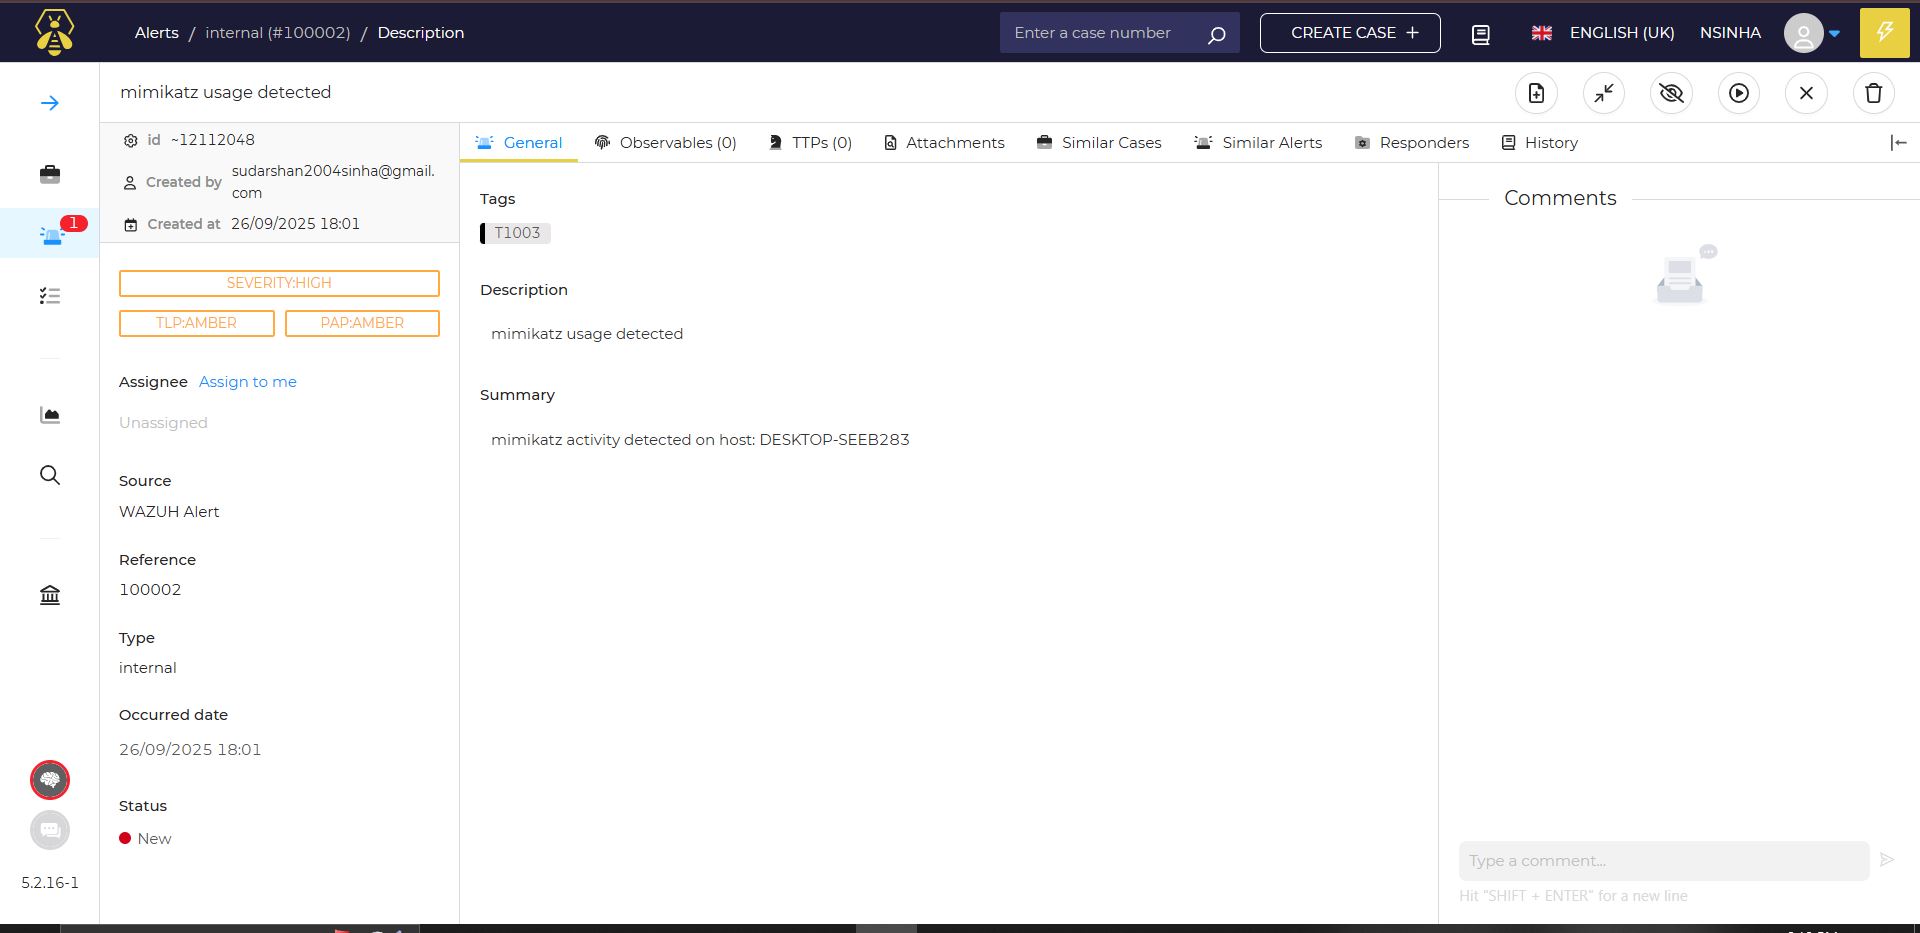
### 9.2 在 TheHive 中创建用户
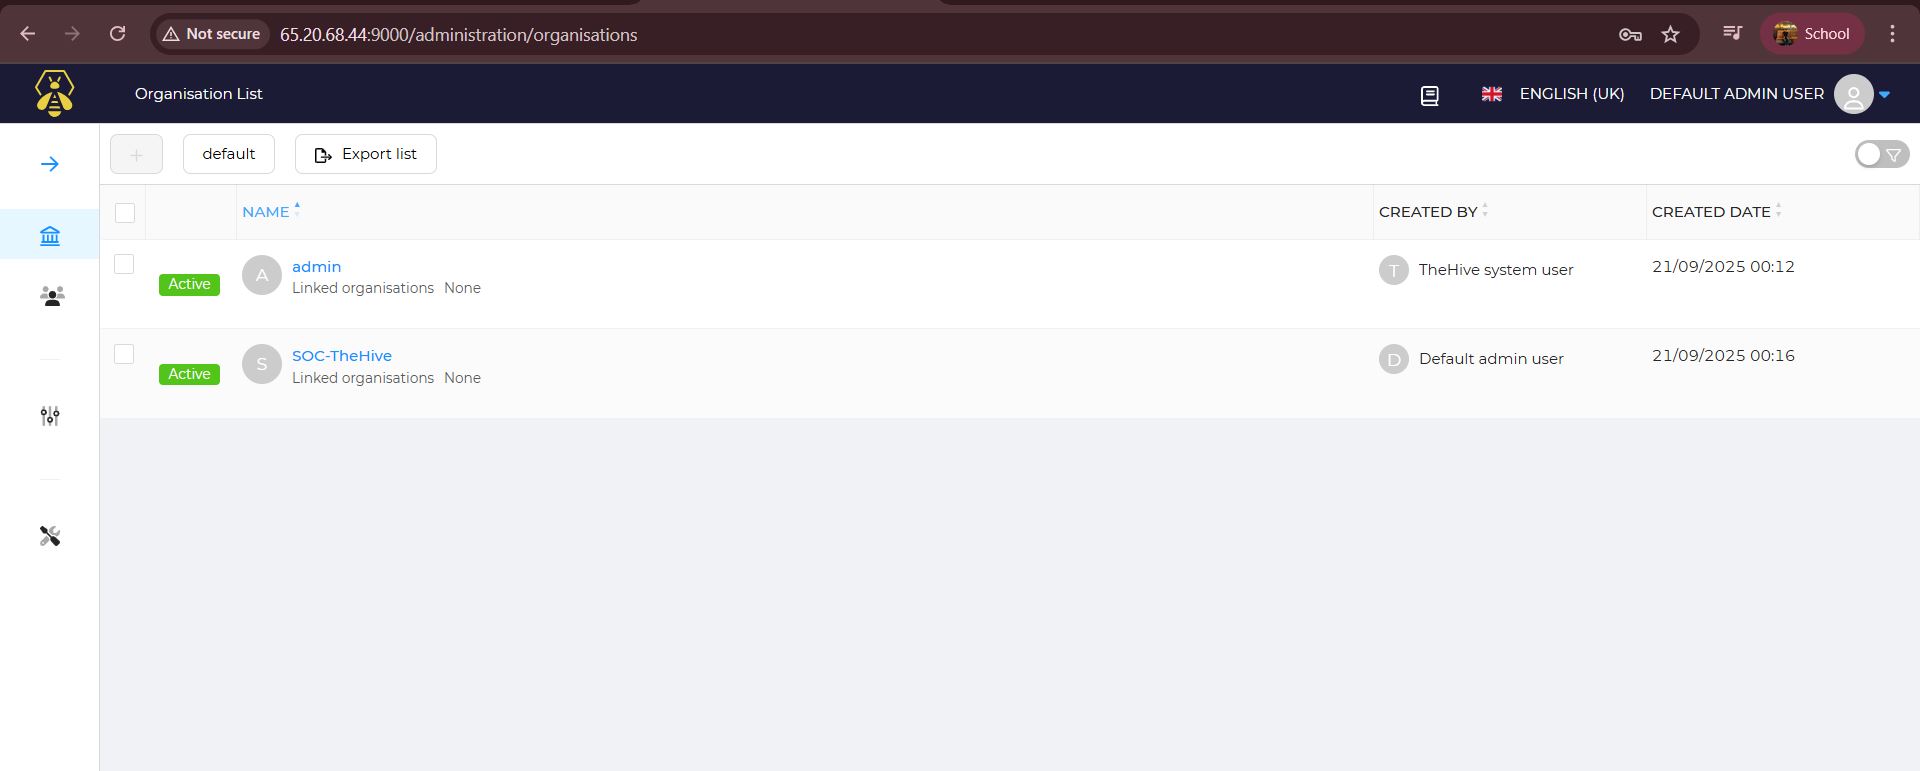
**步骤:**
1. 登录 TheHive:`admin@thehive.local` / `secret`
2. 转到 **Admin → Organisations** → 创建新组织:`SOC-TheHive`
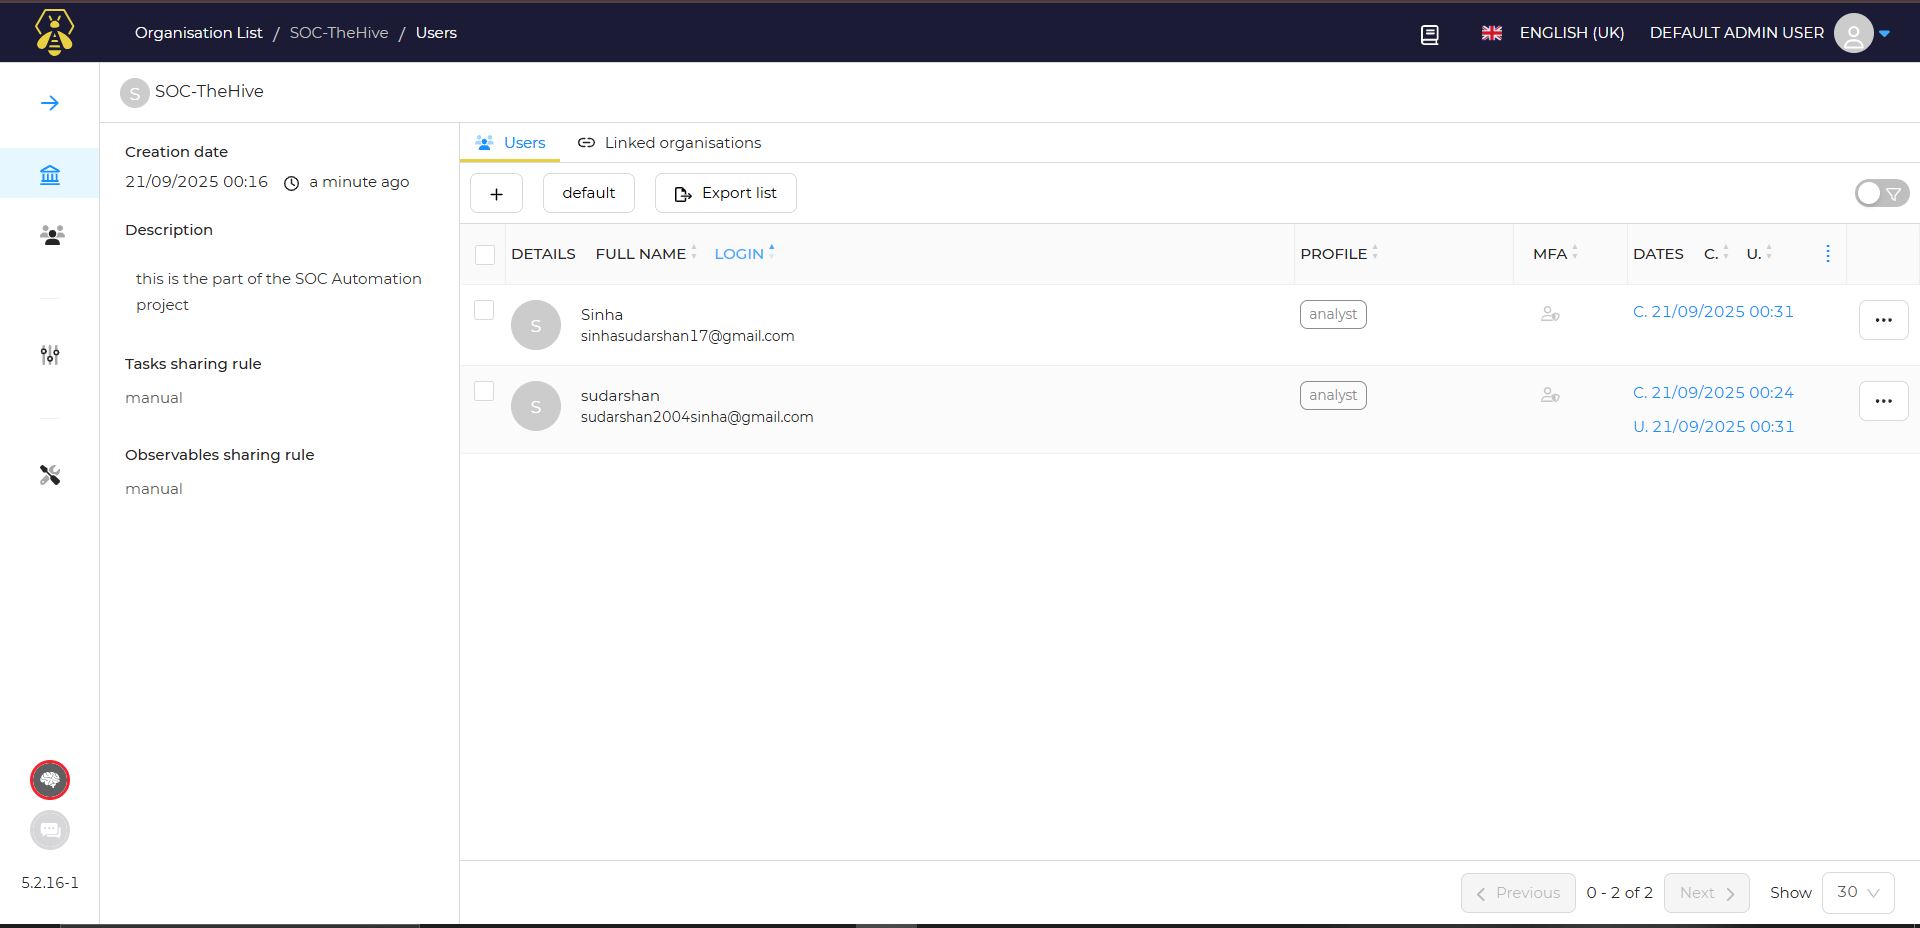
3. 在 SOC-TheHive 中,创建两个用户:
| 类型 | 名称 | 登录账号 |
|---------|--------------------|-----------------------------------|
| Normal | NSinha | sinhasudarshan17@gmail.com |
| Service | Service_sudarshan | sudarshan2004sinha@gmail.com |
4. 对于 `Service_sudarshan` → 生成一个 **API Key** → 复制它
5. 为两个用户设置密码
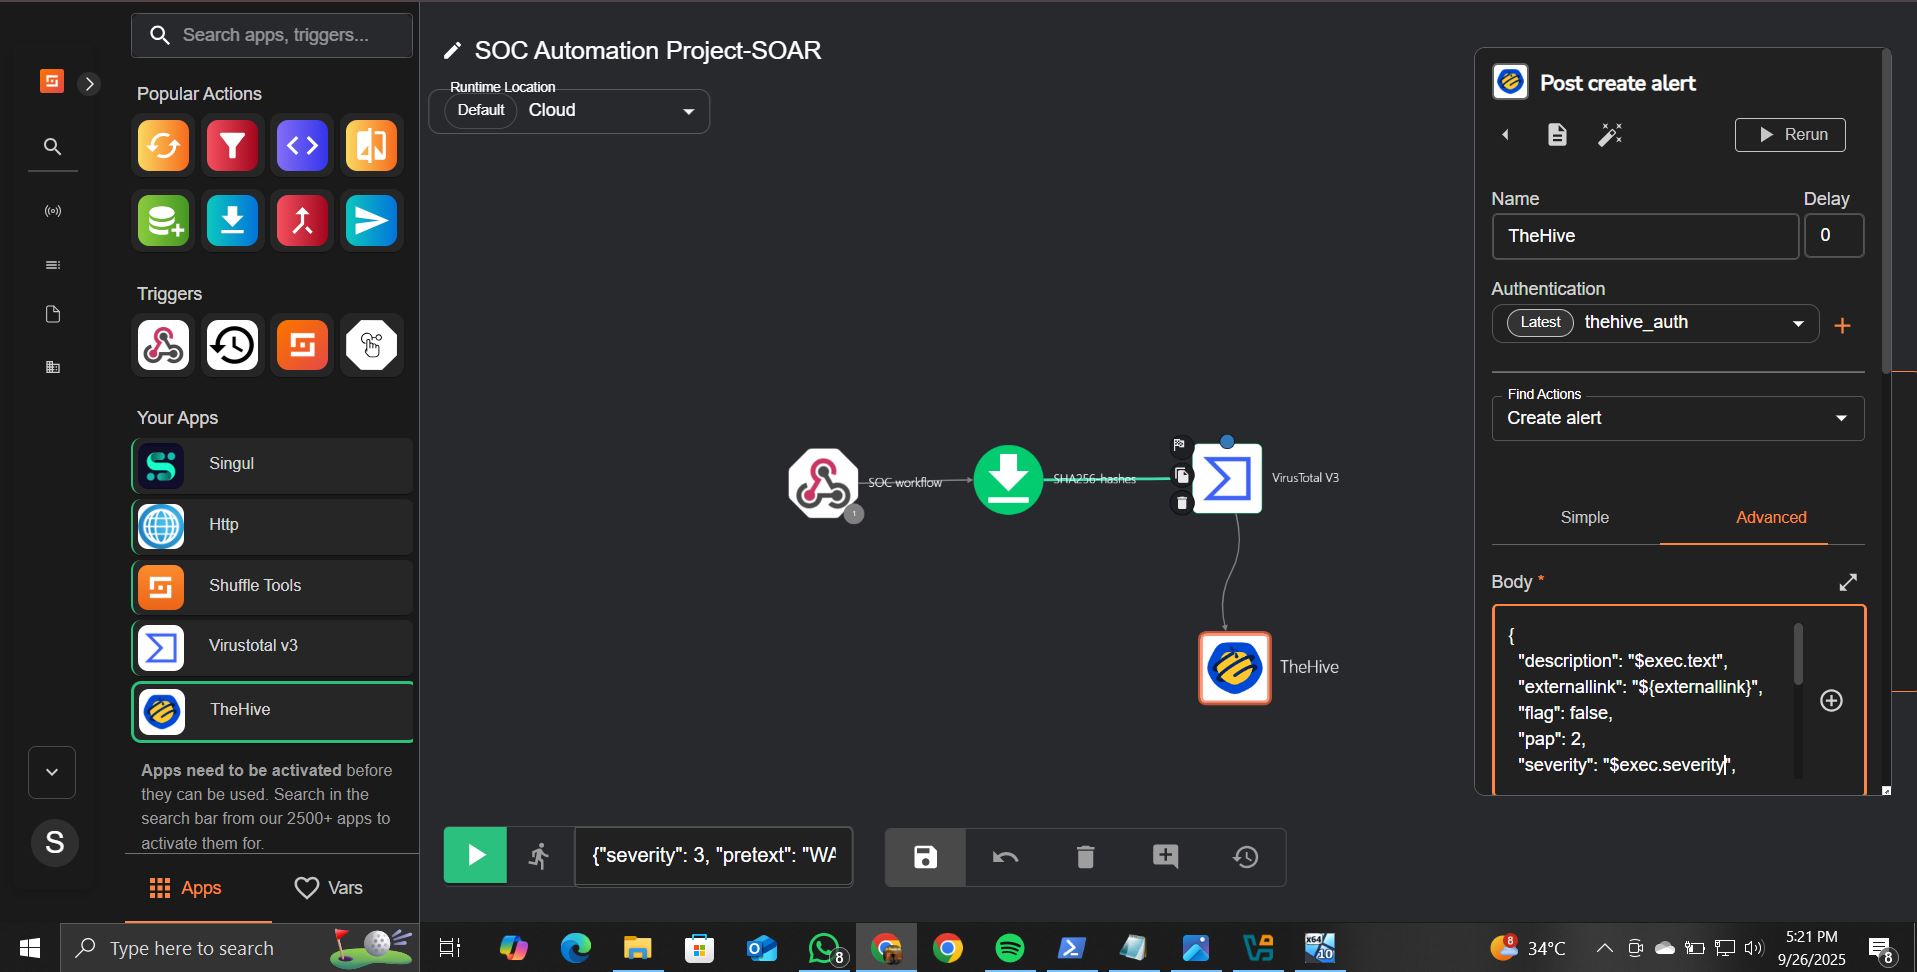
**将 TheHive 连接到 Shuffle:**
- 在 Shuffle 中,添加 **TheHive** 应用
- 粘贴 API Key
- URL:`http://65.20.68.44:9000`
- 操作:**Create Alert**
- 在 **Advanced** 标签页中编辑主体:
```
{
"description": "$exec.title",
"externallink": "${externallink}",
"flag": false,
"pap": 2,
"severity": "3",
"source": "$exec.pretext",
"sourceRef": "$exec.rule_id",
"status": "New",
"summary": "mimikatz activity detected on host: $exec.all_fields.full_log.win.system.computer",
"tags": ["T1003"],
"title": "$exec.title",
"tlp": 2,
"type": "internal"
}
```
保存工作流并重新运行 Mimikatz。你应该会在 Shuffle 中看到 **status: 201** — 警报创建成功。
## ✅ 总结
| 阶段 | 组件 | 状态 |
|-------|-----------|--------|
| Phase 1 | Wazuh 安装在 Vultr (65.20.92.112) 上 | ✅ Done |
| Phase 2 | TheHive 安装在 Vultr (65.20.68.44) 上 | ✅ Done |
| Phase 3 | Windows agent 已配置,Mimikatz 已检测,自定义规则已创建 | ✅ Done |
| Phase 4 | Shuffle 工作流 → VirusTotal 富化 → TheHive 警报已创建 | ✅ Done |
## 📚 参考资料
- https://documentation.wazuh.com/current/index.html
- https://docs.strangebee.com/resources/thehive4py/
- https://shuffler.io/
- https://github.com/gentilkiwi/mimikatz/releases
标签:AMSI绕过, CIDR查询, Docker, Docker Compose, Linux服务器, Shuffle, SOAR, SOC自动化, TheHive, Vultr, Wazuh, 云端部署, 威胁检测, 安全工作流, 安全运营中心, 安全防御评估, 工单管理, 库, 应急响应, 案例分析, 网络安全, 网络映射, 自动化运维, 请求拦截, 速率限制, 防御工事, 隐私保护