lowlydba/incident-io-action
GitHub: lowlydba/incident-io-action
一个将 GitHub Actions 工作流事件与 incident.io 事件管理平台打通的 GitHub Action,用于在流水线故障时自动发送上下文丰富的告警并支持去重与自动解决。
Stars: 1 | Forks: 0
# incident.io 警报
[](https://github.com/super-linter/super-linter)

[](./badges/coverage.svg)
[](https://github.com/marketplace/actions/sustainable-npm)
[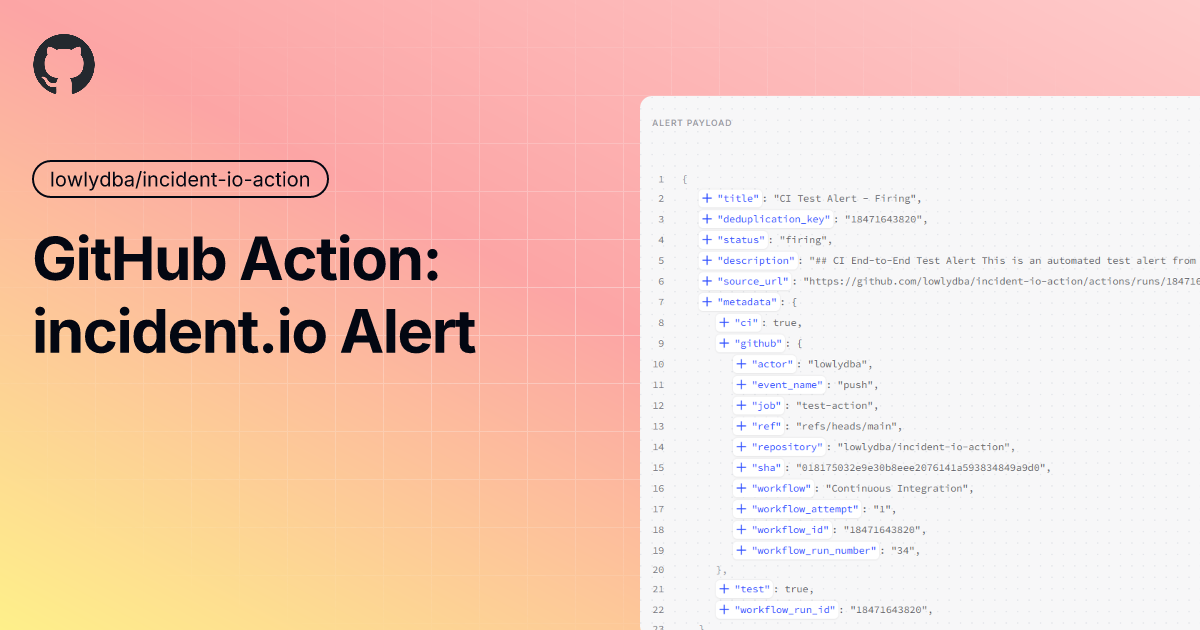](https://static.pigsec.cn/wp-content/uploads/repos/2026/06/e06b2cadef162721.png)
使用 Alert
Events V2 API 从你的 GitHub Actions 工作流中向 incident.io 发送告警。此 Action 会自动利用 GitHub 工作流上下文丰富告警信息,
实现你的 CI/CD pipeline 与事件管理之间的无缝集成。
## 目录
- [📚 教程:入门指南](#-tutorial-getting-started)
- [🔧 操作指南](#-how-to-guides)
- [📖 参考文档](#-reference)
- [💡 原理说明](#-explanation)
## 📚 教程:入门指南
了解如何从 GitHub Actions
工作流向 incident.io 发送你的第一个告警。
### 前置条件
1. 一个 [incident.io](https://incident.io) 账户
2. 一个启用了 Actions 的 GitHub 仓库
3. 10 分钟
### 步骤 1:创建一个 HTTP 告警源
1. 登录你的 incident.io 仪表板
2. 导航到 Settings → Alert Sources
3. 点击 [创建告警源][create-http] 并选择 HTTP
4. 为其命名(例如,“GitHub Actions”)
5. 保存并记下 Alert Source Config ID 和 Token
### 步骤 2:将 Secrets 添加到你的仓库
1. 进入你的 GitHub 仓库
2. 导航到 Settings → Secrets and variables → Actions
3. 添加两个新的仓库 secrets:
- `INCIDENT_IO_TOKEN`:你的告警源 token
- `INCIDENT_IO_ALERT_SOURCE_ID`:你的告警源 config ID
### 步骤 3:创建你的第一个工作流
创建 `.github/workflows/alert-on-failure.yml`:
```
name: Alert on Failure
on:
push:
branches: [main]
jobs:
example-job:
runs-on: ubuntu-latest
steps:
- name: Simulate failure
run: exit 1
continue-on-error: true
- name: Send alert to incident.io
if: failure()
uses: lowlydba/incident-io-action@v1
with:
incident-io-token: ${{ secrets.INCIDENT_IO_TOKEN }}
alert-source-config-id: ${{ secrets.INCIDENT_IO_ALERT_SOURCE_ID }}
title: 'Workflow Failed'
status: 'firing'
description: 'The main workflow has failed.'
```
### 步骤 4:测试一下
1. 提交并推送该工作流文件
2. 在 Actions 标签页中查看工作流的运行情况
3. 检查你的 incident.io 仪表板以查看告警
🎉 恭喜!你已经成功从 GitHub Actions 向
incident.io 发送了第一个告警。
## 🔧 操作指南
常见任务的实用指南。
### 如何在部署失败时发送告警
监控你的部署工作流,并在它们失败时发送告警:
```
name: Production Deploy
on:
workflow_run:
workflows: ['Deploy to Production']
types: [completed]
jobs:
alert-on-failure:
runs-on: ubuntu-latest
if: ${{ github.event.workflow_run.conclusion == 'failure' }}
steps:
- name: Send deployment failure alert
uses: lowlydba/incident-io-action@v1
with:
incident-io-token: ${{ secrets.INCIDENT_IO_TOKEN }}
alert-source-config-id: ${{ secrets.INCIDENT_IO_ALERT_SOURCE_ID }}
title: 'Production Deployment Failed'
status: 'firing'
description: |
Deployment to production has failed.
Workflow: ${{ github.event.workflow_run.name }}
Commit: ${{ github.event.workflow_run.head_sha }}
```
### 如何添加自定义 Metadata
使用 `metadata` 字段为告警添加额外的上下文:
```
- name: Send alert with custom data
uses: lowlydba/incident-io-action@v1
with:
incident-io-token: ${{ secrets.INCIDENT_IO_TOKEN }}
alert-source-config-id: ${{ secrets.INCIDENT_IO_ALERT_SOURCE_ID }}
title: 'High Error Rate Detected'
status: 'firing'
description: 'Error rate exceeded threshold'
metadata: |
{
"service": "api",
"environment": "production",
"error_rate": "5.2%",
"threshold": "1.0%",
"region": "us-east-1"
}
```
### 如何自动解决告警
在问题被修复后发送一个“已解决”的告警:
```
- name: Send firing alert
id: alert
uses: lowlydba/incident-io-action@v1
with:
incident-io-token: ${{ secrets.INCIDENT_IO_TOKEN }}
alert-source-config-id: ${{ secrets.INCIDENT_IO_ALERT_SOURCE_ID }}
title: 'Service Degradation'
status: 'firing'
- name: Wait for recovery
run: sleep 60
- name: Resolve alert
uses: lowlydba/incident-io-action@v1
with:
incident-io-token: ${{ secrets.INCIDENT_IO_TOKEN }}
alert-source-config-id: ${{ secrets.INCIDENT_IO_ALERT_SOURCE_ID }}
title: 'Service Recovered'
status: 'resolved'
deduplication-key: ${{ steps.alert.outputs.deduplication-key }}
```
### 如何使用自定义去重 Key
通过自定义去重 key 控制告警分组:
```
- name: Send alert with custom key
uses: lowlydba/incident-io-action@v1
with:
incident-io-token: ${{ secrets.INCIDENT_IO_TOKEN }}
alert-source-config-id: ${{ secrets.INCIDENT_IO_ALERT_SOURCE_ID }}
title: 'Database Migration Failed'
status: 'firing'
deduplication-key: 'db-migration-${{ github.run_id }}'
```
## 📖 参考文档
该 Action 的完整技术参考。
### 输入
| Input | Description | Required | Default |
| ------------------------ | ------------------------------------------------------------------------------------------- | -------- | ---------------- |
| `incident-io-token` | 用于身份验证的 incident.io API token | ✅ | - |
| `alert-source-config-id` | 来自 incident.io 的告警源 config ID | ✅ | - |
| `title` | 告警的标题 | ✅ | - |
| `status` | 告警的状态 (`firing` 或 `resolved`) | ✅ | `firing` |
| `description` | 包含额外细节的描述(支持 Markdown) | ❌ | - |
| `deduplication-key` | 此告警的唯一去重 key。如果未提供,默认使用 GitHub 工作流运行 ID | ❌ | [Run ID][run-id] |
| `source-url` | 告警源的链接。如果未提供,默认使用 GitHub 工作流运行 URL | ❌ | Run URL |
| `metadata` | 作为 JSON 字符串的额外 metadata | ❌ | `{}` |
### 输出
| Output | Description |
| ------------------- | ---------------------------------------- |
| `deduplication-key` | 用于告警的去重 key |
| `response-status` | 来自 incident.io API 的响应状态 |
### 自动 GitHub 上下文
此 Action 会自动将 GitHub 工作流上下文包含在 `github` 键下的告警 metadata 中:
| Field | Description |
| --------------------- | ---------------------------------- |
| `workflow` | 工作流的名称 |
| `workflow_id` | 工作流运行的唯一 ID |
| `workflow_run_number` | 工作流的运行编号 |
| `workflow_attempt` | 重新运行时的尝试编号 |
| `job` | 作业的名称 |
| `actor` | 触发工作流的用户 |
| `repository` | 仓库名称 (owner/repository) |
| `ref` | Git 引用 (branch/tag) |
| `sha` | 提交的 SHA |
| `event_name` | 触发工作流的事件 |
此上下文会自动与你提供的任何自定义 `metadata` 合并。
## 💡 原理说明
### 为什么使用此 Action?
问题:当 CI/CD pipeline 发生故障时,团队需要立即了解故障情况以便快速响应。虽然 GitHub 提供了通知功能,但与像 incident.io 这样专业的事件管理平台集成,可以提供更好的上下文、跟踪和协作能力。
解决方案:此 Action 桥接了 GitHub Actions 和 incident.io,自动创建包含工作流上下文的告警,使团队能够:
- 🎯 集中管理多个系统中的事件跟踪和告警通知
- 📢 利用 incident.io 的升级和值班功能
- 📋 维护事件的唯一事实来源
- 🔗 将 CI/CD 故障与其他系统告警相关联
### 告警去重的工作原理
此 Action 使用去重 key 将相关的告警组合在一起。默认情况下,每次工作流运行都会根据 GitHub 运行 ID 获得一个唯一的 key,从而防止同一运行产生重复告警。
默认行为:每次工作流运行都会创建一个新的告警
```
Workflow Run #123 → Alert with key "123"
Workflow Run #124 → Alert with key "124"
```
自定义 key:使用相同的 key 来更新现有的告警
```
Firing alert → deduplication-key: "db-migration-prod"
Resolved alert → deduplication-key: "db-migration-prod" (updates same alert)
```
### 告警状态生命周期
incident.io 中的告警遵循以下生命周期:
1. Firing:需要关注的活跃问题
2. Resolved:问题已修复
此 Action 支持这两种状态,允许你:
- 🚨 在检测到问题时创建告警 (`status: firing`)
- ✅ 在修复后自动解决告警 (`status: resolved`)
### GitHub 上下文丰富
此 Action 会自动为每个告警添加 GitHub 特定的 metadata。这提供了关于以下内容的即时上下文:
- 📊 发生了什么:工作流名称和作业
- 📍 在哪里发生:仓库、分支、提交
- 👤 谁触发的:发起工作流的参与者
- ⏰ 何时发生:运行编号和尝试次数
这种丰富过程是自动发生的,并会与你提供的任何自定义 metadata 合并,确保你永远不会丢失重要的上下文。
### 设计决策
incident.io 中的每个告警源都有独特的路由、升级和分组规则。要求提供此 ID 可确保告警能传达给正确的团队,并遵循适当的响应程序。
大多数用例都涉及对单个工作流的失败发出告警。默认使用运行 ID 可以减少告警噪音,同时仍然允许在高级场景下进行自定义。
手动收集上下文容易出错且乏味。自动丰富功能可确保每个告警中包含一致、全面的信息,从而缩短响应时间并便于调试。
## 附加信息
### 项目许可证
本项目基于 MIT 许可证授权 - 详情请参阅 [LICENSE](LICENSE) 文件。
### 法律免责声明
这是一个非官方的、由社区创建的 GitHub Action,不附属于 Pineapple Technology Ltd,也未获得其认可或支持。incident.io 名称、徽标和相关商标均为 Pineapple Technology Ltd 的财产。此 Action 使用 [api-docs.incident.io](https://api-docs.incident.io) 中记录的公开 incident.io API。使用此 Action 的用户
有责任遵守 incident.io 的服务条款和 API 使用政策。
此 Action 的维护者对使用此 Action 可能导致的任何问题、损害或服务中断不承担责任。使用风险自负。
标签:GitHub Actions, MITM代理, 事件管理, 代理支持, 告警, 暗色界面, 网络调试, 自动化, 自动化攻击, 自动笔记