github/spec-kit
GitHub: github/spec-kit
一套规格驱动开发工具包,通过结构化的多阶段工作流帮助开发者与 AI 编码助手更高效地协作,产出高质量软件。
Stars: 114116 | Forks: 10074

🌱 Spec Kit
Build high-quality software faster.
一个开源工具包,让你专注于产品场景和可预测的结果,而不是从零开始对每一部分进行氛围编码 (vibe coding)。


## 目录
- [🤔 什么是 Spec-Driven Development?](#-what-is-spec-driven-development)
- [⚡ 快速开始](#-get-started)
- [📽️ 视频概览](#️-video-overview)
- [🚶 社区演练](#-community-walkthroughs)
- [🤖 支持的 AI Agents](#-supported-ai-agents)
- [🔧 Specify CLI 参考](#-specify-cli-reference)
- [🧩 打造专属 Spec Kit:扩展与预设](#-making-spec-kit-your-own-extensions--presets)
- [📚 核心理念](#-core-philosophy)
- [🌟 开发阶段](#-development-phases)
- [🎯 实验目标](#-experimental-goals)
- [🔧 前置条件](#-prerequisites)
- [📖 了解更多](#-learn-more)
- [📋 详细流程](#-detailed-process)
- [🔍 故障排除](#-troubleshooting)
- [💬 支持](#-support)
- [🙏 致谢](#-acknowledgements)
- [📄 许可证](#-license)
## 🤔 什么是 Spec-Driven Development?
Spec-Driven Development **彻底颠覆**了传统的软件开发模式。几十年来,代码一直是王道 —— 规格说明只是我们搭建的脚手架,一旦“真正的”编码工作开始就会被丢弃。Spec-Driven Development 改变了这一点:**规格说明变得可执行**,直接生成可工作的实现,而不仅仅是指导实现。
## ⚡ 快速开始
### 1. 安装 Specify CLI
选择你喜欢的安装方式:
#### 选项 1:持久安装(推荐)
安装一次,随处使用。固定特定的发布标签以确保稳定性(查看 [Releases](https://github.com/github/spec-kit/releases) 获取最新版本):
```
# 安装特定稳定版本(推荐 — 将 vX.Y.Z 替换为最新 tag)
uv tool install specify-cli --from git+https://github.com/github/spec-kit.git@vX.Y.Z
# 或从 main 安装最新版本(可能包含未发布的更改)
uv tool install specify-cli --from git+https://github.com/github/spec-kit.git
```
然后直接使用该工具:
```
# 创建新项目
specify init
# 或在现有项目中初始化
specify init . --ai claude
# 或
specify init --here --ai claude
# 检查已安装工具
specify check
```
要升级 Specify,请参阅 [升级指南](./docs/upgrade.md) 获取详细说明。快速升级:
```
uv tool install specify-cli --force --from git+https://github.com/github/spec-kit.git@vX.Y.Z
```
#### 选项 2:一次性使用
无需安装直接运行:
```
# 创建新项目(固定到稳定版本 — 将 vX.Y.Z 替换为最新 tag)
uvx --from git+https://github.com/github/spec-kit.git@vX.Y.Z specify init
# 或在现有项目中初始化
uvx --from git+https://github.com/github/spec-kit.git@vX.Y.Z specify init . --ai claude
# 或
uvx --from git+https://github.com/github/spec-kit.git@vX.Y.Z specify init --here --ai claude
```
**持久安装的好处:**
- 工具保持安装状态并在 PATH 中可用
- 无需创建 shell 别名
- 通过 `uv tool list`、`uv tool upgrade`、`uv tool uninstall` 更好地管理工具
- 更简洁的 shell 配置
#### 选项 3:企业/离线安装
如果你的环境阻止访问 PyPI 或 GitHub,请参阅 [企业/离线安装](./docs/installation.md#enterprise--air-gapped-installation) 指南,了解如何使用 `pip download` 在联网机器上创建便携的、特定于操作系统的 wheel 包的分步说明。
### 2. 确立项目原则
在项目目录中启动你的 AI 助手。大多数 agents 将 spec-kit 公开为 `/speckit.*` 斜杠命令;处于 skills 模式的 Codex CLI 则使用 `$speckit-*`。
使用 **`/speckit.constitution`** 命令创建你项目的指导原则和开发指南,这些将指导所有后续的开发工作。
```
/speckit.constitution Create principles focused on code quality, testing standards, user experience consistency, and performance requirements
```
### 3. 创建规格说明
使用 **`/speckit.specify`** 命令描述你想要构建的内容。专注于**做什么**和**为什么**,而不是技术栈。
```
/speckit.specify Build an application that can help me organize my photos in separate photo albums. Albums are grouped by date and can be re-organized by dragging and dropping on the main page. Albums are never in other nested albums. Within each album, photos are previewed in a tile-like interface.
```
### 4. 创建技术实现计划
使用 **`/speckit.plan`** 命令提供你的技术栈和架构选择。
```
/speckit.plan The application uses Vite with minimal number of libraries. Use vanilla HTML, CSS, and JavaScript as much as possible. Images are not uploaded anywhere and metadata is stored in a local SQLite database.
```
### 5. 分解任务
使用 **`/speckit.tasks`** 从你的实现计划创建可执行的任务列表。
```
/speckit.tasks
```
### 6. 执行实现
使用 **`/speckit.implement`** 执行所有任务并根据计划构建你的功能。
```
/speckit.implement
```
有关详细的分步说明,请参阅我们的[综合指南](./spec-driven.md)。
## 📽️ 视频概览
想看看 Spec Kit 的实际效果吗?观看我们的[视频概览](https://www.youtube.com/watch?v=a9eR1xsfvHg&pp=0gcJCckJAYcqIYzv)!
[](https://www.youtube.com/watch?v=a9eR1xsfvHg&pp=0gcJCckJAYcqIYzv)
## 🚶 社区演练
通过这些社区贡献的演练,看看 Spec-Driven Development 在不同场景下的实际应用:
- **[全新 .NET CLI 工具](https://github.com/mnriem/spec-kit-dotnet-cli-demo)** — 从空白目录构建一个时区工具作为 .NET 单一二进制 CLI 工具,涵盖完整的 spec-kit 工作流:constitution、specify、plan、tasks 以及使用 GitHub Copilot agents 进行多轮 implement。
- **[全新 Spring Boot + React 平台](https://github.com/mnriem/spec-kit-spring-react-demo)** — 从零开始使用 Spring Boot、嵌入式 React、PostgreSQL 和 Docker Compose 构建 LLM 性能分析平台(REST API、图表、迭代跟踪),包含 clarify 步骤和跨工件一致性分析。
- **[既有 ASP.NET CMS 扩展](https://github.com/mnriem/spec-kit-aspnet-brownfield-demo)** — 扩展现有的开源 .NET CMS(CarrotCakeCMS-Core,约 307,000 行 C#、Razor、SQL、JavaScript 和配置文件),新增两个功能 —— 跨平台 Docker Compose 基础设施和令牌认证的无头 REST API —— 展示了 spec-kit 如何在没有预先规格或 constitution 的情况下融入现有代码库。
- **[既有 Java 运行时扩展](https://github.com/mnriem/spec-kit-java-brownfield-demo)** — 扩展现有的开源 Jakarta EE 运行时(Piranha,跨 180 个 Maven 模块约 420,000 行 Java、XML、JSP、HTML 和配置文件),添加受密码保护的服务器管理控制台,在大型多模块 Java 项目上演示 spec-kit,无需预先规格或 constitution。
- **[既有 Go / React 仪表板演示](https://github.com/mnriem/spec-kit-go-brownfield-demo)** — 演示完全从**终端使用 GitHub Copilot CLI** 驱动的 spec-kit。扩展 NASA 的开源 Hermes 地面支持系统,添加轻量级基于 React 的 Web 遥测仪表板,展示了完整的 constitution → specify → plan → tasks → implement 工作流可从终端运行。
- **[带自定义预设的全新 Spring Boot MVC](https://github.com/mnriem/spec-kit-pirate-speak-preset-demo)** — 使用自定义海盗语预设从零构建 Spring Boot MVC 应用程序,展示了预设如何重塑整个 spec-kit 体验:规格说明变成了“航行宣言”,计划变成了“战斗计划”,任务变成了“船员分配” —— 全部以地道的海盗黑话生成,且无需更改任何工具。
## 🤖 支持的 AI Agents
| Agent | 支持 | 备注 |
| ------------------------------------------------------------------------------------ | ------- | ----------------------------------------------------------------------------------------------------------------------------------------- |
| [Qoder CLI](https://qoder.com/cli) | ✅ | |
| [Kiro CLI](https://kiro.dev/docs/cli/) | ✅ | 使用 `--ai kiro-cli`(别名:`--ai kiro`) |
| [Amp](https://ampcode.com/) | ✅ | |
| [Auggie CLI](https://docs.augmentcode.com/cli/overview) | ✅ | |
| [Claude Code](https://www.anthropic.com/claude-code) | ✅ | |
| [CodeBuddy CLI](https://www.codebuddy.ai/cli) | ✅ | |
| [Codex CLI](https://github.com/openai/codex) | ✅ | 需要 `--ai-skills`。Codex 推荐 [skills](https://developers.openai.com/codex/skills) 并将 [自定义提示](https://developers.openai.com/codex/custom-prompts) 视为已弃用。Spec-kit 将 Codex skills 安装到 `.agents/skills` 并以 `$speckit-` 调用它们。 |
| [Cursor](https://cursor.sh/) | ✅ | |
| [Gemini CLI](https://github.com/google-gemini/gemini-cli) | ✅ | |
| [GitHub Copilot](https://code.visualstudio.com/) | ✅ | |
| [IBM Bob](https://www.ibm.com/products/bob) | ✅ | 基于 IDE 的 agent,支持斜杠命令 |
| [Jules](https://jules.google.com/) | ✅ | |
| [Kilo Code](https://github.com/Kilo-Org/kilocode) | ✅ | |
| [opencode](https://opencode.ai/) | ✅ | |
| [Pi Coding Agent](https://pi.dev) | ✅ | Pi 开箱即不支持 MCP,因此 `taskstoissues` 无法按预期工作。可以通过 [extensions](https://github.com/badlogic/pi-mono/tree/main/packages/coding-agent#extensions) 添加 MCP 支持 |
| [Qwen Code](https://github.com/QwenLM/qwen-code) | ✅ | |
| [Roo Code](https://roocode.com/) | ✅ | |
| [SHAI (OVHcloud)](https://github.com/ovh/shai) | ✅ | |
| [Tabnine CLI](https://docs.tabnine.com/main/getting-started/tabnine-cli) | ✅ | |
| [Mistral Vibe](https://github.com/mistralai/mistral-vibe) | ✅ | |
| [Kimi Code](https://code.kimi.com/) | ✅ | |
| [iFlow CLI](https://docs.iflow.cn/en/cli/quickstart) | ✅ | |
| [Windsurf](https://windsurf.com/) | ✅ | |
| [Junie](https://junie.jetbrains.com/) | ✅ | |
| [Antigravity (agy)](https://antigravity.google/) | ✅ | 需要 `--ai-skills` |
| [Trae](https://www.trae.ai/) | ✅ | |
| 通用 | ✅ | 自带 agent —— 对不支持的 agents 使用 `--ai generic --ai-commands-dir ` |
## 🔧 Specify CLI 参考
`specify` 命令支持以下选项:
### 命令
| 命令 | 描述 |
| ------- |------------------------------------------------------------------------------------------------------------------------------------------------------------------------------------------------------------------------------------------------------------------------------------------|
| `init` | 从最新模板初始化一个新的 Specify 项目 |
| `check` | 检查已安装的工具:`git` 以及 `AGENT_CONFIG` 中配置的所有基于 CLI 的 agents(例如:`claude`、`gemini`、`code`/`code-insiders`、`cursor-agent`、`windsurf`、`junie`、`qwen`、`opencode`、`codex`、`kiro-cli`、`shai`、`qodercli`、`vibe`、`kimi`、`iflow`、`pi` 等) |
### `specify init` 参数与选项
| 参数/选项 | 类型 | 描述 |
| ---------------------- | -------- |-------------------------------------------------------------------------------------------------------------------------------------------------------------------------------------------------------------------------------------------------------------------------------------------------------------------------------------------------------------------------------------------|
| `` | 参数 | 新项目目录的名称(如果使用 `--here` 则可选,或使用 `.` 表示当前目录) |
| `--ai` | 选项 | 要使用的 AI 助手(有关完整的最新列表,请参阅 `AGENT_CONFIG`)。常见选项包括:`claude`、`gemini`、`copilot`、`cursor-agent`、`qwen`、`opencode`、`codex`、`windsurf`、`junie`、`kilocode`、`auggie`、`roo`、`codebuddy`、`amp`、`shai`、`kiro-cli`(`kiro` 别名)、`agy`、`bob`、`qodercli`、`vibe`、`kimi`、`iflow`、`pi` 或 `generic`(需要 `--ai-commands-dir`) |
| `--ai-commands-dir` | 选项 | agent 命令文件的目录(与 `--ai generic` 一起使用是必需的,例如 `.myagent/commands/`) |
| `--script` | 选项 | 要使用的脚本变体:`sh` (bash/zsh) 或 `ps` (PowerShell) |
| `--ignore-agent-tools` | 标志 | 跳过对 Claude Code 等 AI agent 工具的检查 |
| `--no-git` | 标志 | 跳过 git 仓库初始化 |
| `--here` | 标志 | 在当前目录初始化项目,而不是创建新目录 |
| `--force` | 标志 | 在当前目录初始化时强制合并/覆盖(跳过确认) |
| `--skip-tls` | 标志 | 跳过 SSL/TLS 验证(不推荐) |
| `--debug` | 标志 | 启用详细的调试输出以便排查故障 | `--github-token` | 选项 | 用于 API 请求的 GitHub token(或设置 GH_TOKEN/GITHUB_TOKEN 环境变量) |
| `--ai-skills` | 标志 | 将 Prompt.MD 模板作为 agent skills 安装到 agent 特定的 `skills/` 目录中(需要 `--ai`) |
| `--branch-numbering` | 选项 | 分支编号策略:`sequential`(默认 — `001`、`002`、`003`)或 `timestamp`(`YYYYMMDD-HHMMSS`)。时间戳模式对于分布式团队避免编号冲突很有用 |
### 示例
```
# 基本项目初始化
specify init my-project
# 使用特定 AI assistant 初始化
specify init my-project --ai claude
# 初始化并支持 Cursor
specify init my-project --ai cursor-agent
# 初始化并支持 Qoder
specify init my-project --ai qodercli
# 初始化并支持 Windsurf
specify init my-project --ai windsurf
# 初始化并支持 Kiro CLI
specify init my-project --ai kiro-cli
# 初始化并支持 Amp
specify init my-project --ai amp
# 初始化并支持 SHAI
specify init my-project --ai shai
# 初始化并支持 Mistral Vibe
specify init my-project --ai vibe
# 初始化并支持 IBM Bob
specify init my-project --ai bob
# 初始化并支持 Pi Coding Agent
specify init my-project --ai pi
# 初始化并支持 Codex CLI
specify init my-project --ai codex --ai-skills
# 初始化并支持 Antigravity
specify init my-project --ai agy --ai-skills
# 使用不支持的 agent 初始化(通用 / 自带 agent)
specify init my-project --ai generic --ai-commands-dir .myagent/commands/
# 使用 PowerShell 脚本初始化(Windows/跨平台)
specify init my-project --ai copilot --script ps
# 在当前目录初始化
specify init . --ai copilot
# 或使用 --here 标志
specify init --here --ai copilot
# 强制合并到当前(非空)目录而无需确认
specify init . --force --ai copilot
# 或
specify init --here --force --ai copilot
# 跳过 git 初始化
specify init my-project --ai gemini --no-git
# 启用 debug 输出以进行故障排除
specify init my-project --ai claude --debug
# 使用 GitHub token 进行 API 请求(有助于企业环境)
specify init my-project --ai claude --github-token ghp_your_token_here
# 随项目安装 agent skills
specify init my-project --ai claude --ai-skills
# 在当前目录初始化并安装 agent skills
specify init --here --ai gemini --ai-skills
# 使用基于时间戳的分支编号(适用于分布式团队)
specify init my-project --ai claude --branch-numbering timestamp
# 检查系统要求
specify check
```
### 可用的斜杠命令
运行 `specify init` 后,你的 AI 编码 agent 将可以访问这些用于结构化开发的斜杠命令。
对于 Codex CLI,`--ai-skills` 将 spec-kit 作为 agent skills 安装,而不是斜杠命令提示文件。在 Codex skills 模式下,以 `$speckit-constitution`、`$speckit-specify`、`$speckit-plan`、`$speckit-tasks` 和 `$speckit-implement` 调用 spec-kit。
#### 核心命令
Spec-Driven Development 工作流的基本命令:
| 命令 | 描述 |
| ----------------------- | ------------------------------------------------------------------------ |
| `/speckit.constitution` | 创建或更新项目指导原则和开发指南 |
| `/speckit.specify` | 定义你想要构建的内容(需求和用户故事) |
| `/speckit.plan` | 使用你选择的技术栈创建技术实现计划 |
| `/speckit.tasks` | 生成可执行的任务列表以供实现 |
| `/speckit.implement` | 执行所有任务以根据计划构建功能 |
#### 可选命令
用于增强质量和验证的附加命令:
| 命令 | 描述 |
| -------------------- | ------------------------------------------------------------------------------------------------------------------------------------ |
| `/speckit.clarify` | 澄清未明确说明的领域(在 `/speckit.plan` 之前推荐;原为 `/quizme`) |
| `/speckit.analyze` | 跨工件一致性与覆盖率分析(在 `/speckit.tasks` 之后、`/speckit.implement` 之前运行) |
| `/speckit.checklist` | 生成自定义质量检查表,以验证需求的完整性、清晰度和一致性(类似于“针对英语的单元测试”) |
### 环境变量
| 变量 | 描述 |
| ----------------- | ------------------------------------------------------------------------------------------------------------------------------------------------------------------------------------------------------------------------------------------------------------------------------------------------------ |
| `SPECIFY_FEATURE` | 覆盖非 Git 仓库的功能检测。设置为功能目录名称(例如 `001-photo-albums`)以在不使用 Git 分支时处理特定功能。
\*\*必须在你与之交互的 agent 上下文中设置,然后才能使用 `/speckit.plan` 或后续命令。 |
## 🧩 打造专属 Spec Kit:扩展与预设
Spec Kit 可以通过两个互补的系统根据你的需求进行定制 —— **扩展**和**预设** —— 加上用于一次性调整的项目本地覆盖:
```
block-beta
columns 1
overrides["⬆ Highest priority\nProject-Local Overrides\n.specify/templates/overrides/"]
presets["Presets — Customize core & extensions\n.specify/presets//templates/"]
extensions["Extensions — Add new capabilities\n.specify/extensions//templates/"]
core["Spec Kit Core — Built-in SDD commands & templates\n.specify/templates/\n⬇ Lowest priority"]
style overrides fill:transparent,stroke:#999
style presets fill:transparent,stroke:#4a9eda
style extensions fill:transparent,stroke:#4a9e4a
style core fill:transparent,stroke:#e6a817
```
**模板**在**运行时**解析 —— Spec Kit 自上而下遍历堆栈并使用第一个匹配项。项目本地覆盖(`.specize/templates/overrides/`)让你可以为单个项目进行一次性调整,而无需创建完整的预设。**命令**在**安装时**应用 —— 当你运行 `specify extension add` 或 `specify preset add` 时,命令文件被写入 agent 目录(例如 `.claude/commands/`)。如果多个预设或扩展提供相同的命令,则最高优先级的版本胜出。移除时,次高优先级的版本会自动恢复。如果不存在覆盖或自定义,Spec Kit 使用其核心默认值。
### 扩展 —— 添加新功能
当你需要超出 Spec Kit 核心范围的功能时,请使用**扩展**。扩展引入新的命令和模板 —— 例如,添加内置 SDD 命令未涵盖的特定领域工作流、与外部工具集成或添加全新的开发阶段。它们扩展了 *Spec Kit 能做什么*。
```
# 搜索可用 extensions
specify extension search
# 安装 extension
specify extension add
```
例如,扩展可以添加 Jira 集成、实现后代码审查、V-Model 测试可追溯性或项目健康诊断。
有关完整指南、完整的社区目录以及如何构建和发布自己的扩展,请参阅 [Extensions README](./extensions/README.md)。
### 预设 —— 自定义现有工作流
当你想要更改 *Spec Kit 如何工作*而不添加新功能时,请使用**预设**。预设覆盖核心及已安装扩展附带的模板和命令 —— 例如,强制执行面向合规性的规格格式、使用特定领域术语或将组织标准应用于计划和任务。它们自定义 Spec Kit 及其扩展生成的工件和说明。
```
# 搜索可用 presets
specify preset search
# 安装 preset
specify preset add
```
例如,预设可以重构规格模板以要求法规可追溯性、调整工作流以适应你使用的方法论(例如 Agile、Kanban、Waterfall、jobs-to-be-done 或领域驱动设计)、向计划添加强制性安全审查关卡、强制执行测试优先的任务排序,或将整个工作流本地化为不同的语言。[海盗语演示](https://github.com/mnriem/spec-kit-pirate-speak-preset-demo)展示了自定义可以有多么深入。可以按优先级顺序堆叠多个预设。
有关完整指南,包括解析顺序、优先级以及如何创建自己的预设,请参阅 [Presets README](./presets/README.md)。
### 何时使用哪种
| 目标 | 使用 |
| --- | --- |
| 添加全新的命令或工作流 | 扩展 (Extension) |
| 自定义规格、计划或任务的格式 | 预设 (Preset) |
| 集成外部工具或服务 | 扩展 (Extension) |
| 强制执行组织或法规标准 | 预设 (Preset) |
| 发布可复用的领域特定模板 | 两者皆可 —— 预设用于模板覆盖,扩展用于与新命令捆绑的模板 |
## 📚 核心理念
Spec-Driven Development 是一个结构化的过程,强调:
- **意图驱动开发**,规格说明在“*如何做*”之前定义“*做什么*”
- 使用护栏和组织原则进行**丰富的规格创建**
- **多步骤细化**,而不是从提示一次性生成代码
- **高度依赖**先进的 AI 模型能力来解释规格
## 🌟 开发阶段
| 阶段 | 焦点 | 关键活动 |
| ---------------------------------------- | ------------------------ | ------------------------------------------------------------------------------------------------------------------------------------------------------------------ |
| **0-to-1 开发** ("Greenfield") | 从零开始生成 | - 从高层需求开始
- 生成规格说明
- 规划实现步骤
- 构建生产就绪的应用程序
|
| **创意探索** | 并行实现 | - 探索多样化的解决方案
- 支持多种技术栈和架构
- 试验 UX 模式
|
| **迭代增强** ("Brownfield") | Brownfield 现代化 | |
## 🎯 实验目标
我们的研究和实验重点是:
### 技术独立性
- 使用多样化的技术栈创建应用程序
- 验证 Spec-Driven Development 是一个过程,不依赖于特定技术、编程语言或框架的假设
### 企业约束
- 展示关键任务应用程序的开发
- 纳入组织约束(云提供商、技术栈、工程实践)
- 支持企业设计系统和合规性要求
### 以用户为中心的开发
- 为不同的用户群体和偏好构建应用程序
- 支持各种开发方法(从氛围编码到 AI 原生开发)
### 创意与迭代流程
- 验证并行实现探索的概念
- 提供稳健的迭代功能开发工作流
- 扩展流程以处理升级和现代化任务
## 🔧 前置条件
- **Linux/macOS/Windows**
- [受支持](#-supported-ai-agents)的 AI 编码 agent。
- [uv](https://docs.astral.sh/uv/) 用于包管理
- [Python 3.11+](https://www.python.org/downloads/)
- [Git](https://git-scm.com/downloads)
如果你在使用 agent 时遇到问题,请提交 issue,以便我们改进集成。
## 📖 了解更多
- **[完整的 Spec-Driven Development 方法论](./spec-driven.md)** - 深入了解完整流程
- **[详细演练](#-detailed-process)** - 分步实现指南
## 📋 详细流程
点击展开详细的分步演练
你可以使用 Specify CLI 来引导你的项目,这将引入你环境中所需的工件。运行:
```
specify init
```
或者在当前目录初始化:
```
specify init .
# 或使用 --here 标志
specify init --here
# 当目录已包含文件时跳过确认
specify init . --force
# 或
specify init --here --force
```
系统将提示你选择正在使用的 AI agent。你也可以直接在终端中主动指定它:
```
specify init --ai claude
specify init --ai gemini
specify init --ai copilot
# 或在当前目录:
specify init . --ai claude
specify init . --ai codex --ai-skills
# 或使用 --here 标志
specify init --here --ai claude
specify init --here --ai codex --ai-skills
# 强制合并非空当前目录
specify init . --force --ai claude
# 或
specify init --here --force --ai claude
```
CLI 将检查你是否安装了 Claude Code、Gemini CLI、Cursor CLI、Qwen CLI、opencode、Codex CLI、Qoder CLI、Tabnine CLI、Kiro CLI、Pi 或 Mistral Vibe。如果没有,或者你更愿意获取模板而不检查正确的工具,请在你的命令中使用 `--ignore-agent-tools`:
```
specify init --ai claude --ignore-agent-tools
```
### **步骤 1:** 确立项目原则
转到项目文件夹并运行你的 AI agent。在我们的示例中,我们使用的是 `claude`。
如果你看到 `/speckit.constitution`、`/speckit.specify`、`/speckit.plan`、`/speckit.tasks` 和 `/speckit.implement` 命令可用,就说明配置正确了。
第一步应该是使用 `/speckit.constitution` 命令确立你项目的指导原则。这有助于确保在所有后续开发阶段保持一致的决策:
```
/speckit.constitution Create principles focused on code quality, testing standards, user experience consistency, and performance requirements. Include governance for how these principles should guide technical decisions and implementation choices.
```
此步骤创建或更新 `.specize/memory/constitution.md` 文件,其中包含 AI agent 在规格说明、规划和实现阶段将引用的项目基础指南。
### **步骤 2:** 创建项目规格说明
在确立项目原则后,你现在可以创建功能规格说明。使用 `/speckit.specify` 命令,然后提供你想要开发的项目的具体需求。
一个示例提示:
```
Develop Taskify, a team productivity platform. It should allow users to create projects, add team members,
assign tasks, comment and move tasks between boards in Kanban style. In this initial phase for this feature,
let's call it "Create Taskify," let's have multiple users but the users will be declared ahead of time, predefined.
I want five users in two different categories, one product manager and four engineers. Let's create three
different sample projects. Let's have the standard Kanban columns for the status of each task, such as "To Do,"
"In Progress," "In Review," and "Done." There will be no login for this application as this is just the very
first testing thing to ensure that our basic features are set up. For each task in the UI for a task card,
you should be able to change the current status of the task between the different columns in the Kanban work board.
You should be able to leave an unlimited number of comments for a particular card. You should be able to, from that task
card, assign one of the valid users. When you first launch Taskify, it's going to give you a list of the five users to pick
from. There will be no password required. When you click on a user, you go into the main view, which displays the list of
projects. When you click on a project, you open the Kanban board for that project. You're going to see the columns.
You'll be able to drag and drop cards back and forth between different columns. You will see any cards that are
assigned to you, the currently logged in user, in a different color from all the other ones, so you can quickly
see yours. You can edit any comments that you make, but you can't edit comments that other people made. You can
delete any comments that you made, but you can't delete comments anybody else made.
```
输入此提示后,你应该会看到 Claude Code 开始规划和规格起草过程。Claude Code 还会触发一些内置脚本来设置仓库。
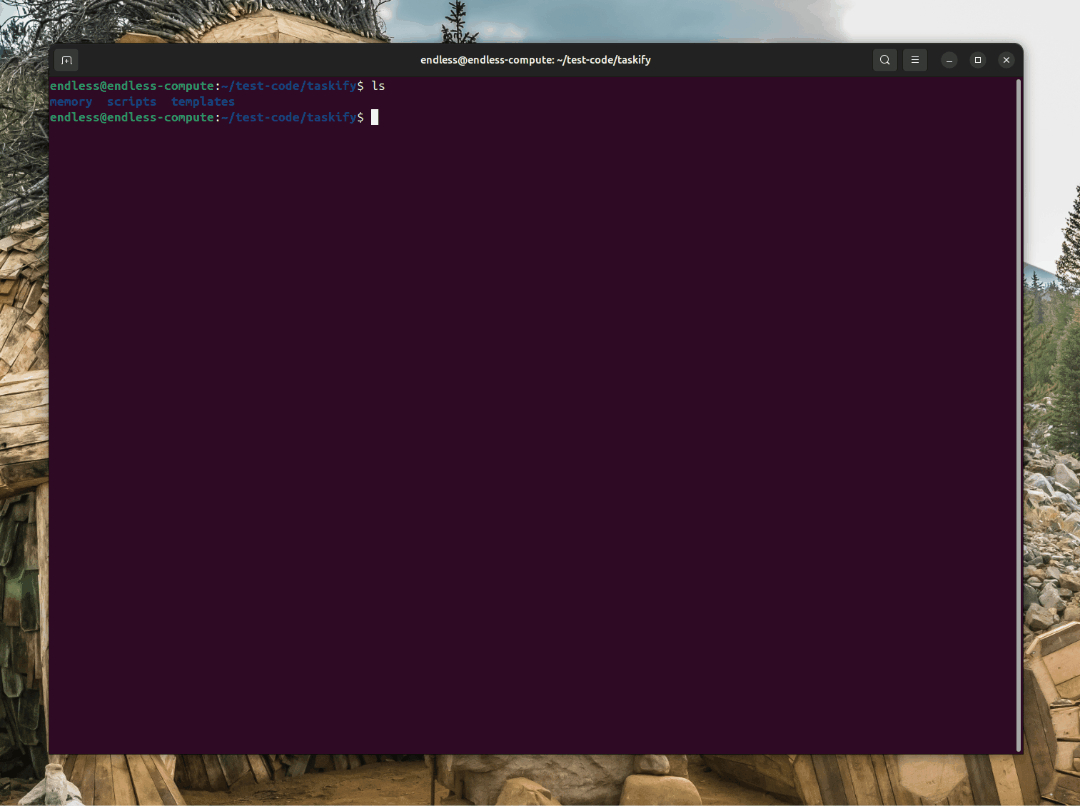
此步骤完成后,你应该会创建一个新分支(例如 `001-create-taskify`),以及在 `specs/001-create-taskify` 目录中创建一个新规格说明。
生成的规格说明应包含一组用户故事和功能需求,如模板中所定义。
在这个阶段,你的项目文件夹内容应类似于以下内容:
```
└── .specify
├── memory
│ └── constitution.md
├── scripts
│ ├── check-prerequisites.sh
│ ├── common.sh
│ ├── create-new-feature.sh
│ ├── setup-plan.sh
│ └── update-claude-md.sh
├── specs
│ └── 001-create-taskify
│ └── spec.md
└── templates
├── plan-template.md
├── spec-template.md
└── tasks-template.md
```
### **步骤 3:** 功能规格说明澄清(规划前必需)
在创建基线规格说明后,你可以继续澄清在第一次尝试中未正确捕获的任何需求。
你应该在创建技术计划**之前**运行结构化澄清工作流,以减少下游的返工。
首选顺序:
1. 使用 `/speckit.clarify`(结构化)—— 顺序的、基于覆盖率的提问,将答案记录在澄清 (Clarifications) 部分。
2. 如果仍有模糊之处,可选择进行随意的自由形式细化。
如果你有意跳过澄清(例如 spike 或探索性原型),请明确说明,以便 agent 不会因缺少澄清而阻塞。
示例自由形式细化提示(如果仍需要,在 `/speckit.clarify` 之后):
```
For each sample project or project that you create there should be a variable number of tasks between 5 and 15
tasks for each one randomly distributed into different states of completion. Make sure that there's at least
one task in each stage of completion.
```
你还应该要求 Claude Code 验证 **审查与验收检查表**,勾选已验证/通过需求的项目,并将未通过的项目保留为未勾选。可以使用以下提示:
```
Read the review and acceptance checklist, and check off each item in the checklist if the feature spec meets the criteria. Leave it empty if it does not.
```
重要的是利用与 Claude Code 的交互作为澄清和围绕规格说明提问的机会 —— **不要将其第一次尝试视为最终结果**。
### **步骤 4:** 生成计划
你现在可以具体说明技术栈和其他技术需求。你可以使用项目模板中内置的 `/speckit.plan` 命令,配合如下提示:
```
We are going to generate this using .NET Aspire, using Postgres as the database. The frontend should use
Blazor server with drag-and-drop task boards, real-time updates. There should be a REST API created with a projects API,
tasks API, and a notifications API.
```
此步骤的输出将包括许多实现细节文档,你的目录树类似于:
```
.
├── CLAUDE.md
├── memory
│ └── constitution.md
├── scripts
│ ├── check-prerequisites.sh
│ ├── common.sh
│ ├── create-new-feature.sh
│ ├── setup-plan.sh
│ └── update-claude-md.sh
├── specs
│ └── 001-create-taskify
│ ├── contracts
│ │ ├── api-spec.json
│ │ └── signalr-spec.md
│ ├── data-model.md
│ ├── plan.md
│ ├── quickstart.md
│ ├── research.md
│ └── spec.md
└── templates
├── CLAUDE-template.md
├── plan-template.md
├── spec-template.md
└── tasks-template.md
```
检查 `research.md` 文档,确保根据你的指示使用了正确的技术栈。如果有任何组件看起来不对,你可以要求 Claude Code 完善它,甚至让它检查你想使用的平台/框架的本地安装版本(例如 .NET)。
此外,如果所选技术栈变化迅速(例如 .NET Aspire、JS 框架),你可能希望要求 Claude Code 研究其细节,提示如下:
```
I want you to go through the implementation plan and implementation details, looking for areas that could
benefit from additional research as .NET Aspire is a rapidly changing library. For those areas that you identify that
require further research, I want you to update the research document with additional details about the specific
versions that we are going to be using in this Taskify application and spawn parallel research tasks to clarify
any details using research from the web.
```
在此过程中,你可能会发现 Claude Code 卡在研究错误的内容上 —— 你可以使用如下提示帮助将其引导回正确方向:
```
I think we need to break this down into a series of steps. First, identify a list of tasks
that you would need to do during implementation that you're not sure of or would benefit
from further research. Write down a list of those tasks. And then for each one of these tasks,
I want you to spin up a separate research task so that the net results is we are researching
all of those very specific tasks in parallel. What I saw you doing was it looks like you were
researching .NET Aspire in general and I don't think that's gonna do much for us in this case.
That's way too untargeted research. The research needs to help you solve a specific targeted question.
```
### **步骤 5:** 让 Claude Code 验证计划
计划制定好后,你应该让 Claude Code 过一遍,以确保没有遗漏的部分。你可以使用如下提示:
```
Now I want you to go and audit the implementation plan and the implementation detail files.
Read through it with an eye on determining whether or not there is a sequence of tasks that you need
to be doing that are obvious from reading this. Because I don't know if there's enough here. For example,
when I look at the core implementation, it would be useful to reference the appropriate places in the implementation
details where it can find the information as it walks through each step in the core implementation or in the refinement.
```
这有助于完善实现计划,并帮助你避免 Claude Code 在其规划周期中遗漏的潜在盲点。一旦初始完善通过完成,请要求 Claude Code 在进入实现阶段之前再次过一遍检查表。
你还可以要求 Claude Code(如果你安装了 [GitHub CLI](https://docs.github.com/en/github-cli/github-cli))继续从当前分支向 `main`一个带有详细描述的 pull request,以确保正确跟踪工作。
### **步骤 6:** 使用 /speckit.tasks 生成任务分解
实现计划验证后,你现在可以将计划分解为具体的、可执行的任务,这些任务可以按正确的顺序执行。使用 `/speckit.tasks` 命令从你的实现计划自动生成详细的任务分解:
```
/speckit.tasks
```
此步骤在你的功能规格说明目录中创建一个 `tasks.md` 文件,其中包含:
- **按用户故事组织的任务分解** —— 每个用户故事成为一个单独的实现阶段,有其自己的一组任务
- **依赖管理** —— 任务按顺序排列以尊重组件之间的依赖关系(例如,模型先于服务,服务先于端点)
- **并行执行标记** —— 可以并行运行的任务标记为 `[P]` 以优化开发工作流
- **文件路径规范** —— 每个任务包含实现应发生的确切文件路径
- **测试驱动开发结构** —— 如果请求了测试,则包含测试任务并排序为实现之前编写
- **检查点验证** —— 每个用户故事阶段包含验证独立功能的检查点
生成的 tasks.md 为 `/speckit.implement` 命令提供了清晰的路线图,确保系统化实现,保持代码质量并允许增量交付用户故事。
### **步骤 7:** 实现
准备好后,使用 `/speckit.implement` 命令执行你的实现计划:
```
/speckit.implement
```
`/speckit.implement` 命令将:
- 验证所有前置条件已到位(constitution、spec、plan 和 tasks)
- 解析来自 `tasks.md` 的任务分解
- 按正确顺序执行任务,尊重依赖关系和并行执行标记
- 遵循你的任务计划中定义的 TDD 方法
- 提供进度更新并适当地处理错误
实现完成后,测试应用程序并解决任何可能不在 CLI 日志中可见的运行时错误(例如浏览器控制台错误)。你可以将此类错误复制并粘贴回你的 AI agent 以进行解决。
## 🔍 故障排除
### Linux 上的 Git Credential Manager
如果你在 Linux 上遇到 Git 身份验证问题,可以安装 Git Credential Manager:
```
#!/usr/bin/env bash
set -e
echo "Downloading Git Credential Manager v2.6.1..."
wget https://github.com/git-ecosystem/git-credential-manager/releases/download/v2.6.1/gcm-linux_amd64.2.6.1.deb
echo "Installing Git Credential Manager..."
sudo dpkg -i gcm-linux_amd64.2.6.1.deb
echo "Configuring Git to use GCM..."
git config --global credential.helper manager
echo "Cleaning up..."
rm gcm-linux_amd64.2.6.1.deb
```
## 💬 支持
如需支持,请提交 [GitHub issue](https://github.com/github/spec-kit/issues/new)。我们欢迎错误报告、功能请求以及关于使用 Spec-Driven Development 的问题。
## 🙏 致谢
本项目深受 [John Lam](https://github.com/jflam) 的工作和研究的影响并基于此。
## 📄 许可证
本项目根据 MIT 开源许可证的条款授权。有关完整条款,请参阅 [LICENSE](./LICENSE) 文件。标签:AI编程助手, 二进制发布, 代码生成, 大语言模型开发, 威胁情报, 工作流自动化, 开发框架, 开发者工具, 开源工具, 技术规范, 提示词工程, 数据管道, 文档结构分析, 渗透测试工具, 策略决策点, 网络安全研究, 自动化开发, 规范驱动开发, 软件工程, 逆向工具, 防御加固