nkematehp/wazuh-soc-detection-home-lab
GitHub: nkematehp/wazuh-soc-detection-home-lab
基于 Wazuh 构建的 SOC 家庭实验室,提供端到端的威胁检测、事件调查与自动化响应实践环境。
Stars: 0 | Forks: 0
# Wazuh SOC 检测家庭实验室
一个基于 Wazuh 的 SOC 家庭实验室,用于监控、威胁检测、事件调查和自动化响应。
## 功能
- Wazuh Manager、Indexer 和 Dashboard
- Windows 和 Linux 端点监控
- 自定义检测规则
- MITRE ATT&CK 映射
- 事件调查
- 文件完整性监控 (FIM)
- Wazuh Active Response
## 为什么构建此项目
构建此项目旨在通过模拟攻击、编写检测规则、调查警报和实施自动化响应,来获得使用 Wazuh 的实践经验。
## 实验室环境
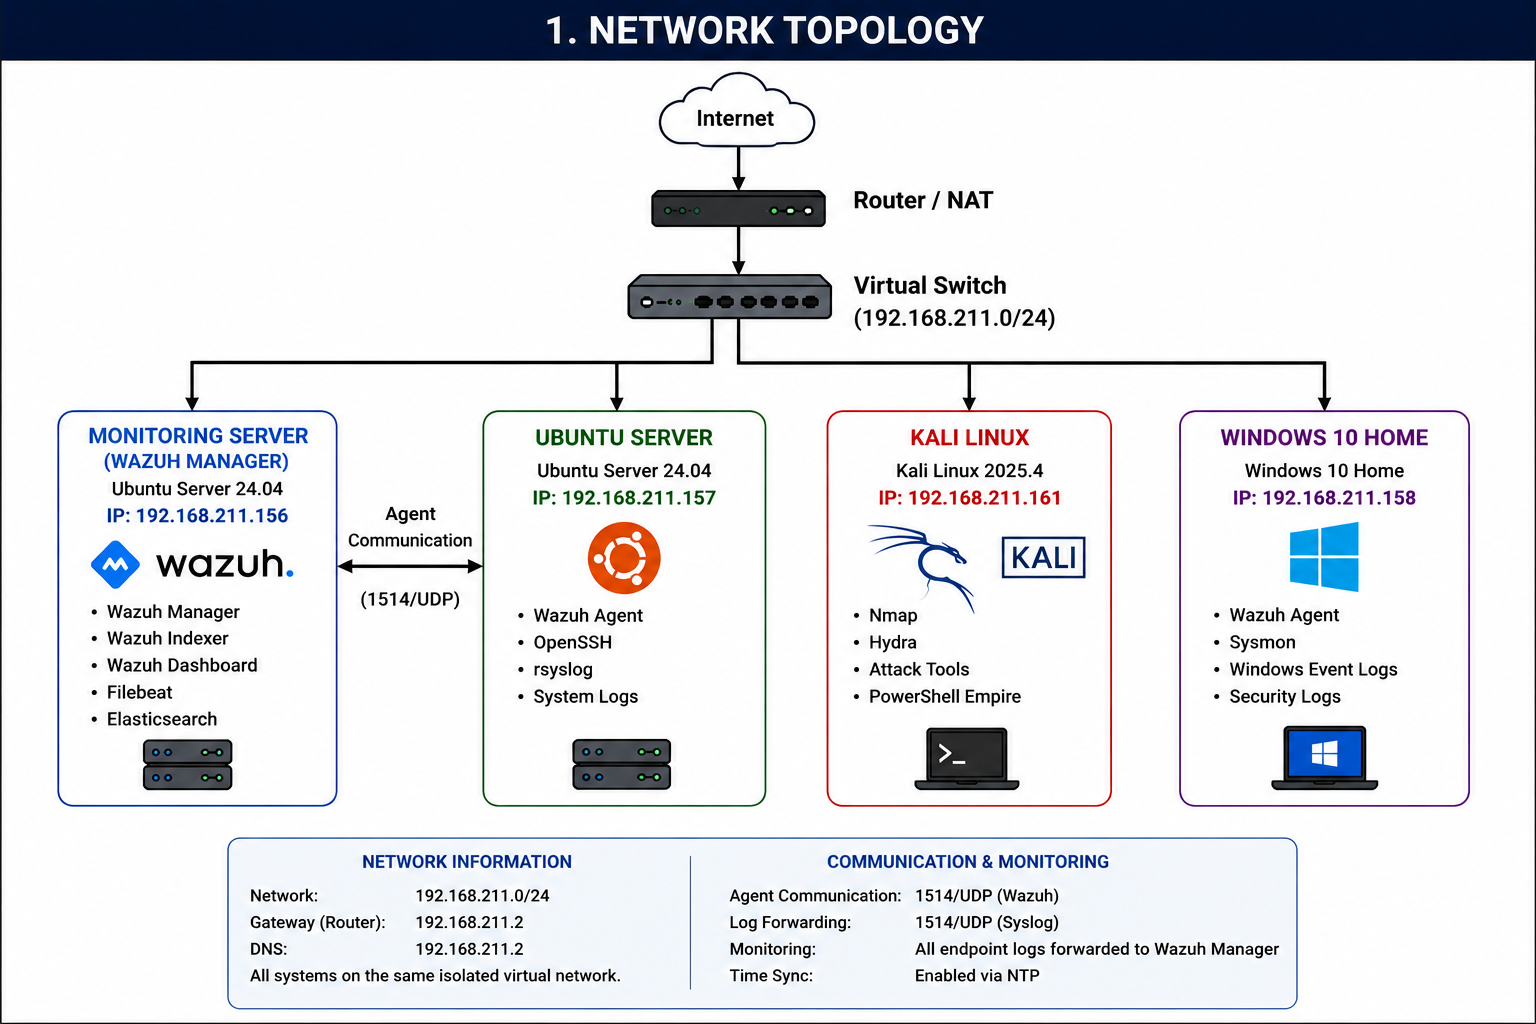
| 系统 | 角色 | IP 地址 |
| ----------------- | --------------------------------- | --------------- |
| 监控服务器 | Wazuh Manager, Indexer, Dashboard | 192.168.211.156 |
| Ubuntu 服务器 | Linux 端点 | 192.168.211.157 |
| Windows 10 Home | Windows 端点 | 192.168.211.158 |
| Kali Linux 2025.4 | 攻击机 | DHCP |
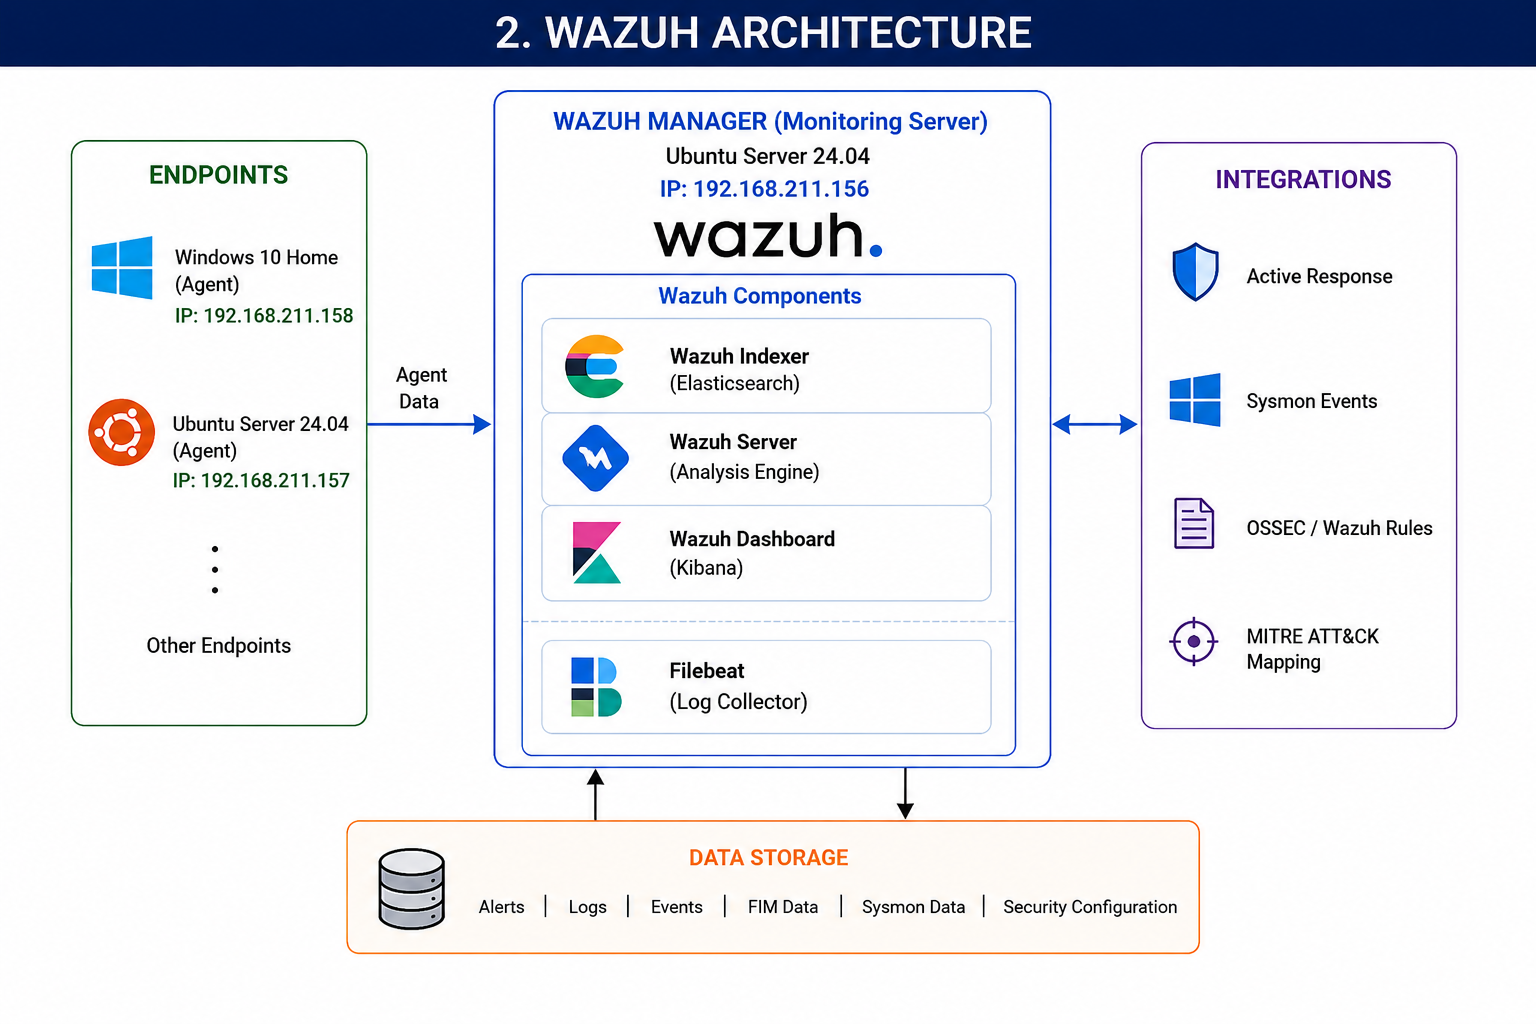
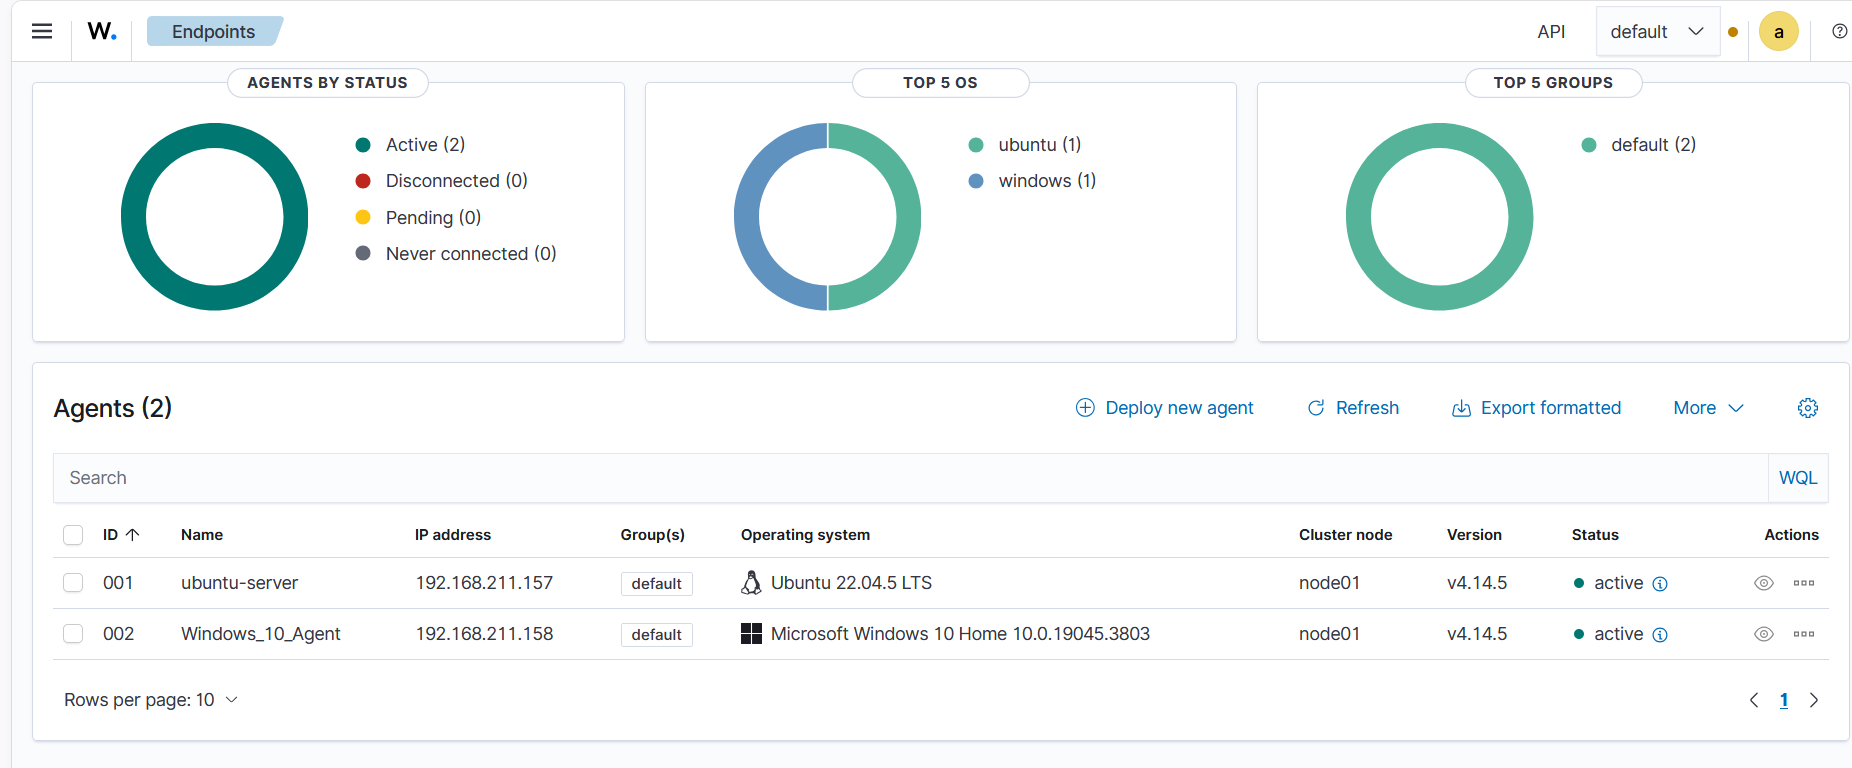
Wazuh Manager 监控两个端点:
- ubuntu-server
- windows-endpoint
Kali Linux 用于模拟攻击。
## 架构
实验室架构由一个 Wazuh Manager 和两个受监控的端点组成。
## 使用的技术
- VMware Workstation Pro
- Ubuntu Server 24.04 LTS
- Windows 10 Home
- Kali Linux 2025.4
- Wazuh
- Sysmon
- rsyslog
- OpenSSH
- MITRE ATT&CK Framework
## 攻击场景
| # | 攻击 | MITRE ATT&CK |
| - | ---------------------------- | ---------------- |
| 1 | SSH 暴力破解 | T1110 |
| 2 | Windows 侦察 | T1082, T1016 |
| 3 | 注册表 Run 键持久化 | T1547.001 |
| 4 | 文件完整性监控 | T1222, T1485 |
## 检测规则
实验室中使用的自定义 Wazuh 规则。
- [规则说明](rules/rule-explanations.md)
- [自定义规则](rules/custom-rules.xml)
- [解码器](rules/decoders.xml)
## 调查报告
每次攻击都包含相应的调查报告。
- [SSH 暴力破解调查](investigations/01-ssh-bruteforce.md)
- [Windows 侦察调查](investigations/02-windows-reconnaissance.md)
- [注册表持久化调查](investigations/03-registry-persistence.md)
- [文件完整性监控调查](investigations/04-file-integrity-monitoring.md)
## 主动响应
SSH 暴力破解攻击使用 Wazuh Active Response 自动进行缓解。
- [使用 Wazuh Active Response 封锁 SSH IP](active-response/ssh-ip-blocking.md)
## 截图
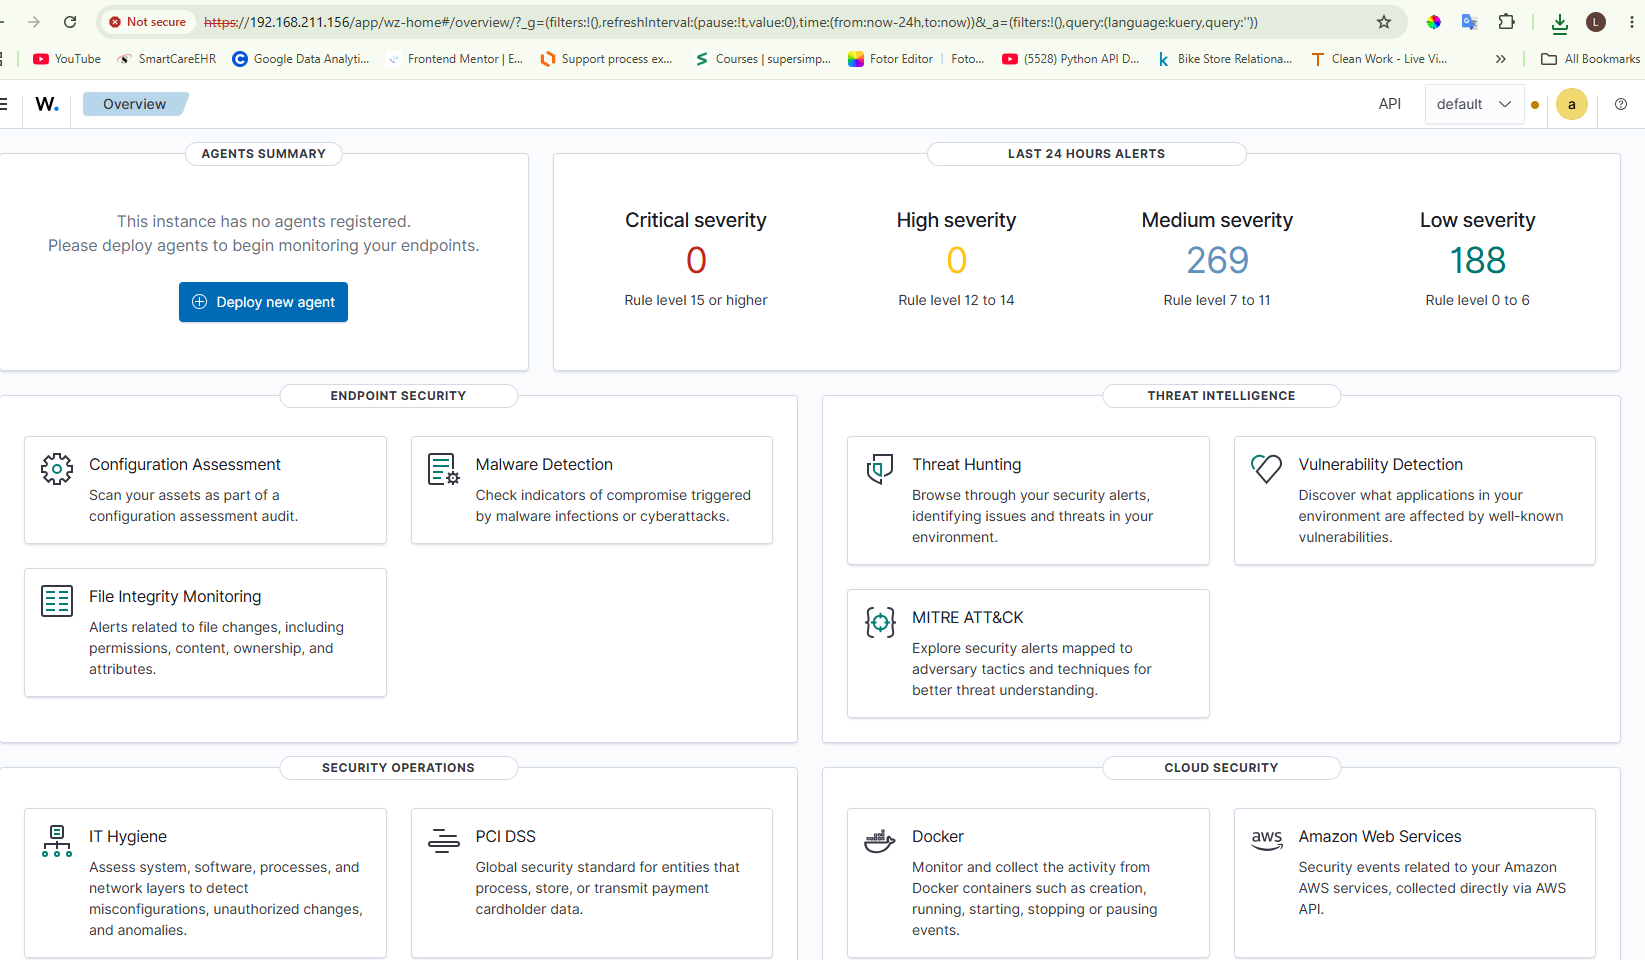
### Wazuh Dashboard
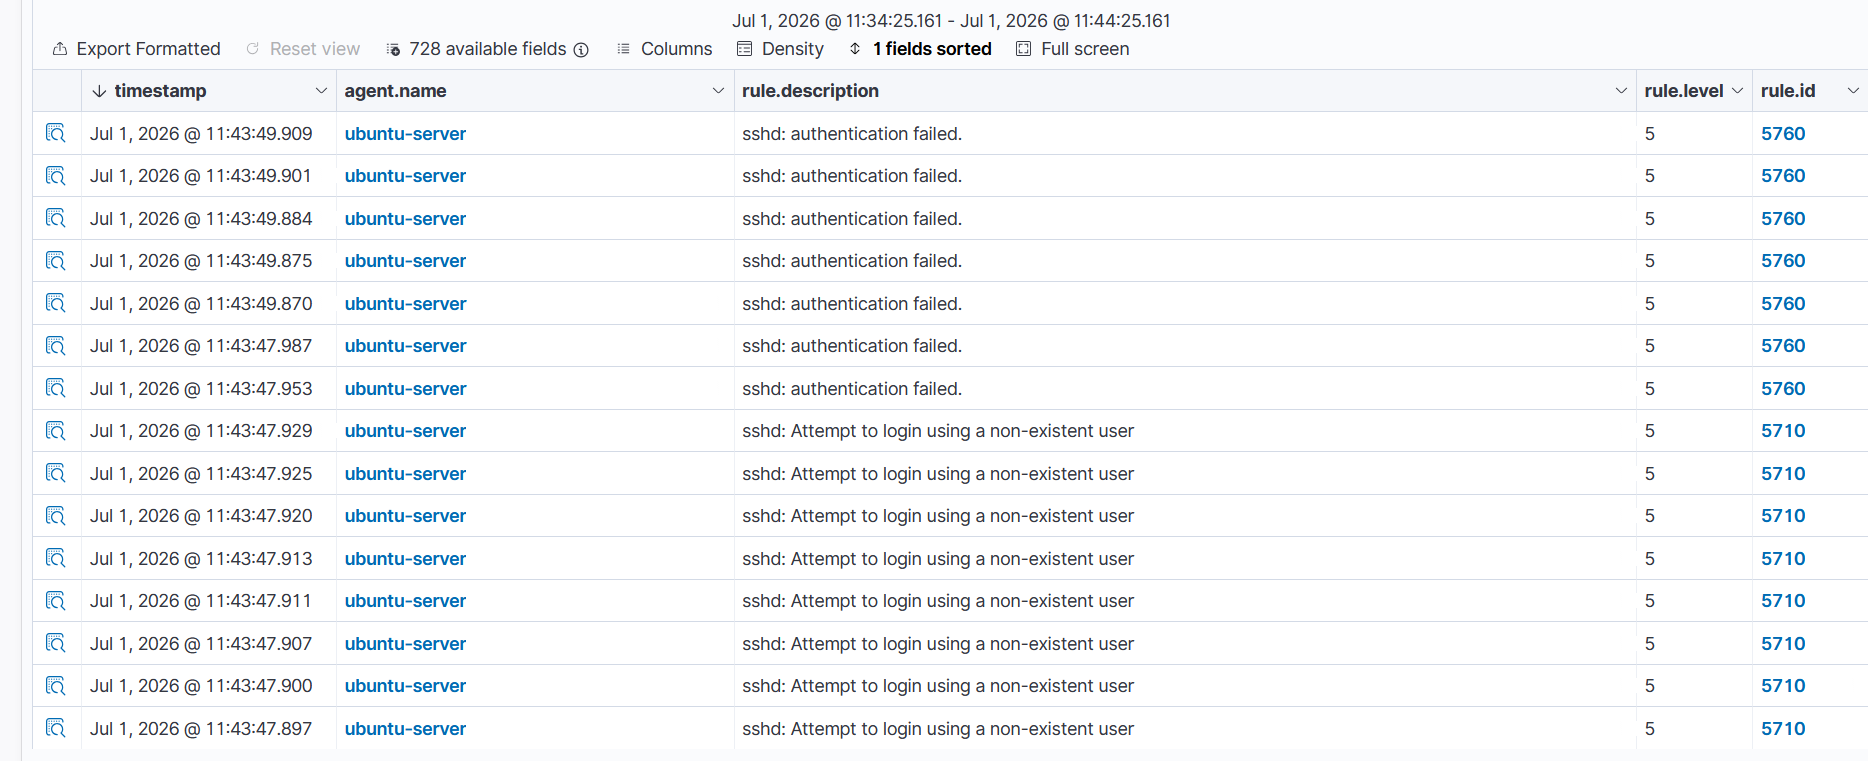
### SSH 暴力破解检测
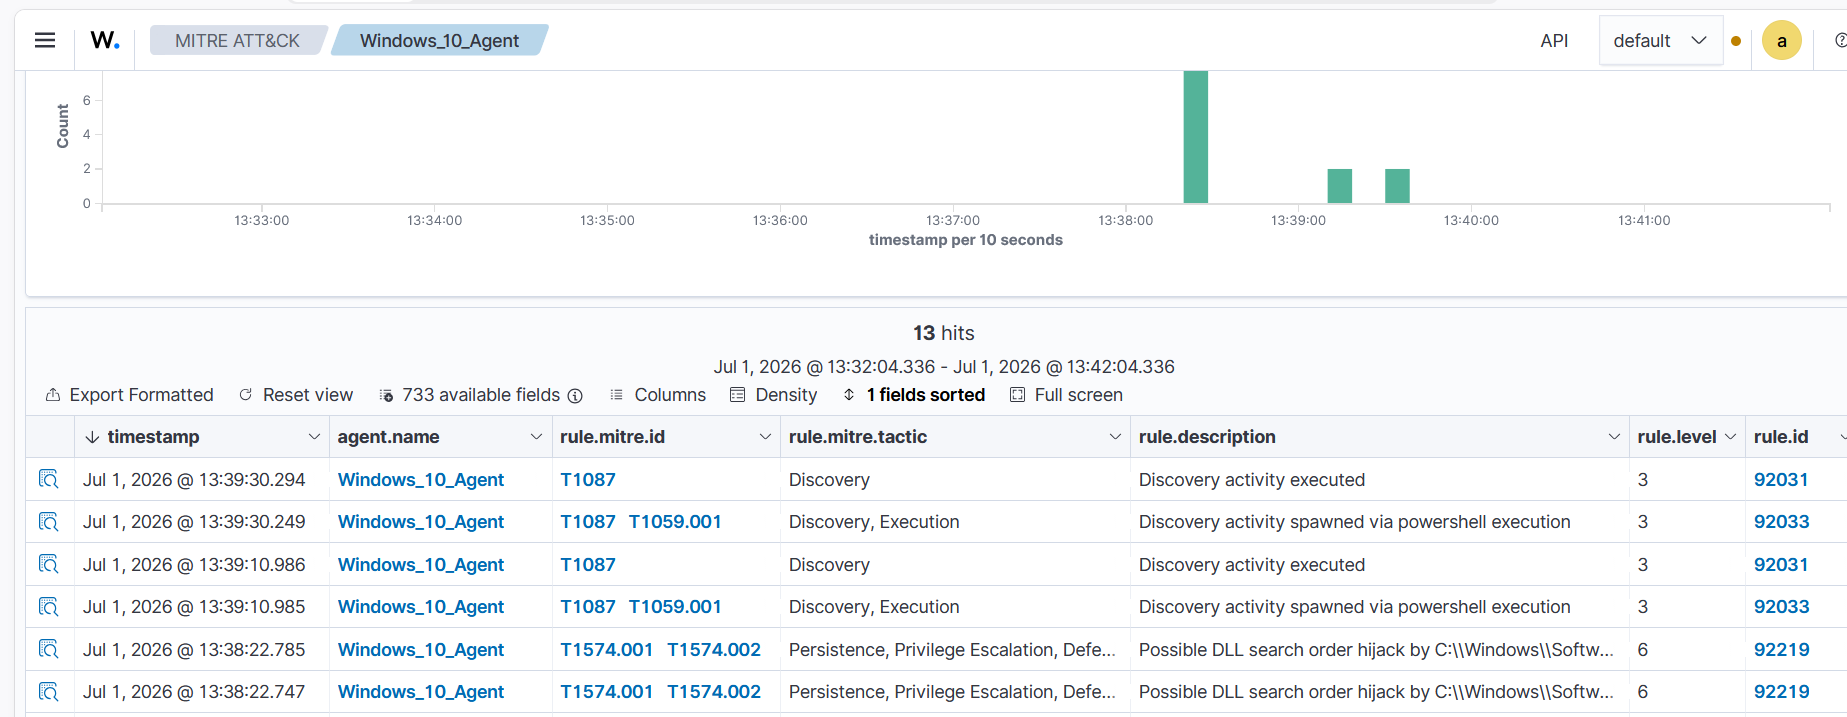
### Windows 侦察检测
### 已连接的 Agent
## 仓库结构
```
wazuh-soc-detection-homelab/
├── README.md
│
├── architecture/
│ ├── network-topology.png
│ └── wazuh-architecture.png
│
├── setup/
│ ├── monitoring-server.md
│ ├── ubuntu-server.md
│ ├── windows-endpoint.md
│ ├── kali-linux.md
│ ├── wazuh-installation.md
│ └── agent-deployment.md
│
├── attack-scenarios/
│ ├── 01-ssh-bruteforce.md
│ ├── 02-windows-reconnaissance.md
│ ├── 03-registry-persistence.md
│ └── 04-file-integrity-monitoring.md
│
├── investigations/
│ ├── 01-ssh-bruteforce.md
│ ├── 02-windows-reconnaissance.md
│ ├── 03-registry-persistence.md
│ └── 04-file-integrity-monitoring.md
│
├── active-response/
│ └── ssh-ip-blocking.md
│
├── rules/
│ ├── custom-rules.xml
│ ├── decoders.xml
│ └── rule-explanations.md
│
├── screenshots/
│ ├── agents-connected.png
│ ├── file-integrity-monitoring-alerts.png
│ ├── hydra-attack-blocked.png
│ ├── registry-persistence-alerts.png
│ ├── ssh-bruteforce-alerts.png
│ ├── ssh-bruteforce-hydra.png
│ ├── wazuh-active-response-alert.png
│ ├── wazuh-dashboard.png
│ ├── wazuh-login.png
│ ├── wazuh-services.png
│ └── windows-reconnaissance-alerts.png
│
└── notes/
├── lessons-learned.md
└── recommendations.md
```
## 安装与配置文档
- [监控服务器设置](setup/monitoring-server.md)
- [Wazuh 安装](setup/wazuh-installation.md)
- [Ubuntu 服务器设置](setup/ubuntu-server.md)
- [Windows 端点设置](setup/windows-endpoint.md)
- [Kali Linux 设置](setup/kali-linux.md)
- [Agent 部署](setup/agent-deployment.md)
## 安装与配置顺序
1. 监控服务器设置
2. Wazuh 安装
3. Ubuntu 服务器设置
4. Windows 端点设置
5. Kali Linux 设置
6. Agent 部署
7. 攻击场景
8. 调查
9. Active Response 配置
## 作者
**Princewill Nkemateh**
标签:AMSI绕过, Wazuh, 后渗透, 威胁检测, 安全实验室, 安全运营中心, 无线安全, 终端监控, 网络映射, 自动化响应